2: Through the Fringe of Madness
The Elder Scrolls IV: Oblivion Walkthrough and Guide
The Elder Scrolls IV: Oblivion Guide - Shivering Isles
Quest 2: Through the Fringe of Madness
Before you can enter the Shivering Isles, you must first pass through the Gates of Madness. While this may not seem to be a daunting task, you will quickly discover upon your arrival that passing through the Gates of Madness is far from simple.
With 'Through the Fringe of Madness' set as your active quest, follow the arrow on your compass to reach the Gates of Madness. The Gatekeeper stands before the Gates of Madness. Stand back and watch as the monster obliterates a band of adventurers who had the same deed in mind as you. It would not be wise to attempt killing this monster without aid. Don't loiter for too long, as the Gatekeeper's rage will quickly shift once all of the adventurers lay dead.
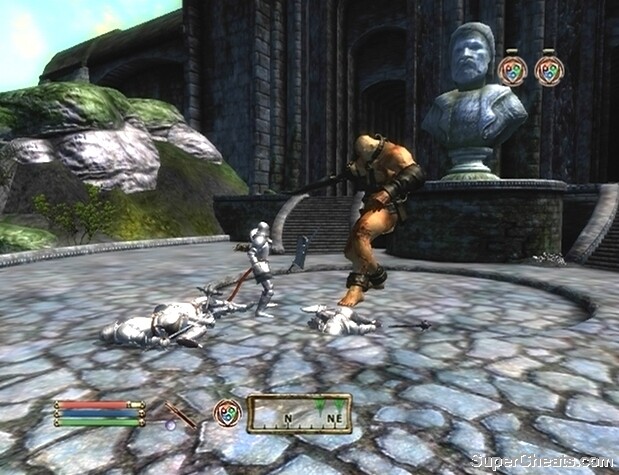 The formidable Gatekeeper guards the Gates of Madness. |
A couple of items are needed to kill the Gatekeeper without difficulty. You'll need to attain Tears of Relmyna and some arrows fashioned out of the bones of a dead Gatekeeper.
The tears come from Relmyna Verenim, who resides in the Wastrel's Purse. Look to the local area map and locate the Wastrel's Purse, then make your way there and enter. Once in the Wastrel's Purse, look for Relmyna Verenim, who is most likely in one of the rooms upstairs. Speak to Relmyna to learn that she is the creator of the Gatekeeper. Other than that bit of information, she offers very little else.
After speaking to Relmyna in the Wastrel's Purse, look for a 'Letter to Sheogorath' on a table in her room. When you've located the item, ensure that Sneak Mode is toggled, and that the eye icon is faded before reading it and then taking it into your inventory. The letter states that Relmyna visits the Gatekeeper each night at around 12:00AM. With this information, wait a safe distance from the Gates of Madness and at around midnight, Relmyna should appear. Wait until leaves the Gatekeeper before moving in to pick up the Tear-filled Handkerchief that she left on the ground. Once you have the handkerchief, three Tears of Relmyna, a poison that can be applied to a weapon or arrow, will be added to your inventory.
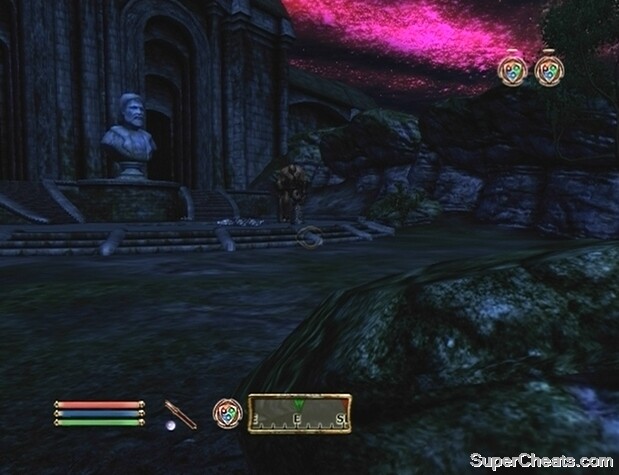 Relmyna Verenim visits the Gatekeeper at around 12:00AM each night and cries. Wait out of sight, and activate the Tear-filled Handkerchief after her visit to acquire Relmyna's Tears. |
For the bone arrows, you must see a man named Jayred Ice-Veins. Look for a Redguard named Shelden wandering around Passwall. Ask him about the Gatekeeper, and an arrow pointing to Jayred Ice-Veins will appear on your compass. Follow the arrow on your compass to the Nord and select the 'Gatekeeper' dialogue option while speaking to him, He'll agree to help you take down the Gatekeeper, provided you pick the lock on the door into the Gardens of Flesh and Bone. Jayred believes that arrows fashioned out of the bones of the dead Gatekeeper in the Garden of Flesh and Bone would be extremely effective against the current Gatekeeper. Before agreeing to anything, ensure that you have the Tears of Relmyna first. When ready, speak to Jayred and select the 'Lead on' dialogue option. Unlock the gate, and then help Jayred kill the skeletons in the garden.
When Jayred Ice-Veins has acquired the bones from the Garden of Flesh and Blood, you'll have to wait a few hours for the finished arrows. Once a few hours have passed, speak to Jayred and select the 'Bone Arrows' dialogue option to be given the arrows. If you don't have a bow, you can try applying the tears to a melee weapon.
Once you're ready to take down the Gatekeeper, speak to Jayred and tell him to follow. When you reach the Gates of Madness, equip a bow with the Bone Arrows, and then apply the Tears of Relmyna to one of the arrows. With Jayred's help, the Gatekeeper should fall quite quickly. Search the Gatekeeper's corpse and remove the Key to Dementia and the Key to Mania.
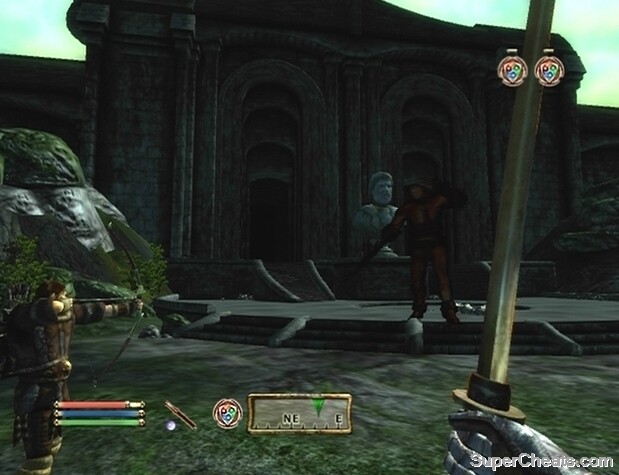 Take out the Gatekeeper with Jayred Ice-Veins' help and retrieve the Key to Mania and the Key to Dementia from his corpse. |
After removing the keys from the Gatekeeper's corpse, Haskill will appear and explain that the one of the doors on the Gates of Madness leads to Dementia, and the other to Mania. The door on the left will take you to Mania, while the one on the right will take you to Dementia. Go through the door to Mania to add the Blessing of Mania greater power to your character's spell book. Go through the door to Dementia, and the Blessing of Dementia greater power will be added to your character's spell book. The Mania greater power casts Frenzy, while the Dementia greater power casts Demoralize, making neither of them particularly useful. Decide which power you would like more, and step through the corresponding door.
The next stop is New Sheoth Palace. It's other side of the island, so it's quite a trek. To reach New Sheoth Palace, you'll have to travel through either the city of Bliss or the city of Crucible. Once inside one of these cities, follow the arrow on your compass to the door into the 'Palace Grounds area. Enter New Sheoth Palace to converse with the Daedric Lord himself. After explaining the task before you, Sheogorath will hand over the Charity of Madness amulet. The amulet boasts Fire, Frost, and Shock resistance enchantments.
No comments yet. Tell us what you think to be the first.