SQ: Settlement Quests
The Elder Scrolls IV: Oblivion Walkthrough and Guide
The Elder Scrolls IV: Oblivion Guide - Shivering Isles: Side Quests
Settlement Quests
This set of quests is broken down into the following sections. You can use the links below to jump to the part of the page you are interested in.
Everything in Its Place
Ghosts of Vitharn
Taxonomy of Obsession
The Great Divide
To Help A Hero
The Hill of Suicides
Everything in Its Place
This quest takes place in Fellmoor, which is located southwest of New Sheoth. It's next to the 'R' in the 'Pinnacle Road' text on the world map. In Fellmoor, locate and speak to the Khajiit named Kishashi. She speaks of another Khajiit named Ranarr-Jo. She won't tell you much unless her disposition is at least 70. Raise her disposition through bribery or persuasion, and then select the 'Ranarr-Jo's Trust' dialogue option. She'll give you an Old Spoon, which apparently means something to Ranarr-Jo.
Ranarr-Jo can most likely be found in Kishashi's House. Tell Ranarr-Jo that Kishashi gave you the Old Spoon to give to him. Then, inquire further about Cindanwe. Ranarr-Jo believes that she is reading their minds, and asks that you rid Fellmoor of her. He mentions a notebook that Cindanwe uses to take notes on the Khajiits working for her.
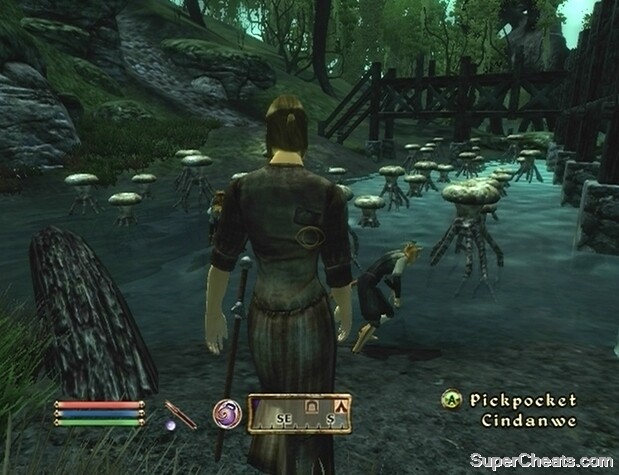 Befriend Cindanwe and ask for her journal to get it for Ranarr-Jo. That, or simply pickpocket it from her. |
Acquiring the notebook for Ranarr-Jo is optional, but will net you an extra reward upon completion of this quest. Find Cindanwe and bribe her to raise her disposition to least 70. Doing so will cost a fair bit of gold, and Cindanwe's disposition may max out at a number below 70, depending on how high your character's Speechcraft attribute is. To avoid this, speak to Cindanwe with your weapon drawn, and then bribe her. After bribing her, put away your weapon, speak to her again, and her disposition should be ten points higher than what it was maxed out at.
When Cindanwe's disposition is at least 70, select the 'Notebook' dialogue option and she'll hand it over. Of course, you could always steal the Notebook from Cindanwe; she carries it with her, so simply pickpocketing it would work.
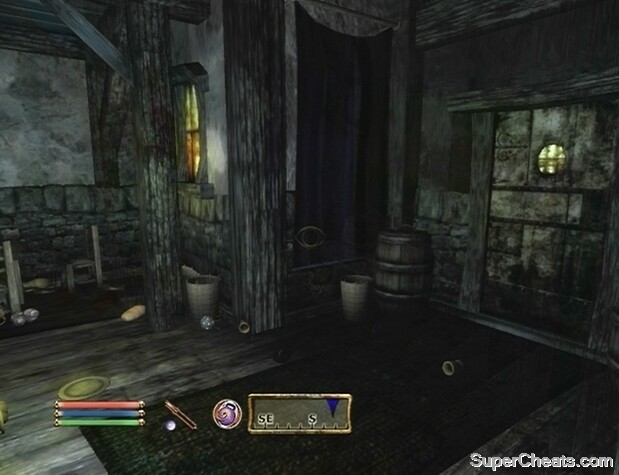 Make a mess of Cindanwe's House to keep her occupied for awhile. |
As with most quests of this nature, the obvious way to rid Fellmoor of Cindanwe is to kill her. However, Ranarr-Jo mentions that Cindanwe requires that everything is 'just so.' He suggests entering her home and wrecking the place. Enter Cindanwe's House, and open the two barrels next to the door. The quantity of the ingredients inside is the same for each different type; remove some of the ingredients to change this. There are other barrels in her house, so do the same to those. Use the LB/L1 button to move all of the food items placed around the house onto the floor. Continue doing until an in-game pop up informs you that you have sufficiently altered Cindanwe's House.
Speak to Ranarr-Jo once you have wrecked Cindanwe's House. You are given the Ring of Mind Shielding, which adds the Resist Magic and Reflect Magic effects. If you acquired the Notebook from Cindanwe, an extra dialogue option will appear once you are given your reward. Select this dialogue option and you will be given a random skill book.
Stealing Cindanwe's Notebook and wrecking her house.
Ghosts of Vitharn
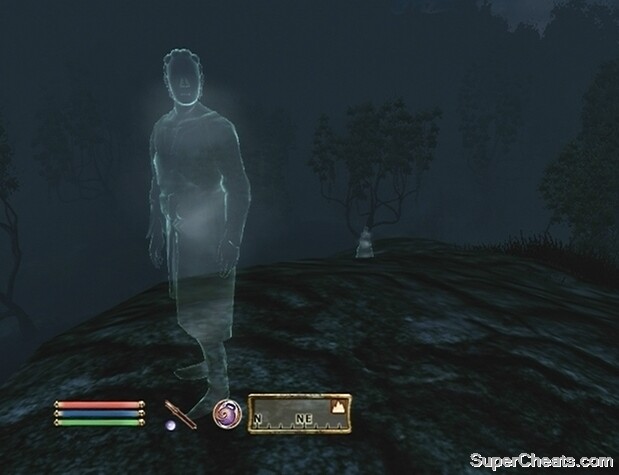
While in the Shivering Isles, you may hear rumour of the ruined fortress of Vitharn. Upon hearing this rumour, the location of Vitharn will be marked on your map. Vitharn sits in the 'Shallow Grave' section of Sheogorath's Realm. Upon your arrival, you will witness some ghosts fighting each other. Some of these ghosts are hostile, so remain vigilant. The green ghosts are the hostiles, and the blue ones are friendly.
All of the main doors of Vitharn are supernaturally locked, so travel along the walls until you come to a tree on the bottom-right corner (as it appears on the local area map). Search for the door, and enter the Vitharn Sump. With 'Ghosts of Vitharn' set as your active quest, follow the arrow on your compass to the door to the Vitharn Reservoir. You'll have to swim underwater to reach it.
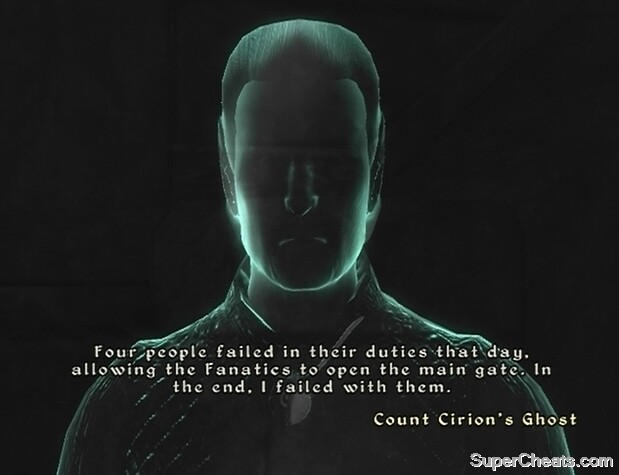 The ghost of Count Cirion asks that you free his people from the curse put upon Vitharn. |
Through the Vitharn Reservoir, enter the Vitharn Keep. Upon entering the Keep, you will be approached by the ghost of one Count Cirion. Choose the 'I meant no offense' dialogue option when prompted. Centuries ago, Vitharn was overrun by Fanatics. Four people in the bailey failed in their duties, ultimately leading to the fall of Vitharn. The people of Vitharn have been cursed to relive the last moments of the invasion because of this failure. Count Cirion wants you to put an end to the curse to free the ghosts of his people.
Three items must be acquired to put an end to the curse. From the Vitharn Reservoir door, follow the linear path and turn left when you can. While walking down this corridor and keep an eye on your right; when you notice a Press Block on the wall, activate it. Approach the middle bench on the right side of the room, turn right there, and jump into the secret area. One of the items, the Dagger of Depletion, is on the shelf to your right.
Another of the items, the Desideratus' Doll, is on a shelf in the barracks, which is adjacent to the throne room. Once you have the doll, leave the barracks via the north exit. Continue moving forward until you reach a locked metal door. Toggle Sneak Mode here, and then unlock the door. Slowly enter the room; if noticed by Bat-gro-Orkul, you will be ejected, so take it slow. You're here for Althel's Arrows, which are on a table just behind Bat-gro-Orkul.
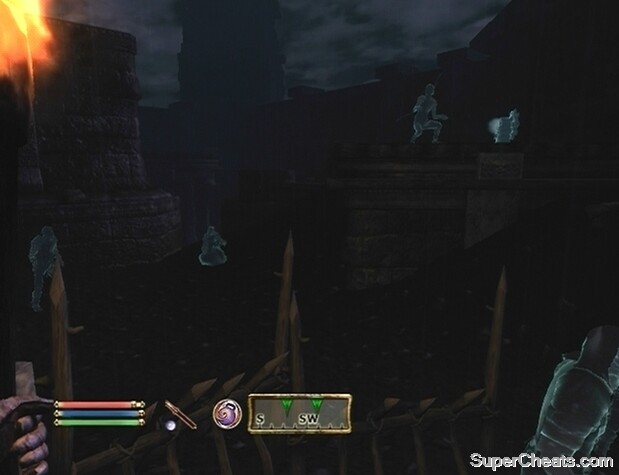 Use the ghostly items you've collected to change the behaviour of three of the ghosts in the Vitharn Bailey. |
When you have obtained the Dagger of Depletion, Desideratus' Doll, and Althel's Arrows, enter the Vitharn Bailey. In the Bailey, the final moments of the Fanatic invasion are repeated over and over. There are two shades here that you must give ghostly items to. Althel needs her arrows; she is up by the ghostly gate wheel. Hloval Dreth needs the Dagger of Depletion; he should be somewhere below Althel's position.
Desideratus Annius does not require anything. He spawns next to Hloval, and runs straight into Vitharn Keep. The doll in your inventory must be burned in the ghostly brazier by the gate to prevent Desideratus from retreating into Vitharn Keep. After burning the doll, speak to Desideratus and select the 'Desideratus' Betrothed' dialogue option. It may take a couple of sessions to properly outfit the shades and burn the doll. Luckily, you do not have do these things all in one go, as your actions carry over into subsequent sessions.
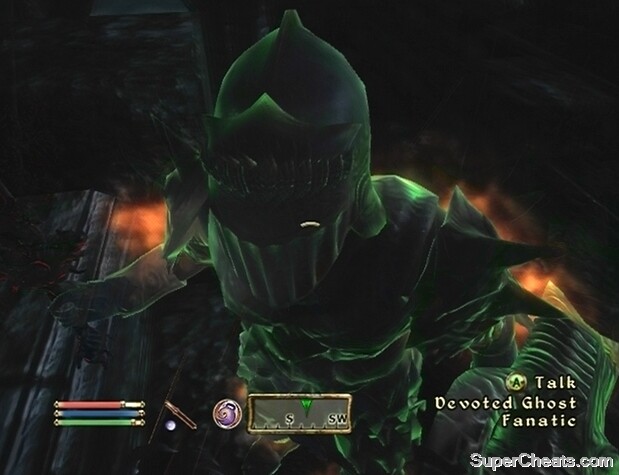 Equip Count Cirion's Helmet and kill the Devoted Ghost Fanatic in the Vitharn Bailey to fully end the curse. |
You have done everything that can be done at this time, so return to Vitharn Keep and speak to Count Cirion in the throne room. Count Cirion hands over his helmet, which is a horned variant of the Madness Helmet. After getting the helm from Cirion, return to the Bailey. While wearing Count Cirion's Helmet, stand on the platform with the archer and kill the Devoted Fanatic that engages you to completely lift Vitharn's curse. Your reward is Count Cirion's Helmet, which fortifies the Block and Heavy Armor skills.
Using the ghostly objects to end the curse on the people of Vitharn.
Taxonomy of Obsession
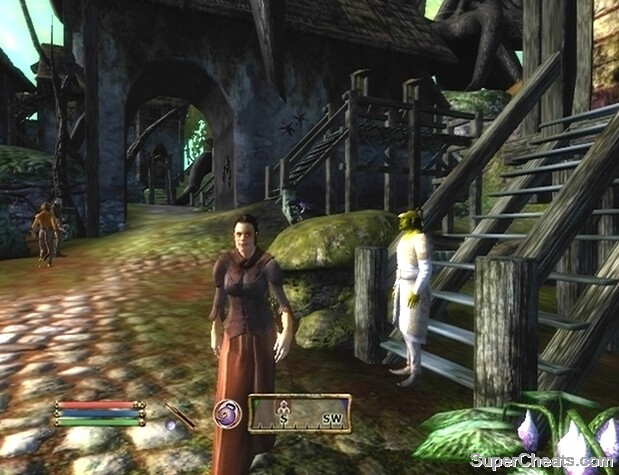
This quest is started in the settlement of Highcross. Highcross is located far north of New Sheoth, just above the 'J' in the 'Jester's Spine Mountains' text on the world map. You need to speak to Mirili Ulven there; she can most likely be found in her house after dark. Locate Mirili and ask her about her research. You won't get anything out of her if her disposition is below 70. Persuade or bribe Mirili to raise her disposition to at least 70, and then inquire again about her research. She'll give you a list of the alchemy ingredients she needs to complete her research.
As you can see, it is a fairly lengthy list. All of the items can be found in the Shivering Isles. As mentioned on the list, Mirili is willing to pay 10 gold per sample, though she is not willing to buy more than one of the same type of ingredient.
The Great Divide
Travel to the settlement of Split, which is far northwest of New Sheoth. It is just south of the 'l' in the 'Overlook Road' text on the world map. There's something odd about Split. By walking around Split and speaking to the inhabitants, this oddity will become readily apparent. Everyone in Split has a double. There is a Demented version and a Manic version of everyone.
Both doubles hate the other; hate to the point of wishing for their death. You'll need to locate a Nord named Horkvir Bear-Arm to get started. Horkvir explains that a wizard cast a spell on the town, spawning everyone's double. There are two Horkvirs: a Demented version, and a Manic version. It's up to you to decide which one to help. Both Horkvirs have the same thing in mind—to wipe out the doubles on the other side.
 There is a Demented version and a Manic version of everyone in Split. |
With 'The Great Divide' set as your active quest, arrows will appear on your compass, pointing to all of the doubles you are required to kill. If you kill a double that you are not supposed to, you will not get a reward upon completion of the quest.
Of course, killing these characters is considered murder. Killing them outright while being observed will place a bounty on your head. For this reason, it is best to sneak into their homes at night (all locks in Split are classed as 'Very Easy,' so you won't need a high Security skill level), creep up to them while they sleep, and kill them. Be absolutely certain that you are killing the right double, as you don't want to forfeit the reward.
You must kill one Horkvir Bear-Arms, one Atrabhi, one Urul gro-Agamph, one Jastira Nanus, and one J'zidzo. After killing all of one side of Split, return to the remaining Horkvir Bear-Arms for a levelled monetary reward.
Wiping out one side of Split without being detected.
To Help a Hero
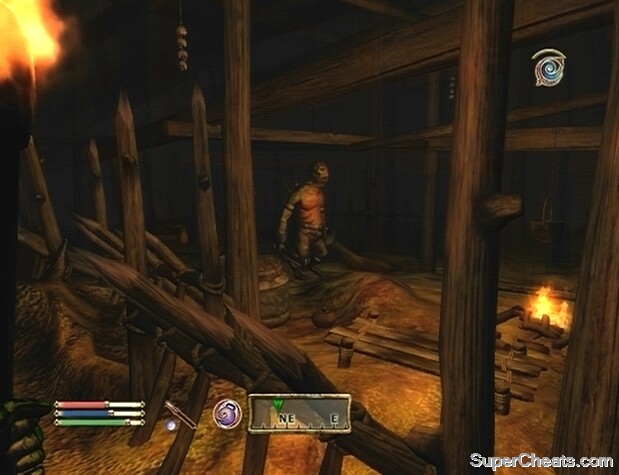
This quest starts at Hale, which is a small settlement far northeast of the Gates of Madness. It's a bit northwest of the first 'O' in the 'Overlook Road' text on the world map. Upon your arrival, locate and speak to Pyke. He'll most likely be in Zoe Malene's House, or just outside of it. Pyke explains that he was a Knight of the Thorn in Cyrodiil, but has lost his Knights of the Thorn Medallion to a group of Grummite. Though he has no interest in being a Knight of the Thorn anymore, he would like the stolen medallion back as a memento. Agree to help Pyke and Fetid Grove will be marked on your map.
Make your way to Fetid Grove and enter. As you may have gathered from Pyke's telling of his lost Medallion, Fetid Grove is home to a tribe of Grummite. With 'To Help a Hero' set as your active quest, follow the arrow on your compass to the door to the 'Fetid Grove, Encampment' area. Pyke's Medallion is in a chest in the middle of this area. There are many Grummites planted along the route to the chest, but luckily they are fairly spaced out, so you likely won't have to face more than one of them at once.
 The Grummites in the Fetid Grove have Pyke's Knights of Thorn Medallion. |
When you have Pyke's Medallion in your inventory, exit Fetid Grove and return to Hale. Give the Medallion to Pyke. In return you are given a Thorn Shield. This shield adds the Reflect Spell effect and fortifies the Block skill. Not a bad piece of equipment.
The Hill of Suicides
This quest will not appear in your journal. To get started with this informal quest, travel to the Hill of Suicides. The actual location point is just below the 'The' in 'The Hill of Suicides' text on the world map. Be sure to hit this location point, as this way you can then fast travel directly to the Hill of Suicides. You cannot interact with the restless souls on the Hill of Suicides. To complete this quest and earn a reward, five skulls must be brought back to the ghosts on the hill.
Lorenz Bog-trotter's Skull - This skull is found in Knotty Bramble, which is located in Dementia along Pinnacle Road. The skull itself is located in the 'Knotty Bramble, Lost Crypts' area. To get to this section, you'll have to make your way through the initial Knotty Bramble area, then through the 'Knotty Bramble, Hatchery.' In the Hatchery, first drop down to the lower level, then follow the tunnel below to the door. Once in the Lost Crypts, proceed through the stone-wall rooms until you encounter a second Zealot body on a pedestal. Use the LB/L1 button to move the body to the side to reveal a small Press Block. Press the button, then turn back and look in the hall for some rubble off to the left. Hop up onto the section in the wall on the left; Lorenz Bog-Trotter's Skull is on the pedestal there.
 Find and deliver the skulls to the souls on The Hill of Suicides to put them to rest. |
Gadeneri Ralvel's Skull - Found in Knifepoint Hollow, an area that visited during the main quest. It is located northwest of New Sheoth, a bit north of the second 'l' in the 'Hill of Suicides' text on the world map. The skull is in the 'Knifepoint Hollow, Chantry' area. Move through the entire area; when you reach the door back to the initial Knifepoint Hollow area, turn around and instead go through the metal gate. There are two pillars in this room, and a Press Block on the pillar to the left. Activate the Press Block to reveal an extra area beyond the small room that is seemingly the end. Hop up over the rubble and take Gadeneri Ralvel's Skull on the treasure chest to your left.
M'Desi's Skull - Found in Rotten Den in Dementia. It's just a short ways southwest of the 'd' in the 'Pinnacle Road' text on the world map. The skull is in the 'Rotten Den, Sanctum' area. To reach this part, you'll have to move through the 'Rotten Den, Deadfall' and then 'Rotten Den, Precipice.' Look to the local area map if you are having difficulty progressing. Once inside the Sanctum area, drop down each hole in the floor until you reach the bottom level. The skull is in the Zealot sanctum, a stone room that is also the south-most room on the map. M'Desi's Skull is on a chest at the focus point of the room. To leave Rotten Den, you'll have to move through the 'Rotten Den, Hollow' area first. The door here leads back to the Sanctum area, but on the upper level. Avoid falling down the hole and continue through to the 'Rotten Den, Encampment' area. The rest of the way out is quite straightforward.
Limark's Skull - This one's in Milchar, which is near the northwest corner of the Shivering Isles. It's just above the 'O' in the 'Overlook Road' text on the world map. Do not enter Milchar by the door marked 'Milchar, Nexus.' From the Nexus door, travel southeast until you reach a door marked as 'Milchar, Xetrem.' Refer to the local area map if you are having trouble finding this door. Upon entering Milchar, pass under the walkway, then turn left and climb up the stairs there. At the top of the stairs, turn right. Make your way down this tunnel, continue heading straight, and eventually you will fall down a short drop. A skeleton containing Linmark's Skull is at the bottom.
Salonia Viria's Skull - This one is in Cann, which can be reached by traveling west from the first 'T' in the 'The Jester's Spine Mountains' text on the world map. The skull is in the 'Cann, Amphitheater' area, specifically. Proceed into 'Cann, The Great Hall.' Move through this area and enter 'Cann, Halls of Tranquility.' This area is a bit more complex, so refer to the local area map to find your way around. Locate the door into the 'Cann, Arena' area and go through. Continue down the tunnel and into the Amphitheater section. Upon entering the Amphitheater, go straight and continue heading in this direction until you can turn left. The small room that you turn in to contains Salonia Viria's Skull; it's on the base of the statue in the bottom-right corner.
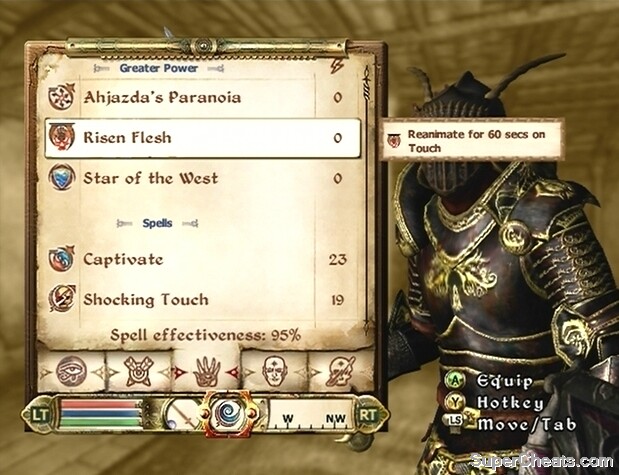 The Risen Flesh Greater Power. |
Once you have collected all five of the skulls, return to The Hill of Suicides. Attempt to speak to each of the ghosts on the hill. Upon speaking to one, their skull will be removed from your inventory. When you have given all five of the ghosts their skulls, you will gain the Risen Flesh Greater Power. This spell allows you to reanimate dead characters for 60 seconds.
Very helpful guide thank you
it means left bumper on your controller
What does
LB/L1 mean?????????????
Thanks,
Willysnutcrackers