Deep Secrets of the Earth
Thank you for printing this page from www.SuperCheats.com.
Remember to come back to check for updates to this guide and much more content for Horizon Zero Dawn
Follow this guide to hear about updates
Last Updated:

Head to Sunfall and explore the area a bit to loot some supply crates. When ready, follow the mission markers to the courtyard where a cutscene will take place. This scene is connected to two new sidequests, Traitor’s Bounty and Queen’s Gambit. You can complete those two first before heading down the massive bunker under Sunfall.

Follow the objective marker that will lead you to the terrace where you can use the rock pillars and walls to climb down. Break down the wooden planks covering the entrance then head inside. This is pretty much straightforward. Like the other bunkers, you need to explore around and scan the datapads you encounter to register them to your Notebook. Your objective is to reach the viewing room.

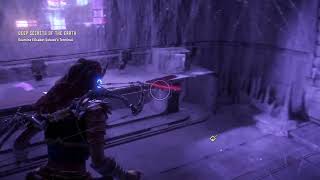
Unfortunately, the exhaust vent that activated earlier caught the attention of some curious Carja personnel. Deal with them however you want then continue scanning for datapads and following the mission marker. Upon reaching the viewing room, Elisabet Sobeck’s holograph will play.


After viewing the holograph, head to the next room called Processing. Scan the optional datapoints there then continue deeper in the facility. You have to reach the part of the bunker called Central Projects. If you consult your map, it should be located on the northwestern corner of the current floor. If you also check the southern examination room, you’ll find a Stranded Necklace (part of a special set that can be traded in Meridian). There are more datapoints to register her so do so as you please then continue following the objective marker.


You’ll encounter more shadow carja heavies along the long corridor. Use your blast sling or fire arrows to get rid of them. Central Projects is just right after the bunker door. However, you have to restore power to it first. There are two power nodes that you have to reactivate, just east of the bunker door.


For the first set on the left side, simply follow the directions of the displayed arrows on the code nexus to unlock a separate door leading to the storage room, in the adjacent corridor. Enter the storage room then climb the ladder up then crawl through the vent to find the spare emitter. Pick it up then cross the tightrope to reach a large container in the other side of the ledge, then drop down to the power nodes.


Install the emitter. Examine the code nexus to learn that the settings have been transposed and set backwards. So starting from the rightmost node from the nexus, rotate the nodes in this order: DOWN, RIGHT, UP, LEFT, DOWN. This should restore power to the door. Head there and continue to Central Projects.

There will be a whole platoon of Eclipse cultists here. Kill every cultist in the room and wait for their reinforcement to arrive from the blast door. Two of them are heavy gunners so make sure to use your blast ammo and fire arrows to deal with them. After killing a heavy gunner, you may use their heavy weapons against them. After clearing the rooms, you’re free to explore again. There will be new datapoints as usual so scan them if you want to.


Continue following the mission markers and find the stairs leading to the upper floor. You’ll find more cultists in the main room but follow the pathway for now. This will lead you to the stairs and the door leading to the room where the cultists are. Engage them or slip past them if you want. Continue following the objective marker and scanning more datapoints along the way. One holo-projectors along the way will play a recording from Tavis Tate, explaining HADES’ supposed function.


Continue following the straightforward path until you reach the “cradle” facility. You can play the holo-projector if you want or you can just go upstairs and into the elevator shaft. Use the ladder to climb and reach the upper floor.

Continue to the next room and scan more datapoints to playback holo-recordings. Head to Sobeck’s office to update the objective. Before interacting with her terminal, loot the container and scan the datapoint on the table. When ready, access the terminal for a cutscene. Quest complete.


Anything missing from this guide?
ASK A QUESTION for Horizon Zero Dawn
Comments for Deep Secrets of the Earth
Add a comment
Please log in above or sign up for free to post commentsNo comments yet. Tell us what you think to be the first.
Table of ContentsClose
- Basics
- Main Quests
- Side Quests
- Errands
- Skills
- Collectibles - Ancient Vessels
- Collectibles - Banuk Figures
- Collectibles - Metal Flowers
- Collectibles - Vantage Points
- Tallnecks
- Bandit Camps
- Hunting Grounds
- Cauldrons
- Inventory and Crafting
- Machine Catalogue
- Extras
Guide Updates
Get notified of updates to this guide
Many of our guides get updated with additional information. To get an email when this guide is updated click below.
 Join us on Discord
Click to close