Second Hand Soul
Thank you for printing this page from www.SuperCheats.com.
Remember to come back to check for updates to this guide and much more content for God of War (PS4 - 2018)
Follow this guide to hear about updates
Added:
This favor requires the exploration of the optional area, Volunder Mines, which is accessible after the first water level drop (after encountering the World serpent for the first time). To trigger this favor, you have to find the mine’s entrance first. From the lake, head to the southeast towards the Cliffs of the Raven.

Mystic Gate
From there, find a narrow passage called the Volunder Chasm. Continue rowing your boat forward until you reach a beach. The location’s mystic gate will become available here.

Odin’s Ravens
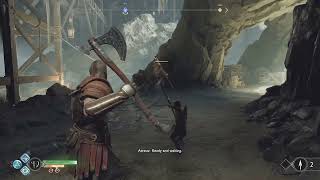
There’s a raven flying above the beach area. Adjust your throw with the proper timing and angle to destroy it since it’s flying in a fixed circular pattern.

Lore Marker
Continue along the cavern and squeeze through a narrow path to find a lore marker and a coffin near each other. Order Atreus to examine the lore marker then loot the contents of the nearby coffin.

Dwarven Shop
Continue forth and crawl under the tunnel to reach the actual entrance of the sealed mine. Brok will be conveniently waiting for you here so talk to him to receive the entry stone to open the sealed door and officially start the favor.

Have Atreus examine the lore marker etched on the wall. Next, interact with the pedestal to install the entry stone and open the door. Continue forth then destroy the explosive jar to the left. This will clear up the entrance to a room with a hacksilver pouch and a coffin. Collect the loot the continue forth.

Jump across the gap then destroy the wooden planks ahead. Approach the ledge to trigger a short cutscene involving a soul eater. Once back in control, turn to the right (east) and destroy the wooden planks to find a small alcove. Dig up the hacksilver on the ground near the vases then drop down from the ledge.

As soon as you reach the ground, nightmares and draugrs will ambush you. You can destroy the holding connected to the suspended explosive jar above to cause an explosion below it; otherwise, keep ordering Atreus to fire his arrows at the nightmares so you can easily deal with the draugrs. After clearing the area, approach the knight’s corpse by the waterfall to retrieve some hacksilver. Head to the metal gate the soul eater lifted earlier and lift it up to continue.

Take out the revenant you’ll encounter along the way. Once done, go to the southeast first. Destroy the wooden planks to your immediate right to reveal a wooden chest. Loot its contents then continue towards the wooden bridge and chain holder. Pick up the hacksilver along the way then kick the chain so you can use it to descend or ascend later.

There’s a rune-sealed stone door ahead. You have to find three rune seals scattered in the immediate area and destroy them to unlock that door. One of the seals is right beside the door. Jump across the gap and approach the door to see it, right under a hanging explosive jar. You can destroy it using the jar or by throwing your axe directly at it.

From where you’re standing, turn around to find another seal on the stone pillar to the left of the chain holder as shown below. Destroy it as well.

Before crossing the gap, look down to the southeast to find an explosive jar behind some ores. Destroy it to clear the ledge. Backtrack to the chain holder you clicked earlier then descend.

Treasure Map (Dead and Bloated)
More nightmares will appear so take them out then loot the coffin below. There’s another treasure map on the ground. Have Atreus read it to register it to your journal. Drop down to the lower platform you cleared earlier and pick up a large amount of hacksilver in front of the corpse.

Follow the path under the bridge which leads to the second chain holder. Jump down to the open space below but don’t detonate any of the explosive jars yet. Turn to the right to find a metal gate with a coffin and the third rune seal inside. Lift the gate to get inside. Destroy the last seal and loot the coffin. This should unlock the stone door earlier.

However, as soon as you leave the gates, you’ll be ambushed by heavy draugrs and nightmares. These nightmares may even possess these heavy draugrs, making them more dangerous and will constantly heal them. To remove the nightmare from the possessed draugr, you have to fill up the draugr’s stun gauge. Once you expel the nightmare, prioritize taking it out or it will possess another host. If you haven’t detonated any of the explosive jars earlier, you can lure them near their radius and detonating them deliberate to deal damage and instantly Kill nightmares. Clear the area of enemies. Before continuing, pick up the loot and destroy the nearby objects to reveal healthstones if you need to heal.

Make your way back to the broken bridge and go through the stone door. Pick up the hacksilver along the way then prepare to fight the soul eater. When ready, jump off the ledge and attack the soul eater to start the fight.

Boss: Soul Eater
By default the Soul Eater is immune to ordinary attacks. It’s only weak point is when it is opening its chest to attack. Throwing your axe while it’s open deals considerable damage and will cause a fragment of the Soul Eater’s body to fly off. This fragment will detonate after a few seconds but you can pick it up and throw it while its chest is exposed. This can be tricky and will require timing but if done correctly, it will heavily damage the Soul Eater and may even instantly stun it. While stunned, you can mount and pummel it with punches to its weak point to deal free damage.

During the battle, a couple of draugrs will join the fray. These will serve as your source of healthstones so Kill them quickly whenever you can. You can also lure the soul eater near the explosive jars in the area and detonate them when it’s in range. If you want to play it safe, you can just keep your distance and throw your axe whenever it readies itself for an attack. Just remember that you have only a second to react and evade. Keep doing this until the enemy is critically low, where it will be stunned and allow you to land the finishing blow on it.

Legendary Chest
Once the soul eater has been defeated, pick up its drop, including the epic Alchemist Ring needed by Brok. Open the nearby legendary chest as well to get the Fury of the Ice Troll light runic attack. Turn to the north and interact with the ledge to boost Atreus up and let down the chain that you need to pull yourself up.

Read the lore etched on the wall then zipline using the rope to reach the other area. More enemies will appear as soon as you hit the ground, more enemies will appear. Take out the nightmares first before dealing with the speed draugr. You can also use the explosive jars nearby as necessary.

The real path is through the ledge pointing west in your compass but for the meantime, shimmy along the wooden beams to the northeast to reach a hacksilver pouch on the platform there. From there, climb the nearby wooden wall to get back to the spot where you ziplined a few minutes ago.

Continue to the tunnel to the west and you’ll encounter ranged and shield draugrs as obstacles. You can still parry projectiles launched by the ranged draugrs and break the guard of the shield draugr, as long as you learned the necessary skills. Otherwise, you’ll have to Kill the ranged enemies first so you can focus on the shield-bearing one. Don’t hesitate to use your runic attacks to gain the upper hand.

After clearing the tunnel, loot the hacksilver pouches along the way then loot the wooden chest to the left of the chain holder. Loot it then kick the chain so you can go down back near the entrance of the mines.

Return to Brok and give him the ring to complete the favor. You’ll get the rare axe pommel, Grip of Volunder. You’ll also receive the corresponding amount of EXP.

Video Walkthrough
Anything missing from this guide?
ASK A QUESTION for God of War (PS4 - 2018)
Comments for Second Hand Soul
Add a comment
Please log in above or sign up for free to post commentsNo comments yet. Tell us what you think to be the first.
Table of ContentsClose
- Basics
- The Journey
- Favors - Dwarves
- Favors - Wayward Spirits
- Favors - Free Dragons
- Favors - Valkyries
- Labors
- Artifacts
- Nornir Chests
- Jotnar Shrines
- Treasure Maps
- Alfheim Locations
- Lake of Nine Locations
- Bosses
- Valkyries
- Muspelheim Trials
Guide Updates
Get notified of updates to this guide
Many of our guides get updated with additional information. To get an email when this guide is updated click below.
 Join us on Discord
Click to close