Chapter 7: The Magic Chisel 2
Thank you for printing this page from www.SuperCheats.com.
Remember to come back to check for updates to this guide and much more content for God of War (PS4 - 2018)
Follow this guide to hear about updates
Last Updated:
After retrieving the Blessings of the Frost from the legendary chest, drop down the ledge and exit the previously blocked gate behind the giant stone block you pulled earlier. Once outside, jump and grab on the next wall. Move to the left and look down so you can drop down to a barely visible ledge that has a wooden chest in it.

Loot the chest and head back out again. This time, climb up then shimmy to the right. Climb up to the next ledge to find another large shatter crystal. Approach it and grab it so that you can push it towards the large ice base holding the giant hammer. As soon as you push it, aim at it and order Atreus to fire his shock arrows as the crystal swings towards the ice base. When done correctly, this should completely destroy the base and move the crystal to the right.

Once it does, shoot the crystal again to destroy the thin ice wall covering the coffin. Loot the Solid Svartalfheim Steel from it. Next, approach the crystal once more so you can jump and grab on it then climb up.

Continue climbing then enter the first hole. Kick the cover then climb up to the next hole. Shoot the shatter crystal to clear the path then continue up to the strap. Interact with it to release it.

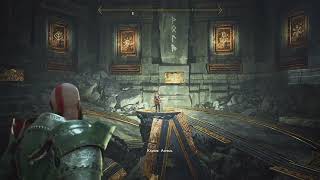
After finding yourself in another ledge, you’ll have to figure out how to reach the hammer’s head. Pick up the hacksilver pouch nearby then open the gate. Loot the coffin along the way to get Runeweaver War Belt and a Solid Svartalfheim Steel. Here you’ll find a collapsed floor and an intact sand bowl. Destroy the wooden planks covering the hole to the right then order Atreus to crawl to it and reach the bowl.

Atreus will read the clue: Winter, Spring, Summer, Autumn. You have to hit the plates under each stone tablet to change their symbols, each representing the seasons. The order should be:
Autumn, Summer, Spring, Winter as shown below. Order Atreus to input the answer on the sand bowl and the stone floor will be re-assembled by magic. Hop on the floor and it will slowly start the ascend.

While ascending, draugr will attack. This will also cause Atreus to leave the sand bowl to engage them, which will slowly reduce the magic’s effectiveness in the form of a gauge in the top of your screen. Atreus needs to input the answer to the riddle on the bowl to “refresh” the timer. This can be done by killing enemies as fast as you can. You can easily push enemies off the floor to Kill them instantly. Keep repeating this as you survive several waves of enemies.

When you’re near the top, Kill the ranged enemies on the top ledge then quickly order Atreus to shoot the shatter crystal on both sides of the ledge to destroy it. Then quickly jump to the marked wall so you can climb out of the tower.

Once you’re out, pick up the nearby hacksilver pouch then shimmy around the wall to reach the hammer’s head. Interact with it to push it off. After the sequence, crawl out of the debris to reach a chasm and the chisel tip just ahead. Jump to the next wall you can grab then shimmy to the left. Just as you turn around the corner, look down so you can grab the hold below and shimmy to the right to reach the hidden coffin containing a Solid Svartalfheim Steel.

Now backtrack to the main path until you reach the wooden ledge where you can drop off. There are inactive draugrs here so destroy them still then grab the nearby hold and start climbing up again to the next ledge. Jump across the gap and continue forth. Before reaching the door, turn left to find a hacksilver pouch in front of a corpse. After collecting it, head to the door and enter.

You’ll find yourself in the great dining hall with a lot of frozen enemies on the wall. Shoot the shatter crystal on the chandelier to force it to swing to the other side. Shoot it again to force it to crash to the side this time. Shoot it for the third time to dislodge the shatter crystal, allowing you to take pieces of it that you can throw.

Take a piece of the shatter crystal and throw it at the middle wall where a troll is frozen. Blast it to release the Stonebeard King. Similar to Jarn Fotr, this boss is capable of releasing ice shards with its stomp and its weapon. Being an ice troll, Stonebeard King doesn’t have any resistance to your Leviathan axe and frost attacks so use them without holding back.

There will also be wolves that will join the fray. As long as you keep Atreus shooting his shock arrows, it will be enough to damage the boss and Kill the wolves. Use your axe throws and runic attacks to deal damage instead of getting up close and engaging it with melee attacks. Finish it off to get the Boar Stampede runic summon, hacksilver, and Solid Svartalfheim Steel x4.

As you may have guessed, the other trapped creatures can be freed by repeating the same procedure. You have no choice but to do it since clearing the ice they’re trapped is necessary for you to proceed. Before doing anything else, grab a shatter crystal piece and throw it at the sap-covered chest on the high ledge to the east of the shatter crystal.

Next, break the last two ice in any order you want. The ice to the right contains a fierce ogre and nightmares while the other contains three wulvers. After defeating all of them, check the floor and collect their loot. Climb up the next ledge and pick up the hacksilver pouch on the leftmost side of the previously frozen corridor.

Continue ahead to find Sindri. Check his shop again if you need to upgrade or craft, otherwise you can ignore him. Loot the nearby wooden chest and head outside. Turn to the immediate right to find an opening you can vault over then loot the Solid Svartalfheim Steel from the coffin around the corner. Backtrack to the main path and jump to the next hold. Shimmy around and drop to the next wooden platform. From there, jump down to approach the chisel. Of course that would be too easy so just in time, Magni and Modi will appear and engage you in battle.

At the start, focus on one of them, preferably Magni because he’s the bigger threat between the two of them. Modi will keep Atreus busy so you’ll have limited support from him. If possible, try to use runic attacks when they’re both in range so you can damage them at the same time. Watch out for Magni’s long reach and unblockable attacks. Keep showering them with Atreus’ shock arrows since it can jump between targets and damage the two of them if they’re together. Modi will use his shield to his advantage so it’s more a reason to focus on Magni first.

When one of them is down by two bars, he’ll be temporarily disabled and will kneel on the ground with an aura of lightning. He’ll be invulnerable while in this state so don’t waste your attacks on him until he stands back up. Once the other is also down by two HP bars, they’ll perform a special attack called the Snowblind.


While the attack is in effect, you’ll be back to back with Atreus in a defensive position. You have to rotate to the direction of the attack and block it. Keep an eye to your threat indicator as you’ll only have 1-2 seconds to react. Remember that you don’t need to parry the attack. You can hold your shield up early in you’re already sure of the direction where they’re coming from. Continue doing this until the effect is over.

Once the battle resumes, both of them will have new attacks. Modi will be able to throw a shock “grenade” while Magni will dig his sword to the ground and slash his sword upward, creating a massive electric wave that will travel in a straight line.

They can also perform a combination attack where Magni throws Modi up in the air and the latter slams the ground with an electric shockwave. Be careful of Magni’s area shock attack. You can predict it when his sword is imbued with lightning and he’s about to stab the ground. Keep focusing on one of them until you take out two HP bars off your target. Once one of them is temporarily disabled, use this chance to pick up any healthstones around you while avoiding the other brother’s attack.

Once both of them are down by two health bars, they’ll perform their Snowblind attack once more. Like before, watch the threat indicator and react accordingly. This time, they’ll be performing fake attacks, making it a bit challenging to predict the real attack. Just put up your shield when one of them approaches you then quickly put it down and rotate when the first aggressor starts to move back. This fake will always involve a real attack from behind.

After the effect is over again, you’ll return to normal combat. At this point, they’ll be more aggressive with their attacks and combos. Like before, focus on one of them to disable him then finish off the other. They’ll do their snowblind attack one more time but this is just for dramatic effect. During this cutscene, you’ll be able to finish off Magni by simply pressing the attack button when prompted. After the scene, the battle’s over and Modi will run away.

Loot the Leiptr Alloy and Frozen Flame that Magni drops. Finally, interact with the chisel to obtain a piece of it. From hereon, you can now use that piece to break the magically-sealed doors you’ve seen before, including those in Hidden Chambers of Odin. After collecting the chisel tip, the quest will be complete.

Anything missing from this guide?
ASK A QUESTION for God of War (PS4 - 2018)
Comments for Chapter 7: The Magic Chisel 2
Add a comment
Please log in above or sign up for free to post commentsNo comments yet. Tell us what you think to be the first.
Table of ContentsClose
- Basics
- The Journey
- Favors - Dwarves
- Favors - Wayward Spirits
- Favors - Free Dragons
- Favors - Valkyries
- Labors
- Artifacts
- Nornir Chests
- Jotnar Shrines
- Treasure Maps
- Alfheim Locations
- Lake of Nine Locations
- Bosses
- Valkyries
- Muspelheim Trials
Guide Updates
Get notified of updates to this guide
Many of our guides get updated with additional information. To get an email when this guide is updated click below.
 Join us on Discord
Click to close