Chapter 5: Inside the Mountain 2
Thank you for printing this page from www.SuperCheats.com.
Remember to come back to check for updates to this guide and much more content for God of War (PS4 - 2018)
Follow this guide to hear about updates
Last Updated:
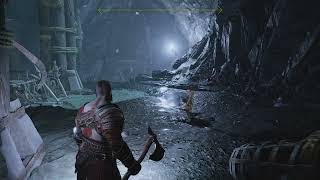
You’ll be in the Heart of the Mountain where you have to find your way up to the summit. Start off by interacting with the gear wheel to the right that Controls the claw. After the accident, engage the draugrs that will be awakened by the commotion and defeat them.

After clearing the area, there will be some stuff to explore. First, approach the hidden chamber door in the southern corner of the room (refer to the compass) to mark its location in your Labor list.

Next, find the lore marker behind the large square wooden container in front of the hidden chamber door to register it to your journal.

There’s also a lift on the platform beside that hidden chamber door but it’s covered with brambles so you can’t use it for now. However, climb up that platform still then find an alcove with wooden boards. Destroy the boards to reveal another knight corpse with a hacksilver pouch.

Leave the platform and continue exploring the area. There’s a wooden chest hidden behind some wooden boards under the wooden platform to the northwest as shown here. Destroy the boards to get some hacksilver from the wooden chest. There’s a coffin and artifact under another wooden platform but it’s blocked by a red sap so ignore it for now.

Enter the flame torch lit tunnel to continue. You’ll find Brok’s shop a few steps inside so approach him to register this location in your completion progress and check if you can upgrade some of your equipment. Before moving on, make sure to take out Odin’s raven flying around the enormous cavern in front of Brok’s shop. It’s immediately visible so it’s hard to miss it.

Next, climb up the wooden ledge beside Brok’s shop. Light up the two light crystal torches within range then destroy the crate to the left blocking a narrow tunnel you can crawl into. This leads to a wooden chest, a large runestone, and a coffin that contains a Solid Svartalheim Steel.

Backtrack a bit then drop off the ledge. There’s a spiked corridor that you have to pass through. Throw your axe at the wooden board until it can’t rotate anymore then enter the corridor. As the board rotates back, the other half of the spikes will slowly retract so use this chance to pass through the narrow gap as soon as you’re able to. Hit the large spiked gate to open it and reach the next area.

In this area, be careful of the two standing draugrs since they’ll spring back to life as soon as you get near or when you attack them. Take out the immediate enemies so you can resume your exploration. First, look up and destroy the bridge holders to lower the drawbridges. Next, destroy the holding attaching the large cart to a rope.


After freeing the cart, grab the handle and push it out of the way. Park it in front of the marked ledge, between the bridge and the massive gate to the south.

Before climbing up the cart, backtrack a bit then open the spiked door on the wall to reveal the corpse inside with another cup artifact (Bottoms Up).


After getting the artifact, climb up the cart then cross the bridge. Light up the torch ahead then continue to the next smaller bridge. Two of the draugrs there are alive so attack them preemptively to Kill them with ease. Kick the chains across that bridge to create an easy way to climb back up.

Now backtrack again to find a hole near the bridge you crossed. Drop down that hole to find a coffin inside. Loot another Solid Svartalheim Steel inside then lift up the gate to open it permanently. Use the chain you lowered earlier to climb back up.

This time, continue ahead and light up the next torch. Another raven should be visible ahead so Kill it to register it to your Labor. Turn to the left to find more draugrs across the second drawbridge. Attack preemptively before continuing.

Continue ahead then light up the next torch. Climb up two ledges to find another large runestone and another coffin. Loot the Scaled Waist Guard of Focus (rare waist armor) from it.

Drop down from the ledge then continue to the tunnel. Destroy the wooden boards ahead then lift the fallen stone block to pass through. This should bring you to the previous cavern with the crane. Kick the chain for easy access then interact with the chain to lift the giant gate. Return to the cart by lifting the smaller gate to the left.

Now push the cart outside and align it to the ledge to the left as shown below. Climb up the cart then jump across the ledge to reach the next platform.

Continue ahead and open the legendary chest along the way to obtain the Falcon’s Dive runic summon. After that, kick the chain at the edge to create another convenient access to this platform. Continue ahead and interact with the large boulder to move it out of the way and free the giant crane’s rope. Now climb back down to the lower ground where a frost troll will emerge from the chasm.

The troll, Jarn Fotr is similar to the other trolls you faced before. It’s still a safe option to keep your distance and pummel it with axe throws, ranged runic attacks, and arrows. Keep an eye out of its frost area attacks since it will cause the freeze status that will slow you down on top of dealing considerable damage to you. It will be better to use your runic attacks after Atreus fires all of his light arrows so you can deal extra damage from the light arrows’ weakening effect.

The troll’s attacks are very slow and predictable so you shouldn’t have problems evading them. About halfway down its HP, it will call in reinforcements in the form of explosive and fire draugrs. Use the large battlefield to keep your distance and even luring the troll in catching the draugrs in a crossfire with its attacks. When it’s almost down, you can use your Spartan Rage to pummel it to submission and finish off the job. After defeating the troll, loot a Frozen Flame, The River of Knives (heavy runic attack), and Solid Svartalheim Steel from it.

Before returning to the gearwheel, make a quick detour to Brok’s Shop and use the Frozen Flame you recently acquired to power up your Leviathan Axe and unlock new skills. Use all your EXP to get new skills as you’ll need them as you continue up the summit.

Anything missing from this guide?
ASK A QUESTION for God of War (PS4 - 2018)
Comments for Chapter 5: Inside the Mountain 2
Add a comment
Please log in above or sign up for free to post commentsNo comments yet. Tell us what you think to be the first.
Table of ContentsClose
- Basics
- The Journey
- Favors - Dwarves
- Favors - Wayward Spirits
- Favors - Free Dragons
- Favors - Valkyries
- Labors
- Artifacts
- Nornir Chests
- Jotnar Shrines
- Treasure Maps
- Alfheim Locations
- Lake of Nine Locations
- Bosses
- Valkyries
- Muspelheim Trials
Guide Updates
Get notified of updates to this guide
Many of our guides get updated with additional information. To get an email when this guide is updated click below.
 Join us on Discord
Click to close