Profiles
As you unlock more skills in different skill trees, you’ll gain access to Profiles. To avoid confusion, think of it as the Class or Job in the class Mass Effect games. However, as mentioned before, ME: Andromeda doesn’t lock you permanently on a single class; instead, switching roles or class on the fly is encouraged via the Profiles system.
There are seven unique profiles in the game which can be ranked up by investing skill points on the skill groups they belong to. For example, the Soldier profile (class) can be ranked up by spending 6 skill points on Combat skills whereas the Sentinel (Bio/Tech) profile can be ranked by spending 3 SP to Biotics and 3 SP to Tech.
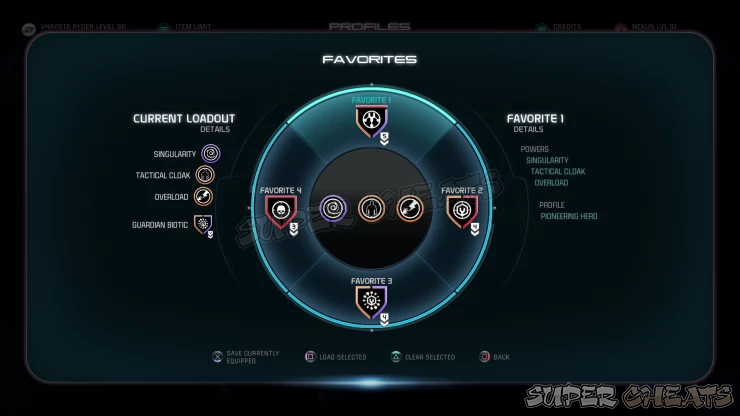
Only one profile can be active or “equipped” at any given time. While equipped, the bonuses that profile give will be immediately applied to your Ryder. You can create Favorites which will quick-map three Powers and one profile in a single slot. Since you can have four Favorite slots, you can have 4 profiles with access to 12 powers at your disposal. Switching profiles is highly recommended due to the large variety of enemies and combat situations that may arise.
Soldier (Combat)
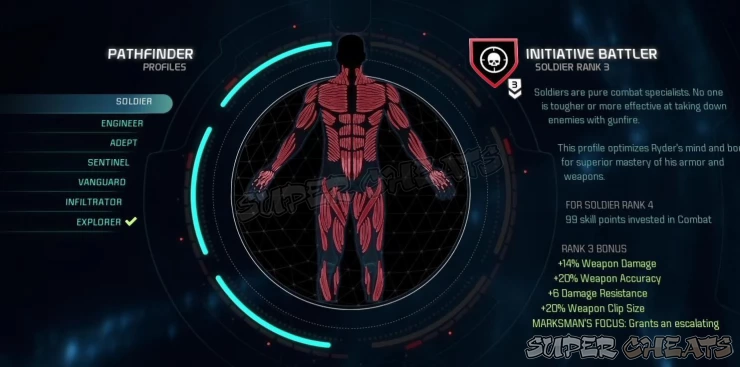
Special Effect:
Markman's Focus: Boosts damage output per every enemy killed (Stackable)
This profile is specifically geared towards weapon proficiency. This allows Ryder to excel in keeping the offensive through extensive weapon use. This is particularly user-friendly to beginners or simple fans of shooting. While this profile's effectiveness will be hampered when facing armored or shielded enemies, using the appropriate special ammo (like the Disruptor ammo for dealing with shielded enemies) or having the correct weapon mods (e.g. +damage against armored targets) should be enough to cover this weakness.
| Stat Bonus | Rank 1 | Rank 2 | Rank 3 | Rank 4 | Rank 5 | Rank 6 |
| SP Cost | 6 | 24 | 54 | 99 | 156 | 232 |
| Weapon Damage | +10% | +12% | +14% | +16% | +18% | +20% |
| Weapon Accuracy | +10% | +15% | +20% | +25% | +30% | +35% |
| Damage Resistance | +2 | +4 | +6 | +8 | +10 | +12 |
| Weapon Clip Size | +10% | +15% | +20% | +25% | +30% | +35% |
Engineer (Tech)
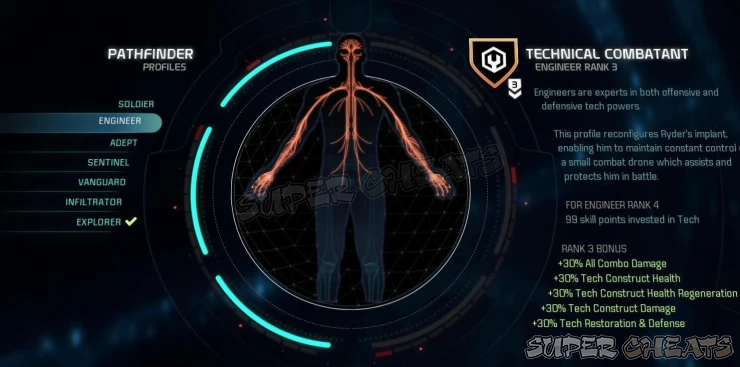
Special Effect:
Combat Drone: A drone will become available that boosts tech power recharge speeds. If an enemy gets too close, the drone will self-destruct, releasing a disabling EMP Blast. The drone will recharge/re-construct automatically over time but while it's in the process, the recharge speed bonus will not be active.
The stat bonuses of this profile will boost his/her tech constructs while improving Power Combo damage, restoration and defense. Use this profile only if you’re fond of using tech constructs such as the auto-turret and Remnant VI. Otherwise, you should stick to more Ryder-focused combat or tactical profiles.
| Stat Bonus | Rank 1 | Rank 2 | Rank 3 | Rank 4 | Rank 5 | Rank 6 |
| SP Cost | 6 | 24 | 54 | 99 | 156 | 232 |
| All Combo Damage | +20% | +25% | +30% | +35% | +40% | +45% |
| Tech Construct Health | +20% | +25% | +30% | +35% | +40% | +45% |
| Tech Construct Regeneration | +20% | +25% | +30% | +35% | +40% | +45% |
| Tech Construct Damage | +20% | +25% | +30% | +35% | +40% | +45% |
| Tech Restoration and Damage | +20% | +25% | +30% | +35% | +40% | +45% |
Adept (Biotic)
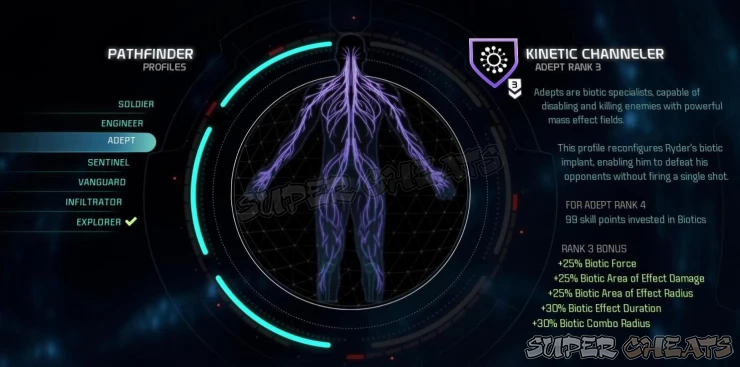
Special Effect 1:
Biotic Echoes: Biotic combos trigger extra explosions that to additional enemies hit.
Special Effect 2:
Biotic Jumps and Evades: Jump-jets will be replaced by biotic Powers, which increases the distance.
The Biotic skill tree already has good crowd-control abilities. This profile further enhances that by improving the area of effect damage, radius, and effect duration of offensive biotic Powers. The only drawback is that this profile can be challenging to use when facing shielded or armored enemies. To make the most out of offensive biotic skills, you must prioritize getting rid of the shields of enemies. Bringing in tech allies like Liam (he has Overload), using Disruptor ammo, crafting Weapons with augmentations that deal bonus damage to shields, or simply timing your biotic skill activation after the target's shield is down should be considered.
| Stat Bonus | Rank 1 | Rank 2 | Rank 3 | Rank 4 | Rank 5 | Rank 6 |
| SP Cost | 6 | 24 | 54 | 99 | 156 | 232 |
| Biotic Force | +15% | +20% | +25% | +30% | +35% | +40% |
| Biotic AoE Damage | +15% | +20% | +25% | +30% | +35% | +40% |
| Biotic AoE Radius | +15% | +20% | +25% | +30% | +35% | +40% |
| Biotic Effect Duration | +20% | +25% | +30% | +35% | +40% | +45% |
| Biotic Combo Radius | +20% | +25% | +30% | +35% | +40% | +45% |
Sentinel (Biotic/Tech)
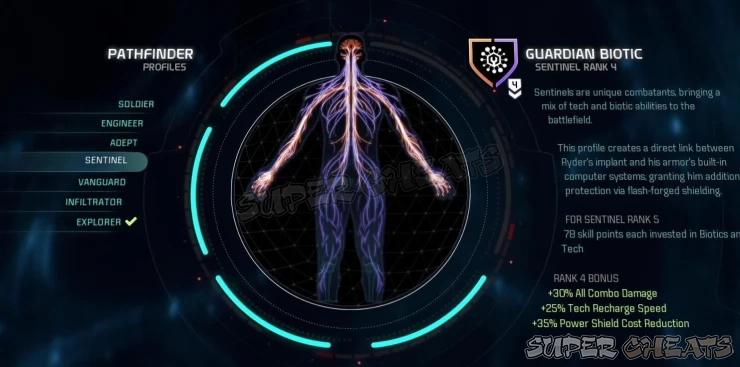
Special Effect:
Tech Armor: Grants +30 damage resistance once shields are down.
With shield-focused enhancements, this profile is great for taking in damage and increasing survivability. It also helps lowering shield cost for shield-powered skills like R6 Lance and R6 Nova. This good mix of tech and biotic skills make the Sentinel a “tanky mage” per se. If you're fond of using this profile, consider having equipment and/or augmentations that increases the max shields and/or reduces the shield regeneration delay.
| Stat Bonus | Rank 1 | Rank 2 | Rank 3 | Rank 4 | Rank 5 | Rank 6 |
| SP Cost* | 3 | 12 | 27 | 50 | 78 | 116 |
| All Combo Damage | +15% | +20% | +25% | +30% | +35% | +40% |
| Tech Recharge Speed | +10% | +15% | +20% | +25% | +30% | +35% |
| Power Shield Cost Reduction | +20% | +25% | +30% | +35% | +40% | +45% |
| Power Restoration and Defense | +20% | +25% | +30% | +35% | +40% | +45% |
*This is a hybrid profile so it means to reach Rank 6, you have to allocate 116 SP to both Biotic and Tech groups.
Vanguard (Biotic/Combat)
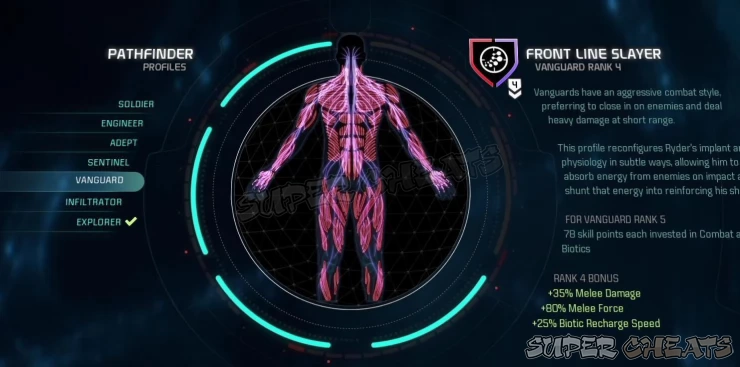
Special Effect1:
Siphoning Strikes: Melee attacks absorb enemy shields, restoring 20% of your Max Shield rating per successful hit.
Special Effect 2:
Biotic Jumps and Evades: Jump-jets will be replaced by biotic Powers, which increases the distance.
Vanguard is the melee tank profile in the game. The stat boosts are primarily geared towards melee damage and shields. With Charge, Ryder can close in immediately to the target then use Nova for AoE damage. With Siphoning Strikes, your lost shields can also be restored quickly so getting up and close won’t be a problem. It's more effective to use light and fast melee Weapons to dish out damage and recover shields faster with this profile active. If you're fond of using this profile often, consider augmenting your equipment with effects that increase melee damage, max shield, and jump-attack effects (like the leg armor parts which enhances your AoE damage)
| Stat Bonus | Rank 1 | Rank 2 | Rank 3 | Rank 4 | Rank 5 | Rank 6 |
| SP Cost* | 3 | 12 | 27 | 50 | 78 | 116 |
| Melee Damage | +20% | +25% | +30% | +35% | +40% | +45% |
| Melee Force | +50% | +60% | +70% | +80% | +90% | +100% |
| Biotic Recharge Speed | +10% | +15% | +20% | +25% | +30% | +35% |
| Power Shield Cost Reduction | +20% | +25% | +30% | +35% | +40% | +45% |
| Max Shields | +10% | +15% | +20% | +25% | +30% | +35% |
*This is a hybrid profile so it means to reach Rank 6, you have to allocate 116 SP to both Biotic and Combat skill groups.
Infiltrator (Tech/Combat)
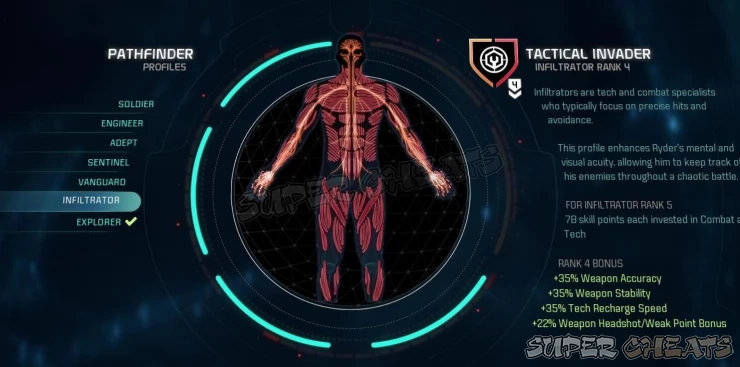
Special Effect 1:
Battlefield Awareness:
See enemies behind walls when viewing through a scope
Special Effect 2:
Cloak Evades: Evading activates a brief cloaking effect
Infiltrator profile follows a strict assassin-like gameplay with the improved proficiency when using scoped Weapons, particularly sniper rifles. Battlefield awareness alone is great for recon since it allows you to spot enemies from behind cover. When used with a powerful sniper rifle with good penetration and range, you can take out enemies with headshots even while they’re hiding.
Cloak Evades grants you some breathing room in case you get surrounded and lowers enemy aggro towards you. This profile is best used with the tech skill Tactical Cloak you’ll get a damage bonus for attacking while in cloak. While this removes your cloak, being able to sneak behind enemies or aim for their weakspot before attacking makes this damage boost worthwhile.
The profile improves weapon accuracy, stability, and headshot/weakpoint bonus which makes handling a powerful sniper rifle with this profile active very appealing.
| Stat Bonus | Rank 1 | Rank 2 | Rank 3 | Rank 4 | Rank 5 | Rank 6 |
| SP Cost* | 3 | 12 | 27 | 50 | 78 | 116 |
| Weapon Accuracy | +20% | +25% | +30% | +35% | +40% | +45% |
| Weapon Stability | +20% | +25% | +30% | +35% | +40% | +45% |
| Tech Recharge Speed | +20% | +25% | +30% | +35% | +40% | +45% |
| Weapon Headshot/ Weak Point Bonus | +50% | +60% | +70% | +80% | +90% | +100% |
*This is a hybrid profile so it means to reach Rank 6, you have to allocate 116 SP to both Tech and Combat skill groups.
Explorer (All)
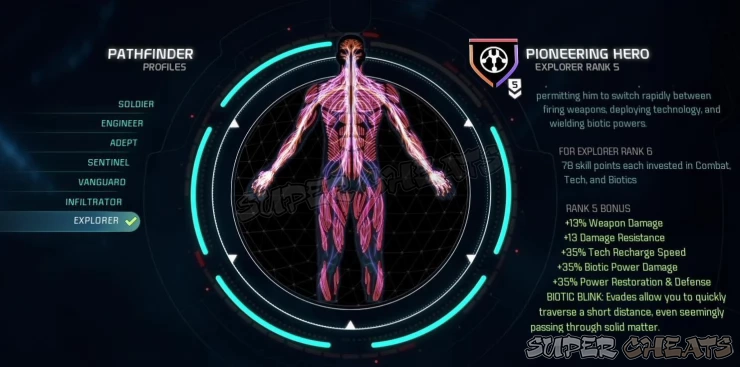
Special Effect:Biotic Blink:
Allows Ryder to “blink” or teleport to a distance which can bypass even solid barriers or obstacles.
The Explorer is the jack-of-all-trades. Biotic Blink replaces the standard evade move which is quite useful in almost all scenarios because of its ability to pass through small physical objects. The stat bonuses are fairly evened out to get the good aspects of the other skill groups but not necessarily to excel at them. This profile is generally aimed for players who prefer an “all bases covered” approach. Having Biotic-Tech primer and detonator power assignments work well for offense, while keeping a buffing/support power in the middle slot can provide better utility. With the right passive skills and equipment augmentations, this profile can allow Ryder to carry four Weapons at once while still having the capability to deliver punishing biotic and tech power damage at any given situation.
| Stat Bonus | Rank 1 | Rank 2 | Rank 3 | Rank 4 | Rank 5 | Rank 6 |
| SP Cost* | 2 | 8 | 18 | 33 | 52 | 78 |
| Weapon Damage | +5% | +7% | +9% | +11% | +13% | +15% |
| Damage Resistance | +5 | +7 | +9 | +11 | +13 | +15 |
| Tech Recharge Speed | +15% | +20% | +25% | +30% | +35% | +40% |
| Biotic Power Damage | +15% | +20% | +25% | +30% | +35% | +40% |
| Power Restoration and Defense | +15% | +20% | +25% | +30% | +35% | +40% |
*This is a special profile so it means to reach Rank 6, you have to evenly distribute 78 SP to all three skill groups.
Anything missing from this guide?
ASK A QUESTION for Mass Effect: Andromeda
Comments for Profiles
Add a comment
Please log in above or sign up for free to post comments- Basics
- Priority Ops (Main Story)
- Heleus Assignments (Nexus)
- Heleus Assignments (Tempest)
- Heleus Assignments (Eos)
- Heleus Assignments (Aya)
- Heleus Assignments (Havarl)
- Heleus Assignments (Voeld)
- Additional Tasks (Nexus)
- Additional Tasks (Eos)
- Additional Tasks (Aya)
- Additional Tasks (Havarl)
- Allies and Relationships
- Trophies
 Join us on Discord
