Planetside
Thank you for printing this page from www.SuperCheats.com.
Remember to come back to check for updates to this guide and much more content for Mass Effect: Andromeda
Follow this guide to hear about updates
Last Updated:

After reaching solid ground, you’ll be teaming up with Liam, who managed to survive to crash and land near you. Once you’re in control, you can scan the plants and the debris to earn a bit of research points. Examine the nearby QEC device then continue following the path until you reach a lightning field. Sprint straight through the field to avoid getting hit by lightning. Continue until you reach the safety of the tunnel.


Continue ahead and shoot the busted powercell with your sidearm then continue forth. Check out the small cavern to the left along the way and scan the glowing energy fault to get some Remnant research data. Leave the cavern and continue forth.


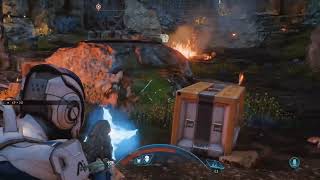
Jump across the cavern and continue to the objective marker to trigger a cutscene. You’ll find a couple of hostile aliens near Fisher. They have to be dealt with force no matter what approach you do so it’s better to take them out quickly. After they’re dealt with, another cutscene will take place. Before moving forth, make sure to interact with the supply boxes to replenish your ammo, health, and shields.


First Contact
Note: There are several optional tasks in this planet that you can only do here. You can check out these optional objectives in any order, as long as you don’t progress too much with the main tasks. Take note that you can’t return to this planet after completing the main mission here so make sure to accomplish all of them while you’re here and before continuing to the point of no return. We will be covering those optional objectives here as well.
Continue to the northeast path to find another member of the landing crew, Kirkland. Unlike Fisher, you can’t save him no matter what you do so go ahead and engage the aliens. Take cover behind the barricades to protect yourself and to get into favorable openings and shots.

After taking down the hostile aliens, check up on Kirkland to get his M-8 Avenger assault rifle. Now you can switch between your sidearm and the assault rifle using your weapon wheel. Next, examine the alien tech vault door to gain some research points.

If you continue north, you’ll encounter a cloaking animal. Kill it and scan it for additional research points. Continue ahead and you’ll see three flares to the northwest. You need to check them out later but there’s really no rush.


For the meantime, continue north to find an enormous chasm. From there, turn around to find a path leading to a cavern to the south containing a floating alien synthetic creature(?). What’s more important about this encounter are the two large containers with a lot of valuable loot inside. Get the items and leave the cavern.


From hereon, you can explore the area and activate various optional tasks before checking out the source of the flares (main objective). You can check them out at any order you want. They’ll usually be marked as a “?” in your HUD and map.
(Optional) Investigate your shuttle’s crash site
The other half of your crashed shuttle is found along the way towards the main objective (source of the flare). That crash site contains ammo boxes, containers, and the shuttle’s flight recorder. However, there will be a small alien force that will ambush you here so prepare to fall back behind the safety of solid objects for cover. Checking out this crash site will not appear in your objective logs.


(Optional) Investigate the Alien Ruins

This is located due west of Greer’s objective marker. After checking out the crash site, you now have to explore the alien ruins. The entrance is riddled by frequent lightning strikes so run inside and follow the mission marker inside. Investigate the interior of the ruins while scanning the various objects of interest and looting the containers inside.

Head deeper inside until you reach the room with orange lights on. Scan the objects inside. Upon scanning the large machine near the middle of the room, you can interact with it to restore power to the facility.

Leave the room and backtrack to the main hall. The previously-closed door to the left (north) where the mission marker is pointing should be open. Head there and loot the large containers along the way. Proceed to the vault-like door and approach it. The alien machine will spring back to life and attack. Destroy it and scan it as well as the nearby alien tech for research points. The objective is now complete and you have to leave the ruins. However, the hostile aliens you encountered before have been alerted and you have to repel their attack.


(Optional) Locate Greer

Head to the marked location where Greer is located. From the alien ruins, head east and you’ll find a small tunnel with a large pipe leading to a cavern where Greer is held captive by two alien soldiers. Kill the enemies and talk to Greer to rescue him. Be careful not to make contact with the toxic sludge. He’ll tell you that he’ll look around for supplies then meet up with you later. Objective complete.


(Optional) Investigate the Crashed Alien Ship

From Greer’s cavern, head further east then follow the valley south to find an alien crash site. There are several hostile aliens in the site so eliminate them and scan the alien ship for more research points. Loot the unknown alien transport container as well to complete the objective.


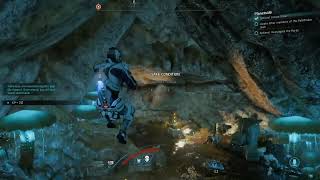
(Optional) Investigate the Mysterious Cave

The opening of this cave can be located north of where the crashed alien ship is located. Enter the cave and scan both the giant alien plant and the trapped insect-like creature inside.


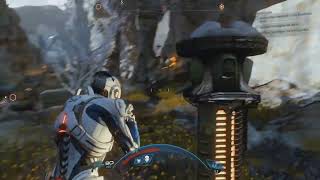
That’s all the optional objectives in the area. You’re now ready to check out the source of the flares. Before heading there, you can check out the ledge with the opening, just north of the mysterious cave entrance. This is where you’ll infiltrate later on with the story and finding it now will just enable some extra dialogue as well. The large enemy base is located here but you can’t do anything yet with the force field on.


Leave the ledge for now. If you approach the gate leading to that base, a small armed alien force will emerge from the gate and engage you.

Next, head to the direction of the flares. As you get near the spot, you’ll pick up the radio chatter from your surviving teammates. Upon reaching the crash site, you’ll find the other team being attacked by the same hostile alien force that you’ve encountered all along. Use the cover and systematically take them out. After the battle, replenish your ammo and health then prepare for another attack.

At this point, you should have leveled up already. Make sure to spend some skill points to unlock offensive Powers which will be very useful against these enemy forces. An alien dropship will deliver another wave of hostile aliens soldiers. This time, they’ll also bring their cloaking alien “dogs” as well. These creatures will engage you at melee range and will attempt to flush you out of cover. Deal with them quickly with your own melee attacks or blindfire at them when you can.

Later on, an unknown alien heavy soldier with shields will arrive. If you have Overload, you can greatly damage its shield. If not, you can also rely on your Disruptor Ammo if you have any on stock. Also, the field between your position and the alien landing spot has ocassional lightnhing strikes. If you’re lucky, one of these lightning strikes can instantly disable the heavy’s shield. Otherwise, if you don’t have any, take out the minions first so you can focus-fire on that heavy to break through its shield and kill it.


After repelling the attack, the weather condition will severely turn to worse and the lightning strikes will become very frequent. Leave the shuttle and make your way to the open ledge earlier to find Alec surveying the shielded enemy base.

After the cutscene, it’s time for you to storm the enemy base. Breaking through the enemy forces should be easy enough with your squad and your father in tow. Make sure to move from cover to cover to give time for your shields to recharge away from enemy fire. Make sure to move close to the ammo boxes along the way to ensure that you’re properly resupplied.

There’s no need to fully explore the area since Alec will be pushing forward with or without you. Keep following Alec and clear the enemies along the way. After reaching the control pedestal behind the base, there are more enemies waiting. Clear them out so Alec can start working on the pedestal. More enemies will be coming so order Liam and Cora to take positions on both sides to cover both flanks. You’re free to defend which side needs more cover.


Once they’ve taken positions, you have to hold off the attack until Alec completes the decryption on the alien pedestal. Once the decryption is complete, join your dad by the door and interact with it for a cutscene. Mission complete.

Anything missing from this guide?
ASK A QUESTION for Mass Effect: Andromeda
Comments for Planetside
Add a comment
Please log in above or sign up for free to post commentsNo comments yet. Tell us what you think to be the first.
Table of ContentsClose
- Basics
- Priority Ops (Main Story)
- Heleus Assignments (Nexus)
- Heleus Assignments (Tempest)
- Heleus Assignments (Eos)
- Heleus Assignments (Aya)
- Heleus Assignments (Havarl)
- Heleus Assignments (Voeld)
- Additional Tasks (Nexus)
- Additional Tasks (Eos)
- Additional Tasks (Aya)
- Additional Tasks (Havarl)
- Allies and Relationships
- Trophies
Guide Updates
Get notified of updates to this guide
Many of our guides get updated with additional information. To get an email when this guide is updated click below.
 Join us on Discord
Click to close