Workbench Locations (Ellie)
Thank you for printing this page from www.SuperCheats.com.Remember to come back to check for updates to this guide and much more content for The Last of Us 2
Last Updated:

Workbenches are the only places in the game where you can customize your ranged weapons using Parts that you scavenge while exploring. The upgrades are all beneficial and permanent but due to the number of parts you can find, you should prioritize which weapons to upgrade first and what upgrades to select first. The rifle and your pistol are reliable starter weapons and you should upgrade them first since their ammo are somewhat common. Prioritize upgrading Stability to reduce weapon sway (unless you disabled Weapon Sway in the Accessibility options) then Capacity, while the others will depend on the weapon. Damage upgrade for the rifle can be bought later to make it more potent in one-shotting most enemies and eventually adding a 6x scope to it will allow you to pick off most targets at great distances.
Workbenches can be used as often as you need as long as you can go back for it. Some workbenches especially those you encounter in one-off areas can only be used while you’re there so keep finding parts and use workbenches whenever you can. On this page, we will help you find all workbenches in the game. Most can be encountered along the way while others need some exploration to locate them. For convenience, we will have dedicated pages for the workbenches you can find per playable character. Finding all workbenches will unlock the Trophy "Prepared For the Worst".
New to the game? Don’t forget to check out our Beginner’s Guide for a quickstart! You can also check out our other dedicated pages for the other collectibles in the game. You can also check out our extensive spoiler-free walkthrough that will help you how to find collectibles as you progress through areas.
Jackson
The first workbench you'll find is in The Library. You can find it in the hallway beside Eugene's room but you'll have to power up the nearby generator first. Finding it is part of the story so you won't miss it.
Downtown, Seattle
Head to the corner of Marion and 4th Ave (as shown below) to find a large military tent. Examine the wanted posters along the stairs for a short conversation with Dina. Continue upstairs then slip through the barely-opened gate to access the tent. Loot the parts on the shelves and the shotgun ammo beside the corpse. You can also examine the FEDRA scanner inside the open crate. Use the workbench afterward to upgrade your weapons.

Capitol Hill (Gas Station)
After passing through the Capitol Inn building, head past the dry cleaner shop and Nancy's boutique/gift shop. Continue walking along that street to find a gas station. Head inside to find a lot of parts and a Workbench. You can use the workbench to upgrade your weapons if you haven’t done so already.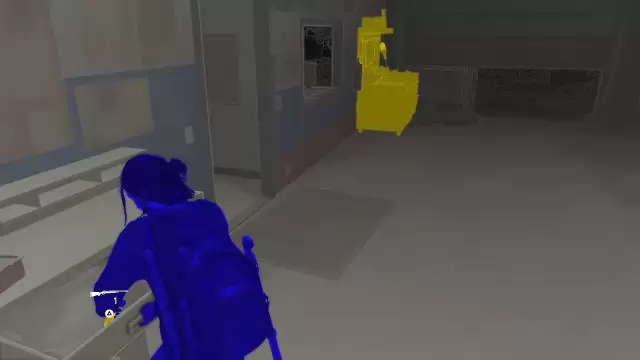
Capitol Hill (Martial Arts Gym)
After encountering Tommy's dead horse in the stream, continue forth until you reach a closed gate and a tight, grassy path full of trip mines. You can trigger these trip mines by throwing bottles or bricks at them. Enter the gym to the right then head to the locker room. Pick up the Fran's Refusal artifact on the small bulletin board. Turn around and you’ll find a Workbench.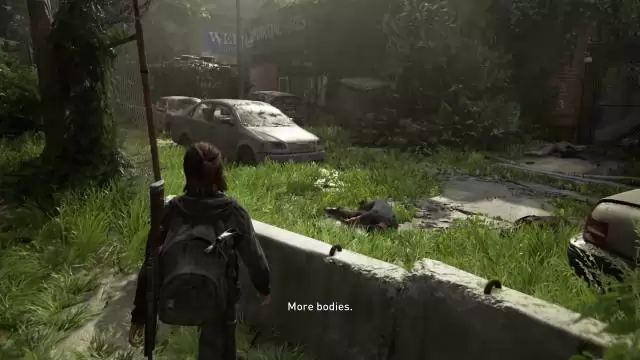
The Tunnels
After passing through the first set of train cars, follow the tunnel until you find an open doorway with a red glow. Enter the red room and examine the WLF body by the grille then climb up the ladder to the right. There’s a lead pipe in front of the dead clicker and a rope to the left. Don’t grab the rope yet; enter the room to the right to find a Workbench. There are some parts and materials on the shelf to the left side.
Seattle Day 2
Hillcrest
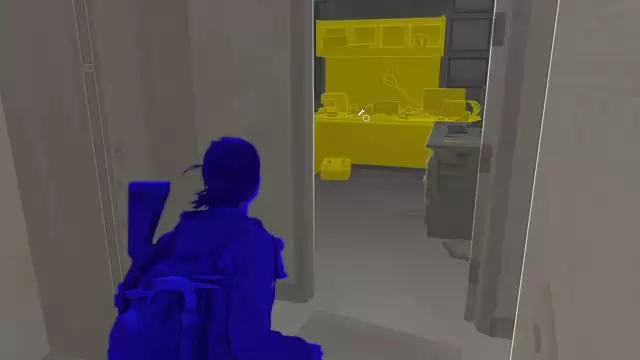
This Rosemont store is on the right side of the street. Pick up the materials outside then find the hole that leads to the basement behind the counter. Here you can find Boris' Daughter's Drawing artifact on a table and a Workbench, as well as some supplements and other supplies.
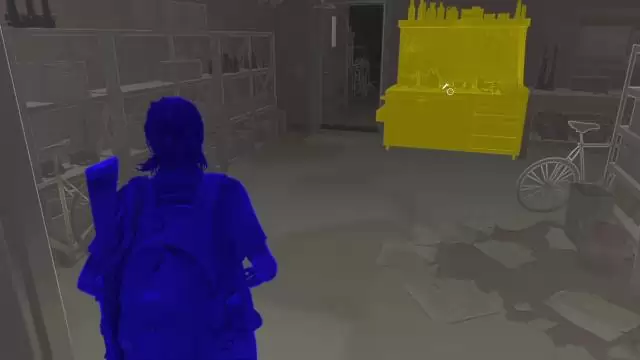
After your first encounter with the WLF Patrol with dogs, you'll come across a back alley where you'll have to push a dumpster to reach the rooftop and drop inside a bicycle shop. You'll find this workbench as soon as you enter the building; besides, passing through this location is mandatory so you won't miss it.
The Seraphites
Continue following the main road and you’ll find an apartment to the left and a locked gate to the right. You have to find a way to vault over the gate to proceed but it’s recommended to explore the apartment building to the left first since it has a lot of valuable loot inside. The main door is locked so head to the side where you can use a delivery truck to climb up and reach the second floor window. Smash the window and climb inside. Pick up the artifact on the table, trading card in the drawer inside the bedroom behind the kitchen, as well as a safe. Once done, enter the next apartment unit. Pick up the parts near the blinded window and other scattered items in the unit. You’ll also find a workbench by the kitchen. The bedroom near the workbench is locked but there is some valuable loot inside.

Find the hole on the wall where you can crawl into. Find the workbench in the corner to the right. Pick up more supplements and other materials from the shelves then use the workbench.


Seattle Day 3
Road to the Aquarium
Continue along the road until you reach the dead end. You’ll have to enter the WPL building to the right. After entering, loot the ammo and materials on the shop to the right, then follow Jesse up to the next hallway. Loot the cupboards in the break area to get some supplements from the cupboard. Enter the bathroom nearby to find more materials and parts. Return to the hallway but don’t open the double doors yet; check the open door in front of it that you can crawl into. Look to the left to find a workbench. On the table, you’ll find more supplements and the Tormentra Trading Card. Use the workbench; when ready, open the double door to reach the next room.

After swimming through a second submerged street, you'll eventually reach the ruins of a mall. Make your way up and look for a mostly intact floor with offices at the back. Explore that floor to find a workbench and a case of parts on the nearby table as well.

The Flooded City
After passing through another set of rapids, the boat will stall. After restarting the engine, continue to the left and look for a blue-painted building with the “Manufacturing, Production” signage, as shown below. Disembark there and head inside to find a workbench. Don’t forget to dive to the flooded part of the room to find more parts and crafting materials. Use the workbench then return to the boat and continue forth. If you found all the previous workbenches up to this point, the trophy “In The Field” will be unlocked as well.

Follow the stream until you finally reach an arcade bar building. Break the glass and dock your boat inside. You’ll have to free the chain holding the grate to continue forth. Dock the boat inside then go upstairs to find the workbench.

Santa Barbara
Pushing Inland
After entering the large house from the second floor and clearing the first floor of shamblers and stalkers, you can find the workbench in the dining area at the back.
The Resort
The last workbench is found inside the shed as soon as you enter the Rattler compound through a chain-link fence. Clear the area of enemies to use it.
Next Page
Workbench Locations (Abby)
Previous PageWeapons, Explosives, and Holsters Locations
Guide Menu
Anything missing from this guide?
ASK A QUESTION for The Last of Us 2Comments for Workbench Locations (Ellie)
No comments yet. Tell us what you think to be the first.
Table of ContentsClose
 Join us on Discord
Click to close