Seattle: Day 1 (Part 1)
Thank you for printing this page from www.SuperCheats.com.Remember to come back to check for updates to this guide and much more content for The Last of Us 2
Last Updated:
Welcome to our comprehensive, collectible-intensive, spoiler-free walkthrough. As a general note, make it a habit to manually save often especially if you’re not relying on guides when playing, so you can always go back to “point-of-no return” portions of the game to collect various collectibles. In this playthrough, we have enabled High Contrast Mode and Enhanced Listening so don’t get confused if you see different features in the screenshots we’ll feature in this guide. You can modify these settings anytime from the Options menu.
Collectibles Summary
The Gate
Continue riding with Dina until you reach some abandoned cars and a waiting shed. Dismount in front of the shed to get the Motivator trading card in front of the billboard. If you have collected all trading cards that can be found up to this point, you’ll also receive the Starter Set Trophy.

Continue riding along the straightforward path until you reach the road with lots of abandoned vehicles. The path to the right has nothing but a broken bridge/dead end so head west instead. Continue along the road until you reach a construction office to the left. Enter the office and loot the alcohol from the drawer near the entrance. Get the The Starfire Kids trading card from the bulletin board.


Head to the next room and open the desk drawer to get the Map of Seattle Artifact. You’re done here now so get back to your horse and follow the road until you reach the closed gate leading to the city.

After arriving at the gate, approach the massive gate with the message “WLF Trespassers will be killed on sight!” for a Journal Entry. There are no enemies in this area so feel free to comfortably explore.

Next, there are two FEDRA offices by the gate. Enter the first FEDRA office and pick up the Refugee Note Artifact on the desk.

Head to the second office and crawl underneath to get a piece of Rag. Enter that office then pick up the Infected Infographic Artifact on the desk.

Once done, pick up a large piece of Rag inside one of the holding cells nearby and some parts on the back of the parked truck. Next, climb up to the roof of the holding cells then continue ahead towards the yellow ladder. Get near it and ask for Dina’s help to boost you up.

Climb up the ladder then jump to the metal scaffolding to the right. Jump to the next ledge near the wall then crawl through the narrow space. Finally, jump to the next ledge and crawl over the broken wall.

Continue ahead to the tower with the ladders but don’t go down yet; look for a ladder to the left that leads to the watchtower. Get the parts and rag there, as well as the Chessmaster Trading Card on the desk and Isaac’s Orders Artifact on the right.

Climb down the ladder then climb down another ladder. This doesn’t reach the ground so drop down instead. There are also no enemies in this area so just focus on exploring for now. Start by smashing the window of the FEDRA office then vault inside. Turn around and open the drawing beside the workstation to get the Checkpoint Gate Codes Artifact. Take note of the codes then take the other door to leave the office.


Circle around and turn on the generator. Open the small gate but don’t connect the generator cable yet. Carry it then throw it over the roof of the office. Circle around and use the cable as a rope to climb up to the roof. On the roof, you’ll find a lot of supplies, the Oozer Trading Card on the floor and the Rooftop Note Artifact on the chair.


After looting the rooftop supplies and collectibles, jump back down and retrieve the cable. This time, bring it to the power panel by the sliding gate by the FEDRA office building then insert it to the socket to power up the panel and open the sliding gate.

Next, pull the cable again then carry it back to where the generator is then throw it over the fence to land as close as possible to the adjacent office. Go around the fence and pick up the cable and attach it to the power panel near the stairs. This will power the gate controls inside this office.


Go inside the office but don’t operate the gate controls yet. Smash the window near some crates and vault over to the other side. You can open the small gate if you want then use the ladder to reach the watchtower. Pick up the parts, alcohol, and supplements inside.

Now head back to the office and operate the gate controls. Referring to the gate codes note earlier, enter the gate code 0512 to open the gate and let Dina and Shimmer in. Once done, ride your horse and jump over the obstacle to leave this area.

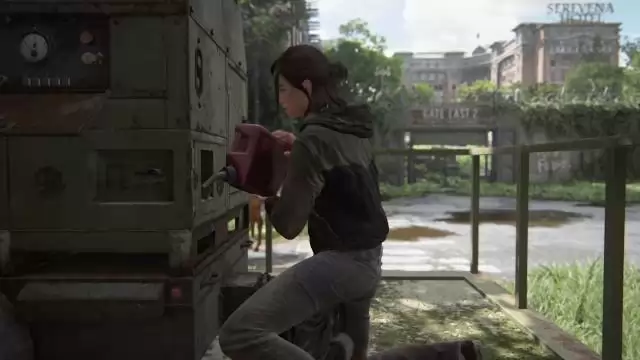
There are no objects of interest along the way until you reach Gate East 2 (Fuck FEDRA) gate. Disembark from your horse then check the guardhouse to the left. Open the drawer to find the FEDRA Census Document Artifact. That’s the only collectible in this immediate area so try to turn on the generator nearby to discover it’s out of gas. To continue with the story, you’ll have to retrieve gas from the two specific locations in the Downtown area. Ride the horse and jump over the barricade to reach Downtown.

Downtown
Downtown Seattle is a large area that you can explore at your own pace. You'll need to visit the dome building and the Courthouse to continue with the story and everything else that you do here is optional. However, we strongly suggest starting taking this time now and exploring since there’s a lot of collectibles and valuable stashes that you can find in this area. Some items may be dynamic so it’s possible that you’ll find different items than what we have listed here. Nevertheless, consider these spots as “spawn” points for other valuable items or objects of interest so you’ll still find something as you check out these spots. Take note however, that after your business with the Synagogue and Courthouse, you’ll have to leave this area and head to the next part of the city. Please refer to our dedicated page on exploring Downtown, Seattle at this point of the story.
* Synagogue walkthrough
* Courthouse walkthrough
After visiting the Synagogue and Courthouse and retrieving the gas, head back to the dry generator in the F*ck FEDRA (Gate East 2) gate. After filling up the generator, interact with the keypad and enter the code 5345. This will open the gate that will lead you to the Severena Hotel.
* Continue to Seattle: Day 1 (Part 2)
We have questions and answers related to this topic which may also help you:
Anything missing from this guide?
ASK A QUESTION for The Last of Us 2Comments for Seattle: Day 1 (Part 1)
No comments yet. Tell us what you think to be the first.
Table of ContentsClose
 Join us on Discord
Click to close