Artifact Locations (Ellie)
Thank you for printing this page from www.SuperCheats.com.Remember to come back to check for updates to this guide and much more content for The Last of Us 2
Last Updated:

Artifacts are basically notes that you can find scattered in the environment, usually left behind by other survivors. Some of these are somewhat tricky to find since they are either hidden in off-path spots or cleverly hidden in plain sight - like other collectibles. In this page, we will list down the locations of all artifacts in the game, divided into chapters. Since there's a lot of artifacts to find, we will be dividing the individual locations based on the story chapters per playable character.
For convenience, it is recommended to enable High Contrast mode in the Accessibility options. You can also consider turning on the Enhanced Listening Mode (in the Navigation and Traversal section in the Options menu) which will enable you to use mapped buttons to send a ping to find nearby collectibles in your immediate location. Finding all artifacts (and Journal Entries) will unlock the "Archivist" Trophy.
New to the game? Don’t forget to check out our Beginner’s Guide for a quickstart! You can also check out our other dedicated pages for the other collectibles in the game.
Jackson
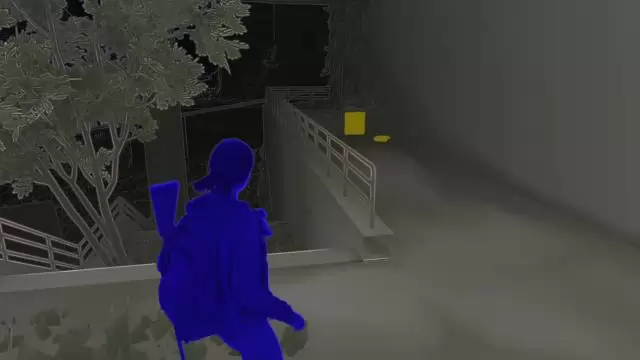
While following Jesse in Waking Up, continue until Jesse stops by the door of the Tipsy Bison bar. Don’t enter the bar where Jesse is waiting yet; instead, go around the tractor with the cart full of logs then head to the right to find a note on top of a crate, beside a ladder. Pick up the Volunteer Request artifact.

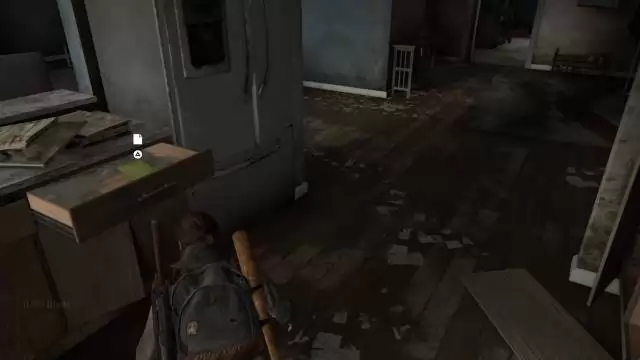
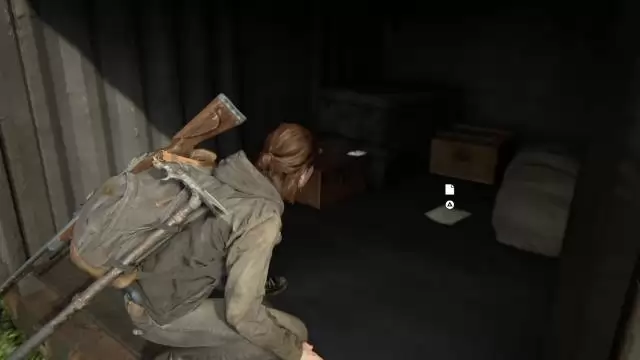
In the The Overlook, after crawling out of the house, turn around and enter the house through the open window. Pick up the Health Kit from the luggage in the bedroom then head to the next room. Pick up the pistol ammo and the Note artifact on the table.


After leaving the first lookout with Dina, you'll come across a small suburban neighborhood. Climb to the second floor of the wrecked house across the trailer home then open the drawer between the closet and the bed to get the A Note to Santa artifact.

After crawling under the semi truck behind the supermarket and killing the infected that ambushes Ellie, turn to the right and enter the open door to the loading bay. Squeeze through the small gap inside the trailer to get the Supermarket Apology artifact and some supplements.

After wearing your gas-mask and entering the supermarket offices, you'll find a small room with a safe. The Goodboy Combo artifact is on the table which will also give the clue about the code to open the nearby safe.

After reaching The Library, you’ll need to find another way in. Find a locked door with the glass window beside it in the corner of the room then smash the window so you can vault over inside. Loot the parts on the desks then open the other door. On the way out, Ellie will pick up Eugene's Firefly pendant artifact.


After getting Eugene's Firefly Pendant, head to the makeshift bedroom and check the top of the desk to get the Photo of Eugene and Tommy artifact. Get some parts on the desk, then open the drawer beside the bed then pick up Eugene's Ultimatum artifact.


Seattle Day 1
The Gate
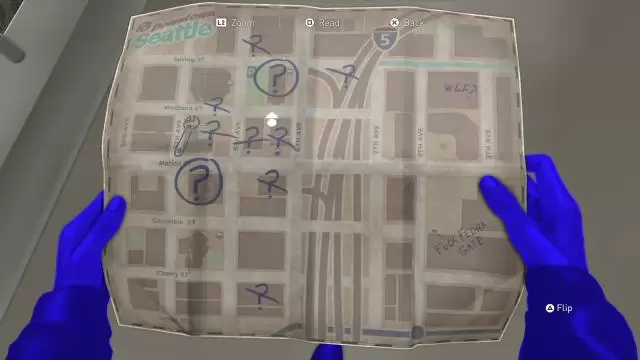
Continue riding along the straightforward path until you reach the road with lots of abandoned vehicles. The path to the right has nothing but a broken bridge/dead end so head west instead. Continue along the road until you reach a construction office to the left. Head to the next room and open the desk drawer to get the Map of Seattle artifact.

After reaching The Gate in the outskirts of the city, you'll find two FEDRA offices outside the gate. Enter the first FEDRA office and pick up the Refugee Note artifact on the desk.

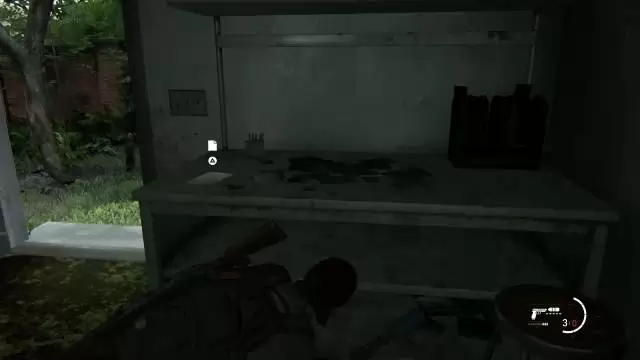
Head to the second office and crawl underneath to get a piece of Rag. Enter that office then pick up the Infected Infographic artifact on the desk.

After climbing up the broken wall, continue to the watchtower. Go up the ladder to reach watchtower itself then pick up Isaac's Orders artifact on the crate to the right. You can also find the Chessmaster trading card on the table to the left.

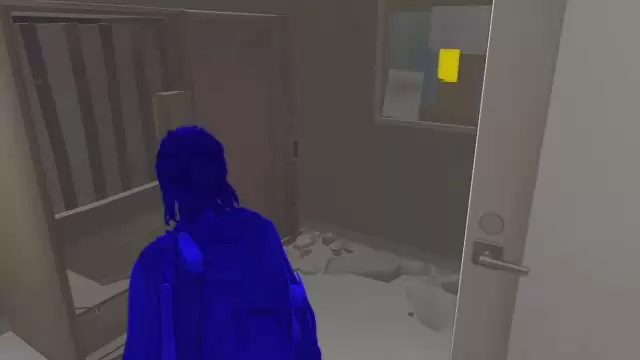
After successfully climbing over the broken wall and climbing down, you'll find a FEDRA office. Smash the window then vault inside. Turn around and open the drawing beside the workstation to get the Checkpoint Gate Codes artifact.

From the same FEDRA office described above, exit through the other door to find the generator. Power it up then carry the cable and throw it over the roof so you can climb up on the other side of the office using the cable. The Rooftop Note artifact is found on the chair on the roof. The Oozer Trading card can also be found beside it.

After getting Dina and Shimmer through The Gate, continue forth until you reach Gate East 2 (Fuck FEDRA) gate. Disembark from your horse then check the guardhouse to the left. Open the drawer to find the FEDRA Census Document artifact.

Downtown, Seattle
Inside the Westlake Bank, clear the infected in the bank lobby then continue to the vault. Examine the bag on the floor to get the Bank Heist Plans artifact. While inside the bank, use the code 60-23-06 to open the vault. Pick up the Pump Shotgun then check the corner of the counter then pick up the Bank Robber Letter artifact.

Still inside the Westlake Bank vault, pull one of the trays in the corner (enable High Contrast Mode to see which trays you can interact) to find an Antique Ring artifact. This will also unlock the So Great And Small Trophy.

In Columbia St cor 6th Ave. Referring to your map, go to the square north of Westlake Bank as shown in the screenshot below. Beside the sloping building ruins, you'll find remains of another building. Beside the desk, you'll find a skeleton with a bag. Open the bag to get the Cache Hunter's Note artifact.


Referring to your map, go to the square northwest of Westlake Bank (Columbia Cor 4th/5th). This plaza is hard to miss since it has a tank in it. To the left of the tank, you'll find a skeleton crushed by rubble. Examine the bag to get the Letter from Isaac artifact. Next, open the hatch of the tank to get 2 shotgun ammo.


Head to the marked location below (corner of Marion and 4th Ave) to find a large military tent with the Workbench inside. Circle around to find a footbridge with some guardhouses. Enter the first one then open the drawer to find the Street Drawing artifact. After getting the artifact, a prompt will appear immediately for a Journal Entry.


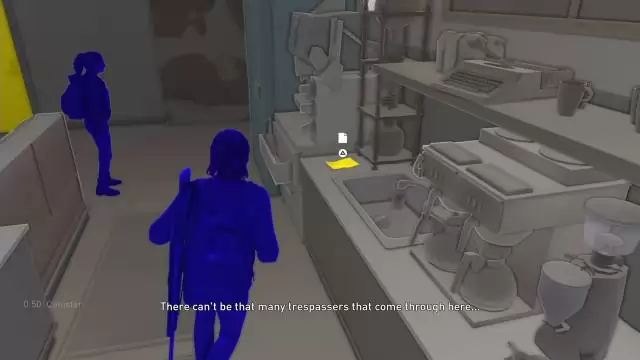
Head to Ruston Coffee in the corner of 5th ave and Spring St. Smash the window then grab the various supplies inside. You’ll also find the WLF Safe House Supply Note artifact on the counter.


In the corner of Spring St and 6th Ave, look for a convoy of trucks under the collapsed overpass. Head to the frontmost truck that’s partially submerged on the stream then open its cargo door. Loot the parts inside and pick up the Note to Informant artifact on the floor.


In the building beside the Courthouse, along Madison St, you’ll find a set of stairs in the alley, with the WLF sign. Continue upstairs to find a bag and a crate. Pick up the WLF Community Supply Chest Note artifact from the bag on the floor, then open the nearby crate to get the supplies inside.
Synagogue
The Synagogue is one of the two story-related locations where you have to find fuel. From the front facade of the building, enter the gate to the left with a ladder that will take you to the lookout tower. Open the drawer there to get the Emergency Protocols Memo artifact.

After swinging across another balcony inside the Synagogue, enter the room on the end of that balcony then pick up the supplements on the table and the Rabbi Saunders' Letter artifact from the desk drawer.

Courthouse
Once you've reached the first floor of the Courthouse, continue past the open elevator shaft and head towards the end of the corridor to find two bodies. Pick up the Plea to a Friend Letter artifact from the body near the corner.
The nearby office is locked so break the glass window and climb inside. Pick up the alcohol from the shelf then pull the machete from the corpse. After pulling it, a paper will fall on the floor. Pick it up to get the Lt. Torres' Final Memorandum artifact.

In the same room, open the file cabinet to the left of the corpse to get the List of Known WLF Agitators artifact inside.

Severena Hotel
Continue to the second floor of the hotel where you'll find a body by the door. Enter that room and open the drawer under the TV stand to get the WLF Recruiter Journal artifact.
Eastbrook Elementary
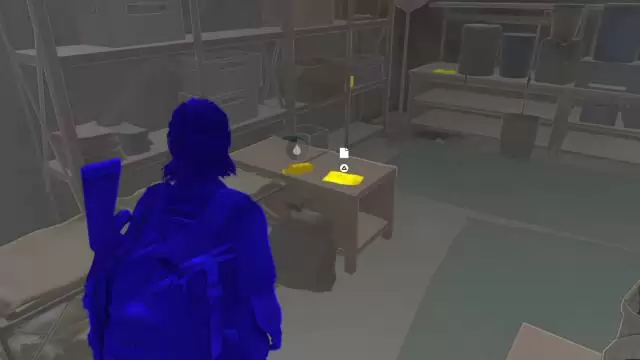
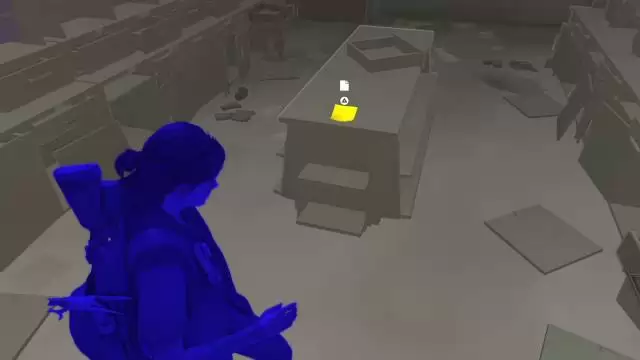
After reaching the rooftop with solar panels and clearing the three enemies, find the door where you can enter. After entering, loot the materials and parts to the left, then turn around and find more materials, supplements, and ammo on the table and shelves in the corner. Don’t forget to pick up the Isaac's Mandate artifact on the same table as well as shown below.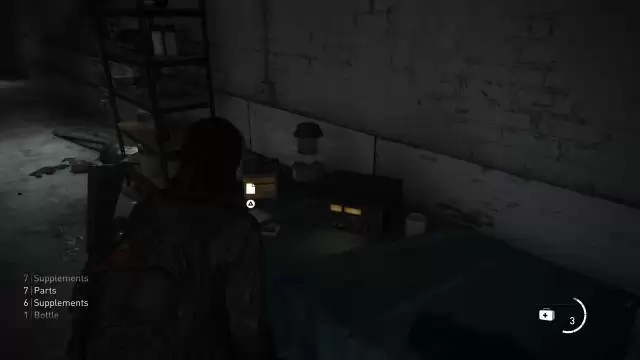
Capitol Hill
After jumping down to the street level, continue to the two apartment buildings. Your landmark is the drained pool on the leftmost side. Head to Apartment 6 which is situated between Apartment 3 and the pool. Once inside, you should see a trail of blood going upstairs. Loot the kitchen for supplies then continue upstairs. Kill the infected that will ambush you then head to the bedroom to find parts, revolver ammo, and Chevy's Apology artifact on the bed. Find some supplements in the bathroom, then check the other bedroom for more items, including a baseball bat.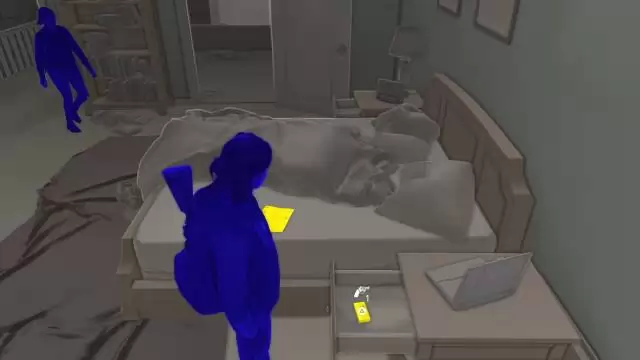
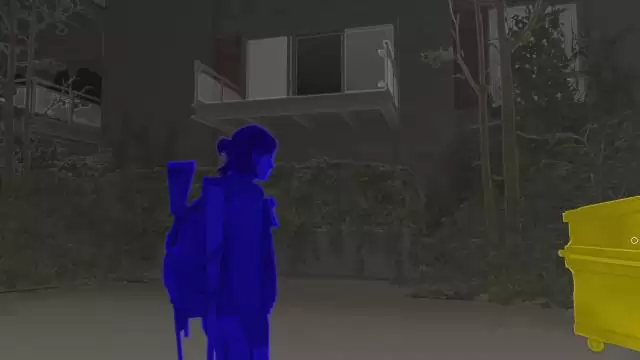
Leave the apartment then proceed forth to the Capitol Inn building. From the inn’s parking lot, find a dumpster to the right that you can move and place it under the balcony of a nearby apartment. Climb up the dumpster then reach the balcony to enter the apartment unit. Loot the items in the kitchen. One of the drawers there has the Raul's Olive Branch artifact.
From the gas station, enter the bookstore just across the street then head to the coffee house section of the same building. Pick up the Rebecca's Tipoff artifact by the sink.
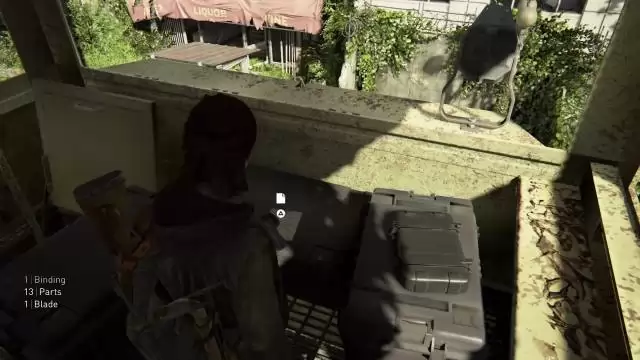
After passing through the Bagel Bros building and jumping over to the next gate, continue until you see a clicker getting blown apart by a trip mine. Loot the Liquor store to the left then take out the remaining infected. Continue past the open gate then climb up the watchtower to the right. Pick up the materials, rifle ammo, parts, and the Tower Doodles artifact.
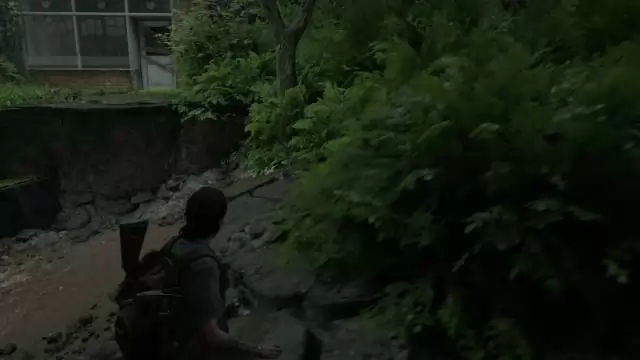
After following the stream you'll come across a collapsed overpass. Just past that is a wall with the "Feel Her Love" painting. From that wall painting, turn around to find an open cargo truck. Climb inside and pick up rifle ammo, materials, and the Raul's Account artifact.
From the stream, continue until you reach a grassy road full of tripmines. Enter the gym to the right then head to the locker room. Pick up the Fran's Refusal artifact on the small bulletin board. img=https://resource.appgamer.com/library/2020/tlou2ch243capitolhill25.jpg title=]
Enter the thrift store just across the gym. Watch out for the trip mines then open the back door and turn to the right to find a small bulletin board on the wall. Get the Thrift Store Reminder artifact from it.
Channel 13
After reaching the news studio where there are several hanging bodies, go to the second floor and find the balcony where you have to shimmy along the curved metal beam. Enter through the broken window, explore the floor (you can find the Kimimela Trading Card on the desk of the small building at the end of the hallway) then continue upstairs to the next floor.
On the next floor, turn left towards the open doorway then enter the curved corner office to the right. Pick up the Dad's Pep Talk artifact from the sofa.

The Tunnels
After forcing open a train car door to escape from a group of clickers, continue along and past its side door. Pick up the supplements along the way until you reach the end of the train car. Loot more supplements and ammo, then find the Subway Note artifact taped on the wall. Regroup with Dina then exit the train car afterward.

After killing the first set of shamblers, continue forth until you find the break room along the long corridor. In the break room, find the Whittled Statue artifact on the table beside the microwave oven by the door.

In the same break room as described above, look for another piece of paper on top of a table past the vending machine. Pick it up to get the Locker Room Note artifact.

In the same break room, smash the vending machine’s glass where you picked up the artifact above. Pick up the can there to get the Soda Can Note artifact, which contains the code for the nearby combination-locked door.

In the last area of the Tunnels, where you have to go through a pile up of several train cars, you'll need to climb up a train car that's turned on its side. Continue to the next train car piled above it then look to the right to find the Subway Station Note artifact.

The Theater
Head towards the counter in the middle of the room with several glass displays. Check the crate on the left to find the Program for Cassandra artifact.
Next, go upstairs then turn left towards the balcony. Pick up the Lone FEDRA Soldier Journal #1 artifact on the round table near the tent.

From the bar, open the “Employees Only” door. Open the door to the projector room then loot the parts and crafting materials. Pick up the Lone FEDRA Soldier #2 artifact on the top of the ham radio.

After retrieving the key for the stage, head towards the stage but before opening the curtain, pick up the The Sick Habit Flyer / Set List artifact on top of the protective case to the right.

The Birthday Gift
While exploring the dark, creepy portion of the museum with disturbing confessions scrawled on the walls, follow the straightforward path until you find a corpse near the hole on the wall. Pick up the Suicide Note artifact beside it. Continue forth and the flashback and the chapter will be complete.
Seattle Day 2
These artifacts will be listed in the order they are found.Hillcrest
In the very first area, head to the laundromat. You can find the Join WLF Note artifact in the back room.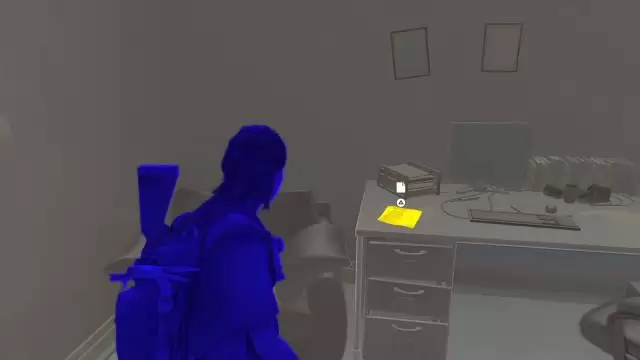
This Rosemont store is on the right side of the street. Pick up the materials outside then find the hole that leads to the basement behind the counter. Here you can find Boris' Daughter's Drawing artifact on a table and a Workbench, as well as some supplements and other supplies.
After exploring and looting the establishments in the first area, climb over the toppled truck on the other end of the street to reach the next area. After climbing the truck, head to the left through a narrow path by the bushes. You should find a small store here that you can reach by climbing over the dumpster. Break the glass and enter the store. Grab the Need a Plan Note artifact on the display desk then loot the supplements from the drawer to the side and behind the cashier counter.
While in the same area as described above, enter the Used & Rare Books shop and pick up the Yolanda's Note artifact on top of the display counter.

After your first encounter with the WLF Patrol with dogs, you'll come across a back alley where you'll have to push a dumpster to reach the rooftop and drop inside a bicycle shop. Check the adjacent office to find the Condolence Note artifact on the desk to the left.

After leaving the bike shop with the Workbench, enter the tattoo parlor beside it. Grab the supplements near the hole on the wall then check the back room to find the Note in the Hillcrest Tattoo Parlor artifact.
After leaving the bike shop with the Workbench, you'll have to enter a pet grooming/supplies shop next. The back door is locked but don’t break the window yet; there’s a shambler and a runner in the adjacent bar which will be alerted immediately if you made any noise. Ignore the back room for now and crawl through the hole on the wall to reach the bar. Kill the runner and the shambler then go back to the pet store and break the window to access the back room. Loot the supplements and crafting materials then pick up the Turn in Boris Note artifact on the table near the door.

After leaving the bike shop with the Workbench, you'll have to enter a pet grooming/supplies shop next. Crawl through the hole on the wall to reach the bar. Kill the shambler and runner then go to the kitchen. Look to the left to find a memo posted on the wall. Examine it to get the Dale's Combo artifact. (this is the code for the safe in the auto-repair shop earlier) Loot more supplements along the way then open the door to continue forth.

After taking the long concrete stairs, you'll hear a muffled explosion and smoke emanating from a short distance. Continue forth until you climb over a fence that will take you to a house's backyard with a playhouse. Enter the house next then turn left to the kitchen. Obtain the Rosemont's Flyer artifact on top of the drawer to the left. Loot the other materials and ignore the hole on the door for now.

While in the same house as described above, head to the living room and pick up the supplements on the small table as well as the Boris' Confession artifact. Pick up the remaining loot in the room then exit through the damaged door in the kitchen.

Finding Strings
While exploring the hotel rooms, enter Room 107 to find the Tara's Invitation artifact on the dresser near the door.
The Seraphites
Exit the convenience store by the window then cross the street. There’s a bar there (with the red awnings) with several infected inside. You can break a window and let the infected out so you can pick them off safely. One of the clickers that you’ll kill will drop the WLF Target List artifact. Head inside the bar and loot the various supplies in the bar area. Explore its kitchen as well to find some supplements and more crafting materials.
Enter the conference center then head to the elevator shaft and climb up the ladder and slip through the stalled elevator to reach the upper floor. The door is locked so break the glass window and the glass roof above it. Next, grab the rope and throw it over the metal support to the left. Jump down to the ground and grab the rope. Climb up then swing to the other room. In this room, loot the various parts, ammo, and supplies. You can find the Shift Trading Card on the couch.


Continue following the main road and you’ll find an apartment to the left and a locked gate to the right. You have to find a way to vault over The Gate to proceed but it’s recommended to explore the apartment building to the left first since it has a lot of valuable loot inside. The main door is locked so head to the side where you can use a delivery truck to climb up and reach the second floor window. Smash the window and climb inside. Pick up the loot and the Evacuation Letter artifact on the table.


Inside the other apartment unit described above, use the Workbench to trigger an ambush by the WLF deserters hiding inside the locked bedroom. After killing them, the previously-locked bedroom should now be open. Head inside to find the WLF Deserter Letter artifact on the cabinet beside the door.

After entering the Garden Suites, enter Room 201 next. Scour the room for ammo, parts, and crafting materials. Open the door to the fire exit but don’t drop down to the alley yet. Instead, go upstairs to reach the room above. The door is locked so head to the accessible then smash the window to get in. Inside, pick up the Dying Husband's Plea artifact from the corpse nearby. Don’t forget to get the supplements, ammo, and other materials as well. Once done, make your way to the alley.

Once you reached Weston's Pharmacy, check behind the counter and grab the Pharmacy Note artifact under the counter.

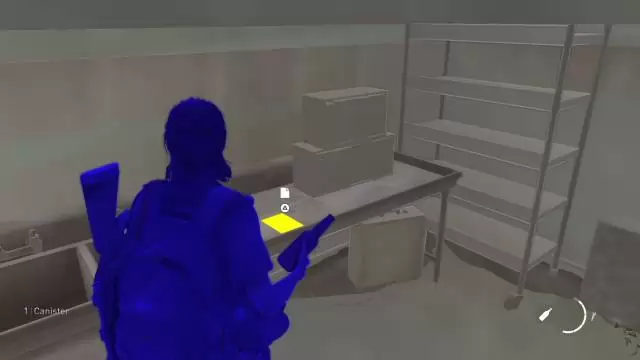
Finally, after reaching the second floor of the hospital, enter the first room to the right. Pick up the Hospital Supply List artifact on the drawer behind the couch. Loot the supplements from the trays nearby as well.

Seattle Day 3
These artifacts will be listed in the order they are found.Road to the Aquarium
Continue until you reach a heavily flooded and destroyed street. Jump to the water and find some parts on the other end of the pool, on the left side. Surface from where you found the parts to find a ledge that you can climb on. This will take you to the parking building with some infected. There is a collectible and some loot inside so it’s worth the risk. Like before, enabling High Contrast Mode will allow you to spot these stalkers easily that you’ll normally won’t detect via Listen mode. After killing the infected, enter the small room with the broken wall and collect the parts and ammo inside. Head further inside and find a way up to reach the collapsed ramp with a corpse and some items around it. As you approach the body, more stalkers will drop from the ledge above; kill them all then pick up the Garage Note artifact on the floor, as well as a machete, and pistol ammo.

Eventually, you'll enter a bookstore after passing through the flooded street. Drop down to the lower floor and continue past the escalator towards the children’s corner of the store with the large mushrooms. Pick up the Bookstore Note artifact on the table.

After leaving the bookstore, you'll run into another WLF patrol. After clearing the area, head to the second floor of the building with the scaffolding to find supplements, crafting materials, and ammo. On the wall by the broken windows, get the Textile Note artifact.

The Flooded City
Continue riding the boat until you encounter a grate that will block your path. Before pulling the chain and moving on, there are valuables that you can loot in the area. Take the stairs then turn left to find a body. Pick up the Stash Note artifact beside it. This also contains the code for the safe nearby.
Continue further past the point where your boat stalls and look for the Carthy Hotel on the right side. Steer inside the flooded building and disembark near a sunken boat. Grab the supplements and supplies, then pick up the Shambler Note artifact beside the corpse.


Past the Carthy Hotel, continue forth until you encounter a shootout between the WLF and seraphites. You’ll be attacked on site so you can park your boat behind cover then swim towards the building where The Seraphites are held up. Sneak inside and kill all seraphites so you can freely loot the place. Pick up the Encampment Note artifact on the wall near the conference wall in the second floor of the building.

Leave the occupied by scars (described above) but don’t get on the boat yet. Head towards the train car at a short distance then head inside. Continue climbing inside until you reach a rope and a locked door. Pick up the rope and drop down from the ledge to rappel down.


Next, swing to the next ledge and climb inside the other train car. Pick up the supplements inside and the Sniper's Note artifact on the seat. From there, you can jump to the water without any fall damage.

Follow the stream until you finally reach an arcade bar building. Break the glass and dock your boat inside. You’ll have to free the chain holding the grate to continue forth. Dock the boat inside then pick up the Arcade Flyer artifact on the table across the stairs.


After defeating the bloater in the arcade bar, make your way upstairs and check the mini-bar to the left to find some supplements and crafting materials. Ignore the grate’s chain for now then continue along the long corridor past the pinball machines to reach the gaming lounge. Look to your immediate left and get the Arcade Note artifact on the wall near the arcway.

Santa Barbara
Pushing Inland
At the start of the mission, before leaving the boat, pick up the Abby's Note artifact from the counter on the left.
Continue towards the house to the left with the U-Move trailer parked in the garage. Kill the lone infected there then enter the garage to find ammo, parts, and other supplies. Pick up the Mansion Note artifact on the desk to the left.

After entering the large house from the second floor and clearing the first floor of shamblers and stalkers, you can find the Runaway Warning artifact on the center table beside the Workbench.

The Resort
After getting a good view of the Rattler compound and dropping down from the train car, follow the tracks then head to the platform to the left and follow the trail of blood to a rattler’s body. The Santa Barbara Slave Note artifact pinned beside it.
After reaching the second floor of the main rattler compound, head to the right to find Rattler's Letter Home artifact on the nightstand near a bed. This should be the last artifact of the game. If you found all the Journal Entries and artifacts up to this point, the Trophy “Archivist” should be unlocked as well. This should be the last collectible of the game so you can just focus on the objectives.

Anything missing from this guide?
ASK A QUESTION for The Last of Us 2Comments for Artifact Locations (Ellie)
No comments yet. Tell us what you think to be the first.
Table of ContentsClose
 Join us on Discord
Click to close