Workbench Locations (Abby)
Thank you for printing this page from www.SuperCheats.com.Remember to come back to check for updates to this guide and much more content for The Last of Us 2
Last Updated:

Workbenches are the only places in the game where you can customize your ranged weapons using Parts that you scavenge while exploring. The upgrades are all beneficial and permanent but due to the number of parts you can find, you should prioritize which weapons to upgrade first and what upgrades to select first. The rifle and your pistol are reliable starter weapons and you should upgrade them first since their ammo are somewhat common. Prioritize upgrading Stability to reduce weapon sway (unless you disabled Weapon Sway in the Accessibility options) then Capacity, while the others will depend on the weapon. Damage upgrade should be acquired next for weapons that have them since they'll become your hard-hitting weapons against tough enemies like shamblers or the bloater.
Workbenches can be used as often as you need as long as you can go back for it. Some workbenches especially those you encounter in one-off areas can only be used while you’re there so keep finding parts and use workbenches whenever you can. On this page, we will help you find all workbenches in the game. Most can be encountered along the way while others need some exploration to locate them. For convenience, we will have dedicated pages for the workbenches you can find per playable character. Finding all workbenches will unlock the Trophy "Prepared For the Worst".
New to the game? Don’t forget to check out our Beginner’s Guide for a quickstart! You can also check out our other dedicated pages for the other collectibles in the game. You can also check out our extensive spoiler-free walkthrough that will help you how to find collectibles as you progress through areas.
Seattle: Day 1
The workbench locations will be listed on the order you'll find them.On Foot
You'll find this workbench in the boat workshop, near the stairs as shown below.
The Forward Base
After passing through the gate from the parking lot, turn to the left to find a tent where there are soldiers working on ammo clips and other weapons. It’s along the way so you won’t miss it. There’s a workbench there that you can use.
Hostile Territory
After passing through Martyr's Gate, you'll encounter a Scar Patrol emerging from a destroyed multi-storey building. Go through that building through the fire escape stairs until you reach a small Scar rest camp, where this workbench is located as shown below.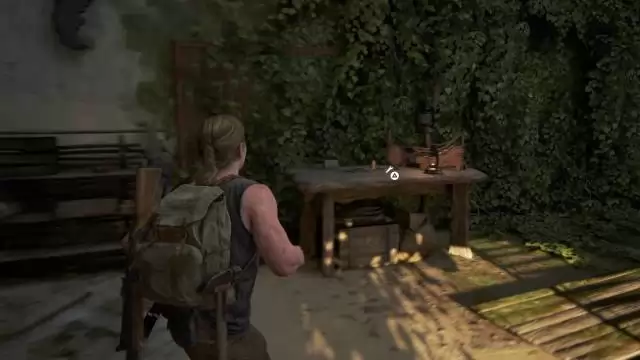
The Forest
After defeating the seraphite brute and getting your backpack back, you'll enter an auto shop. Look to the left to find this workbench near a car.
The Coast
As soon as you start the mission, you'll have to enter a building. You'll instantly find the workbench inside. This is not missable since you'll come across it as part of the story.
Seattle: Day 2
The workbench locations will be listed on the order you'll find them.The Shortcut
After clearing the infested deli/eatery, make your way to the telecoms shop across the rapids then look to the left to find this workbench.
Continue to the upper floors until you finally come across a shrine dedicated to the Scar prophet. Head to the next room to find a Workbench. Check the other corner for some ammo, supplements, parts, and other materials. After using the workbench, take the ladder up to the next section.

Ground Zero
You can find the workbench in the same room as the generator that you have to turn on to restore power to the doors so you won't miss this.
Seattle: Day 3
The workbench locations will be listed on the order you'll find them.The Island
Continue following the path until you finally reach a small watchtower on an uphill path. Climb into the watchtower to find some ammo, supplies, and parts. Continue forth until you find two more wooden buildings. Head inside the building to the left. At the back of this building, you’ll also find a workbench.
The Escape
You'll find this workbench along the way as soon as you enter the radio station.
Anything missing from this guide?
ASK A QUESTION for The Last of Us 2Comments for Workbench Locations (Abby)
No comments yet. Tell us what you think to be the first.
Table of ContentsClose
 Join us on Discord
Click to close