10 - The Research Facility
Super Smash Bros Brawl Walkthrough and Guide
by SPV999
Super Smash Bros Brawl
Level 10: The Research Facility
Enemies: ROB Sentry, ROB Blaster, Roturret, Glunder, Bytan, Metal Primid, ROB Launcher.
Boss: None.
Boxes: 5
Story Note
Well, that was a rather wrong picture of Samus breaking into an unknown research lab.
The boxes don’t contain anything, so continue though. Take the elevator down and destroy the ROB sentries. Now go back up and go left. Destroy that ROB Sentry. Go up one more level. Destroy the ROB Sentries and ROB Blaster to get to the item box (1). Back across and go up again.
 Yellow Box #16 |
Head right. Watch the ROB blaster and enter the door.
Story Note
Looks like they are using Pikachu to power a misc. machine. Samus saves the poor mouse, who now joins the fray.
Pick your character and prepare to fight four ROB Sentries and two ROB Blasters. Enter the door.
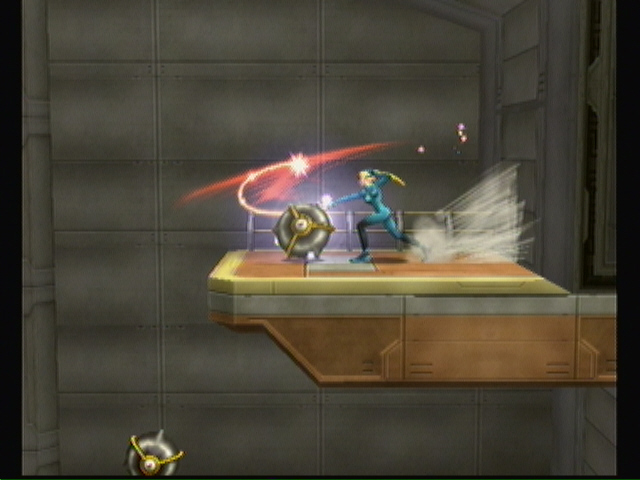
 I see your laser, and raise you my own. |
This room is big, and you’ll come back to it several times. For now, just go straight across, take out the ROB Sentries and ROB Blaster to go down the ladder and through the door.
 Heed the arrow. |
Go right till you’re on a larger platform. Two Roturrets and ROB Sentries will appear. In killing the Roturrets, you’ll probably KO the ROBs as well. Continue along and take out the ROB Sentry and Blaster up the ramp. Ignore the upper path and keep right. Take out the two ROB Sentries and the Buckot. Grab the key and go back and take the upper path.
 My key! |
Ignore the upper-upper path again and stay left. Destroy the Roturret and two ROB Sentries. Now head back and take the upper-upper path. The left is locked, so take the right path. Watch the Roturret. Grab the key. Go back left and use it on the locked door. Destroy the ROB Blaster and hit the switch. Go back right to where the second key and Roturret was. Step on the Launcher and let it propel you across the gap to an item box (2).
 Yellow Box #16 |
Fall down and head left. Follow the arrows back to the door.
Back here again! You want the door directly above you. To get there, climb the ladder and ride the windmill platforms.
 Here. |
Platform look familiar? It should. Ride it across while watching out for the Jyks. At the end, some Glunder will come down. Destroy them to activate a switch. Hit it and run back.
 Sorry, just need to get the switch. |
This time, ride the windmill to the green ladder directly overhead. Climb up and destroy the boxes on the right, and the ones across the gap to get an extra life (3). Now head back to the ladder. This time go left and enter the door.
 ZSS’s blaster doesn’t destroy blocks, sadly |
Don’t mind the Bytan. There’s literally infinite of them. Keep climbing till you reach a moving platform. There are ROB Launchers on either side, so carefully take them out on your way up. To the left of the door is another item (4). Enter the door.
 If I had my armor, I’d so retaliate... |
Go right till you see a gap in the ceiling. There is your next item. Just triple jump to get it (5).
 Don’t be fooled, the box is on top. |
Fall down and defeat the three giant Bytan. Jump up the next ledge. STOP! I know you’ve never seen these before, but they are mines. Rather big, annoying ones that that. Keep your distance and detonate them with projectile fire.
 Don’t get too close! |
This next part is impossible to explain without getting yourself killed, so I’ll say this: RUN! Use double jumps and jump over everything. The ROB Launcher will probably get you, but oh well. Keep moving till you get in a fight with a bunch of Metal Primid. KO here is hard, so you’ll have to do it the old fashioned way of beating them to a pulp. As with all slow things, use your speed.
Continue right. Jump over the gap and use the movable platform to get over the next ledge. Stay light on your feet and jump from the ledge to the next purple platform. Quickly jump from the platform to the ROB Launcher and use an aerial down attack on it and jump back to the purple platform. One more time should do it. Now jump to the next ledge. And enter the door.
Story Note
Samus spies her trademark Power Suit in this control center, meaning it’s somewhere on the facility. Like all good Metroid games, the goal of this mission was to upgrade Samus’s suit.
End of Level!
Cheats, hints, walkthrough index
It took my 7 tries
i'm stuck on this level.lost 2 many lives.had 2 start over.taking forever.
wish i didn't lose final life.must move faster and beat level.
hi
How do you destroy the last detonator at the top. I can't get it
how do you grab a key? do you press any specific buttons? cuz i can't seem to be able to pick up a key...
Ahh... The dear Samus and Pika Pika (Pikachu, just in case). I was playing this and I forgot to press the button to the orange platform and ran right into that bottomless pit. Sigh. Poor Pikachu.