The Giant Chasm
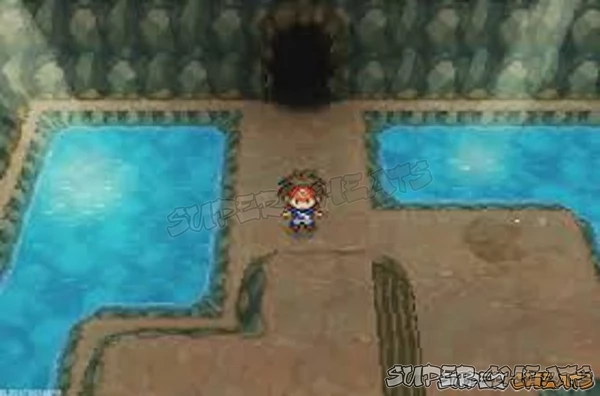
After you healed and re-supplied your team, head out on the docks and down to the sandbar and make your way to Route 22 - but this time since you already moved the boulder you can use the faster route via the platforms. When you reach the cave entrance and head inside, once you go south you will see that the way is no longer blocked.
For the most part we obtained the bulk of the Pokemon we could previously, but you should be aware that there are some others here, including some very desirable ones deeper into the Chasm - and we will cover that in a moment to be sure.
The part of the Chasm we are in now is the Main Cave, and as we have all the Wild Pokemon already in our collection here, we will make our way through the cave to the next area of it, having our fun as we go!
Make sure you turn on your Dowser, and then head south after entering the Chasm to the spot where the pair of Grunts are blocking the path, at which point Hugh appears, and then another Grunt comes to collect the pair blocking the path, telling them that everything is all set, whatever that will turn out to mean...
The messenger turns out to be Rood's Spy... So first thing first, you will be exploring as well as working your way towards resolving this part of the story, so keep in mind that you are still in explore mode, right?
The Dust Clouds offer you Dark Gems, Flying Gems, Grass Gems, Normal Gems, and Water Gems.
You will find Treasure Balls that contain TM13 Ice Beam, Max Repel, and a Star Piece.
You will find Wild Pokemon that include Level 44 to 47 Clefairy, Delibird, Lunatone, Piloswine, Sneasel, Solrock, Vanillish in the main area and Excadrill in Dust Clouds. In the water via Surf you will find Basculin and Seel, and in the water holes, Basculin, Dewgong, and Seel.
Pushing the boulder into the pit gives you access to the water, which you should head north up to the end in order to grab TM13 Ice Beam from the Treasure Ball at the end. Doubling back you reach the long set of stairs going down – but before you use that head south and west to find the Star Piece using your Dowser, then head up and around, push the boulder into the pit and grab the Max Repel from the Treasure Ball there.
Follow the path north, ignoring the Grunts and continuing until your Dowser signals to look right, and grab the hidden Ultra Ball, then continue around and push the boulder into the pit to grab the Star Piece from the Treasure Ball. Continue to follow the path all the way east and follow your Dowser to the Ice Gem that you have to push a boulder into a pit to reach, then follow the path all the way back to where you entered, continue all the way south and west, and look for the exit along the bottom of the area, which leads to the Route 13.

Route 13 Giant Chasm Annex
First thing you need to understand is that the area that is just outside is NOT Route 13, it is the Route 13 Giant Chasm Annex, but that is OK there is a reason we are going here...
Outside you will spot a Treasure Ball with a Yellow Shard - be sure to collect that - and then if you follow your Dowser you will find a Max Potion in the grass. Down on the coast (which is on Route 13 proper) there is a Treasure Ball with a Hyper Potion you should grab, then use the Dowser to get a Heart Scale nearby. Head back to the Annex area now, as you already have all of the Pokemon from Route 13 from our earlier visit.
The Wild Pokemon here include Level 47 to 49, Clefairy, Delibird, Lunatone, Pelipper, Solrock, Tangela, and Vanillish, and in the Shaking Grass you will find Audino, Clefable, Tangrowth, and Vanilluxe.
Of the Pokemon here you should still need Clefable and Vanilluxe, as you should already have all of the others. If you do not, now is a good time to grab them, but either way we are going to assume that you have them all in your collection by the time you return to the Giant Chasm to continue this Adventure!
The Giant Chasm Forest
Return to the Chasm and head down the long set of stairs, exiting below into an outside area in which the Team Plasma crew is gathered and you find Hugh watching them! Talk to Hugh and then watch as Rood tries to convince the crew not to fight. That does not work, then Hugh gives a speech and Team Plasma attacks!
Team Plasma Grunt has a Level 47 Weezing and a Level 47 Muk and pays $1880.
After the battle Rood gifts you with some Max Revives, then Hugh takes off. You should grab the Razor Claw from the Treasure Ball in the bottom corner and the Moon Stone from the Treasure Ball in the top corner, and then take a few minutes to work the area for Wild Pokemon because there are some important ones here...
| Dex No. | Name | Type | Location |
| 36 | Audino | Normal | Shaking Grass |
| 90 | Clefable | Normal | Shaking Grass |
| 89 | Clefairy | Normal | Tall/Dark Grass |
| 254 | Deliberd | Ice/Flying | Tall/Dark Grass |
| 261 | Ditto | Normal | Tall/Dark Grass |
| 214 | Lunatone | Rock/Psychic | Tall/Dark Grass |
| 260 | Mamoswine | Ice/Ground | Shaking Grass |
| 264 | Metagross | Steel/Psychic | Shaking Grass |
| 263 | Metang | Steel/Psychic | Tall/Dark Grass |
| 259 | Piloswine | Ice/Ground | Tall/Dark Grass |
| 215 | Solrock | Rock/Psychic | Tall/Dark Grass |
The Wild Pokemon here include Level 45 to 50 Clefairy, Delibird, Ditto, Lunatone, Metang, Piloswine, and Solrock. In the Shaking Grass you will find Audino, Clefable, Mamoswine, and Metagross.
Of the Pokemon here the ones you still need to add to your collection should be Ditto, Metang, Mamoswine, and Metagross.
This will require a bit of effort on your part, but it is well worth it. With respect to the Ditto, you will want to capture more than one, since you need to obtain at a minimum a pair with natures that are at opposite ends of the spectrum, but you can do that later when you are actually ready to breed, so for now just grab one – or not, your call...
Once you have captured the Pokemon you are ready to follow Hugh for another confrontation with Team Plasma – so head through the grass to the steps leading up to the ice, and when you reach the top you will have another go at the Team Plasma Frigate!
Negotiating this path is really wicked simple – from the bottom steps go north to slide all the way to the top, then east up the stairs and slide, then north, slide west, slide south, then west again, then just head up the stairs here and east onto the gang plank. Simpatico!
Team Plasma Frigate Again
As you go aboard you will once again see Hugh challenging a large Number of Grunts – head over and give him a Wutsup? Hugh lets you know that he is going to force Plasma to tell him about his sister's Pokemon, and asks that you go on and search the Frigate – so why not?
Heading south to the open hatch as we walk through we get jumped by a pair of Grunts who – for the first time in our experience – have a FULL team of Pokemon for us to face! This should be interesting!
The pair of Team Plasma Grunts send out a Level 46 Trubbish and Level 46 Scraggy as their openers, and follow them with a Level 46 Scrafty and Level 46 Garbodor, and close with a Level 46 Whirlipede and Level 46 Golbat, paying $3680 for the lesson.
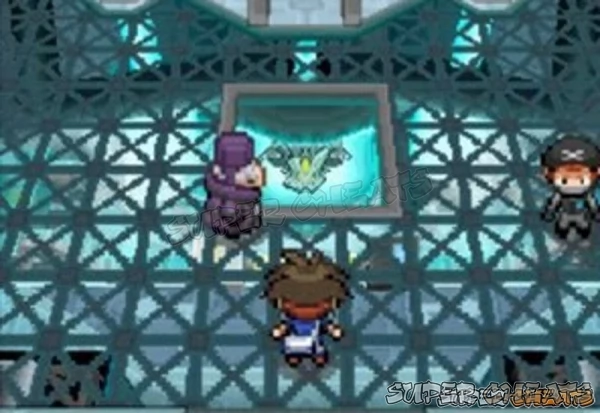
Using the teleport pad here sends us to the area with the force fields, and instant contact with Rood's spy, who spends a few minutes complaining and then fills you in on the fact that the floors are a maze of pipes and you need to step on switches to get past the barrier.
Let's start on the left-hand-side of the passage and begin battling our way to the switches, shall we?
Team Plasma Grunt has a Level 45 Skorupi, a Level 45 Foongus, and a Level 45 Golbat, and pays you $1800.
Heading south you walk out onto the first pipe and close the first switch, which changes the pipe configuration. Head west and north down to the lower level for another battle.
Team Plasma Grunt has a Level 47 Scrafty and pays $1880.

Teleportation Maze
Now before you do anything else you need to be aware that the glowing yellow squares are actually teleportation pads, and you have to use them to get through the maze that is this area, in combination with the pipes of course. But getting through the maze is not our only concern - we also want to have all the battles we can, and collect all of the items that we can, right?
So first thing first, step onto the pad near the Grunt you just battled and you will teleport into a special chamber in which one of the switches that are used to bring down the forecefields that are blocking access to the area that we want to get to is located. Step onto the switch and you will shut down one of the forcefields, then step back onto the teleportation pad to return to the maze.
Head east and step on the next pad, then head north and claim the Power Belt from the Treasure Ball there. Head east and avoid the next pad to have a Grunt battle.
Team Plasma Grunt has a Level 46 Grimer and a Level 46 Seviper, and pays you $1840.
Now step on the pad that is near him and close the next forcefield switch to lower it before teleporting back to the maze! Heading south to the pad below will teleport you to the other side of the maze, at which point you should go all the way north avoiding the pad to have a battle.
Team Plasma Grunt has a Level 46 Koffing and a Level 46 Amoongus, and pays you $1840.
After the battle step onto the nearby pad to reach and close another switch and lower yet another barrier. Teleport back and use the pad to the south to return to the other side, and then go up the stairs to the south and east and have another battle.
Team Plasma Grunt has a pair of Level 45 Deino, and a Level 45 Sneasel, and pays you $1800.
Standing behind and to the left of the Grunt is a Doctor for you to battle.
Team Plasma Doctor has a Level 49 Leavanny and pays you $2940, and then heals your team after you beat him. Note that you can return to him for additional healing as needed.
Head out onto the pipe to close the switch there and then make your way back around and up the stairs and head to the east to have another battle.
Team Plasma Grunt has a Level 47 Scolipede and pays you $1880.
Nearby is a Treasure Ball with a Max Revive, and a Treasure Ball with a Max Elixir, so be sure to grab those, then head down the stairs here and head north past the pad (it just teleports to the pad to the far north) and have another battle.
Team Plasma Grunt has a Level 46 Trubbish and a Level 46 Zangoose and pays you $1840.
Step on the pad and teleport to another switch, close that and you lower the final barrier, before teleporting back and heading back up the stairs. Use the center pipe (the one with no switches) to run to the north side of the area where you will find a Treasure Ball with a Zinc to grab, then backtrack and use the right-hand pipe to close that switch, before running west along the new pipe route and close that switch.
Head south to the platform and then back out to the right-hand pipe and close that switch to gain access to the north switch on that pipe route. Close that and head all the way to the west to close the switch there, changing the route for the left-hand-side pipe giving you access to the north and back to where you originally entered the area. Now, BEFORE you head north, go ahead and run to the right-hand-side and have a battle with the Grunt you did not battle before.
Team Plasma Grunt has a Level 47 Krookodile, and pays you $1880.
With that battle out of the way, head north past the spy and you will again confront Zinzolin and this magnificent Legendary Pokemon Kyurem!
As we step forward Zinzolin appears behind us, warning that there is no way we will be able to break into the cell and free the Pokemon – time for another battle with Zin!
Zinzolin has a pair of Level 49 Cryogonal, and closes with his Level 51 Weavile, and pays $9180 for this lesson.
If your team took some serious hurt you can backtrack to the Team Plasma Doctor for a healing before you continue beyond this point.
The Frigate Bridge
Using the right-hand pad you will find yourself teleported to the Bridge, where you are in for a surprise! It turns out that Professor Colress is there, in control!
Colress makes it very clear to you that he not only knew what he was doing, but meant to do it, and he did not care if it meant the end of the world – his research was simply that important to him. The man is clearly a nutter.
Colress opens with his Level 50 Magneton, a Level 50 Magnezone, a Level 50 Metang, a Level 50 Beheeyem, and closes with his Level 52 Klinklang, paying you $10400 for the lesson.
After the battle Colress basically tells you that he is still intent upon his quest, but that he respects you, and then tells you where you need to go for the next stage of this battle.
You should have plenty of med kit to reset your team, and before you head into the next area, you will want to use it to restore your team as much as you can, but if you took major damage or you used too much PP, you may want to head back to the Doctor who previously healed your team and have them heal you again... In fact that is probably the best idea.

Confronting Lord Ghetsis
As you approach the other pad the guard there freaks and runs away, shocked that you beat Colress, and that clears the way for you to step on that pad, which naturally takes you to Lord Ghetsis and his personal lair! But he is not alone – there are Shadow Triad here!
Ghetsis departs after learning that the next stage of his plan is completed – the Triad having delivered the news – but before you can get to battling, Hugh shows up and the Triad reveals that he does indeed have the Pokemon that previously belonged to Hugh's sister! This cannot be allowed to stand!
Shadow Triad unleashes his Level 49 Pawniard, and then his Level 51 Absol, and finally his Level 49 Pawniard, paying you $5100 for the lesson, but surprisingly not using the stolen Pokemon in the battle. Before you relax though, the other two members of the Triad appear, and you need to battle them!
Shadow Triad (right) has a Level 49 Pawniard, followed by a Level 51 Banette, and then a Level 49 Pawniard, paying you $9180 for that lesson!
Shadow Triad (back) has a Level 49 Pawniard, followed by a Level 51 Accelgor, and closes with his Level 49 Pawniard, paying you $9180.
After the final battle the first Triad gives the stolen Pokemon back to Hugh, effectively allowing Hugh to complete his mission of rescuing his sister's Pokemon! But as Hugh points out, you cannot allow Plasma to execute this plan...
Depending upon how you did here you may want to have that Doctor heal your team again before proceeding, in fact the large amount of PP you expended in the battles you just fought makes that minor detour a good idea, so why not?
Once you team is healed and you are back in the Lair of Ghetsis, head south in the direction that Lord Ghetsis departed and you will exit the Frigate via its forward gang plank and find yourself in a different section of the Giant Chasm Forest.
Anything missing from this guide?
ASK A QUESTION for Pokemon White 2
Comments for The Giant Chasm
Add a comment
Please log in above or sign up for free to post comments- Walkthrough
- Odds & Ends
- Reference Section
 Join us on Discord

please make a video for the puzzle