The Route to Driftveil City
Thank you for printing this page from www.SuperCheats.com.
Remember to come back to check for updates to this guide and much more content for Pokemon White 2
Follow this guide to hear about updates
By CMBF

Added:
Before we get too far into the narrative I want to mention that you should be prepared for significant story action when you arrive in and work your way around Driftveil, just saying. In fact that story action Begins before you even reach the gate, when you stumble upon Hugh facing off against a group of Team Plasma Grunts on the north avenue.
The first Team Plasma Grunt has a Level 27 Trubbish and pays you $1080.
The second Team Plasma Grunt has a Level 27 Watchog and pays you $1080.
After the battle concludes in your favor the Grunts depart, and Hugh reveals why he really and truly hates Team Plasma so much... This is part of his personal backstory and worth taking in, as it adds an emotional layer to Hugh that, quite frankly, I would not have believed he possessed if I had not experienced this for myself.
After the battle ends and the Grunts disappear, Hugh heals your Pokemon and then charges you with his desire that you fill your Pokedex and get as strong as you can for the battles ahead, and then he departs. The way to the west gate is now open to us, so head there and pass through now...
Note that if you did not do Route 5 before the Gym Battle then you will now experience your encounter with Bianca, be gifted with HM02 Fly and then get briefed about Hidden Grottos and capture that special Minccino. In that case go ahead and collect the two treasure balls and have the battles here as well, since you have not yet done so, and then you will find that the bridge is now accessible.
If you followed the guide then when you leave there will not be another meeting with Bianca, and you should find that the last battle you need to complete to unblock the bridge is in the offing! Head over to the west side and talk to Motorcyclist Charles, who is sitting on his hog and, when you talk to him, tells you about triples battles, and then invites you to have one!
Charles opens with his Level 26 Tirtouga, Sigilyph, and Archen, and when you beat him, pays you $832, and then clears the path for you to go out onto the bridge.

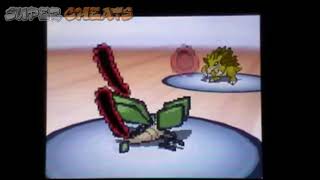
The Driftveil Bridge appears like a giant Charizard when opened
The Driftveil Bridge
As you head out on to the bridge stop and chat up the bloke you run into to unlock the Funfest Mission “Wings Falling on the Drawbridge” and then look in the shadow spots on the bridge to capture yourself a Ducklett – or the odd Clever Wing, Genius Wing, Health Wing, Muscle Wing, Pretty Wing, Resist Wing, and/or Swift Wing... Or more than a few of each if you like since they can be useful... Each wing can be sold, which makes them a good way to farm cash if you need it, and they also have the following properties:
Clever Wing: Slightly increases the base Special Defense stat for a Pokemon. Sell value = $1500 per.
Genius Wing: Slightly increases the base Special Attack stat for a Pokemon. Sell value = $1500 per.
Health Wing: Slightly increases the base HP for a Pokemon. Sell value = $1500 per.
Muscle Wing: Slightly increases the base Attack stat for a Pokemon. Sell value = $1500 per.
Pretty Wing: Though this feather is beautiful, it has no effect upon Pokemon, and is not stored in the Medicine Pocket, but in the Items Pocket. It is pretty much just for selling. Sell value = $100 per.
Resist Wing: Slightly increases the base Defense stat for a Pokemon. Sell value = $1500 per.
Swift Wing: Slightly increases the base Speed stat for a Pokemon. Sell value = $1500 per.
In the center of the bridge you will encounter a trainer who, if you chat him up, will inform you that this bridge has another name - the Charizard Bridge - because when it is open it resembles a Charizard... Bet you did not know that.
Once you have managed that, head along the bridge and you exit into Driftveil City!

Driftveil City has monuments, Moomoo Milk, and a Gym to beat
Driftveil City
As you head into town you encounter a Team Plasma Grunt brow-beating an ex-Team Plasma Grunt into rejoining the Team – but he does not want to! And then Hugh shows up with his standard low-key approach – and the Grunt runs away with Hugh chasing after him!
The ex-Grunt fills you in and invites you to their Home to hear the rest of the story... Be an idea now to hit the Pokemon Center to heal up and re-supply – and save our game – then have a chat with the little girl on the second floor by the counter, who gifts you with a Luxury Ball.
Bear in mind that while you can buy regular Poke Balls and Great Balls from the top counter man, the bottom one also sells balls, specifically Net Balls, Nest Balls, and Dusk Balls as well as Mail.
The girl by the Nurse's counter tells you about how the city now has a lot of hotels in it, which you will certainly find out for yourself as you explore it.
Down the street from the Center is the Driftveil Continental Hotel, and on the top floor is a trainer who will gift you with a Big Root – and a bunch of trainers throughout that you can chat up...
Exit the Hotel and head back along the street to the building across the main street to find the Driftveil Chateau Hotel, where you will find in the lobby the Master Move Tutor, who will accept Red Shards to teach your Pokemon the following moves:
- Covet (2 Shards)
- Bug Bite (2 Shards)
- Drill Run (4 Shards)
- Bounce (4 Shards)
- Signal Beam (4 Shards)
- Iron Head (4 Shards)
- Super Fang (6 Shards)
- Uproar (6 Shards)
- Seed Bomb (6 Shards)
- Dual Chop (6 Shards)
- Low Kick (8 Shards)
- Gunk Shot (8 Shards)
- Fire Punch (10 Shards)
- Thunder Punch (10 Shards)
- Ice Punch (10 Shards)
On the top floor is a trainer who will gift you with an Air Balloon, which is a held item that allows the Pokemon holding it to float (at least until they get hurt which then causes the balloon to explode), which can be useful when facing an enemy who uses moves that cannot damage a floating Pokemon. Still you would have to plan that encounter out pretty well don't you think?

Driftveil City Market is where you get your Moomoo Milk, in bulk!
Driftveil Market
After you have obtained your Balloon and chatted up the trainers you wanted to chat up, you should head downstairs and outside and hit the Driftveil Market, where you can buy Incense from an ex-Plasma Grunt, Moomoo Milk, and find a man in black who, if you show him a Pokemon over Level 30 will gift you an Expert Belt.
There is also an Herb Merchant if you like but be aware that Pokemon are not keen on the often bitter taste... Before you finish up with the Market you need to enter via the back door and grab TM63 Embargo from the Treasure Ball that is behind the counter.
Charles is riding around behind the Market if you need to get some XP for your team, as he will gladly do another triple battle rotation with you!
To the southwest of the Market is the Driftveil Luxury Suites – man this town has a lot of hotels – a girl in the lobby would like to see a Pokemon that knows Attract, and if you show her one, she will give you a Heart Scale.
On the 19th Floor you will find trainers to chat with, and on the 23rd Floor a trainer who will gift you with an Everstone – a held item that when it is equipped by a Pokemon will prevent them from evolving.
Through the gate to the south is where the Tourney is held, but as you are not yet qualified we can safely ignore that for the moment...
Across the street is the Grand Hotel Driftveil, where you can obtain a Shell Bell from the bloke by the counter who counts the Pokemon in your Dex... On the 14th Floor you will find some young trainers to chat up, and on the 19th Floor two trainers who offer Observations.
– North of the Pokemon Center –
Note: before you head up above the Pokemon Center free up a slot in your party first. With one open slot you can then continue.
Above the Center you will find the entrance to the Twist Mountain Shortcut that is currently under construction and thus not accessible, and to the east of that the home that the ex-Plasma Grunt told you about. As you approach he leads you to meet with Rood, who demands to battle you before inviting you inside.
Rood has a Level 27 Herdier and a Level 27 Swoobat and pays you $2700. After the battle Rood apologizes and then Hugh shows up and is invited to join you. Inside you go, where Rood tries to explain to Hugh the facts as he knows them, but Hugh is not interested. After saying his piece he takes off to battle at the Pokemon Gym.
Rood has a favor to ask of you – he wants you to look after the Pokemon he has, a Level 25 Zorua! After you accept it you can chat with the other trainers here to learn a bit of the back story. Be an idea to go store that new Pokemon since it does not factor into our next stage.

Route 6 above Driftveil City offers XP and new Pokemon to collect
Route 6
The entrance to Route 6 is found by heading up above the Pokemon Center and then taking the road up the stairs to the west, passing the construction site and zoning onto Route 6.
| Dex No. | Name | Type | Location |
| 36 | Audino | Normal | Shaking Grass |
| 32 | Azumarill | Water | Shaking Grass |
| 163 | Castform | Normal | Shaking Grass |
| 159 | Deerling | Normal/Grass | Tall Grass |
| 35 | Dunsparce | Normal | Shaking Grass |
| 144 | Emolga | Electric/Flying | Shaking Grass |
| 161 | Foongus | Grass/Poison | Tall Grass |
| 155 | Karrablast | Bug | Tall Grass |
| 19 | Leavanny | Bug/Grass | Shaking Grass |
| 31 | Marill | Water | Tall Grass |
| 157 | Shelmet | Bug | Tall Grass |
| 18 | Swadloon | Bug/Grass | Tall Grass |
| 15 | Tranquill | Normal/Flying | Tall Grass |
| 16 | Unfezant | Normal/Flying | Shaking Grass |
At this point the local Gym is now open and you can access it for the battle with its Gym Leader and obtaining another Gym Badge, but your team may not be leveled sufficiently to manage that battle just yet. Or maybe they are – you have to decide that for yourself – but assuming that they are not, and assuming that you would like to add some more Pokemon to your collection, heading for Route 6 now is a good idea.
If you check your collection you should find that of the Pokemon available on Route 6, you will need to capture a Azumarill, Castform, Foongus, Karrablast, Marill, Shelmet, and an Unfezant. You do not need to capture a Deerling since you will shortly be receiving one as a gift of sorts. After you capture all you need and do some leveling in the first part of the Route you should heal at the Center and then open a spot in your party so that you can accept that Deerling when it is offered.
If you had a Fishing Pole you could catch a Basculin, Poliwag, Poliwhirl, or Politoed, and if you had Surf you could catch a Azumarill, Basculin, or Marill on the water.
In addition to the above the following trainers are present for you to battle for the XP and money:
Pokemon Breeder April who has a Level 27 Minccino and a Level 27 Deerling and pays you $864.
Parasole Lady Nicole who has a Level 28 Castform and pays you $896.
School Kid Mara has a Level 27 Deerling and a Level 27 Shelmet, and pays you $540. Just past her is a Treasure Ball with an Elixer and a Treasure Ball that turns out to be a Wild Foongus!
When you reach the Seasons Research Lab you battle Scientist Jacques who has a Level 28 Deerling and pays you $1344.
Scientist Marissa has a Level 27 Shelmet and a Level 27 Karrablast and pays $1296.
In a Treasure Ball beside the building is a Moon Stone so be sure to grab that! Inside the building you can chat up the trainers who will teach you a lot about the seasons and how they impact Pokemon, and there is a trainer who will give you a special Deerling – but you will need to open a spot in your party, so Fly back to town to do that first if you did not come prepared.
You will want to take the Level 30 Deerling back to town and store it in your PC before you proceed, and once you reach the Lab again continue to the west to find a Treasure Ball that is really a Foongus, and then battle School Kid Alvin who has a Level 27 Foongus and a Level 27 Karrablast and pays $540.
Nearby is a real Treasure Ball with an Ultra Ball in it, and another Foongus posing as a Treasure Ball. Above that you battle Parasol Lady Tihana, who has a Level 28 Castform and pays $896.
On the right over the bridge is a rest house where you can get your team healed, and obtain a Shiny Stone from the little girl inside.
If you head into the dark grass behind the house and head to the right along the path you will battle Pokemon Ranger Richard, who has a Level 28 Whirlipede and a Level 28 Foongus, and pays $1680. He gifts you with a Pecha Berry for beating him.
That is the final trainer battle for Route 6 as you have reached the end and Chargestone Cave – so return to working your way through the grass to obtain Pokemon and train your team, and when you are ready, head back to the city and take on the Gym Leader!
The Gym Battle for your Fifth Badge the Quake Badge
The Driftveil Gym and Gym Leader Battle
Outside of the Gym Hugh is waiting for you, and he warns you that the battle is tough, and that the Ground-types will be a challenge for you... That is not necessarily true considering that the present level of our team is now well above the competition.
When you enter the Gym you talk to the receptionist to learn you need to use the lift, and when you take the first lift down you will find the Greeter waiting for you, and they gift you with a Fresh Water as usual, then you step out onto the moving tracks to begin the challenge of conquering the Gym!
On the second platform headed straight up you meet the Assistant Gym Leader named Worker Noel and his Level 31 Baltoy, who pays you $1240.
Take the track to the right to the next platform, then down to another platform before taking the right-hand track to the platform with Worker Tavarius, who has a Level 29 Drilbur, Level 29 Baltoy, and Level 29 Sandile, and pays you $1160.
Now take the tracks all the way to the right until you can go no further, then all the way up to the platform with Worker Tibor, who has a Level 30 Sandile and a Level 30 Drilbur and pays $1200.
Now head down one platform and then left to the third platform, then up two to reach the end platform for this line where you find Worker Maynard, who has a Level 31 Drilbur, and pays you $1240 for the lesson on how to get your butt kicked!
Head down one platform and then left one, up one, and left two platforms to the end and down two platforms to find Worker Pasqual who has a Level 30 Drilbur and a Level 30 Baltoy, and pays $1200.
Head up two platforms and then all the way right as far as you can go, then up as far as you can go and to the right to find Worker Friedrich, who has a Level 31 Sandile and pays $1240.
Now head left two platforms, down one, and then down again using the special purple track. Head right one more platform and then up using another special purple track to confront the Gym Leader, Clay!
Gym Leader Clay opens with his Level 31 Krokorok followed by his Level 31 Sandslash, then his Level 33 Excadrill. He pays $3960 and of course gives you your fifth Gym Badge, the Quake Badge. He also gifts you with TM78 Bulldoze. With that battle completed Pokemon up to Level 60 will obey you, including those obtained in trades!
Clay then uses his special lift to take you to the exit, then heads outside. You follow and have a chat with Hugh, then Clay tells you about The Pokemon World Tournament – which is on the south side of town, and tells you he will be waiting there for you.
Anything missing from this guide?
ASK A QUESTION for Pokemon White 2
Comments for The Route to Driftveil City
Add a comment
Please log in above or sign up for free to post commentsNo comments yet. Tell us what you think to be the first.
Table of ContentsClose
- Walkthrough
- Odds & Ends
- Reference Section
Guide Updates
Get notified of updates to this guide
Many of our guides get updated with additional information. To get an email when this guide is updated click below.
 Join us on Discord
Click to close