Castelia City
I know that it does not really need to be said, but hey, you have been doing an amazing job on this new Adventure, and considering how well-made and fascinating the game has been so far, why I think we should give out kudos all around!
Now that you have had the grand tour at Pokestar Studios, and made more than a few movies to gain some fame and some useful kit, it is time to continue the Adventure, which means exploring new areas, having new experiences, and obtaining new Pokemon both for our Dex and collection.
Head back to town for a quick stop at the Pokemon Center, heal up, shop, and collect your medals from the Medal Man, and then since we have done everything we can do here for now, it is time to head for the docks and the next phase of our Adventure, which in this case is a confrontation with Team Plasma!
When we arrive we find Roxie facing off against a bunch of Team Plasma Grunts – Hugh is with her and when we arrive that evens the odds up by making it a three vs three confrontation!
The battle ensues and you kick their butts of course, as after all you are just facing a Level 14 Patrat... The grunt pays off $560 for the lesson you just taught them, and then Roxie gifts you your first HM, HM01 Cut, and asks you to check Route 20 to see if they went that way!

Checking Route 20
When you get out on Route 20 you run into Hugh and he asks you to help check the entire Route, so do that and you will run into the Team Plasma Grunt to the south, and battle them again. This time it is a Level 14 Purrloin you have to fight, but you gain another $560 for your effort so it is not a total loss! The Grunt heads back to Virbank City and Hugh finds you, telling you that you should head to the docks and find a ride in a boat to continue the chase.
You could do that, sure, but there are actually a few other things we really should do before that...
As we are so close to home now, and since once we take that boat we will not be close to home, why not pop in and say hello and goodbye to Mom?
She is happy to see you and lets you rest, so hey, this dropping in had positive results! Now on the way out of town stop by the Pokemon Center and collect a new medal from Medal Man – a Medal for stopping at home to say hi to Mom! Sweet!
Now, head back to Virbank City and, if you have not already done so, teach the HM Cut to one of your Pokemon so that you can cut down the tree on the west side of the first area in the Virbank Complex and thus grab a Super Potion from the Treasure Ball just south of the tree.

Back at the Docks
When you arrive you find Roxie and her dad talking outside – when they are done you follow her dad inside and chat with Hugh to trigger the Ferry CS and voila! A short time later you are in Castelia City! And how cool is that?! Cool, that is how cool!
So now that you are here in the big city this would be a great time to look around and explore the city!
As you do that a good place to start is the docks we are standing on... Head all the way south and grab the Heart Scale from the Treasure Ball on the bottom right of the docks, and then chat with the trainers here. If you chat with the Captain you will discover that he is happy to take you back to Virbank City (so now you know you can go back any time you like).
As you leave the docks a Harlequin gifts you with a bike – nice one! – then fills you in on the Harlequin Hunt Game, adding that the places you want to look are The Medal Office, Passerby Analytic HQ, and the Battle Company. Basically you need to seek out and speak to the Harlequins you find in those Locations...
Battle Company is the brown building on the left side of the street at the corner, so why not head in and check it out? When you enter the lobby an executive stops you to explain that the people who work there have Pokemon Battles, then he gifts you with an incredibly useful hold item called Experience Share – if you have one of your Pokemon hold that, they will get half of the regular XP from any battle your other Pokemon have!
The girl on the bottom right of the lobby will ask you what starter you chose, and after you tell her, give you a special hold item specifically for that type, so be sure to chat her up.
The Harlequin is in the lobby on the right so go talk to it, then if you like talk to the other trainers and then use the lift to find some battles! This is a great chance to pick up some extra XP, and considering that you need to get your team to Level 28 for the next Gym Battle, any free XP is good XP!
You have two floors to choose from, so start on the first and have yourself a battle with Clerk Clemens, who has a Level 16 Growlithe, and he pays out $640 for the lesson of battling you. He also gifts you with some Quick Balls as well.
Clerk Gilligan has a Level 17 Pidove, paying $1360 for the pleasure of losing to you. Clerk Warren has a Level 16 Marill, paying $640, and the gift of some Timer Balls. The bloke in the lab coat on the bottom right will give you an item called a Scope Lens, which is a hold item that allows the Pokemon holding it the chance to make a critical hit. Clerk Britney has a Level 16 Budew, handing over $640 for the battle lesson.
To the left of where you battle is a Treasure Ball with a Guard Spec in it, and that wraps up the action for floor 47F, so take the lift to the other floor, 55F, and get off!
You find an Ether in a Treasure Ball on the left after you exit the lift, and then you battle School Kid Neil who has a Level 17 Eevee and a Level 17 Herdier, and after you beat him pays out $340 and the satisfaction of having cleared the building of trainers to battle! Hit the lift and head back to the lobby then head right along the main road to the Pokemon Center to heal up!
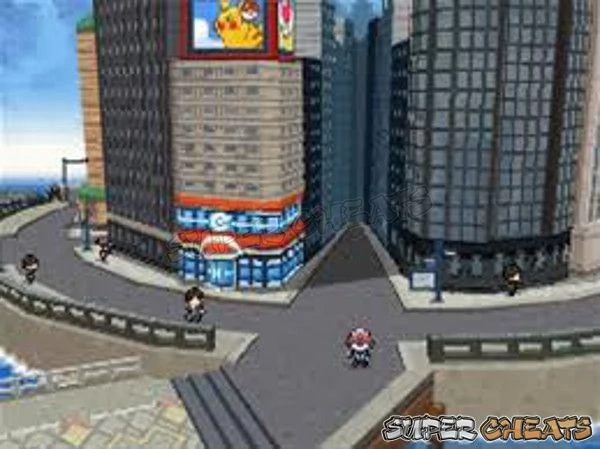
Castelia Pokemon Center
After you heal your team, speak with Mr. Medal to pick up your next batch of Medals and then chat up the trainers here to learn about Geonet, and talk to the trainer upstairs to learn that Professor Fennel has moved to the city and that he studies Pokemon Trainers.
Exploring Continues
Let us do this in an orderly and well-planned fashion, shall we?
First head all the way to the left and down on the docks to reach Liberty Pier – when you talk to the Captain of the ship here you learn it is the Ferry for Liberty Garden, which is a special area from the previous game in the series that required a special event Wondercard in order for you to visit it. This was where you could obtain the Legendary and Mythical Pokemon Victini – if you had the event card that is...
Some trainers on the dock will tell you that in the past a famous trainer hid a Legendary Pokemon called Victini at Victory Garden. Why not visit there? After all the ferry is here, we are here? And if you happen to actually possess a Victini, bring it with you – trust me about that, if you bring Victini back to its previous home under the lighthouse something special can happen. And even if you do not have a Victini, this is a trip worth taking just for the view!
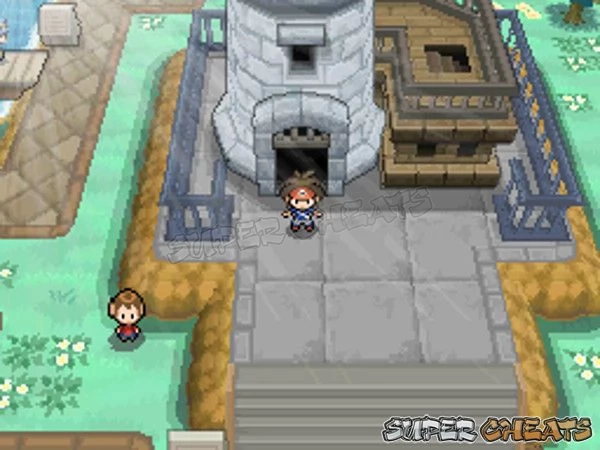
Liberty Garden
In Pokemon Black and White you had to have a special pass to come here called the Liberty Pass, which in addition to allowing access to the island, also allowed you to capture the Legendary Pokemon Victini. In the base of the lighthouse is a bedroom in which Victini used to live – and if you bring your Victini here from Black/White, they will ask you to let them out of their ball and talk to you about their memories of the time that they lived here.
If you chat with the tourists outside you learn that Victini used to live here, but a trainer came and joined it to their party – that would be YOU if you did that in Black or White!
With this pleasant side-trip out of the way, it is time to take the Ferry back to the city.
Castelia City Again
Head back up to the street and to the right top corner and the first building with a sign, which is Passerby Analytics HQ – so head inside and talk to the Harlequin there, and the trainers who are also present to get a free Pokeball, get appointed a Statistician by the lab-coat guy, which allows you to accept Surveys for the Survey Radar. A girl on the left asks you to take some surveys for her, and she Rewards you with a Soda Pop for taking her surveys.
Unity Pier
After you leave the Analytic Office head right along the street to the next intersection and then down onto Unity Pier. Speak with the first Trainer you see – a girl in white – to be gifted with a Destiny Knot, a hold item that will cause an opponent Pokemon to become infatuated if your own does as well.
Talk to the sailor on the left to learn that this is the ferry that goes to Unity Tower. That is all we need to do at the moment, so head back up to the street. When you reach the next intersection to the right head down.
Prime Pier
This is where the ferry is to go back to Virbank. There is also a mysterious ship tied to the pier on the right – take a quick look at that, it will become very significant later. Not now though, so if you have spoken to everyone here, head back up to the street above.
Heading to the right towards the Pokemon Center, you will reach the next intersection. From here head down.

The Cruise Dock & M/V Royal Unova
While there really is very little to suggest that a unique experience awaits you – the plain concrete pier with the large cruise ship the M/V Royal Unova tied to it does indeed offer that and more! As you walk out onto the dock you will see that the Royal Unova Cruise Ship is tied up with her gangplank down and a member of the crew waiting to check-in the passengers for the evening cruise through Unova's deep harbor.
Bearing in mind that the scheduled cruises take place only in the early evening hours, when you arrive at the docks too late or too early the hostess or host on the dock will make that fact plain to you, however when you arrive within the window of time that is set aside for the launch of the evening's cruise, instead of telling you to return on the next evening tide, the host/hostess invites you on board!
There are specific requirements for your character to be welcomed aboard – as previously noted there is the time requirement, which basically starts just before the sun touches the horizon, and ends by mid-evening. Passage on the Royal Unova for the scheduled cruise requires the purchase of a ticket – which will set you back a cool $1K but assuming that you have unlocked the National Pokedex that is a well-spent $1,000 considering that in the process of playing through the pick-up battles that are to be had here, the player will encounter more than just a few Pokemon from other regions.
From the main deck the you have the choice of taking in the sights rather than strictly battling if that is what you would like to do – and when you can afford it taking the cruise just to take in the unique view is well worth the expense and time! The M/V Royal Unova departs from the Castelia Docks and passes under the Skyarrow Bridge, entering the Castelia River and traveling up-river as far as the Marvelous Bridge before it turns around and steams back down the river towards the City again.
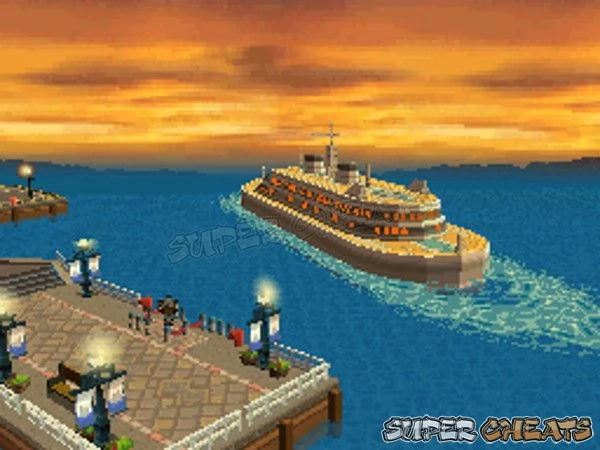
Upon purchasing your ticket and boarding the Royal Unova your host will reveal the Number of Pokemon Trainers who are on board for this cruise – a number that you should pay close attention to since battling and defeating all of them will result in you receiving a special prize as your well-earned reward.
The special prize for defeating all of the posted Trainers on a given cruise is awarded specifically from the selection of prizes that are set aside for that day's cruise – meaning that depending upon what day of the week it is, you can receive different prizes.
To fulfill the conditions that are required to earn the special prize the player must battle all of the designated Trainers within the time limit of the cruise, the timer for which is noted by the Captain blowing the ship's whistle five times, with the fifth toot indicating that the timer has run out.
While the special prize includes a selection of different Pokemon Food Items, among the most desirable of prizes is the Rare Candy that is Sunday's Prize, so you may want to make a practice of seeing to it that you take the cruise at least every Sunday, if not more often :)
There are a Number of rumors that have been circulating on the web, among them being that the faster that you complete the battles the more likely you are to find yourself receiving a better special prize... While that is certainly an understandable notion, it happens to be untrue; once you get a little history under your belt you will see that the prizes are a predictable matter of the day of the week and your success in defeating all of the designated Trainers. Just ignore the rumors mates.
The source for that common claim is probably the fact that there is a timer, but when you bear in mind that the timer only runs between battles and not during them, this rumor obviously has fewer teeth to bite with than it would have if the timer were uniform, right? Once you have actually found and engaged a Trainer the timer pauses for that battle, so you do not have to rush through each battle, you can take your time and thus use your skills, knowledge, and your very capable Team of Pokemon so that you can obtain meaningful victories.
Due to the timer it is very important that you pay attention to the clues that you are given by the crew, because even though there are only a specific Number of Trainers doing battle on that particular cruise, all of the regulars are present anyway, and if you mistakenly engage one of the Trainers who has chosen not to battle for that cruise, they will bend your ear and tell you a story, which has the effect of eating the available time on the timer, which can cost you the special prize!
Paying attention to the crew, you will learn how many Trainers are battling for this cruise, and the Number on both the Port and Starboard, sides, as well as what the door colour is for active battles – that combination of information being crucial to successfully finding the right Trainers in order to avoid the chatty-patties and stick with the active battlers...
The Cruise Schedule: When to show up has a bit to do with what season it happens to be, as the departure times are based upon sunset, the time for which is altered by the season. Generally you can expect that the Royal Unova will depart on the following basic schedule:
- Spring: 5:00 – 7:59 (1700 - 1959)
- Summer: 7:00 – 8:59 (1900 - 2059)
- Autumn: 5:00 – 7:59 (1700 - 1959)
- Winter: 5:00 – 6:59 (1700 - 1859)
The Cruise Special Prizes: As mentioned above, the special prizes are based upon two solid factiods, those being your success in defeating all of the designated Trainers for this cruise, and what day of the week it happens to be! The following generally is what you can expect, depending:
- Sun: Rare Candy (Medicine: Raises a Pokemon One (1) Complete Level)
- Mon: Lava Cookie (Food: Heals all Status Ailments for One (1) Pokemon)
- Tue: Berry Juice* (Drink: Heals one (1) Pokemon a total of 20HP)
- Wed: Lava Cookie (Food: Heals all Status Ailments for One (1) Pokemon)
- Thu: Old Gateau (Food: Heals all Status Ailments for One (1) Pokemon)
- Fri: Lava Cookie (Food: Heals all Status Ailments for One (1) Pokemon)
- Sat: Rage Candy Bar** (Food: Heals all Status Ailments for One (1) Pokemon)
* If the Berry Juice us given to a Shuckle as a held item it will eventually convert to a Rare Candy.
** When this special food item is used in the Desert Resort area on a Darmanitan (#555 Darmanitan – evolves from Darumaka at Level 35) it triggers its Hidden Ability “Zen Mode” which has the effect of temporarily changing its type from its base Fire-type to Fire/Psychic-type temporarily. Feeding it a Rage Candy Bar elsewhere will not achieve this effect outside of the Desert Resort, however your Darmanitan's HA Zen Mode can also be triggered randomly when its health (HP) drops below 50%.
Zen Mode has the effect of temporarily changing the form of this Fire-type to Fire/Psychic-type in its new and unique form, which has the effect of hardening its body as well as changing its coloration to a blue-hue.
Be aware that the Trainers that are encountered on the Royal Unova change depending upon whether or not you have entered the Hall of Fame (become Regional Pokemon Champion in other words) with a different lineup draw for pre-Hall of Fame and post-Hall of Fame status.
Sewer Entrance Pier
This is an important place – or it will be soon for us – so mark it in your mind for now. At the end of this short pier is the entrance to the Sewers, and we will need to be going there both to level and to capture Pokemon as well as uncover a mystery of sorts. Not only that but our journey through the Sewers will also reveal a secret and well-hidden park!
Note that access to the ewers is seasonally dependent; during the Autumn and Winter months the Sewer is directly accessible via the entrance, however during the other seasons access to the entire complex will require the HM Surf. Also be aware that different areas are accessible depending upon the different seasons, so you will want to return to explore the Sewers again for each season to see what else can be accessed in addition to the original City Park that is now accessible exclusively via the Sewers and which is the only place that Wild Eevee can be encountered and captured! But more on that later, as there is still the rest of the city to be explored...
Return to the street and head to the right into the gate, and talk to the first Trainer you encounter inside to receive the held item Quick Claw. This item, when it is held by one of your Pokemon, can boost their Attack Speed which may allow them to attack first.
Talking to the Harlequin here will result in them telling you how many Locations you have yet to visit for the Harlequin Hunt contest. Talking to the Guard at the desk will reveal where this bridge leads, but talking to the Construction Worker will reveal that the bridge is currently under repair and so it is closed to traffic.
Hit the Pokemon Center to heal up if you need to, and collect any outstanding Medals, save your game, and then go outside and head up the road that runs beside it (Castelia Street) and enter the first building on the right, which is the Game Freak HQ!
Game Freak HQ
In addition to being the game company that makes the Pokemon Games, Game Freak is also a cool place for you to pick up some XP!
Head up the lift to the 22F floor and grab the Revive from the Treasure Ball in the back, then have a battle with Game Freak Nishino and his Level 16 Clefairy, taking $1280 from him for the battle. Game Freak Morimoto has a Level 14 Pansagea Level 14 Pansear, and a Level 14 Panpour, gaining you $1120 as your reward. You can return once each day to battle them again if you like...
With that mischief managed, head back down the lift and head outside. Across the street on the left is a vending machine that dispenses drinks, which includes Fresh Water, Soda Pop, and Lemonade – you may want to buy a few of those... The building just past it on the left has a lift that will take you to the 11th floor, where a girl will gift you TM44 Rest, which is worth the trip up the lift!
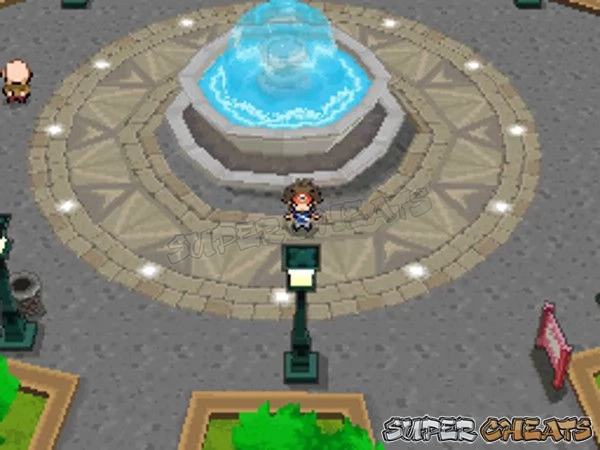
The Main Square
Head to the end of the street then left to Mode Street, and head south down it to visit the Castelia City Casteliacone Stand, where you can buy one or 12 of the snacks. Across the street is Studio Castelia, inside of which are paintings by the local Gym Leader. You can talk to a trainer here and show him the Pokemon type he asks to see and get to pick a berry.
Head south and on to the main road, then left to Narrow Street and north up it, and a man in black steps out of the alley and gifts you TM70 Flash! Well worth the trip down the alley! Cafe Sonata is across the alley, and if you head inside and talk to the bartender to get a free Moomoo Milk!
Head all the way north to the end of the street to the Square, then left and south down the next street, and into the first building on the left you can enter, in the lobby of which you will find the Name Rater, the Feeling Reader, and the Pokemon Masseuse. The lift will take you either to 2F or 3F – on 2F you find the Medal Office, and the final Harlequin! Go you!
You can have your Medal Collection evaluated here as well as learn more about the Medal contest, and on the 3rd floor you meet Amanita, the woman who perfected the Pokemon Storage System in Unova! She will tell you about the storage system, and you can learn about Game Sync and Pokemon Dreams from the second woman here. The third woman is Professor Fennel who you should chat up.
The Pokemon Gym
The building to the south and on the right is the Pokemon Gym, but it seems that the Gym Leader Burgh is absent. When you talk to the bloke outside the door named Clyde you are interrupted by Iris, who then takes off for the area by the Pokemon Center – so you should give chase!
On your way talk to the Harlequin who gave you the contest to collect your prize – a Rare Candy – and then catch up to Iris, then follow her out onto Thumb Pier, where she shows you the Sewer Entrance.
Hugh appears now and heads into the Sewers! You have to follow after him, right?
Castelia Sewers
This is a special area where the entire area acts like tall grass and you can encounter wild Pokemon. You will find Level 14 to 17 Grimer, Rattata, and Zubat, so you should make the effort to obtain any of them you do not already have – which is all of them!
Bear in mind that if you want to capture a Pokemon you encounter in doubles battle you have to take down one of the pair first, as you cannot aim the ball until there is only one left.
You will encounter Trainers here, including Janitor Felix who has a Level 17 Lillipup and a Level 16 Trubbish, and pays you $640. Worker Scott has a Level 17 Timburr, who pays you $680. Nearby Scott is a Treasure Ball with a Pearl in it.
When you reach the area where the Team Plasma Grunts are, you find a Treasure Ball with the held item TwistedSpoon in it. Team Plasma Grunts have Level 16 Scraggy and Sandile, and give you $1280 for the battle lesson you give them!
After the battle Gym Leader Burgh appears and tells you that there is no reason to go any deeper and you should leave. Hugh then gifts you HM04 Strength – nice one! Hugh then leaves, and you then see some mysterious character emerge from the blown-open wall, compliment you, and leave.
Burgh departs at this point, telling you that you have a choice to make: either you can stay here and train your team, or you can follow him to his Pokemon Gym and have yourself a City Gym Battle and obtain another Gym Badge.
That is the choice you need to make so assuming that you have been nicely leveling up you should check your team to see where it stands. If it is not at Level 28 yet, then stay and train them up to Level 28, capturing any Pokemon types here that you have yet to capture, and only then should you head to the Gym!
There is an extensive maze of compartments with paths around them in the area to the rear right of the Sewers with Trainers to battle as well as Treasure Balls to collect. One of the Trainers here is a Doctor who will heal your Team after they are defeated – and you can continue to use them as a Healing Station for as long as you need to, which means you will not have to leave the Sewers to heal up.
Relic Passage
Before you do anything else, head through the blown-open wall into The Relic Passage where you can capture a Level 16 to 18 Onix, Rattata, Roggenrola, Timburr, and Woobat. You will also encounter the odd Drilbur in the Dust Balls that you can raise by moving fast.
Some of these can be a bit difficult to capture, so bring plenty of Pokeballs with you when you venture down here.
Inside you will find a Treasure Ball with an Escape Rope, and have a battle with Scientist Terrance and his Level 18 Grimer. Beating him earns you $864. Backpacker Kendall has a Level 18 Herdier and pays you $432. Scientist Lumina has a Level 17 Venipede and a Level 17 Koffing, and pays you $816. At the far end of the passage beyond Lumina is a Treasure Ball with a Hard Stone in it.
Keep an eye out for dusty spots as you can walk into them to obtain colored shards...

Back in the Sewers
Following the path west and up the stairs brings us to a special grove with a Tree in the center, a Treasure Ball with a Miracle Seed inside, and a mix of light and dark grass, containing Level 16 to18 Eevee, Petilil, Pidove, Rattata, and Skitty. In the Shaking Grass you can find Audino, Delcatty, and Lilligant.
Note that if you are going after an Eevee – and this is the place to do that since it is the only place you can get one other than the Gift Eevee you can get after the Elite Four – you may want to try to capture a few here, and of you are serious about completing your Pokedex you will want to capture a total of EIGHT of them! Why? That is simple really... One very cool thing about Pokemon White 2 (as opposed to Pokemon Black 2) is that in White 2 you will encounter Eevee far more often than in Black 2. That makes collecting the eight you may want a lot easier.
Since Eevee has a broad stone-based and conditions-based evolutionary path (three of its evolved forms are based on applying stones to it, while two are location-specific, and two are happiness-specific as well as time-specific) in order to have all seven evolved forms plus an Eevee in your collection, you need eight in total.
Ideally you should try to get a male and a female if you can, since that would make breading easier, but the odds of that happening are pretty low due to the fact that there is only a 12.5% chance of getting a female to appear. Still, if you DO get a female, that would be the one you want to keep as your non-evolved form of this Pokemon.
Rapid Training Here
I strongly suggest that once you have captured the Eevee you plan on capturing, and you have obtained all of the other Pokemon for this area, you begin using the Shaking Grass method for training straight away. You can easily get your Team ready for the next Gym Battle after you grab all of the Pokemon from the area by doing this, not only easily but rapidly, and there is something to be said for that.
Basically it is a good idea to remain down in the Sewers and collect one of each of the available Pokemon, and then level your team to Level 28 before emerging and heading first to the Center to heal up and re-supply, and then to the Gym for your next Gym Battle and Badge! You can use the doctor that is located in the Sewers to heal up, making it unnecessary for you to leave, and when you are ready to leave you can make a quick exit bu entering the Sewers and immediately using an Escape Rope, which will automagically cause you to emerge at the entrance in town.

The Castelia City Gym
The Gym here is actually pretty slick and fancy inside, but then it is a Pokemon Gym in a major city, right? Just inside is the Greeter who observes that you are probably very tired from chasing down Team Plasma among other things. Clearly this is a well-informed Greeter... When you chat him up, he hands you the traditional Fresh Water, which is nice of him!
This is an ongoing tradition in the games and as well as gifting the player with a healing Fresh Water he also sometimes offers strategy Tips or outright information about the gym. What he says is really worth listening to, though you probably do not want to base your entire strategy off of his brief comments, just saying...
You can examine the statue thingies to learn that we beat Hugh to the certification battle, which is cool. The Greeter told you that this is a Cocoon Gym - draw your own conclusions from that.
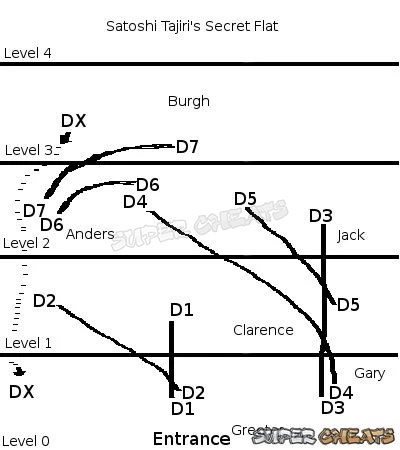
The first step as always is to battle with the Assistant Gym Leaders, so head forward and use the black door (D1) thing to get sucked to the upper floor and battle Harlequin Clarence, who has a pair of Level 20 Sewaddle, and pays you $640 for the lesson.
Head up to the next level (using D5) and walk by the unopened cocoon (D3) to break it open to revel Harlequin Jack, who has a Level 20 Combee and a Level 20 Swadloon, and pays you $640.
Head through the new opening in this Cocoon (D3) to reach Harlequin Gary, who has a Level 19 Sewaddle, a Level 19 Combee, and a Level 19 Dwebble, and pays $608.
Take the door on the side (D4) to go to the next platform and battle Harlequin Anders, who has a Level 20 Dwebble, and a Level 20 Swadloon, and pays you $640.
That is the last Assistant Gym Leader, so head up the next level (using D7) and you will find Burgh waiting for you among a collection of pots of paint that I guess they use for their art?
Talk to Burgh to hear that they think you did a good job back in the sewers – and during a lengthy chat you learn that Burgh favors Bug-Type Pokemon, and then you learn a little about why each one is excited and perhaps why Burgh is excited for Bug-Type Pokemon...
After the sharing is done the battle Begins, and you face their first Pokemon, a Level 22 Swadloon, and then a Level 22 Dwebble, followed by a Level 24 Leavanny, earning you $2880, the third Gym Badge - the Insect Badge - and the move TM76 Struggle Bug as a special gift. With this Gym Badge Pokemon up to Level 40, including those acquired in trade, will obey your commands.
Taking the hole on the left side of the floor (DX) takes you directly down to the exit level, and now would be a great time to head back to the Pokemon Center to get your team healed up!
Anything missing from this guide?
ASK A QUESTION for Pokemon White 2
Comments for Castelia City
Add a comment
Please log in above or sign up for free to post comments- Walkthrough
- Odds & Ends
- Reference Section
 Join us on Discord

also as you challenge burgh he will have a level 22 Dwebble a 22 Swadloon and a level 24 Levanny and the only way to beat him is with flying and fire pokemon thats how i defeated burgh so if you have one of these types then you will be able to defeat him
i need help with training my pokemons before defeating burgh, where do i train?
cool
What's Level 4?