Basic Briefing
This section is largely for gamers who are new to the Pokemon games and so who may not be aware of some of the special and finer points to play. If you are a veteran player you can probably skip this but to be on the safe side you may want to skim it anyway, because some of the details and factoids for many of this have changed since the previous generation. Just saying...
The World of the Pokemon Trainer
To get your bearings first, you need to understand that the lot in life for the average Pokemon Trainer is not really a violence-filled series of confrontation after confrontation – sure there are Pokemon Battles with the trainers you meet – in fact almost every trainer you meet will want to battle you – but this is not really about violence, it is about how you and your Pokemon measure up to them!
When an NPC Trainer issues you a battle challenge that is a good thing, since in addition to gaining XP (Experience Points) for your Pokemon who participate in the battle – which will allow them to level up – you will also obtain prize money if you win (and you should be winning mates). That prize money is crucial to your early success in the game. For that reason alone you should view each Trainer you encounter as a potential source for wealth, XP, and in many cases, useful information.
You will also get a partial Pokedex entry for each of the Pokemon that they use in the battle – which can be an important element to filling in the basic details for your Pokedex since a lot of the Pokemon from other regions will only be encountered in this way at least initially. The good news is that once you have a Dex entry for a Pokemon you will later be able to use the online trade system to acquire that Pokemon, which is an important step for filling your Dex with full information!
Pokemon Levels and Gym Battles
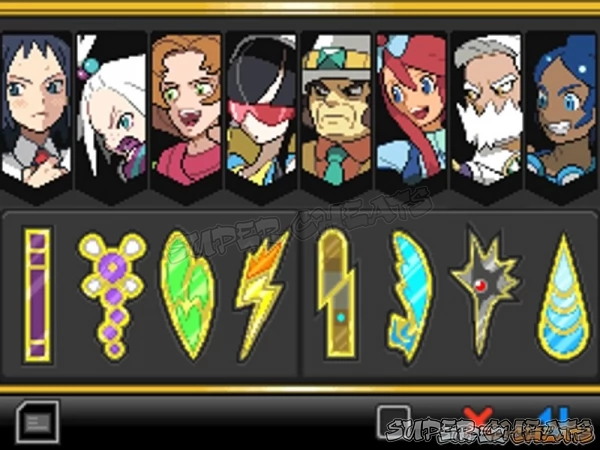
Part of the focus for your Adventure is to level up your team so that you can undertake the special battles at Pokemon Gyms called Gym Battles, the outcome of which when you are successful is the awarding of the Gym Badge for that Gym!
Gym Badges are more – way more – than simply a mark of your success in battling that Gym's Leaders and Assistant Leaders, it has a literal effect on your ability to control Pokemon of specific levels. The following list shows you the Gym Badges in the game, and what possessing them means for you:
Gym 1: Aspertia City – Basic Badge
Gym Badge Effect: All Pokemon up to Level 20 will obey you.
Gym Leader: Cheren (Normal-type Pokemon)
Target Team Level: 10
Gym 2: Virbank City – Toxic Badge
Gym Badge Effect: All Pokemon up to Level 30 will obey you.
Gym Leader: Roxie (Poison-type Pokemon)
Target Team Level: 18-19
Gym 3: Castelia City – Insect Badge
Gym Badge Effect: All Pokemon up to Level 40 will obey you.
Gym Leader: Burgh (Bug-type Pokemon)
Target Team Level: 28-29
Gym 4: Nimbasa City – Bolt Badge
Gym Badge Effect: All Pokemon up to Level 50 will obey you.
Gym Leader: Elesa (Electric-type Pokemon)
Target Team Level: 38-39
Gym 5: Driftveil City – Quake Badge
Gym Badge Effect: All Pokemon up to Level 60 will obey you.
Gym Leader: Clay (Ground-type Pokemon)
Target Team Level: 48-49
Gym 6: Mistralton City – Jet Badge
Gym Badge Effect: All Pokemon up to Level 70 will obey you.
Gym Leader: Skyla (Flying-type Pokemon)
Target Team Level: Above 55
Gym 7: Opelucid City – Legend Badge
Gym Badge Effect: All Pokemon up to Level 80 will obey you.
Gym Leader: Drayden (Dragon-type Pokemon)
Target Team Level: Above 55
Gym 8: Humilau City – Wave Badge
Gym Badge Effect: All Pokemon will obey you regardless of their level.
Gym Leader: Marion (Water-type Pokemon)
Target Team Level: Above 55
Understanding the Gym Battles
If you consult the list above you will see that the base type of Pokemon is listed, which means you will want to shape your strategy based upon using the Pokemon in your Team who are strong against that base type. In addition we make suggestions as to the target level for your team – this is based upon your desire to win as handily as you can. One thing you should remember is that leveling is always a good thing as long as you NEVER level beyond your ability to control that Pokemon!
The strategy for leveling is a bit different in this generation and specifically in White 2 in that by the time you reach the 5th Gym your Team has reached a point where in theory they can dominate all of the Gyms that follow. In theory. Personally we have never found being over-leveled to be a bad thing. Just saying...
About Shiny Pokemon
As you journey through the world you will find that when walking or running through Tall Grass, through Double Grass, and just walking or running in specific special areas, you will encounter wild Pokemon.
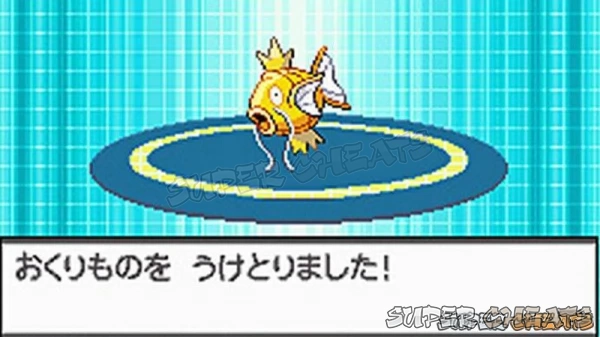
Now, most of them are normal Pokemon in the sense that there is nothing special about them, but on rare occasions you will encounter what are called Shiny Pokemon. Shiny Pokemon are the rarest type of special Pokemon in the world, and they are a highly desirable Pokemon – in fact so highly desirable that many trainers consider them the equal to almost any Legendary Pokemon you care to name at least in value and desirability.
In fact there are trainers who treat Shiny Pokemon as a fetish object!
A minority of trainers actually field entire teams of nothing by Shiny – carefully raised, honed to battle perfection, and uber rare. It is reasonable to say that such teams are outwardly proof that even among Pokemon Trainers there is a notion of entitlement and that wealth can have an impact.
There is actually a private auction held several times a year in Tokyo at which reputable Breeders and Trainers sell(?!) the Shiny Pokemon that they have captured for real-world money! Basically these are trainers whose honesty is a well-established fact, and thus when they offer a Shiny for sale, it is a legitimately caught one, not one created with an editor.
The people who put on the auction have a way to examine the Pokemon being offered and can actually identify edited Pokemon – which is how they can guarantee the authenticity of and bonafides of the Pokemon they auction.
So what exactly is the deal with Shiny Pokemon?
Each Pokemon has a specific appearance in both its form and colors, and you will come to be very familiar with that. Some Pokemon have alternate forms that a trainer can choose, with the alternate form either being set by conditions, a device, or by touching an object in the world (depending on the game and the Pokemon) and then, finally, there is the Shiny form, which it is said every Pokemon has but if you encounter a dozen in your lifetime, you are a fortunate Trainer!
What a Shiny is, in essence, is a rare and special appearance for the Pokemon. It is colored different from the standard form, sometimes with its base colors reversed, while others have entirely new colors.
Depending upon which title in the series you are playing, Shiny Pokemon can have more pronounced appearance or more subdued appearance in how they react to the world and being deployed. In most of the games in the series each of the Shiny have a sprite effect and special sound that is triggered by their being deployed into battle, so that was previously the way you could tell that you had a Shiny in the early games.
The issue of Shiny Pokemon has come a long way since the first gen games, and in fact it has never been more formally dealt with than in Pokemon Black 2 and Pokemon White 2, which for the first time in the history of the series actually feature very obvious markers on the individual Pokemon Records to not only indicate that your Pokemon is a Shiny Pokemon, but also track statistical information relating to how many Shiny you have seen caught, and etc.
Other than the special colors, the special sprites and animations, and the rarity, Shiny Pokemon are really no different than the regular form for whatever type Pokemon it happens to be. That warrants a deeper explanation: while it is true that your Shiny Pokemon is rare, and in those terms, special, that is as far as the rarity goes. Shiny Pokemon do not possess better stats (well, usually... There are exceptions to every rule, and of course when the Shiny happens to also be a Legendary, well then all bets are off).
That being the case if you obtain a Shiny that due to not having a complete party ends up IN your party, and that you mean to sell or trade, it is critically important – most trainers say crucial – that you immediately travel directly to the nearest Pokemon Center (and preferably by flying) and deposit it into a Storage Box and then DO NOT TOUCH IT after that until you are ready to transfer it to the trainer you are selling/trading it to.
The reason for that is simple: each individual battle that each Pokemon has influences its development, and can change its stats, and add to or subtract from specific abilities and resistances, and because of that it is critical that you do not use any Shiny you mean to sell/trade for battles of any type – leave the decisions as to how that particular Pokemon is developed and trained to the person who is going to ultimately be its master, right?
Some trainers believe that a Shiny will have the top range of stats for their type, and that may be true… Who can say? Either way as long as you plan to sell or trade it, there is no point in messing with its stats. As previously noted, some trainers build their entire teams using them and so spend inordinate amounts of time and energy hunting for them and if they are truly lucky, capturing them, but mostly they pay for them...
To capture the Shiny though you have to be very lucky, because a Shiny is much more likely to run from a battle than to stay in it, and many is the trainer who encountered one, tossed a Pokeball, only to have the Shiny break free and immediately run away! Conventional wisdom suggests that the trainer always use the strongest type of Pokeball they posses in trying to capture a Shiny, and always open by tossing a ball and trying for the capture because attacking to weaken it just gives it the chance to run...
Having a Shiny that close only to lose it is reason to cry, because even the most common Pokemon, when it is a Shiny, is worth the value of a Legendary to most trainers. You did not read that incorrectly; you can easily trade a common type Shiny for almost any Legendary! Now that you know, you’ll be sure to keep an eye out for any Shiny you find, right? What’s that? How will you know it’s a Shiny?
Well, when you enter battle with it, it will make a distinct and special sound, and it will also release a starburst pattern of light as it appears, but the most obvious way to ID are its coloration, which will be very different than the normal version, though bear in mind that for some Pokemon that can be very hard to spot; for example, the Shiny for the Pokemon Metapod is a different shade of green, while the Shiny Weepinbell and Victreebell has oddly contrasting colors, but the most difficult of all to spot are Voltorb and Electrode, whose colors are simply reversed, with Voltorb having red on the bottom and white on the top for its Shiny form and Electrode the opposite!
When you do encounter a Shiny for the first time, I sincerely hope that you are able to capture it; a Pokemon Trainer’s first Shiny is a special event and the tradition is to never trade away your first Shiny, but to keep it and make it your most favored Pokemon Companion, in much the same way that Ash and his Pikachu get on.
If you decide to keep your Shiny (and we think you should at least with respect to your very first Shiny) it would be a good idea to set it aside in storage until the time comes that you have a firm understanding of the steps that it takes to properly level and train a Pokemon.
The worse thing that you could do is take a Shiny and badly manage its training, turning it into a mediocre battle companion. There are a lot of really good training guides and even entire websites online that are dedicated to the art of training up Pokemon, and we strongly suggest that when the time comes for you to train your Shiny you consult them. A little knowledge is a dangerous thing, so be sure you are an expert when the time comes, right? Anyway, good luck, and may your aim be true!
Breeding and the Ditto
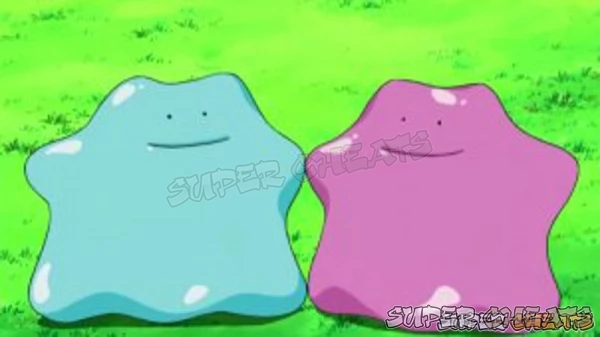
Almost every Pokemon that you encounter has two sexes – Male and Female – though there are some that either are only one sex, or have no sex (or both sexes some trainers say) with a prime example of that being the very special Pokemon called Ditto which can mate with almost any Pokemon regardless of sex and produce a baby of its type. The exception to that is Legendary Pokemon, which cannot reproduce.
Obtaining a single Ditto is not a magic breeding toolbox, and this is something you should be aware of... Because due to issues with Pokemon Nature, the minimum Number of Dittos you are going to need to ensure that you CAN breed if you want to is two – one with that has the Nature of Rash, and another that has the Nature of Gentle – basically those two specific natures happen to be at opposite sides of the imaginary Nature Line – which means that they represent to two sides of the Nature Coin, or the opposite ends of the Nature Spectrum from each other. Once you own a Ditto of each of those Natures there is not a single OTHER Nature you cannot mate with!
In most instances and for most ordinary Pokemon you will not need a Ditto to breed them – in the case of Legendary Pokemon you also will not need a Ditto because, frankly, all Legendary Pokemon are infertile and cannot breed.
Most ordinary Pokemon appear in nature in both sexes, so you can capture a male and a female, and you can make the effort to not only capture a breeding pair, but take the time and make the effort to find just the right breeding pair in the hopes of passing on specific egg moves, influencing the nature of the baby, and even boosting its stats or making it likely that one set of stats will be favored over another. In fact the world of breeding Pokemon is a complex and ultimately specialized element in the world of Pokemon, which is why you will encounter gamers who will readily identify themselves as either a Trainer or a Breeder. Yes, they actually make that distinction.
The reason that Ditto becomes important is that among what are classed as ordinary Pokemon there are sexless Pokemon who do not have the ability to breed without a Ditto. Not only that, but you will find that a small Number of Pokemon will favor one sex seemingly to the exclusion of the other, making it almost impossible to obtain a breeding pair. In that case Ditto is the answer. But there is another reason to favor having the two special Ditto, and that is to seek specific special abilities, moves, and stats in your breeding and the Pokemon that hatch from your eggs.
Basically serious trainers – and those trainers who consider themselves Breeders – might breed dozens of the same type of Pokemon, as they seek specific Egg-level stats and the presence of specific moves at the Egg-level. Once they obtain the desired result, they will then carefully raise that hatched Pokemon to the point where IT can be used for breeding, and then begin again, working towards a specific set of desired results, and in many cases the process can take ten or more generations!
You do not have to make any decisions as far as whether you are going to be a Breeder or not, but you should keep it in mind that at some point in the future you may WANT to be a Breeder, or you may want to breed a specific Pokemon to enhance your team, and at that point you would be very happy that you retained the Ditto of the desired Natures. Just saying...
The Public PC and PC Network
You will have noticed that you have a personal PC at home which you can use to store and send mail, and there are the public PC's in the Pokemon Centers (and other Locations) that you use to access your own PC remotely, to access Professor Juniper’s PC in order to have your Pokedex progress evaluated, and then there is “Someone's PC” (the identity of whom you are not now aware of but that is a secret you will uncover as part of the story), which serves as the storage system for all of the Pokemon you will be collecting as you work on completing your Pokedex.
In previous guides the game included a large Number of PC boxes, but in recent games instead there is a smaller but expandable number, and you have to complete a specific set of steps in order to expand the size of the available storage. Because of that I no longer immediately suggest that you label all of the boxes for each of the types of Pokemon and store them that way, as that really can only happen if you take the steps that are required to expand your potential storage space, and because not every trainer is necessarily willing to do that at this juncture, that explains why it is no longer a normal part of the guide.
So this is one of the first points where the guide will diverge – if you want to expand and organize your Pokemon Storage System and deploy a basic Storage Strategy, continue reading this section. If you do NOT wish to deal with that for now, skip to the next sub-section and the heading entitled “Quick Organization of your Storage” now.
Fully Expanded Organization of the Pokemon Storage System
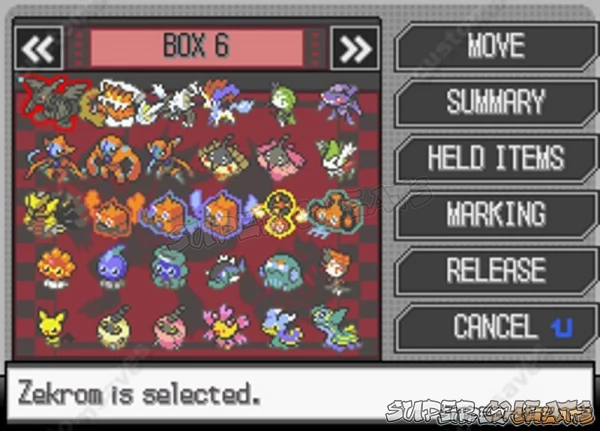
Gaining access to the full Storage Array is actually a lot simpler than you might think, since all that it requires is for you to place at least one Pokemon in each of the available Boxes. This creates a basic progression that works in stages, as detailed here:
Storage Stage 1: 8 Storage Boxes holding a maximum of 240 Pokemon
Storage Stage 2: 16 Storage Boxes holding a maximum of 480 Pokemon
Storage Stage 3: 24 Storage Boxes holding a maximum of 720 Pokemon
Each box can have a custom Wallpaper (background) applied to it, and each can be custom labeled, which is actually a good idea. The following is the suggested label scheme, since it nicely provides you a place to put each type of Pokemon, in a well-organized way:
- Box 01: Incoming
- Box 02: A-Team
- Box 03: B-Team
- Box 04: Legendry
- Box 05: Legendry
- Box 06: Electric
- Box 07: Drk/Psyc
- Box 08: Fighting
- Box 09: Bug/Pois
- Box 10: Rck/Stle
- Box 11: Normal 1
- Box 12: Normal 2
- Box 13: Grass 1
- Box 14: Grass 2
- Box 15: Fire 1
- Box 16: Fire 2
- Box 17: Ghost
- Box 18: Drag/Ice
- Box 19: Flying
- Box 20: Water 1
- Box 21: Water 2
- Box 22: Misc 1
- Box 23: Misc 2
- Box 24: Outgoing
With the boxes set up as notes above (though you can actually mix them however you want, and place them in whatever order you like) as long as you set up the proper places for the different Pokemon to be stored. The idea here is to make it easier to find specific Pokemon by type, as needed, and this will do the trick nicely.
Quick Organization of your Storage
Regardless of how organized you are in real life, adding a bit of organizational effort to the game is not just a good idea, it is almost a requirement! So with that in mind, we are now going to make use of the boxes in the Storage System that we do have access to, in order to create a basic storage strategy that will get us through most of the first half of the game with little difficulty...
To begin with until you have made the effort to and reached the point at which all of the boxes in the Storage Array are unlocked, some basic organization is required... In place of that system instead I suggest that you label a specific set of boxes as follows:
(1) Outgoing - the box you keep all the Pokemon you plan to trade away.
(2) Incoming - the box you will always leave as active when you exit the PC.
(3) A-Team - this is the box for your main game play team, or A-Team.
(4) B-Team - this is the box for the Pokemon you will use to battle other real-world trainers.
(5) Legendry - this is the box you keep all your Legendary Pokemon in.
(6) Misc 1 - this is your first mixed storage box.
(7) Misc 2 - this is your second mixed storage box.
(8) Misc 3 - this is your third mixed storage box.
That covers all of the boxes you presently have available right now, and offers you a reasonably simple and easy to manage sorting system that should allow you to gain access to the Pokemon you want to access with little trouble.
To recap: you place any Pokemon you plan to trade to other games of friends in to the Outgoing Box, you use the Incoming Box as your default box when you exit the PC (so always change to it before you exit) so that all the new Pokemon you get land in a predictable place and you know where to look for them.
The A-Team Box is for the Pokemon you will use for playing the game and where you will want to keep your Dittos (when you capture some). The B-Team Box is for the special Pokemon you breed to use for battle with real-world trainers, and via the online tournament system. The Legendary Box is where you want to keep the really special, or Legendary, Pokemon you manage to collect.
The Misc Boxes are where you will be sticking pretty much all of the other Pokemon you capture, at least until you have unlocked enough additional boxes to begin storing them by type.
That nicely wraps up the issue of the PC and Storage. Now let us examine the Team system a little closer...
A and B Teams
The basic strategy here is simple enough: the Pokemon that you use for adventuring and playing through the story do not need to be so carefully developed and leveled, whereas the Pokemon you use for competition really do need to be carefully managed.
What that means is that the team you assemble for story play, which will include the Pokemon you are comfortable with plus the alternates that you swap into your A-Team for specific tasks, battles, and the like, basically occupy a less demanding and easier to manage presence in the game. The B-Team on the other hand is a different story.
While you do not need to get into this too deeply right now, once you start to get to know the different Pokemon in the game, their types, and their abilities, you will find that you prefer certain ones. Basically once you have those preferences in mind, you are going to first want to store breeding pairs for the types you want in your B-Team Box, and then later, after you complete the story, you will want to breed them for stats and abilities, and once you get the right configuration, you will then want to very carefully level them.
When I say carefully level them I mean just that – serious trainers actually control what types of Pokemon their B-Team members can battle as they work on leveling them, because that actually has an impact on how they level, and what hidden stats get raised. That is a much deeper subject than needs covering here, now, but it is something many trainers will want to be aware of, and because serious trainers (and those who want to be) are always on the lookout for breeding pairs for their B-Team, we covered it here.
For now it is OK to just focus on the story, and on completing your Pokedex, but the story first. And remember, you are having fun – this is a game and it is supposed to be fun! So have fun!
Addressing the Pokedex and Basic Early Trades Strategies
Traditionally the approach that most trainers take with respect to their Pokedex and maintaining the integrity of the Regional Dex prior to the point at which they unlock and have access to the National Dex is to only trade-in Pokemon who appear in the Regional Dex.
You can actually trade Pokemon that do not appear in your active Unova Regional Dex, but they will not appear in your Pokedex listings, and their individual records will be incomplete when you open them.
This is really a personal matter, not an official game play one, but in the process of creating this guide we decided to observe and follow the tradition, which is to only trade-in Pokemon who have dex entries.
The motivation for trading those Pokemon into the game is focused more on time saving than anything else, since save for the game-exclusive Pokemon for the opposite title, you can capture the Pokemon on the Dex in the game – so the reason behind trading Pokemon in is largely to save time and not have to train them up, since they are previously leveled in the other games!
This way we can have teams that are all ready to go for the Gym Battles, which means that we can focus upon fun instead of having to spend what literally can work out to days of play grinding levels just to do the Gym Battles – and hey, when the question is fun over work, I vote for fun every time... Just saying...
Establishing the Standard Inventory Plan
The last thing that we need to cover is your inventory – specifically what needs to be in it. For most casual trainers a working inventory will consist of around x10 of each of the meds and special consumable items, and anywhere from x10 to as many as x50 of the different Pokeballs. Serious trainers collect everything that they can get their hands on, and don't sell ANY consumable items at all or bother thinning their inventory in that regard.
What you decide to keep in your bags is really up to you, but as a helpful suggestion for now, here is a basic list that you may want to try to maintain:
x20 Pokeballs (Captures Wild Pokemon)
x10 Potions (Heals 20 Health for your Pokemon)
x10 Fresh Water (Heals 50 Health for your Pokemon)
x5 Full Heal (Fully Heals your Pokemon)
x5 Antidote (Removes the condition: Poisoned)
x5 Awakening (Removes the condition: Sleep)
x5 Burn Heal (Removes the condition: Burn)
x5 Ice Heal (Removes the condition: Freeze)
x5 Paralyze Heal (Removes the condition: Paralysis)
With the kit above you should be able to survive any one major battle without losing, and capture any Pokemon you encounter (save for Shiny Pokemon, which are never a sure thing), and find that it will suit you for almost every situation.
That wraps up the minor issues that you need to be aware of as you play, so it is time now to move forward with our Adventure, and take in the first Gym Leader, obtain our first Gym Badge, and unlock the trades as well as the other online and multi-player assets that are part of the game!

Summing Things Up
You are about to set out on a great Adventure, this is true. But you are also about to embark upon an adventure in a game that has so much more to offer you than just the story mode and becoming the Regional Champion. We have hinted at the depth of the games in the series above, by revealing just the Shiny and Ditto elements, but from that you should take away this lesson: it is often the bits you have to hunt for because you cannot see them otherwise that are the true measure of a game and its value.
Pokemon White 2 is that sort of game. Consider that in addition to completing the story missions in order to save the world, and in leveling your team so that you can become the Regional Champion having defeated the Elite Four and then the reigning Champion, you have only just scratched the surface of the game.
After entering the Hall of Fame as the Champion you still have yet to fill your Pokedex, discover breeding, play through the plethora of online and co-op mini-games, and discover the fun in battles, both in person and online. There are the Legendary Pokemon that you caught as part of the walkthrough, but there are also others that you will only obtain through special events either online or in the real world, and there are the trades you will need to make between versions – both for Pokemon and for the Keys that are required to unlock other secrets.
In short, there is way more for you to discover in the game than we can possibly cover in this walkthrough and guide – though we are going to try.
If this is your first exposure to the series, then you have picked a good game. Do not be surprised though if in playing this game you end up wanting to play the games that came before it in the series. Some of you will get so into this that you should not be surprised if you end up buying an older GBA and the titles for that generation to play – and doing so can actually pay dividends since it is possible using the generational transfer mechanism that was introduced in that line to move Pokemon from one generation to the next, and to the current generation of the game.
As you play, it is a good idea to find your niche, experiment with the different Pokemon and build the team that works the best for you. That accomplishment will only come by trial and error. Just remember, no matter how well you do at the story, and how well you do becoming Champion, you still Gotta Catch 'Em All!
Anything missing from this guide?
ASK A QUESTION for Pokemon White 2
Comments for Basic Briefing
Add a comment
Please log in above or sign up for free to post comments- Walkthrough
- Odds & Ends
- Reference Section
 Join us on Discord
