The PC, Teams, Planning, Trades, and the Pokedex
Pokemon Black 2 Walkthrough and Guide
by CMBF ![]()
The PC, Teams, Planning, Trades, and the Pokedex
As you can see the early part of the guide and walkthrough is made up of more than just the lessons that are obtained in working your way through the different geographic locations in the Unova Region but also includes a lot of basic and advanced information and lessons that tend to focus on everything from the mechanics of Pokemon and the Art of being a Pokemon Trainer to specialized activities that are intended to obtain specific and predictable results. As we begin exploring each of the different areas that relate, we ask that you take the time to read and absorb this information because it is really will benefit you in the long run. That being said...
Make your way back to your home town and head to the Pokemon Center there; any time that you arrive in a city or town you should make a habit of (and really a tradition of) making the Pokemon Center your first stop, visiting with Nurse Joy there, and healing your team so that you not only restore any missing health but also reset the move counters for each of your team members. Once you have done that you should make it a normal practice to access the PC, shifting any recently acquired Pokemon into their proper boxes, and thus clearing away the Pokemon in your Incoming Box so that it has room for more!
Finally you should be sure to re-supply at the Pokemart Counters and then save your game!
Once you start doing this automatically you will find that it often helps to ensure that should anything go wrong, you always can rely on having that save point set to recover to!
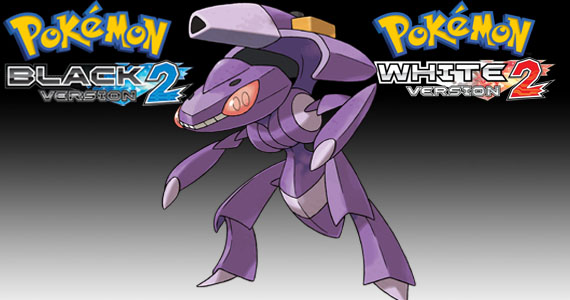 The first WiFi Event Legendary Pokemon: Genesect |
– Your PC –
The first issue we need to address now is your PC Storage – which at the moment is listed on the public PC as “Someone's PC” but later, after you discover the name of the geek who invented and refined the Pokemon Storage System in Unova by completing the related quest on that subject, that will change to be named after them. But that happens later – for now we need to talk about basic strategy for managing the Pokemon you capture and making it easier to keep track of the ones that are important to you.
In previous guides the game included a large number of PC boxes, but in recent games instead there is a smaller number, and you have to complete a specific set of steps in order to expand the size of your storage. Because of that I no longer immediately suggest that you label all of the boxes for each of the types of Pokemon and store them that way, because that really can only happen if you take the steps that are required to expand your potential storage space, and because not every trainer is necessarily willing to do that at this juncture, that explains why it is no longer a normal part of the guide.
So this is one of the first points where the guide will diverge – if you want to expand and organize your Pokemon Storage System and deploy a basic Storage Strategy, continue reading this section. If you do NOT wish to deal with that for now, skip to the next sub-section and the heading entitled “Quick Organization of your Storage” now.
== Fully Expanded Organization of the Pokemon Storage System ==
Gaining access to the full Storage Array is actually a lot simpler than you might think, since all that it requires is for you to place at least one Pokemon in each of the available Boxes. This creates a basic progression that works in stages, as detailed here:
Storage Stage 1: 8 Storage Boxes holding a maximum of 240 Pokemon
Storage Stage 2: 16 Storage Boxes holding a maximum of 480 Pokemon
Storage Stage 3: 24 Storage Boxes holding a maximum of 720 Pokemon
Box 01: Incoming
Box 02: A-Team
Box 03: B-Team
Box 04: Legendry
Box 05: Legendry
Box 06: Electric
Box 07: Drk/Psyc
Box 08: Fighting
Box 09: Bug/Pois
Box 10: Rck/Stle
Box 11: Normal 1
Box 12: Normal 2
Box 13: Grass 1
Box 14: Grass 2
Box 15: Fire 1
Box 16: Fire 2
Box 17: Ghost
Box 18: Drag/Ice
Box 19: Flying
Box 20: Water 1
Box 21: Water 2
Box 22: Misc 1
Box 23: Misc 2
Box 24: Outgoing
With the boxes set up as notes above (though you can actually mix them however you want, and place them in whatever order you like) as long as you set up the proper places for the different Pokemon to be stored. The idea here is to make it easier to find specific Pokemon by type, as needed, and this will do the trick nicely.
== Quick Organization of your Storage ==
Regardless of how organized you are in real life, adding a bit of organizational effort to the game is not just a good idea, it is almost a requirement! So with that in mind, we are now going to make use of the boxes in the Storage System that we do have access to, in order to create a basic storage strategy that will get us through most of the first half of the game with little difficulty...
To begin with until you have made the effort to and reached the point at which all of the boxes in the Storage Array are unlocked, some basic organization is required... In place of that system instead I suggest that you label a specific set of boxes as follows:
(1) Outgoing - the box you keep all the Pokemon you plan to trade away.
(2) Incoming - the box you will always leave as active when you exit the PC.
(3) A-Team - this is the box for your main game play team, or A-Team.
(4) B-Team - this is the box for the Pokemon you will use to battle other real-world trainers.
(5) Legendry - this is the box you keep all your Legendary Pokemon in.
(6) Misc 1 - this is your first mixed storage box.
(7) Misc 2 - this is your second mixed storage box.
(8) Misc 3 - this is your third mixed storage box.
That covers all of the boxes you presently have available right now, and offers you a reasonably simple and easy to manage sorting system that should allow you to gain access to the Pokemon you want to access with little trouble.
To recap: you place any Pokemon you plan to trade to other games of friends in to the Outgoing Box, you use the Incoming Box as your default box when you exit the PC (so always change to it before you exit) so that all the new Pokemon you get land in a predictable place and you know where to look for them.
The A-Team Box is for the Pokemon you will use for playing the game and where you will want to keep your Dittos (when you capture some). The B-Team Box is for the special Pokemon you breed to use for battle with real-world trainers, and via the online tournament system. The Legendary Box is where you want to keep the really special, or Legendary, Pokemon you manage to collect.
The Misc Boxes are where you will be sticking pretty much all of the other Pokemon you capture, at least until you have unlocked enough additional boxes to begin storing them by type.
That nicely wraps up the issue of the PC and Storage. Now let us examine the Team system a little closer...
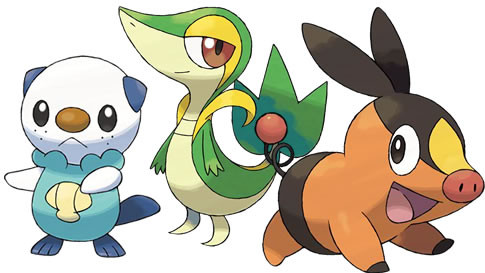 The Trio of Starter Pokemon for Pokemon Black 2 |
– A and B Teams –
The basic strategy here is simple enough: the Pokemon that you use for adventuring and playing through the story do not need to be so carefully developed and leveled, whereas the Pokemon you use for competition really do need to be carefully managed.
What that means is that the team you assemble for story play, which will include the Pokemon you are comfortable with plus the alternates that you swap into your A-Team for specific tasks, battles, and the like, basically occupy a less demanding and easier to manage presence in the game. The B-Team on the other hand is a different story.
While you do not need to get into this too deeply right now, once you start to get to know the different Pokemon in the game, their types, and their abilities, you will find that you prefer certain ones. Basically once you have those preferences in mind, you are going to first want to store breeding pairs for the types you want in your B-Team Box, and then later, after you complete the story, you will want to breed them for stats and abilities, and once you get the right configuration, you will then want to very carefully level them.
When I say carefully level them I mean just that – serious trainers actually control what types of Pokemon their B-Team members can battle as they work on leveling them, because that actually has an impact on how they level, and what hidden stats get raised. That is a much deeper subject than needs covering here, now, but it is something many trainers will want to be aware of, and because serious trainers (and those who want to be) are always on the lookout for breeding pairs for their B-Team, we covered it here.
For now it is OK to just focus on the story, and on completing your Pokedex, but the story first. And remember, you are having fun – this is a game and it is supposed to be fun! So have fun!
== Addressing the Pokedex and Basic Early Trades Strategies ==
Traditionally the approach that most trainers take with respect to their Pokedex and maintaining the integrity of the Regional Dex prior to the point at which they unlock and have access to the National Dex is to only trade-in Pokemon who appear in the Regional Dex. You can actually trade Pokemon that do not appear in your active Unova Regional Dex, but they will not appear in your Pokedex listings, and their individual records will be incomplete when you open them.
This is really a personal matter, not an official game play one, but in the process of creating this guide we decided to observe and follow the tradition, which is to only trade-in Pokemon who have dex entries.
The motivation for trading those Pokemon into the game is focused more on time saving than anything else, since save for the game-exclusive Pokemon for the opposite title, you can capture the Pokemon on the Dex in the game – so the reason behind trading Pokemon in is largely to save time and not have to train them up, since they are previously leveled in the other games! This way we can have teams that are all ready to go for the Gym Battles, which means that we can focus upon fun instead of having to spend what literally can work out to days of play grinding levels just to do the Gym Battles – and hey, when the question is fun over work, I vote for fun every time... Just saying...
== Establishing the Standard Inventory Plan ==
The last thing that we need to cover is your inventory – specifically what needs to be in it. For most casual trainers a working inventory will consist of around x10 of each of the meds and special consumable items, and anywhere from x10 to as many as x50 of the different Pokeballs. Serious trainers collect everything that they can get their hands on, and don't sell ANY consumable items at all or bother thinning their inventory in that regard.
What you decide to keep in your bags is really up to you, but as a helpful suggestion for now, here is a basic list that you may want to try to maintain:
x20 Pokeballs (Captures Wild Pokemon)
x10 Potions (Heals 20 Health for your Pokemon)
x10 Fresh Water (Heals 50 Health for your Pokemon)
x5 Full Heal (Fully Heals your Pokemon)
x5 Antidote (Removes the condition: Poisoned)
x5 Awakening (Removes the condition: Sleep)
x5 Burn Heal (Removes the condition: Burn)
x5 Ice Heal (Removes the condition: Freeze)
x5 Paralyze Heal (Removes the condition: Paralysis)
Note that early on in play the only way to get some (most) of this stuff is through the Pickup Ability of your Lillipup so I cannot stress enough that they are a good addition to your team...
With the kit above you should be able to survive any one major battle without losing, and capture any Pokemon you encounter (save for Shiny Pokemon, which are never a sure thing), and find that it will suit you for almost every situation.
That wraps up the minor issues that you need to be aware of as you play, so it is time now to move forward with our adventure, and take in the first Gym Leader, obtain our first Gym Badge, and unlock the trades as well as the other online and multi-player assets that are part of the game!
More PB2 on SuperCheats.com
No comments yet. Tell us what you think to be the first.