The Hundred Hands of Chaos
Thank you for printing this page from www.SuperCheats.com.
Remember to come back to check for updates to this guide and much more content for South Park: The Fractured But Whole
Follow this guide to hear about updates
Last Updated:
Sneak out of your house
This is yet another major quest that will include several phases and objectives. Your first task is to escape your house. The Silver Key is on the couch. You have to use the Timefart Pause to safely pass over the electrified puddle around it.

Next, you can find the Gold Key from the same spot as before, hanging on the bookshelf by the basement entrance. Finally, you can just enter the kitchen to find the Copper Key on the hands of your sleeping father. You just need to walk in there and take it.

Now head to the door and interact with the padlocks to remove them. Next, enter inspection mode then use your Snap n Pop to remove the two sliding locks. Open the door then head outside.

Follow Toolshed to Kenny’s House
As soon as you get outside, Toolshed will appear and will become your fixed party member in this mission. Continue following Toolshed until you reach Sodosopa. There’s a CAF chest on the rooftop of brighton’s that can be accessed using Fartkour. You’ll get a Gourd of Hipstering artifact and Hipster Glasses costume from the chest. Continue to the right to glide to the next roof then Fartkour from there again to reach the ground. (take note of its location since there’s a sidequest here after completing this mission during daytime)

The lava in the alley can be removed by Toolshed’s Buddy Power but you’ll only unlock that later on this mission. For now, talk to Toolshed to enter Mysterion/Kenny’s house. Once inside, pop the Beer neon sign on the wall then pick up the Fuse of High Tolerance on the floor. For now, head to the kitchen and pop the cracked cabinet on the top right to get a Macaroni. There’s a puzzle that you can solve here later by scanning the defective power outlet above the ref. The required buddy power is not available at this point yet so you can just take note of its location to come back later. For now, leave the kitchen and follow Toolshed to the backroom.

Enter the first room to the left and open the drawer to get the Starchild Headband Recipe and Starchild Suit Recipe. In the same room, head to the right side of the room to find a Yaoi Fanart (Happy Return) on the wall. Leave the room and enter Kenny’s room on the right. Their parents’ room is locked because of the ongoing action so leave it be for now.

Inside Kenny’s room, loot Mysterion’s Character Sheet from the drawer by the bed, and some materials from the toybox. Next, enter the closet and pop the cracked cardboard to get a Cheesing Vial mission item. Press the red button and exit through there to reach the backyard.

In the backyard, before talking to Toolshed for him to demonstrate his buddy power, you can hold the gas tank and move it in front of the makeshift wooden barricade. Pop to ignite it then shoot a ranged fart on it to make it explode, clearing the path. Enter the opening then loot the Scar Wound from the CAF chest on the leftmost side. Backtrack to the yard and loot the duffle bag beside the pile of tires for materials.

The Homeless Camp
Next, talk to Toolshed then activate the gas tank nearby so he can clear the lava blocking your path. Follow Toolshed to the next area. The towering ruin is where you’ll find one of Big Gay Al’s cats and other items but you can’t access it for now. Continue heading to the left until you reach a group of homeless bums. You can’t preemptively attack them until they start moving towards you. Make sure to hit them first to gain combat advantage.
The battlefield is quite narrow and long which will work well with Toolshed’s long-ranged attack. There are two enemies on both sides so use Toolshed’s Drillslinger (#2) whenever you can to damage multiple enemies as long as they’re on a straight line. There’s also no cooldown with this move so you can use this every turn. After the battle, you’ll get Sanity Siphon artifact and Primal Aggression DNA.


Chaos Hideout
Continue north to reach the U-Stor-It storage facility. Follow Toolshed to the entrance and to trigger a cutscene. Once the other Coon and Friends members arrive, you’ll get the chance to explore the first area of the facility. Enter the office then pop the U-Stor-It Backroom Key from the key holder by the front desk.

Access the back room and open the safe to get the Champion Suit. Leave the office and pick up the mask on the ground to trigger yet another cutscene. After the scene, check out / break the other containers in the area for more materials. Before entering the open storage shed in the lower right, enter the closed one above it. Here, you can get the Pencil Stache costume from the container behind the cracked clockface by placing the dynamites in front of it and detonating it. After blowing it up, you can also pull the ladder to the left where you can get the Continuum Enforcer Artifact. Enter the open storage shed to the lower right then go through the hole in the wall to reach the next area.

In the next area, use Diabetic Rage to topple the fuel pump and clear the path for you. Get past it then use the Timefart Glitch to revert the pump to its original position. Loot the container nearby then continue heading east. Take the next mask on the ground to trigger another cutscene. After the scene, you’ll have to face the Chaos Minions (and dogs)

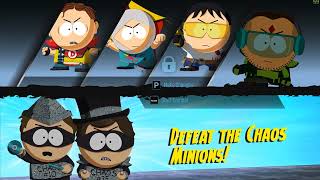
Fighting Chaos Minions
Since there are two groups of enemies on both sides, Toolshed’s Drillslinger will be perfect in damaging multiple enemies at once. The dog minions will serve as the melee fighters while the human minions will perform range attacks. Use AoE attacks then finish them off by using Timefart Pause to land free potshots to critically injured enemies. Don’t forget to heal and buff your allies if needed since there will be another wave of minions you’ll have to deal with after the first one. If you have your ultimate ready at this point, save it for the next wave.

After defeating the first wave of minions, the second wave of adult minions will appear. They have higher HP so make sure to gang up on single targets, connect your AoE attacks, and perform knockback combos whenever you can. Fortunately, they also have very low movement range, making them susceptible to ranged attacks like the Eye Laser of Human Kite and Drillslinger of Toolshed.

Knockbacks are also quite effective against them since it will force them to waste turns moving to their attack range again. Captain Diabetes will be a good tank in this battle, just make sure to use his #2 and #3 powers that will grant him protection as well, minimizing the need for healing often. The sniper minions can be easily taken out so make sure to prioritize attacking them if possible. Defeating the second wave will end the battle, netting you with 75EXP, $1.81 and a handful of scraps.
Further into Chaos Territory
After the battle, open the storage shed in the middle then loot the bag containing a Cloth Strip Mask costume. Next, open the shed to the right and reach the chest on top of the covered truck using the crates to loot the Wasteland Suit and Wasteland Shades costumes from it. Use Timefart Pause to get past the laser and reach the lever that powers it on. Finally, hold the crate of dynamites and move them towards the cracked portion of the wall in the lower right corner then ignite it to blast the obstacle. (Use Timefart Glitch to restore it to its original state if you prematurely detonated it accidentally)

After clearing the path, continue to the next area then get the materials from the container and boxes from the left side. Next, use Fartkour to get past the wall then climb down the ladder to the right. Pop it to make it fall down. You can also use your Pop ability to destroy the cracked cardboard boxes at range to loot their content. Go down the ladder and open the storage shed to reveal two chests. Loot the lower one for materials, then climb back up the ladder on the right. Use Timefart Glitch to return the ladder to its original position then work your way to the left to access the chest containing Face Tendrils costume. Repeat the process to backtrack on the ladder to the right then continue heading east to the next area to trigger a custcene.

After the scene, continue to the right to loot the Enriched Antidote from the bag. You can also buy consumables and materials from the vending machine beside it. Continue to the next area and wait for Coon to drop a movable box from the roof. Move it to the left first and put it in the gap between the flat cardboard box and the pile of others leading to a bag. This will complete the “stairs” leading to the bag. Loot the Maximum Revive Serum from it. Backtrack back down and move the box this time to the gap on the right to create a pathway for you and Toolshed. Cross the other side and continue destroying the cracked cardboard boxes and the cracked portion of the dumpster to the right for more materials. There’s a boss battle ahead so make your preparations. If you don’t have long-ranged powers in the New Kid’s arsenal, make sure to equip them since you’ll be needing it.

General Disarray
After the scene, you’ll be facing the mission’s mini-boss, General Disarray. He can control the machine that spews lava that occupies several tiles. Keep an eye out on the machine’s location; if you see it overhead or near your character, do your best in repositioning them to safety. Similar to the fight with Spontaneous Bootay, the machine has a gauge that automatically fills regardless of whose turn it is so making quick decisions during your turns will also be crucial in this battle.

Your main objective is to defeat the general himself and since he moves around frequently, your best way of dealing damage to him is by using long-ranged and AoE attacks, as well as knockback combos. The Chaos Minions are also immune against Burning so you should take advantage of other status ailments. When controlling your characters, make sure to make them avoid the lava as touching it will automatically inflict the Burning status to them.

Grab every opportunity to either damage the Disarray or finish off a minion as he will actively call for reinforcements, including a tanky Mecha Minion and others that will easily surround and outnumber you. Save your Ultimate as well to be used on Disarray himself. He has considerably high HP but with focused attacks, you should be able to defeat him even if he manages to call in all available reinforcements. Completing this battle will give you the following rewards: 100 EXP, Diabolic Inscription Artifact, The Ginger Sense DNA, and $1.68

New Buddy Power: Sandblaster
After the battle, Super Craig will be trapped in the other side of the lava. Enter Inspection Mode and place the cursor on the lava. Switch to the sandblaster icon then press and hold spacebar to reveal the buddy icon. Head to the buddy icon to use the power. Follow the button combinations on-screen to clear the lava and save the stranded Coon friend. From hereon, you should be able to clear lava any time you want, perfect for some specific spots in town you can’t get into before.


Searching for more clues about Scrambles
After the scene, you can blow away the lava in the entrance of the warehouse. To continue exploring, climb up the ladder to the right to reach the rooftops. You have to reach the top of the water tower but first, you have to knock the chaos minion off it. Pop the cracks to make the kid fall down then remove the lava. Next, you should create a ramp by popping the left crack of the wooden plank in the bottom. If you mistakenly pop the crack to the right, you can turn back time to try again. Once done, use the ramps to reach the top of the water tower. Don’t forget to loot the bag beside the water tank itself. Activate Fartkour when ready.

Once you reach the next rooftop, loot the materials from the cracked cardboard boxes and containers then cross the ladder bridge. There’s an Enriched Antidote hiding behind the pile of boxes in the other side so don’t forget to get it as well. To continue, push the ladder down and go back to ground level. Now clear the path in the middle using the Sandblaster buddy power to continue.

In the next area, enter the shed to the left first then use your Timefart Pause to reach the chest across the electrified puddle to obtain the Trinity of Reflection artifact. The sparkling object to the left is a BP Oil Spill Sample but it’s only a biohazard-type material. Leave the storage shed afterward.

Outside, continue heading to the right while destroying boxes and looting containers for more materials. Engage the chaos minions by the truck and defeat them so you can loot the Infernal Glyphs Recipe from the bag on top of the truck behind them. Continue to the right and open the storage shed beside the Coon to trigger a cutscene and another fight.

Defeat the Meth Heads
This battlefield is filled with explosive barrels that will instantly detonate upon contact, making it possible to trigger a chain reaction. After your team’s full turn, Call Girl will arrive as a combat buddy. You can use her Phone Destroyer long-range attack to detonate the barrels beside enemy positions or target the meth heads directly instead. If you manage to catch them in a chain explosion, you can just pick them off because they’ll be critically injured.


Reach Professor Chaos
After the meth head battle, continue to the right and access the electronic lock. Enter the passcode as displayed on the screen to unlock the door to this warehouse. In the next screen, you’ll be blocked by auto-turrets and some Chaos Minions. Analyze the pipe nozzle beside Toolshed to use the Sandblaster ability to push the fireworks box in the middle of the blockade. Pop it from a distance to detonate the fireworks to destroy the auto-turrets and damage a couple of minions. Land the first strike to engage them in battle to your advantage.

There will still be auto-turrets in this battle but they’re pretty fragile so you can take them out with two attacks. Like before, AoE, long-ranged, and knockback combos work well against these fragile targets.

Try to defeat the first wave of enemies as fast as you can since reinforcements will arrive from the warehouse entrance to the left in the form of two pairs of minions and dogs. Try to defeat this wave as fast as you can as well since a Mecha Minion will arrive as the third reinforcement. Tanks with protection like Captain Diabetes is best positioned on the left since he engage these enemies with minimal assistance. Make sure to save your ultimate against the mecha minion because it has the highest health in the group. You’ll get 75XP, Agonizer of Gaia artifact, and $1.68 for winning this battle.

After defeating the enemies, clear the lava blocking the ladder then loot the bag beside the throne to get more materials. Climb up the ladder then talk to Toolshed to trigger a cutscene to continue with the story.

Defeat Professor Chaos

You’ll be facing Professor Chaos’ ultimate creation: the Mecha Minion Chaos Supreme. This boss fires short-ranged rockets to damage any hero attacking it from melee range and also releases delayed rockets that will land on red-striped tiles. Make sure not to end the turn with a hero standing on these targeted tiles. It also lobs a fireball that scatters lava in pre-selected tiles. This deals AoE damage, causes Burn status, and turns affected tiles to lava until it subsides. Carry at least two characters capable of healing in this battle in case the New Kid doesn’t have healing powers equipped. Captain Diabetes will still be your best melee fighter/tank in this battle.

Like before, use long-ranged attacks to deal damage and carefully move your characters to avoid touching the lava tiles. Due to its size, you can pretty much damage the boss as long as your attack reaches the 3x3 tiles it occupies. After depleting its initial 600 HP, you’ll have to fight its second form.

In the second phase of the battle, the boss will replenish its HP to full again. It will still retain the rocket barrage but will lose the lava launcher ability. You’ll also have to deal with a reinforcement squad of Med Bots from the western side of the field. You should prioritize taking out these soft targets since they will heal themselves and the boss. After getting rid of them, focus on performing ranged attacks since the boss has a wide but short melee range that can deal considerable damage and knock back a few tiles away.

After depleting the second form’s HP, you’ll finally reach the third phase of the battle. The boss’ hitbox will be smaller than before, his range will be longer, and speed can be faster that he can even take two consecutive turns at times. Fortunately, he will also lose the rocket barrage ability and his damage output is somewhat reduced. However, this will be replaced by status-heavy, AoE attacks that can affect multiple characters at once. Long-ranged attacks will help a lot so make sure to deal damage however you can every turn you get. Don’t hesitate to heal as necessary as well. You’ll get 160 EXP, Butter’s Garage Key, Supreme Fist of Chaos (Epic Artifact), Chaos Suit, and $1.78.

After the cutscene, you’ll be back in the Coon Lair. Sit in the chair to begin the debriefing. After a few more scenes, the whole chapter will be complete.

Anything missing from this guide?
ASK A QUESTION for South Park: The Fractured But Whole
Comments for The Hundred Hands of Chaos
Add a comment
Please log in above or sign up for free to post commentsNo comments yet. Tell us what you think to be the first.
Table of ContentsClose
- Walkthrough - 1st Day
- Walkthrough - 2nd Day
- Walkthrough - 3rd Day
- Walkthrough - 4th Day
- Side Quests
- Extras
- Collectibles
Guide Updates
Get notified of updates to this guide
Many of our guides get updated with additional information. To get an email when this guide is updated click below.
 Join us on Discord
Click to close