The Basics
Monster Hunter Tri Walkthrough and Guide
The Basics
Questing
Before you can set out on a quest, you must speak to the Guild Sweetheart at the quest counter in the top-left corner of Moga Village. There are five tiers of quests in the offline mode, ranging from one- to five-stars. You must complete certain key quests in one tier and then an urgent quest to move up to the next highest tier.
After speaking to the Guild Sweetheart, enter a tier and select one of the quests listed to bring up an information pane. Look at the top of the pane to determine the main quest objective and the bottom of the pane to determine the objective of any subquests. You'll also find listed the map the quest takes place on, the amount of time allotted for the quest, the monetary reward for completion, the quest fee for accepting the quest and the condition of the quest environment.
Once you've accepted a quest, you can set out by heading to the end of the pier through the gate to the left of the quest counter.
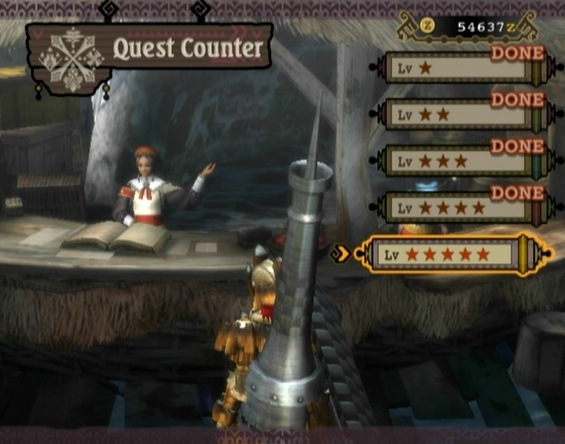 There are five quest tiers in the offline mode. |
A quest will end as soon as you complete the main quest. You can complete subquests (if there are any) to earn additional rewards on the post-quest reward screen and additional supplies during the quest. If you're interested in completing subquests, be sure to do so before completing the main quest.
Your reward pool is reduced each time you fall in combat while on a quest. Fall three times and you'll fail the quest. Fail a quest and you'll lose all of the items you used during that quest, but keep any items you picked up. You can abandon a quest by selecting “Abandon Quest” from the Hunter menu. Abandon a quest and any items you used while on that quest will be returned to you and any items you picked up will be lost.
Quest Types
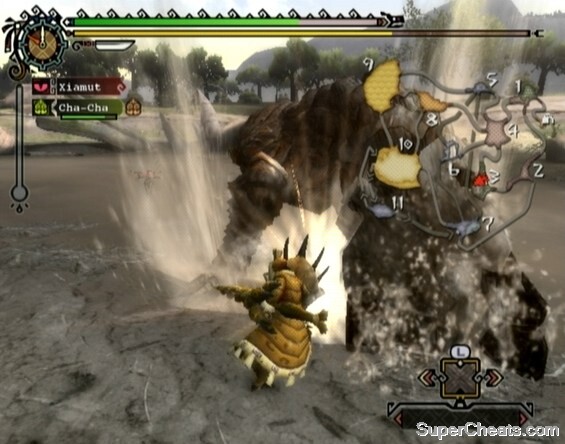
There are three types of quests: hunting, gathering and capture.
The goal of a hunting quest is to kill a set number of small numbers or fell one large monster. When you're hunting a large monster, you can either kill or capture your target to complete the quest. Killing a monster allows you to carve it three or four times. Capturing a monster during a hunting quest will yield a better chance of obtaining rare items on the post-reward screen. If you're hunting online, be sure your group agrees on whether the target is to be captured or killed.
There are three types of gathering quests: item gathering, egg carry quests and Powderstone delivery quests. Item gathering quests are the most straightforward. Your goal is to simply gather a certain number of an item at gather or mining spots and then deposit them into the red Delivery Box at base camp.
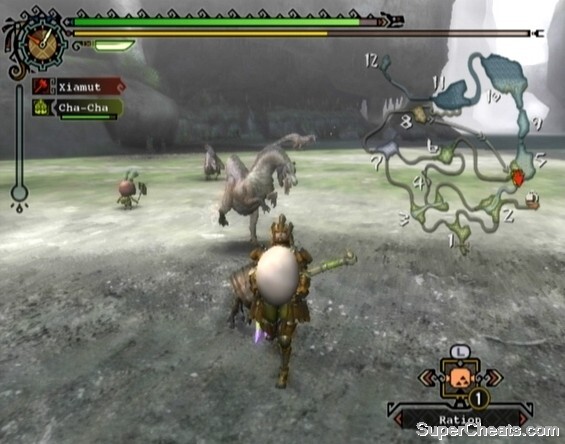 Egg carry quests require you to literally carry each monster egg back to camp. |
Egg carry quests are a bit different. Though a monster egg is placed in your inventory when collected, your hunter must literally carry the egg from the monster's nest back to Base Camp and deposit it in the Delivery Box. Your hunter is left very vulnerable while holding an egg. If an enemy hits you or your hunter's stamina reaches zero, your hunter will drop and break the egg. As such, you'll have to sprint past the monsters in each area on your way back to camp and avoid getting hit -- all while keeping an eye on your hunter's stamina bar.
Powderstone quests are essentially a hardcore version of the egg carry quest. As with the eggs in the egg hunt quests, your hunter must carry the Powderstone back to Base Camp without taking a hit or running out of stamina. Powderstones are hot, so your hunter will continuously take a small amount of damage while carrying one. As a result, there is more to worry about than just dodging monsters: you have to make it back to Base Camp before the extremely hot Powderstone completely drains your hunter's life bar!
To make matters worse, Powderstones explode when dropped, dealing a large amount of damage to anything caught in the blast. So, if the extremely hot Powderstone is about to kill your hunter, dropping it certainly won't do you any good.
The goal of a capture quest is not to kill the target monster, but to weaken it until it's limping and then use a trap and Tranq Bombs to capture it.
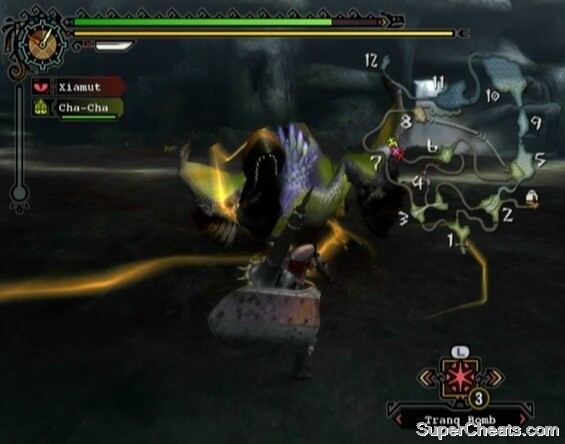 Use Shock Traps or Pitfall Traps and Tranq Bombs to catch weakened monsters. |
The Supply Box for any capture quest will hold an EZ Shock Trap, but it's always a good idea to bring an extra trap with you to avoid blowing the whole thing by setting your one and only trap at the wrong time. You can make a basic Pitfall Trap by combining a Spider Web and Ivy to make a Net and then combining the Net with a Trap Tool (buyable at the market) to make the trap. You can make a Shock Trap by combining a Thunderbug with a Trap Tool.
Weapons
There are six weapon types: Sword & Shield, Great Sword, Lance, Hammer, Long Sword, Switch Axe and Bowgun.
It is best to stick with melee weapons offline. If you do wish to use a Bowgun, note that you won't find any Bowgun discussion in this walkthrough.
The Sword & Shield, Lance and Great Sword are excellent weapon types for beginners. If you plan on following this walkthrough, it is recommended you acquaint yourself with these three weapon types in particular – especially the Lance. All three of these weapon types can block, which is helpful when you're first learning a monster's move set.
 The strong defence of the Lance makes it a good weapon type for beginners. |
The Lance is the easiest weapon type to use underwater, so definitely opt for one if you're having trouble beating Royal Ludroth, Gobul or Lagiacrus.
Every weapon has an attack score and a sharpness gauge. Note that attack scores cannot be used to compare the effectiveness of two weapons of different weapon types. For example, you couldn't look at a Great Sword that has 528 raw attack and say it is better than a Lance that has 368 raw attack. In fact, the damage the Lance with 368 raw attack is capable of dealing overtime makes it a more effective weapon than the Great Sword with 528 raw power.
The sharpness of a weapon is indicated by the sharpness gauge, which is capable of displaying seven different colours. From dullest to sharpest, these colours are: red, orange, yellow, green, blue, white and purple. You won't encounter anything higher than green level sharpness in offline play, but that's nothing to worry about. Weapons with blue, white and purple sharpness are only available in high-ranks quests in the online mode and only on very rare weapons with hard to find materials.
A weapon's sharpness is one of the determinants of how much damage the weapon deals with each swing. In the field, the sharpness of your weapon is indicated by the sword icon next to the clock and below your hunter's health and stamina meters at the top of the screen. If your weapon has green sharpness, ensure that sword icon is always glowing green, as this indicates your weapon is performing at its full potential. The sharpness also determines what a weapon can cut through. For example, while a weapon with green sharpness can slice through the leg of a Qurupeco uninterrupted, a weapon with yellow sharpness will bounce off.
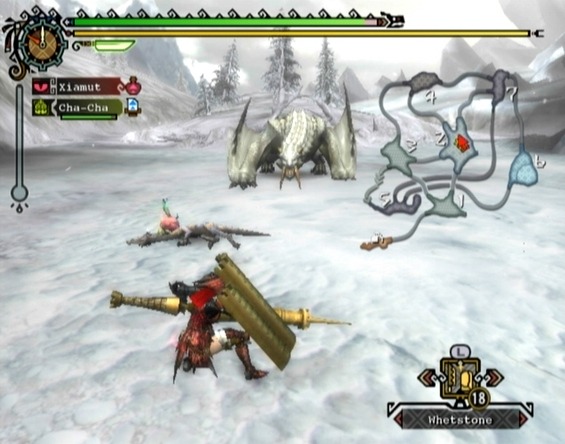 Whetstones sharpen dulled weapons. |
Use a Whetstone to sharpen a dulled weapon. Be careful when using a Whetstone because the weapon sharpening animation is quite lengthy. This can become a big problem when there's a huge, scaly wyvern breathing down your neck. There are Mini Whetstones included in the Supply Box for each quest, but it's best to carry your own stock of Whetstones in your inventory at all times. Whetstones can be bought for cheap at the market in Moga Village.
Some weapons also boast elemental damage. Each monster is weaker to certain elements than to others, so using a weapon that deals elemental damage of the type a monster is weakest to can significantly shorten the length of a battle.
Affinity determines your hunter's chance of scoring a critical hit with each strike. There is positive Affinity, which increases your hunter's chance of scoring a critical hit with each strike, and negative Affinity, which increases the chance of your hunter's strike dealing less than 100 per cent of the damage it normally would.
Armour
There are two classes of armour: Blademaster and Gunner. As you might expect, Blademaster armour is used by hunters who wield melee weapons (i.e., Sword & Shield, Great Sword, Lance, Hammer, etc.) and Gunner armour sets are worn by hunters equipped with Bowguns.
Each piece of armour has a defence stat, elemental resistances and skill points. The defence stat of an equipped piece of armour contributes to your hunter's overall defence, which determines how much damage a monster's attack will deal.
You can increase the defence of a piece of armour using Armor Spheres. Armor Spheres can be mined or received on the post-quest reward screen. Speak to the Wyvern Artisan and select “Upgrade Armor” under the Armorcraft section. Upgrading a piece of armour requires spheres and a bit of zenni. The upgrade requirements for a piece of armour will increase each time you upgrade it.
 Armour reduces the damage your hunter takes. |
Elemental resistances come into play when a monster uses one or more attacks that inflict elemental damage of a certain type. Most complete armour sets have one or more positive elemental resistance and one or more negative resistances. Take note of this when facing certain monsters, as wearing an armour set with a negative elemental resistance can make fighting certain monsters dangerous (e.g., facing Rathalos while wearing a full set of Gigginox Armor, which carries -20 Fire elemental resistance).
Armour Skills
There are positive and negative skill points. All of the skill points on the armour pieces your hunter is wearing are added up on a skill tree, which can be viewed in the Status section of the Info menu (third pane). There are many different skill trees (e.g., Health, Attack, Rec Speed, Expert, etc.) and each skill tree can activate one or more skills. These skills can be beneficial (e.g., Health 50) or detrimental (e.g., Defense Down (Small)).
A skill is activated when its skill point threshold is reached. For example, the Attack Up (M) skill is activated when the combined Attack skill points on the equipment your hunter is wearing is equal to 15 or more. Due to this, the Attack Up (M) skill would be active on a hunter who is equipped with a full set of Rathalos armour, as the combined Attack skill points of each armour piece is 17.
 Equipped armour pieces, Decorations and Charms all contribute skill points. |
Decorations (see the Wyvern Artisan in Moga Village) can be slotted into individual armour pieces to increase the skill points gained from that armour piece when equipped. Not all armour pieces have empty slots, but some have one or more.
A hunter can also equip a Charm, which is an accessory separate from other armour pieces. Equipped Charms only offer additional skill points. Together, Decorations and Charms can be used to reach a higher skill point threshold. For example, the hunter wearing a full set of Rathalos armour could slot two Attack Jewel decorations, which each carry a 1 Attack skill point, and a Rook Talisman with 2 Attack skill points to bump the Attack Up (M) skill to Attack Up (L).
Charms and Decorations can also be used to remove negative skills. For example, a Hunter wearing a full set of Barroth armour set will activate the Critical Eye -1 skill, which reduces Affinity by five per cent. This is because the Expert skill points on each piece of the Barroth armour set when combined is equal to -10. Because this active skill is so close to the skill point threshold, it can be easily removed by simply slotting an Expert Jewel (which carries one positive Expert skill point) on one of the armour pieces, thereby bringing the Expert skill point total for the armour set to -9 (one short of the -10 required to activate the Critical Eye -1 skill).
The Armour Skill system can be difficult to grasp at first. For casual use, all you really need to understand is that the skill point thresholds that activate skills start at 10 and move up in increments of five. That is, having 10, 15 and 20 skill points on certain skill trees will activate a positive skill; the higher the threshold, the more effective the skill. Likewise, having -10, -15 and -20 skill points on certain skill trees will activate a negative skill; the lower the threshold, the more detrimental the skill.
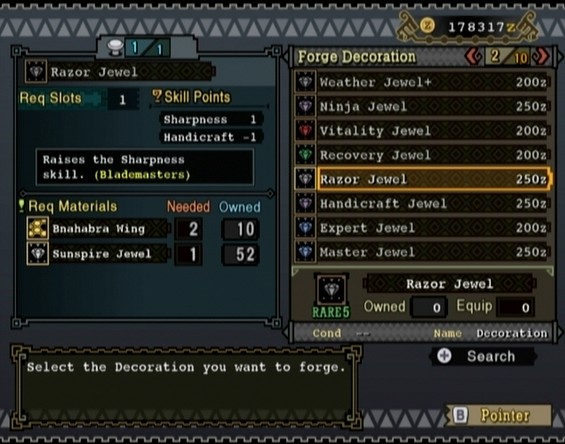 See the Wyverian Artisan about forging and attaching Decorations. |
As long as you're aware of the skill point thresholds, you can use Charms and Decorations to your advantage. Whenever you equip your hunter with a brand new set of armour, check your hunter's skill tree via “Status” on the Info menu and note the skill points and active skills displayed there. If there are negative skills (red) in the Active Skills box, determine the amount of negative points in that skill tree and see if you can't deactivate the skill by equipping a Charm or slotting one or more Decorations in the empty slots on your hunter's armour set.
Note that not all skill trees have three positive thresholds and three negative thresholds. Some simply have one, such as the Tremor Res skill tree, which activates the Tremor-Proof skill at 10 Tremor Res skill points. Others have only one positive skill and one negative skill, such as the Oxygen skill tree (Oxygen Up and Oxygen Down). Every other variation exists and there are a huge amount of skills and skills trees, so your best bet is to refer to an external source.
You won't find a complete list of armour skills in this guide, but you can over at the Monster Hunter Wiki: http://monsterhunter.wikia.com/wiki/MH3:_Armor_Skill_List
Stamina
Stamina is represented by the yellow bar below your hunter's green health bar at the top of the screen. You use up stamina gradually as you sprint and each time you block or use an evasive manoeuvre.
The length of a hunter's stamina bar will decrease at a fixed rate over time. Rations and cooked meat (Rare Steak or Well-Done Steak) can be used to increase the length of your hunter's stamina bar. A hunter's stamina is set to the same length as his or her default health bar at the beginning of each quest, but can be increased in length twice with Rations and/or cooked meat.
 Sprinting, evasive manoeuvres and blocking all use up Stamina. |
It's important to keep your hunter's stamina bar at its maximum length. A small stamina bar could lead to a disastrous outcome, such as your hunter being unable to sprint away from a charging monster, or a monster breaking through your hunter's guard. A hunter whose stamina bar depletes completely when sprinting will stop to catch his or her breath for a few seconds. This animation leaves your hunter completely vulnerable, so cease sprinting whenever your stamina bar is in the red and your hunter is stumbling about.
Large Herbivores such as Aptonoth tend to yield Raw Meat when carved. Raw Meat must be cooked before it can be consumed. Cooking requires a BBQ Spit or a Double BBQ Spit.
Cooking meat is simple. First, you'll need at least one piece of Raw Meat in your inventory. Then, with the BBQ Spit selected in your inventory, press the A button to start cooking. Keep an eye on the colour of the meat while it cooks. There are four different colours: the default (Raw Meat), light brown (Rare Steak), golden brown (Well-done Steak), and black (Burnt Steak). The meat will be light brown after the tune and will turn golden brown for a split second before turning black.
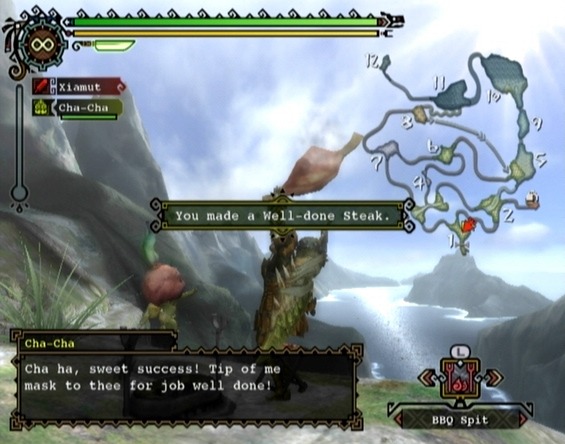 Cooking Well-done Steaks consistently is easy once you get the timing down. |
To cook a Well-done Steak, you must press the A button while the steak is golden brown to take it off the spit. The meat will turn golden brown about two seconds after the tune stops. You'll get a Rare Steak if you're too quick and a Burnt Steak if you're too slow. It may take a few attempts to get the timing down, but with a little practice you'll be able to cook Well-done Steaks consistently and with ease.
The Double BBQ Spit is a one-star Rare Commodity offered by the Argosy Captain when he's in Moga Village (as long as you've requested he visit the Farmer Realm). You can obtain tradeable Rare Commodity items by killing boss monsters in Moga Woods and then reporting back to the Chief's Son for reward. The Giant Skull commodity is a common reward for killing a Great Jaggi in Moga Woods. Once you have a one-star or greater Rare Commodity, you can trade it to the Argosy Captain for a Double BBQ Spit.
Cooking with the Double BBQ Spit is different from cooking with a standard BBQ Spit. For one, you're cooking two Raw Meats simultaneously when using a Double BBQ Spit. The controls are a bit different as a result. You can use the Double BBQ Spit to cook a single piece of meat, like the standard BBQ Spit, or you can keep the R button held down to cook multiple Raw Meats in a row. Keep the R button held down and press the A button about one second after the jingle stops (when the first piece of meat turns golden brown). Your hunter will continue putting Raw Meat on the spit until your inventory is spent or you release the R button.
Cooking Raw Meat with the BBQ Spit and Double BBQ Spit
Status Ailments
Some monster's attacks are capable of afflicting your hunter with a status ailment. These ailments cause one or more negative effects that will persist until the ailment runs its course or you use a cure. Each status ailment is listed below along with one or more cures (if a cure exists).
Poison
Effect: Gradually reduces health. Effects last for a set period of time.
Cure: Antidote, Bitterbug (50% chance), Antidote Herbs (50% chance), Herbal Medicine
Stun
Effect: Disables movement for a set period of time.
Cure: Spin the Left Stick and tap the A button (Classic Controller)
Snowman
Effect: Makes movement sluggish and disables weapons and items.
Cure: The effect lasts for a set period of time, or until your hunter is attacked. Rapidly rotate the Left Stick to break free or use a Cleanser.
Paralysis
Effect: Numbs your hunter, making movement impossible.
Cure: The effect lasts for a set period of time, or until your hunter is attacked.
Sleep
Effect: Makes your hunter drowsy and eventually fall asleep.
Cure: The effect lasts for a set period of time, or until your hunter is attacked. Sleep can be prevented if you use an Energy Drink while your hunter is still drowsy (just before he or she falls asleep).
Muddy
Effect: Makes movement sluggish and disables weapons and items.
Cure: The effect lasts for a set period of time, or until your hunter is attacked. Rapidly rotate the Left Stick to break free or use a Cleanser.
Life Drain
Effect: Giggi suck your hunter's blood, gradually sapping your health.
Cure: Roll
Felvine-Scented
Effect: Makes your hunter more susceptible to Felyne and Melynx attacks. Effects last for a set period of time.
Cure: None
Light/Severe Fireblight
Effect: Gradually reduces health.
Cure: Roll once while in water or repeat evasive manoeuvres to recover.
Light/Severe Iceblight:
Effect: Dramatically reduces your hunter's body temperature and greatly increases stamina expenditure.
Cure: Icethaw Pellet
Light/Severe Waterblight
Effect: Inhibits recovery of stamina.
Cure: Waterblock Seed
Light/Severe Thunderblight:
Effect: Increases your chances of being stunned when a monster attacks.
Cure: Stormsender Seed
Light/Severe Dragonblight
Effect: Saps your hunter's strength and lowers Affinity.
Cure: Dragonfell Berry
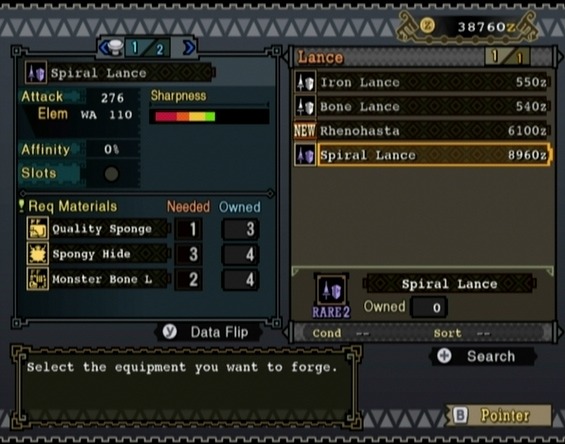
Equipment Forging
The primary way to obtain weapons and armour in Monster Hunter is by crafting. To craft a weapon or a piece of armour, you must provide the necessary materials (and pay a set amount of zenni) to a blacksmith who will use it to create the weapon or armour piece.
Much of the materials used to craft weapons and armour can be obtained by hunting and carving monsters. The types of materials used in crafting are monster bones and minerals (e.g., Iron Ore and Machalite Ore) mined at mining spots. Some materials are quite rare, such as the Deep Dragongem needed to craft the chest piece in Ceadeus's armour set. As a result, obtaining some of these materials will require you to “farm” the monster that drops the item you desire until you obtain one.
 Forging equipment requires material and zenni. |
You can upgrade a piece of armour with an Armor Sphere to increase the defence stat of that armour. Upgrading weapons requires additional materials and more zenni. There is a huge amount of weapon lines in the game and many branch at points.
Note that materials with names that end with a plus symbol (e.g., Spongy Hide ) can only be obtained from monsters in the high-rank quests in the online mode.
More Monster Hunter Tri Stuff
No comments yet. Tell us what you think to be the first.