- Recruit Archangel
Mass Effect 2 Walkthrough and Guide
Recruit Archangel
Meet Aria T'Loak
With that done, you can now head for Afterlife. Proceed through the corridors and open the door ahead. Right in front of you should be Afterlife.
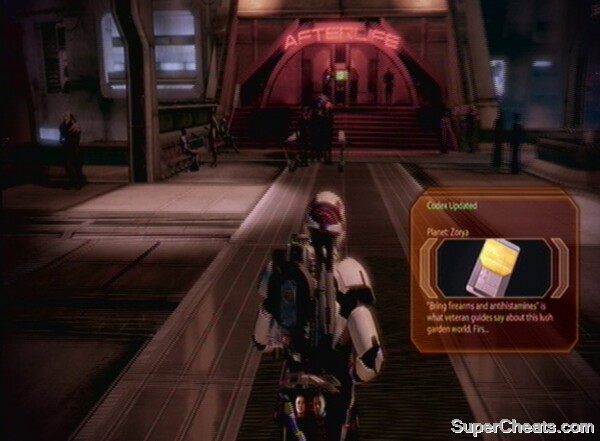 The entrance to Afterlife. |
Take some time to listen to the humorous conversation between a Human and an Elcor bouncer, whose lack of emotion can lead to some hilarious comments. Head inside the club when you're ready by activating the main door.
Afterlife
As Aria knows you are coming you will be allowed in and not kept outside like the other Humans. Once inside the club there are a few things to do, including a few side-quests (see below):
Talk to Aria
Go up the steps in the corner and introduce yourself to the blue-headed female. She is on a platform sticking out over the dance-floor.
Aria is an Asari who was once a newcomer on Omega but has since throttled it for all she can get. Ruthless and efficient, she is not to be trifled with. Having heard that you are the infamous Human Spectre, but back from the dead, she wants to establish your identity. Go along with her questions, and ask her about Archangel, one of the people in the Cerberus dossier. She'll tell you that due to the problems this guy has been causing, a mercenary army is currently attempting to take him down. The obvious way for you to get to him is to join up with this force (which is said to be struggling) and meet him that way.
You should also ask about Mordin Solus, gathering any information you can. Aria will tell you that he's down in the quarantine zone which is currently heavily guarded. For now though we'll go after Archangel, as the people we need to talk to for this are close by.
Join the Mercenary Force
Go back down the stairs and locate the Mercenary Recruiter.
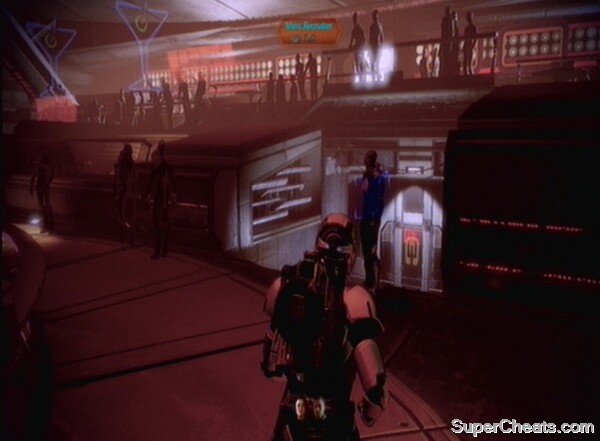 Talk to the Mercenary Recruiter. |
Once allowed inside the recruitment room you'll have the ground rules and terms explained. You can proceed to ask questions about the plan of attack as well as how to get there. A member of the Blue Suns will pilot us to the area from the Transit Hub.
As you are leaving a kid comes in looking to join up. To earn Paragon points, press LT when prompted to ensure he doesn't sign up.
Before you leave you may want to finish the two side-quests available in Afterlife, but they will still be available later.
Travel to Archangel's hideout
When ready, head out of the club. As you are in the final corridor leading outside there is one more chance to earn some Paragon/Renegade points. Speak to the Batarians lurking at the side. Deal with their leader peaceably or forcibly as you see fit.
When outside and near the entrance to the corridors leading to the Normandy, turn right to find the Transit Hub (use your map [Click the right thumbstick on Xbox 360] if you get lost). Speak to the Blue Suns Driver when you get there, and he will take you to the mercenaries.
You can pick your party before embarking on what is essentially an action mission.
Get some information from the Batarian that greets you when you arrive. You will learn that Archangel is holed up in a building with a vantage point over a bridge. That is the only way to get to him (there is a basement but it is filled with rubble after Archangel blocked the route) and any mercenaries are getting picked off. Your job is to distract Archangel while a team try to work their way around the back stealthily. The mercenaries also have access to a gunship, but Archangel took it down and it is being repaired.
Speak to Sergeant Cathka
Pass the mercenary barricade on the right and follow the path to the door at the end. In here, pick up the datapad – this gives details about an attempt to take out Aria being planned in the near future by the mercenaries. If you take it to her, she'll be very grateful – this is one of Omega's side-quests. Listen to some of the conversations, before moving out. Head out of this room and into the next area.
There are three doors. The one on the left is vital. Inside is a mech-suit. Hack the 'Heavy Mech Diagnostic Station' to change the targeting sensors to attack the mercenaries as opposed to Archangel.
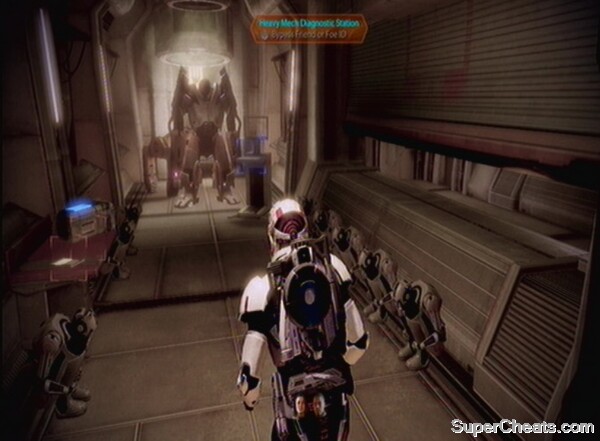 Hack into the mech suits. |
Pick up the Refined Element Zero and hack the Eezo Smuggling Accounts to get everything you can from this room.
Back to the three doors. The one straight ahead from where we initially entered the corridor contains Garm, a member of the Blood Pack. Ask him some questions to add to your Codex. The door to the right is the way ahead, and contains a pad with details of bank accounts to hack. Continue onwards and hack to the door to the right. Interact with the gun to gain a Sub-machinegun upgrade, steal the Blue Suns Gunrunning Accounts and nab the Power Cells on the desk. There is also a med station by the door.
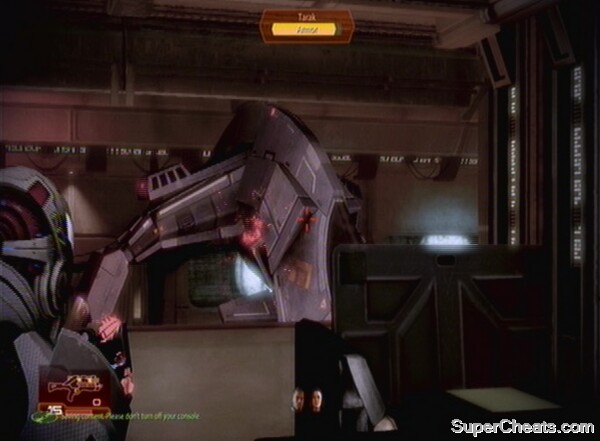
Head back to the main room and speak to the Freelancer by the barricade. He'll direct you to Cathka, but you can go through the other door and follow the corridor to locate the leading hierarchy of the mercs. Speak to Tarac and he'll palm you off onto a female Human, Jentha. Get some additional Codex information from Jentha, and then go to talk to Cathka (or more accurately, his assistant) in the previous room by the gunship.
You have the chance to use a Renegade action once you get to speak to Cathka and he explains the role of the gunship and his work in repairing it. This allows you to shock him with the omni-tool, disrupting his work on the gunship and making a later encounter with it significantly easier. It will give you some hefty Renegade points though, so think carefully about your decision. The gunship is not too hard to take down, but obviously the easier the better. The battle will soon start.
Defend and Meet Archangel
As soon as the cut scene ends and Shepard states that we'll be giving them 'a surprise of our own', you are thrust into the action. You don't have to shoot anyone at this point, but they are marked as enemies and you can take them down. Similarly, Archangel has his own health-bar and, should it fall too low, you will have failed. I recommend engaging enemies from the off – as long as you pick off stragglers and don't reveal your true intentions to the entire group, they will not return fire for a while.
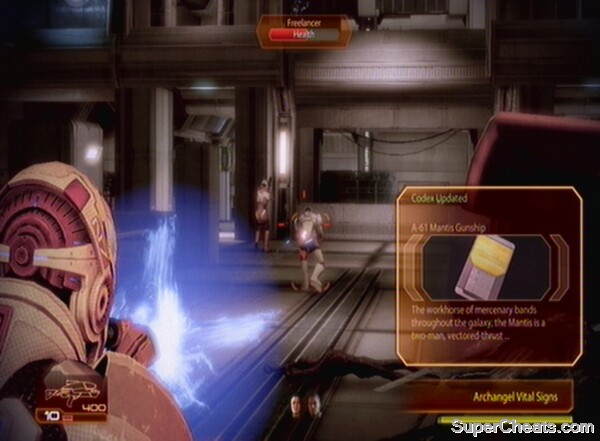 Turn on the mercenaries. |
Take out the two nearest you and proceed inside. Here you will find a Freelance Bomb Tech – aiming to set off explosions to kill Archangel. I suggest continuing on into the main room to take out the enemies directly attacking Archangel first – otherwise the Bomb Tech may alert his friends about your change of allegiance. Deal with the enemies on the stairs and in the main hall, then pick off the Freelance Bomb Tech. You can blow up the bomb by shooting it, but you may wish to save that for later when it would potentially catch more targets.
Once on the upper floor kill the mercenary hacking into Archangel's door and he will open it for you. Continue inside and enjoy the cut scene.
Defend Archangel
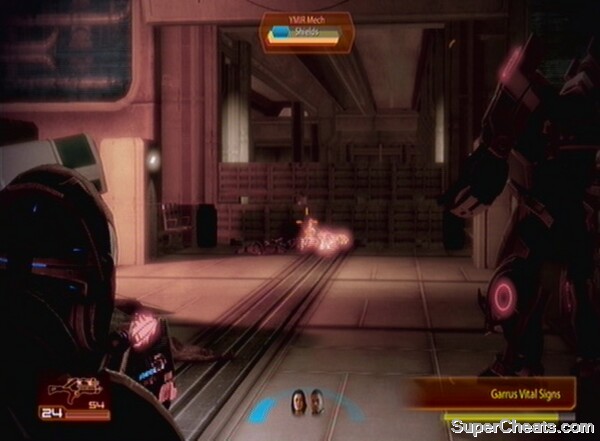
Having greeted an old friend, it is revealed that more soldiers are on their way. The main idea here is to first help Archangel with the enemies on the bridge. Be sure to pick up the Vindicator Battle Rifle from the seat just behind where the cut scene ends. Return to the balcony and take out the advancing LOKI Mechs using a combination of weaponry (Sniper Rifle is best here) and the Pull and Warp abilities. Once they are down the real mercenaries will come across the bridge. These are harder to stop – primarily due to their massive numbers. Stay upstairs and snipe until they get underneath the balcony and you lose sight of them. You may be able to keep them back until the next stage, in which case you can remain with Garrus.
With all the enemies down, Jaroth will send in the Mech Suit we tampered with earlier. Revel in the results, go downstairs and push up next to the Mech to protect it (so it can continue to deal heavy damage on the mercenaries for as long as possible) and to nab some kills yourself.
 Use the hacked Mech Suit to take out the final enemies. |
Note: if you didn't hack the suit this fight is much harder. Use the usual cover and shoot tactics, as well as Miranda's Overload ability to take out the Mech's shield. The best option is to attack from extreme range, out of reach from its most deadly weaponry.
When all of the grunts are down (your Mech will probably have been destroyed by this stage) Jaroth will emerge. He has Shields and Armour but should put up little resistance if you engage him from behind cover at a sufficient distance.
If the mech is on your side, this battle is much easier – try to keep it alive for as long as possible.
With the boss destroyed go and collect all the ammo now strewn around as you will no doubt be running low. With that done, return to Garrus for an update. Remember to collect the Omni-tool Power Boost Upgrade at the bottom of the stairs, the medi-gel at the top and hack the wall safe in the room to the left (when going upstairs) while we have a lull in combat. There is also medi-gel in Garrus's room,
Stop the Mercenaries coming through the Basement
The cut-scene when you speak to Garrus will reveal a little more of what he has been doing since the first game, but more importantly will be interrupted by mercenaries breaking through the basement – they have cleared a path into the building. You can now choose to leave Garrus on his own, or leave a team member with him. Doing the latter will earn you Paragon points, and help to ensure his protection. When the decision has been made, move down the stairs and double back on yourself at the bottom, entering the door.
You can access the Medical Station in here, but move on quickly. You need to run down the steps towards the open door ahead. The green panel to the right brings some security shutters down that will keep the onrushing mercenaries at bay. It takes about ten seconds to shut, however, so you need to stand there and guard it (if anything gets in the way it will terminate the command). As soon as you push the button, enemies will emerge from the door behind. Note that one of the intruders is a Blood Pack Warrior. These guys have heavy armour and carry shotguns, always attempting to get up close to you – they can be deadly at this range. Focus on keeping him at bay first – when the shutter comes down he’s history.
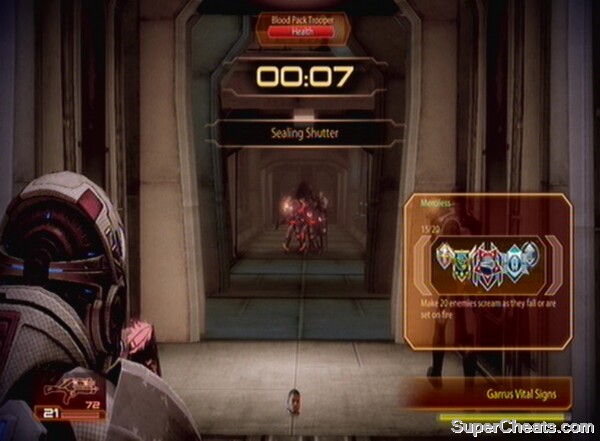 Shut out the mercenaries. |
With the first shutter sealed, head through the door to the left. Enemies have already got into this room, so you need to be careful. Take out the first wave – use Incendiary ammo to make things easier. You then need to run as fast as you can and as far forwards as you can before the next wave arrives – get close to the button, but don't risk being up too close to an incoming Blood Pack Warrior's shotgun. They will also deploy Varren – attack dogs aimed to bite up close and flank your squad. Use Pull to take these enemies out of the equation, should they get too close.
Once you get down to the last enemy of the second wave, begin to move up, killing him as you come near the shutter. Press the button as the third wave emerges and guard the area underneath until it is down. Keep the enemy suppressed and they'll stay in cover.
Note: Time is important here as Garrus continues to take fire – keep an eye on his health bar as an indication of how much time you have left. It helps if you did well in the first section and he was high on health following that.
With this done, go back into the previous room, collecting ammo on your way. You will see a door with a green light on straight ahead. Venture inside. Unlike the other two shutters, this protects a narrow and circuitous corridor. Fight your way over the barricades, vaulting each one as you come to it. The last barricade is by the door. Clear the wave that approaches and then vault over to initiate the shutter. Vault back over the barricade and defend the area underneath it.
Close all the shutters.
Congratulations, but it's not over yet.
Fight back to Garrus
You need to get back to Garrus quickly to prevent his health from falling. Garm is now on the scene and his Blood Pack mercenaries are here to cause trouble. You have been handily warped back to the main room. You can use the bomb if you left it from earlier. Deal with the enemies in here as quickly as possible so you can fight up the steps and to Garm and Garrus before it's too late. Use Incendiary Ammo on the Blood Pack Troopers, Pull on the Varren, and Overload and Pull on the Blood Pack Warriors, depending on your class.
You should be able to see enemies moving up the stairs early on – you must get to them quickly. With Garm down, investigate the Footlocker and then speak to Garrus.
Escape the Facility
All that's left now are the Blue Suns mercenaries. Unfortunately, once the conversation with Garrus ends they will also hit you with the gunship. As long as you stay in cover you are relatively well protected, but you also need to watch out for the ground soldiers that are unloaded. The gunship will rarely attack at the same time as the mercenaries, so use that to your advantage. In the first wave Jentha will attack, replete with shields and armour. Focus on her, using Overload to get rid of her regenerative shield. The next wave will come from the ground floor. Use the open plan design of this level to look over the side and get a flanking angle on the stairs. Take out the mercenaries, using Pull to stop any getting too close to the top. If you take a position at the top of the stairs, you will be able to catch the mercenaries in crossfire with Garrus as they approach.
With the ground troops dealt with, the gunship will return.
 Watch out for the gunship's explosive weaponry. |
Even if you didn't use the Omni-tool to disrupt the gunship's progress earlier, you still should be able to beat it as long as you don't get too close and allow your health to recharge when low.
Once it moves away from the first window, more mercenaries will drop in. Deal with them and it will reappear. This pattern will continue until you finish off the gunship – it only has Armour, no health, so shouldn't take too long to destroy.
Defeat the gunship and its mercenary cohorts.
With that the mission is complete and all attention turns to Garrus and getting him back aboard the Normandy.
Party Member Acquired: Archangel/Garrus
Normandy
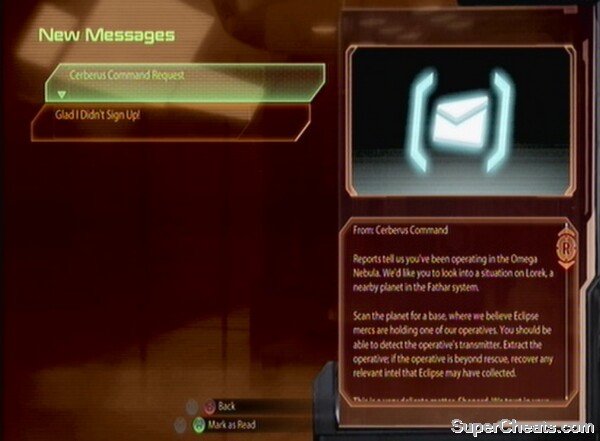
Back on board the Normandy, Garrus is healing nicely. You can take this time to explore the ship and check out the new conversation options, deliver the Serrice Ice Brandy to Dr. Chakwas (if you have done that side quest), or head straight back to Omega using the Galaxy Map (select the Dock option). Garrus will also want to talk to you at the Forward Battery (Deck 3). Read your Personal Messages to receive some titbits about your recent activities on Omega (most notably from the kid you may have stopped from fighting against Archangel) as well a new assignment from Cerberus to investigate a nearby planet.
 Get an update from your Personal Terminal. |
Has anyone experienced endless waves of blue-suns soldiers during the "Escape the Facility"? They come in at the same place as Jentha, but they just don't stop. I'm not even getting troops coming in at ground level - just endless waves of 3 blue suns soldiers.
Very detailed walkthrough of recruiting Garrus mission, very well written and interesting to read through, well done and thanks!! Never been a walkthrough user unless absolutely have to (if I cant get past a point in a game or something like that) but after reading this small part I might have a look at the entire walkthrough. Very well done