Displacement
Gears of War 2 Walkthrough and Guide
Gears of War 2 Guide - Act 3: Gathering Storm
Chapter 5: Displacement
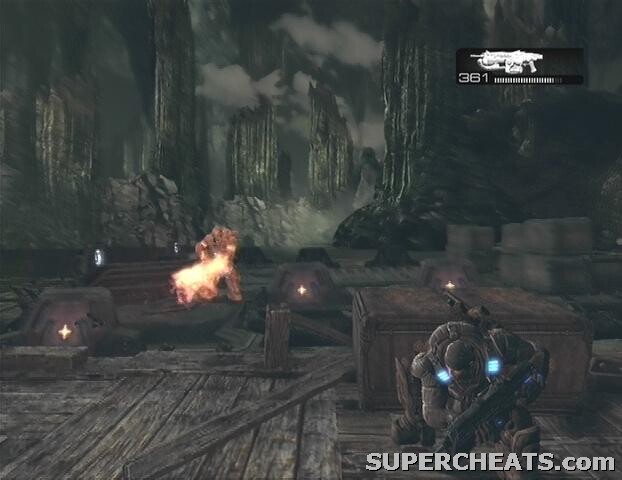
Cross the bridge and make your way to the bottom of the slope. You'll soon encounter a Theron Guard, which is a tougher version of the Drone that carries a Torque Bow. The bolts from the Torque Bow stick into flesh and surfaces and then explode, so keep your head down if you spot a Theron charging a shot (you'll be able to see an orange glow at the front of the bow). The Theron will have to release the bolt eventually whether he hits someone or not, so use the time after he fires to move in closer or take him out. Bolts that explode near you still deal damage, so roll out of the way if one sticks into a nearby wall. You're safe if a bolt sticks into the front of your cover, though it may unsteady your aim when it explodes.
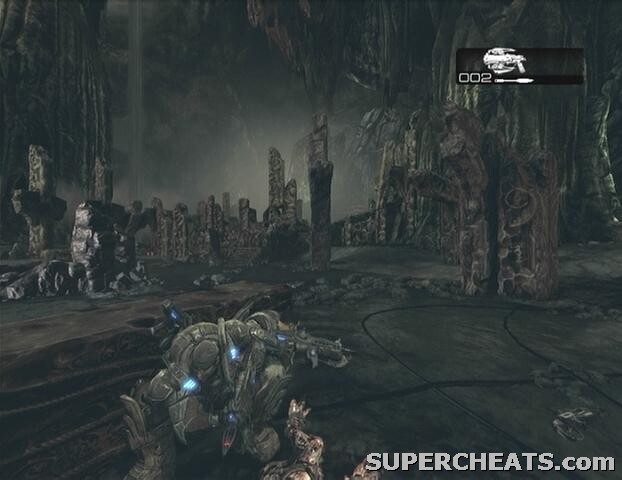 |
Pick up the Torque Bow once the Theron's down if you wish, and then continue along the path. Some Grenadiers, Wretches, and Theron will ambush you up ahead. There's a gunboat in the nearby waters, but ignore it for now. Remember to stay down if you see a Theron charging a shot in the distance. Be ready to melee the Wretches away should they reach you.
There's an ammo container at the back of the first part of this area, so be sure to pick it up before moving on. The next area contains a Flamer, some Tickers, and a Kantus. At this point you must destroy the Locust gunboat. Luckily, the gunboat appears to be transporting a cache of explosives for whatever reason, so hit one of the tanks to set it off, and then watch as the boat is destroyed.
 |
Collectible (1/1): After destroying the Locust gunboat, look around the area for some steps. Climb to the top of these steps and you'll come to a bench. The collectible (Stranded's Journal) is on the ground below this bench.
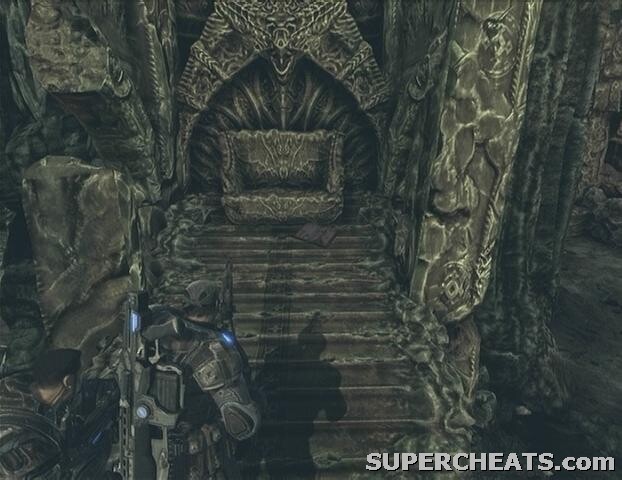 Collectible 1/1 | 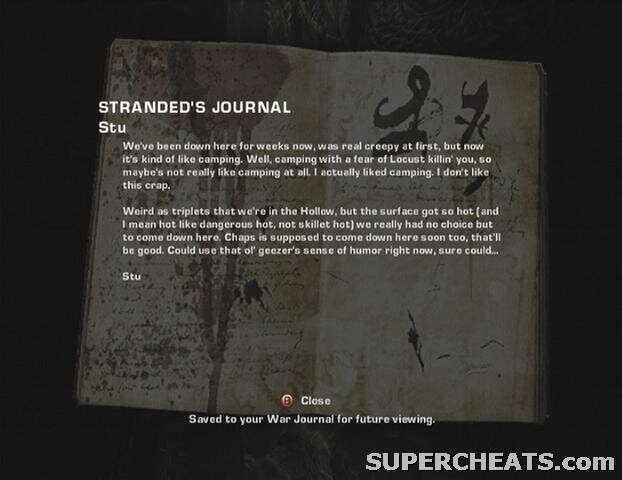 Stranded's Journal |
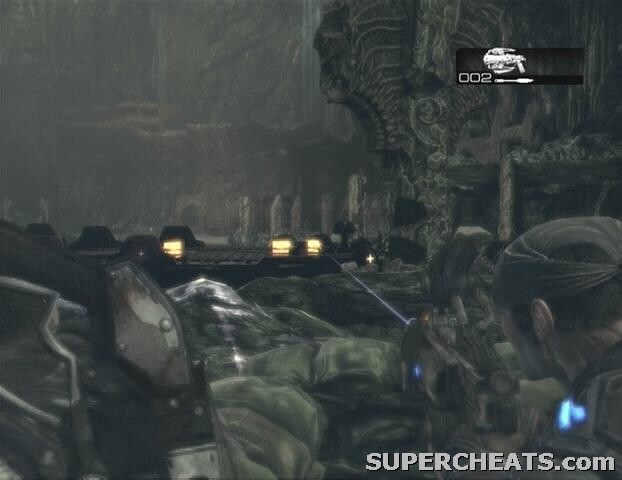
Step onto the wrecked gunboat and cross over to the other side. A short cutscene depicts a gunboat docking up ahead, with some more enemies stepping off. Now there are a couple of Drones, a Kantus, and some Tickers on the pier, as well as another gunboat in the nearby waters. Take cover by the pillar and low wall on the right to get the best coverage. Be ready to melee away or blast the Tickers if they get close.
When the Kantus and Drones have been dealt with, move up and take cover behind one of the collapsed pillars because a Bloodmount will soon appear. Kill off the Bloodmount, grab the ammo box by the pillar, and then move up towards the archway to encounter a couple of Grenadiers and a Kantus. Afterwards, start down the pier and take cover behind one of the crates along the way because another Locust gunboat will soon dock and more enemies will scurry off. There's a Grinder among them, so take him out with a Torque Bow bolt if you're carrying one.
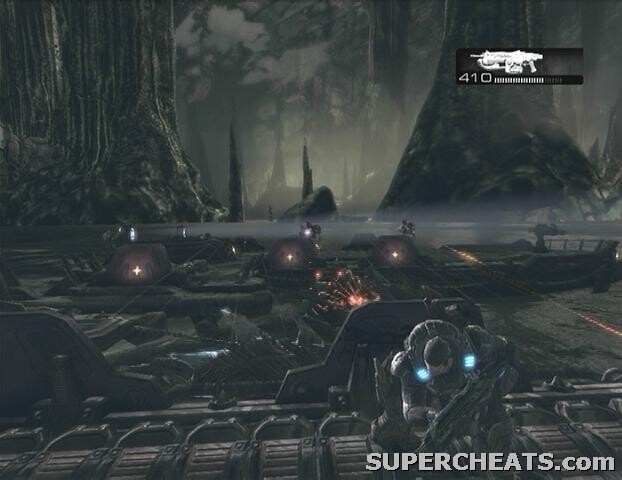
When the enemies on the pier have been defeated, approach the docket boat to trigger a brief cutscene. The end of the pier breaks loose, setting Dom and Marcus adrift. To make matters worse, a couple of Locust gunboats appear and quickly surround the raft. Immediately take cover behind one of the crates on the raft. You'll have to shift around a bit as the gunboat circles to avoid taking fire. Try to lob a Frag Grenade onto their boat if you have one to spare, otherwise just fire back at them from behind cover until they fall.
 |
After awhile the gunboats will trail off and leave you at peace for a short while. Another gunboat soon appears, however, and this one has a Flame Boomer onboard. You have to quickly down this guy to prevent him from destroying the raft. Concentrate your fire on the tanks attached to his back to bring him down quickly. Once he has fallen, Marcus and Dom board the vacant gunboat, after which yet another pair of Locust gunboats appears.
Take cover behind one of the metal plates along the side of the boat and try your best to gun down the Drones on the enemy gunboat. When the second gunboat pulls up on the other side, quickly switch over to the metal plate across from you to avoid taking fire. Pay attention to Dom, as he'll usually let you know when to switch over by calling out a side when another gunboat appears.
A third gunboat with a Grinder onboard will pull up along the left side of the gunboat, so make sure you're behind cover for that one. The ammo container by the bridge respawns indefinitely during this portion, so take advantage of this during any downtime to fill up your weapons.
 |
Once you've survived the assault, the gunboat takes a tumble down a waterfall, marking the end of this chapter.
GoW 2 Cheats, Hints and Walkthroughs
No comments yet. Tell us what you think to be the first.