Digging In
Gears of War 2 Walkthrough and Guide
Gears of War 2 Guide - Act 1: Tip of the Spear
Chapter 6: Digging In
Pick up the Mortar on the platform if you aren't already carrying one and take position along the railing at the front of the assault derrick. A large amount of Locust soon enter the gravesite below. You must defend the assault derrick from this attack until it can deploy the Grindlifts.
While using the Mortar, make use of the white distance markers if it's visible, because it serves as an indication of how far the mortar must travel to reach distant enemies. If the white markers do not appear, hold until anywhere between 70m-105m. Try to only launch mortar to wipe out clusters of enemies and not just one or two; let your teammates pick off the strays. Watch out for grapplers as well, though your allies should be able to deal with them.
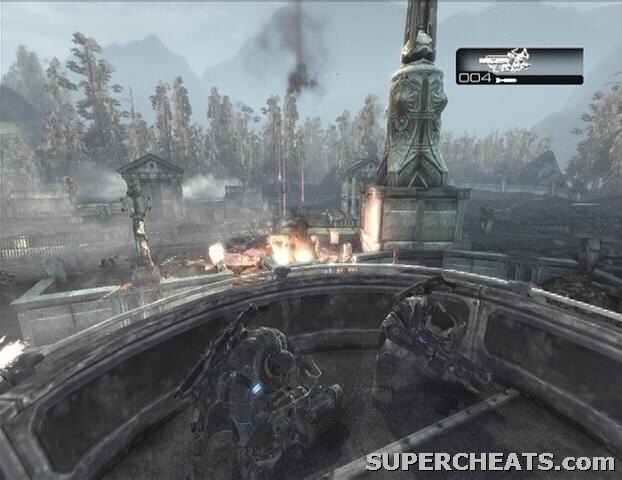 |
The biggest threat here is the Locust Mortar crew that enters the graveyard from the right side of the screen. Be sure to save at least one mortar strike to wipe out these guys, as a single strike from them can gib you and your comrades. There may still be a Mortar in the middle of the platform if you didn't pick it up at the start of the level, so grab if need be and then return to position. The mortar crew will come shortly after the grapplers come onboard, so keep an eye out for them. If the crew manages to fire off a mortar strike, immediately drop your Mortar by pressing a direction on the D-Pad and rush over to the far end of the platform in an attempt to avoid getting killed.
After the mortar crew a group of Boomers will enter the graveyard. They can be quickly eliminated by a mortar strike. Once the Boomers have been dealt with, a pair of Reavers will appear and ground themselves at the back of the graveyard. They're at the very back of the area, so you'll have to aim a bit farther if you hope to hit one with a mortar strike (around 150m to hit the Reaver across from your cover).
You'll complete the chapter and unlock an achievement when the all of the Locust in the graveyard have been wiped out.
GoW 2 Cheats, Hints and Walkthroughs
No comments yet. Tell us what you think to be the first.