Act 1 Collectibles
Gears of War 2 Walkthrough and Guide
Gears of War 2 Guide
Act 1 Collectibles
Chapter 1: Welcome to Delta
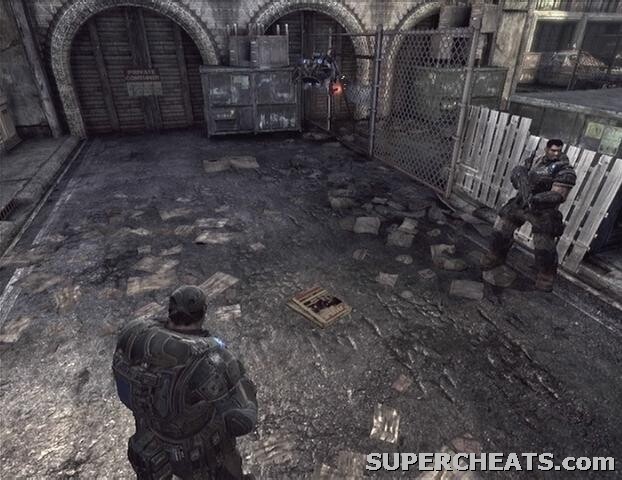
Collectible (1/2): Select the Training option at the start of the game and walk to the end of the alley once in the training area. Here, Jack will continuously saw the chain link fence until you take cover. Look for the collectible (The Eagle Newspaper) on the ground a few steps across from the dumpster and wooden fence in this area.
 Collectible 1/2 | 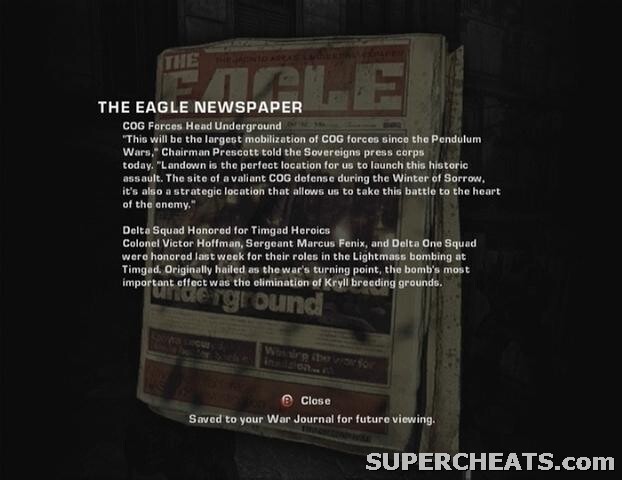 The Eagle Newspaper |
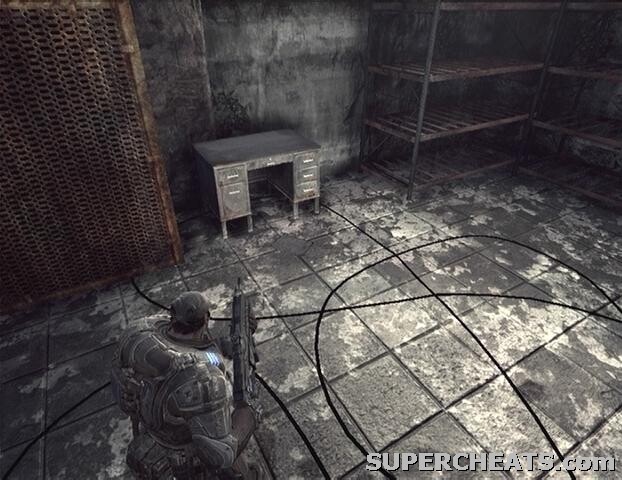
Collectible (2/2): When you reach the ladder at the end of the training session, slide down and turn right. Upon entering the garage, turn left and make your way over to the desk at the end of the room. The collectible (Ambulance Driver's Log) is on the floor in front of this desk.
 Collectible 2/2 | 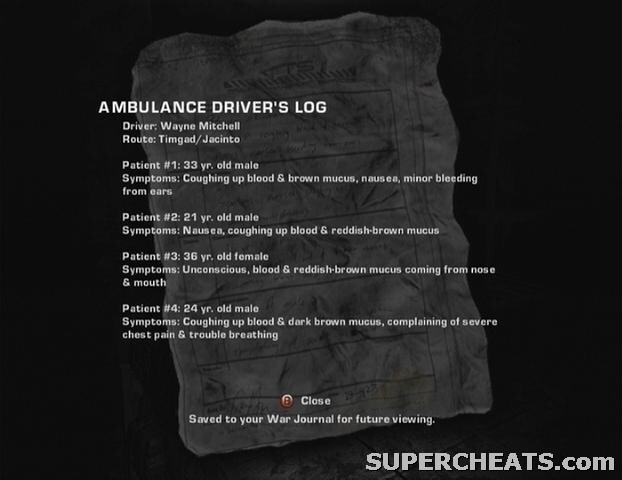 Ambulance Driver's Log |
Chapter 1: Desperation
Collectible (1/5): This collectible is in one of the rooms along the walkway overlooking the lobby where the Drones swarm in. If the one open room along the side of the walkway you are on does not hold the collectible (if you see Frag Grenades, you're in the wrong room), go to the parallel walkway and look in the open room there. The collectible (Doctor's Journal) will be on the floor by some cabinets.
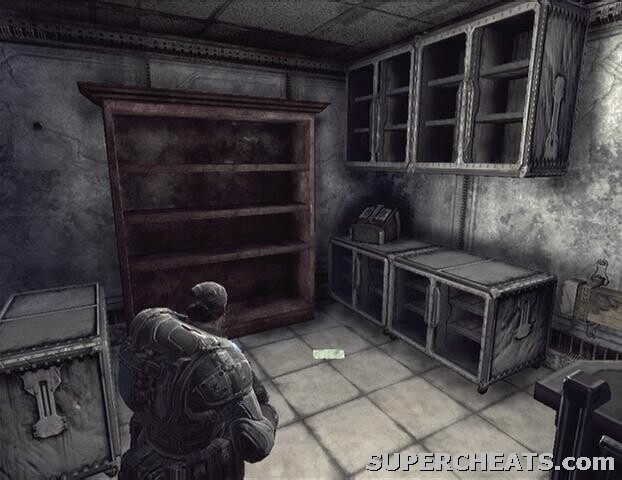 Collectible 1/5 |  Doctor's Journal |
Collectible (2/5): You'll eventually come to a large room with a pair of circular desks facing each other at its center. The collectible (Jacinto Medical Center File) is on the floor between the two desks.
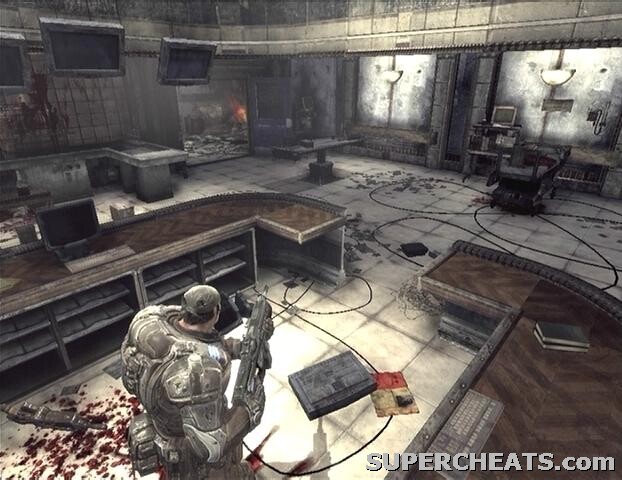 Collectible 2/5 | 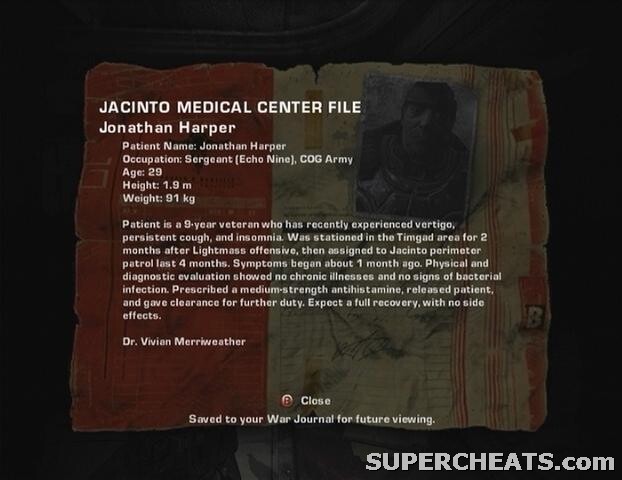 Jacinto Medical Center File |
Collectible (3/5): Enter the small room with the broken double door by the doors to the cafeteria and kitchen. The collectible (COG Letterhead) is on the floor here in front of the desk.
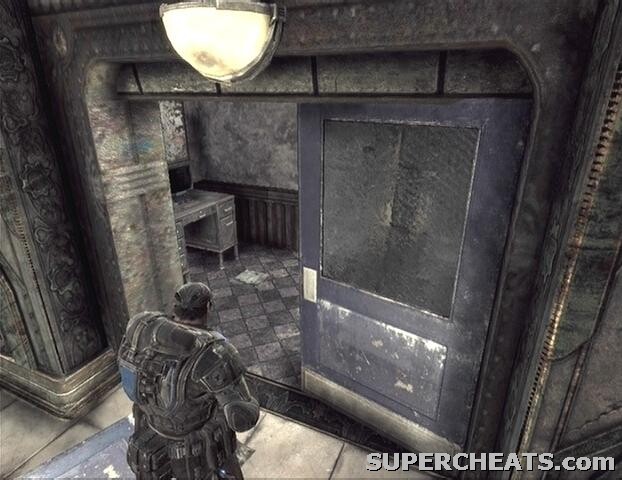 Collectible 3/5 | 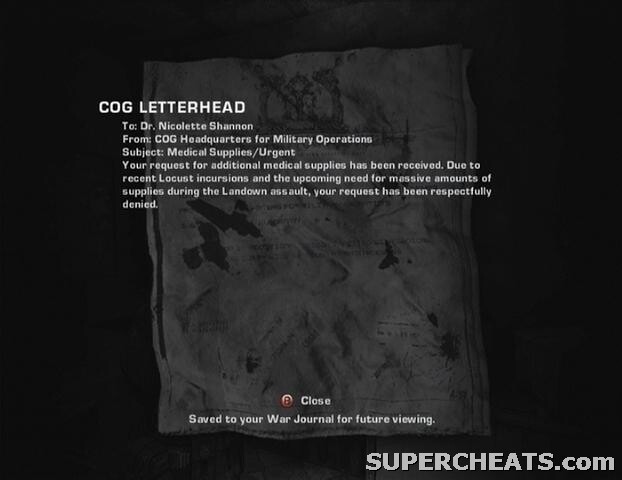 COG Letterhead |
Collectible (4/5): Upon entering the main lobby (the room reached after a King Raven helicopter crashes through a skylight), turn right and move to the very end of the walkway. The collectible (COG Proclamation) is there, next to an ammo box.
 Collectible 4/5 | 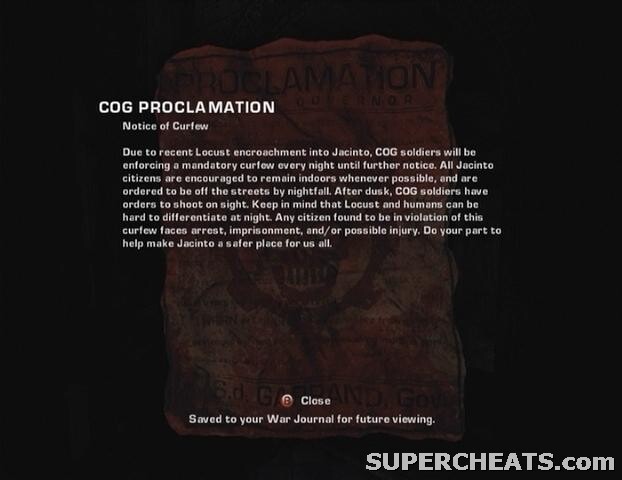 COG Proclamation |
Collectible (5/5): Upon exiting the hospital through its main lobby, turn right and pass under the archway. Turn around and look by the column on the left to spot the collectible (COG Tag).
 Collectible 5/5 | 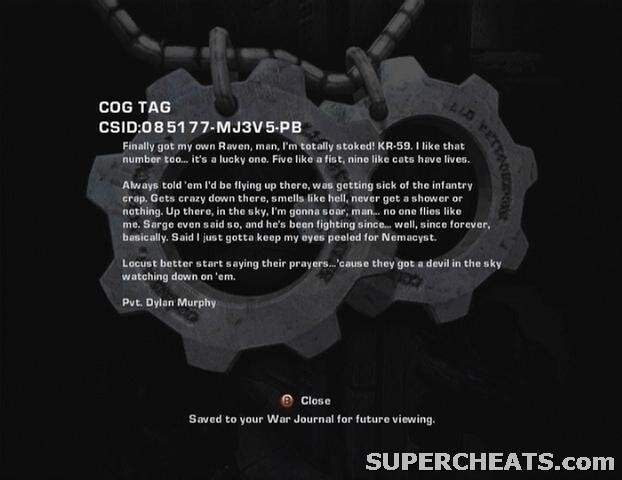 COG Tag |
Chapter 3: Rolling Thunder
Collectible (1/2): At the start of the chapter, turn around and you'll find the collectible (Grindlift Notice) posted next to the ladder at the back of the platform.
 Collectible 1/2 | Grindlift Notice |
Collectible (2/2): This one is found in the area where you must defend Dizzy while he repairs the assault derrick. As soon as you gain control over Marcus, turn left and move towards the ammo boxes and overturned truck in the distance. The collectible (Munitions Requisition Form) is nearby.
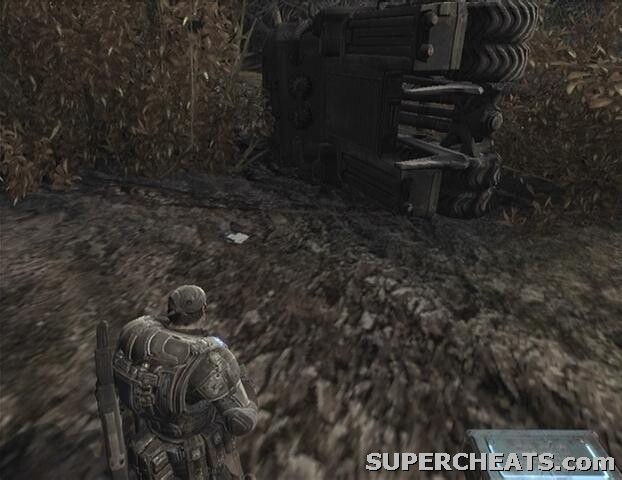 Collectible 2/2 | 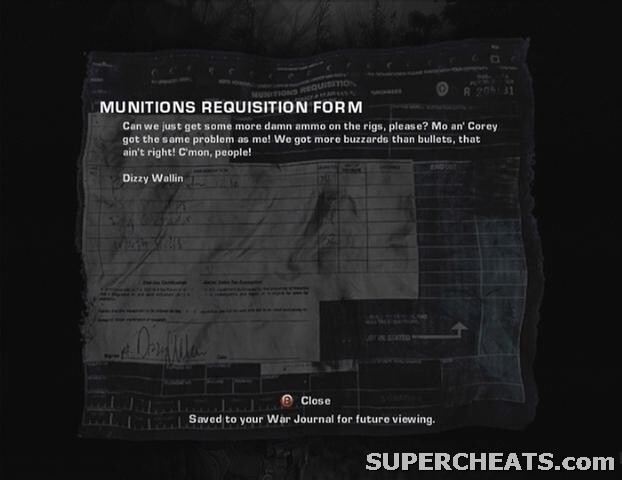 Munitions Requisition Form |
Chapter 5: Roadblocks
Collectible (1/4): At the start of the chapter, turn left and give the door there a few kicks to open it. Hop over the counter and climb up the stairs behind it. The collectible (Jacinto Sentinel Newspaper) is on the floor in this room here.
[15c1.jpg title=Collectible 1/5][15c1-2.jpg title=Jacinto Sentinel Newspaper]
Collectible (2/4): After using your chainsaw bayonet to cut through some wooden planks, look for a small gravesite across from the start of the path that leads up to the Imulsion station. The collectible (Memorial Inscriptions) is the plaque below the statue there.
 Collectible 2/4 | 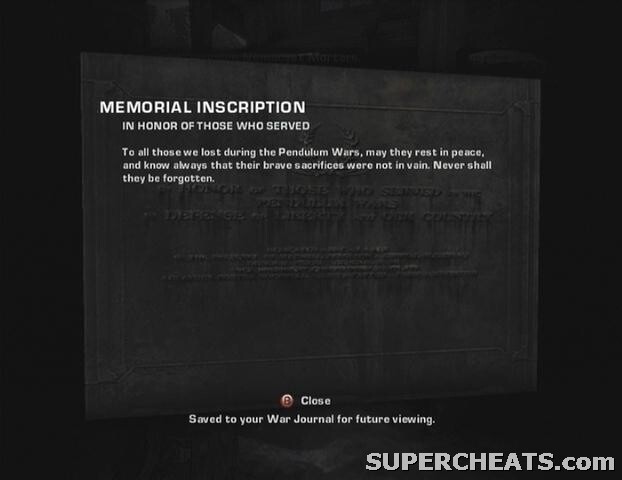 Memorial Inscription |
Collectible (3/4): Enter the small room at the back of the Imulsion station. The collectible (Truck Driver's Note) is can be found on the ground here.
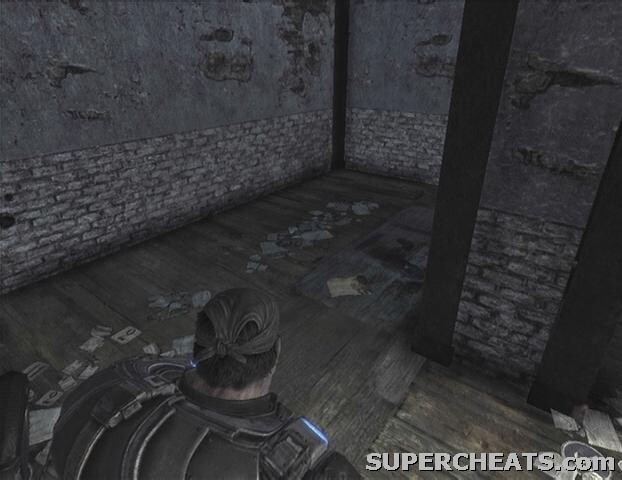 Collectible 3/4 | 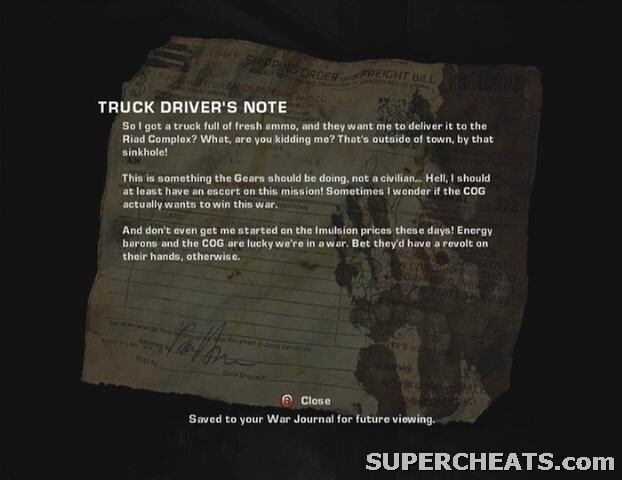 Truck Driver's Note |
Collectible (4/4): Near the end of the Ticker-filled tunnel, you'll come to a car blockade and some steps. Before heading up, look to the left of the steps along the sidewalk for a doorway and head through. The collectible (COG Tag) is on the ground in this room.
 Collectible 4/4 | 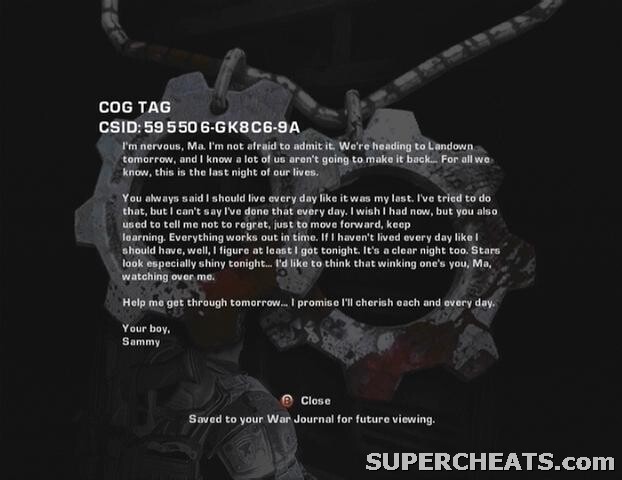 COG Tag |
GoW 2 Cheats, Hints and Walkthroughs
No comments yet. Tell us what you think to be the first.