Bucket List - Solo Set 2
Thank you for printing this page from www.SuperCheats.com.
Remember to come back to check for updates to this guide and much more content for Forza Horizon 2
Follow this guide to hear about updates
By CMBF

Last Updated:
The Second Set of Solo Bucket Lists continues the entertaining and competitive challenge scheme, as well as puts the player into car models that they may not necessarily have access to until much later in the game when they can afford them, particularly with respect to the more expensive car classes (like the Supercars).
- - - - - - - - - - - - - - - - - - - - - - - - - - - - - - - - - - - - - - - - - - - - - - - - - - - - - - - - - - - - - - - -

Solo Bucket List Set 2 Challenge 1 of 15 - Castelletto Car Meet
Solo Bucket List - Set 2
#01 -- Castelletto Car Meet: Medium Difficulty with a Shelby Cobra 427
"Wrestle a Shelby Cobra 427 to 155MPH."
First of all this may seem like a simple challenge - but it is not for a number of reasons - and as you can see in the video embedded above, we illustrate just how easy it is to mess it up or fail it. Oh, and you noticed that the first thing we did when arriving at a new Bucket List challenge was to snap a pic of the car on the off chance it is one needed for the Promo collection? And it was!
Th problem with failing these is that the game will then reset you to the starting point for the challenge - so when it looks like you ARE going to fail, you are WAY better off hitting rewind BEFORE you fail than allowing it to fail and thus put you back at the start. Just saying.
Oh did I also mention there is a timer running? Yeah, there is.
It can be hard to judge if you are going to fail, especially if it is close to speed, so you just keep trying until you nail it!
- - - - - - - - - - - - - - - - - - - - - - - - - - - - - - - - - - - - - - - - - - - - - - - - - - - - - - - - - - - - - - - -

Solo Bucket List Set 2 Challenge 2 of 15 - West Castelletto
#02 -- West Castelletto: Easy Difficulty with a Caterham R500
"Blaze a Caterham R500 Along the Italian Coast at Dawn."
This looks easy enough - until you consider that it has a 1m25s timer, which means you really cannot make any mistakes - and for our purposes a mistake includes ending up in a semi-controlled drift, hitting a wall or going off the side of the road, or anything else that either slows you down or costs you control of the vehicle, even briefly.
The basic goal is to rocket along the twisting and turning Coastal Highway to go from the starting point to the destination point within the allotted time. Doing that successfully means maintaining very tight control over the car, which in this case is a track toy that is designed to go very fast.
Normally I race in third-person, or chase view, as I find that helps a lot with hitting marks and being aware of the other Cars around me. But for this type of race it is often more helpful to switch to a first-person PoV and race from inside the car - as you will see from the video embedded above.
- - - - - - - - - - - - - - - - - - - - - - - - - - - - - - - - - - - - - - - - - - - - - - - - - - - - - - - - - - - - - - - -

Solo Bucket List Set 2 Challenge 3 of 15 - Saint-Martin South
#03 -- South Saint-Martin: Difficulty Easy with a Enzo Ferrari
"Drift an Enzo Ferrari in the Rain."
For this challenge your task is to get in 20 Drifts in the rain. The destination does not really matter in spite of the insistence that the GPS bot uses in her voice about guiding you there. When you get the 20th drift the mission ends no matter where you are - or how close to the destination you got, so just ignore her.
As far as getting the drifts in, what you need to understand is that it does not count ANY drift that fails to hit the minimum drift score of 275. So you want to be sure that each of your drifts is long enough to hit that score at a minimum. Do that and you will have no troubles at all.
- - - - - - - - - - - - - - - - - - - - - - - - - - - - - - - - - - - - - - - - - - - - - - - - - - - - - - - - - - - - - - - -

Solo Bucket List Set 2 Challenge 4 of 15 - Saint-Martin North
#04 -- North Saint-Martin: Difficulty Hard with a Hennessey Venom
"Race a Hennessey Venom Along the Autostrada."
This challenge is marked Hard for a reason - it has a 1m1s timer, and you cannot make ANY mistakes. You have to have a perfect run with no collisions to do it, and you have to start quickly and cleanly... Which means you are very likely going to have to restart this a number of times before you get it.
The first and best advice that I can give you is this: No turns. None. Do NOT follow the line at the start do NOT try to follow the road. Head directly for the highway over the grass. The modest slowing you encounter there is NOTHING compared to the extra time it takes to follow the road.
Second, do NOT watch the timer. Ignore the clock. From the point that the challenge begins to the end you will have the throttle completely and fully engaged and will not let up on it at all. Not once. Not even a little. This is a rocket ride, you start it fast and it stays fast the whole way.
Follow that advice and you will have no trouble.
- - - - - - - - - - - - - - - - - - - - - - - - - - - - - - - - - - - - - - - - - - - - - - - - - - - - - - - - - - - - - - - -

Solo Bucket List Set 2 Challenge 5 of 15 - San Giovanni South
#05 -- South San Giovanni: Difficulty Medium with a Mini Cooper '65
"Push a Mini Cooper '65 to its Limits."
The first thing you need to understand is that the actual speed you are going when you hit the speed trap does NOT matter. That is not what determines whether you succeed or fail. It is the average speed you record INSIDE the trap that matters. So you could be going 73 MPH when you hit the start and 73MPH when you hit the end, but if the speed in between the two points does not equal more than 70MPH you fail.
Also be aware that for this challenge often the rewind button will refuse to engage if you are close to the second set of poles. Don't know why that is but it is.
There is an alternative solution to this if the indicated route gives you too much trouble... The game does not actually care which way you go through the two sets of poles - so in stead of taking the indicated right turn on the route in, just keep going straight on that road, then turn right and approach the Speed Zone from the other direction.
Remember though you have only 2m to do this and it doesn't restore time to the clock when you rewind.
If you watch the video above it is a classic example of eliminating the problems. As I did - and redid - this challenge I came to several conclusions - the first was that it was the curves that were messing the average up. The curves slow you down too much. Ergo the answer was to remove the curves from the equation.
The second problem is the timer - it limits the number of attempts that you can make on this. So the attempts need to be down to one or two at the most.
So I set up the run backwards - where the GPS tells you to take that right-turn, ignore it, keep going straight, and then take the back way in and its right turn (watch the video above).
By doing it this way and going through the grass to eliminate the curve from the equation, you lose a little speed but comparatively far less than if you tried to take the curve!
- - - - - - - - - - - - - - - - - - - - - - - - - - - - - - - - - - - - - - - - - - - - - - - - - - - - - - - - - - - - - - - -

Solo Bucket List Set 2 Challenge 6 of 15 - North San Giovanni
#06 -- North San Giovanni: Difficulty Medium with a RUF RT 12 S
"Prove a RUF RT 12 S can hit 165MPH."
The biggest issue with this one is the fact that it starts you out 2.2 miles from the Speed Camera and it is raining. Porsche are notoriously unstable in this sort of driving condition, so their ordinary road-hugging ability is blunted very badly by the wet roads.
As a result what should be a walk in the park for this car is anything but. That last curve is bad but the presence of civilians on the road is even worse - as you will see in the video above.
Normally I prefer to do these in third-person view, but the need to attain a finer control over the car means that first-person view is really the best option since it provides a tighter feedback in my experience.
That said, as you will see my biggest problem is the civilians on the road - who I hit and thus lose speed over...
Still if you watch the video above you will see the trick to this one.
- - - - - - - - - - - - - - - - - - - - - - - - - - - - - - - - - - - - - - - - - - - - - - - - - - - - - - - - - - - - - - - -

Solo Bucket List Set 2 Challenge 7 of 15 - Sisteron
#07 -- Sisteron: Difficulty Hard with a Lotus Exige S
"Push a Lotus Exige S to the Limit around Sisteron."
The reason that the MPH on this is so low compared to the car you are in has more to do with the road you have to drive on than the car - that is to say actually managing to get through the Speed Zone at 65 MPH or greater is quite an accomplishment.
Now the description of this says to push the car to its limits - but really if you think about it that is not what you are doing here - what you are actually doing is pushing the driver - which is YOU - to YOUR limit. That is not the same thing at all.
For this one it really does not matter which direction you approach it from - the curves are still there and this time they can not be removed from the equation - you basically have to have a very tightly controlled run through. On the plus side, 65 MPH is doable - even if you have to use rewind a few times.
As is often the case the civilians that can get in your way are the bigger issue. That and the timer. You may need to restart on this several times but, once you learn the road you should be able to manage it - watch the video for guidance.
- - - - - - - - - - - - - - - - - - - - - - - - - - - - - - - - - - - - - - - - - - - - - - - - - - - - - - - - - - - - - - - -
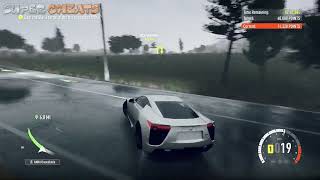
Solo Bucket List Set 2 Challenge 8 of 15 - West Saint-Martin
#08 -- West Saint-Martin: Difficulty Hard with a Lexus LFA
"Go Skill Crazy in a Lexus LFA."
I am not real sure why this one is listed as Hard Difficulty because as you will see from the video above, this was wicked easy! Just follow my example above and you can have that target score of 40K in about a minute or so... Seriously...
- - - - - - - - - - - - - - - - - - - - - - - - - - - - - - - - - - - - - - - - - - - - - - - - - - - - - - - - - - - - - - - -

Solo Bucket List Set 2 Challenge 9 of 15 - East Castelletto
#09 -- East Castelletto: Difficulty Medium with a RUF Yellowbird
"Tame a RUF Yellowbird on the Castelletto Streets."
This one is - despite the curves - so easy you can literally bulldoze your way though - like I did - with no finesse, no care, and certainly little control...
- - - - - - - - - - - - - - - - - - - - - - - - - - - - - - - - - - - - - - - - 632- - - - - - - - - - - - - - - - - - - - - - - -

Solo Bucket List Set 2 Challenge 10 of 15 - Central Coast
#10 -- Central Coast: Difficulty Hard with a Mercedes SLS AMG
"Show off your Skills in a Mercedes SLS AMG."
The biggest issue that you will face for this challenge is the civilian traffic on the roads, and the unfortunate happenstance of hitting something hard enough to cancel out the bank. So obviously the trick is to get in enough individual sets to drive the bonus multiplier up, and not hit civilians or anything that will reset the bank.
Watch the video above to get an idea of how you can do this....
- - - - - - - - - - - - - - - - - - - - - - - - - - - - - - - - - - - - - - - - - - - - - - - - - - - - - - - - - - - - - - - -

Solo Bucket List Set 2 Challenge 11 of 15 - Nice
#11 --Nice: Difficulty Medium with a Huracan
"Tear around the streets of Nice in a Huracan."
Another easy Skill Point based run - just mess it up on the streets since the target is only 30K....
- - - - - - - - - - - - - - - - - - - - - - - - - - - - - - - - - - - - - - - - - - - - - - - - - - - - - - - - - - - - - - - -

Solo Bucket List Set 2 Challenge 12 of 15 - Abbey des Vaux De Cernay
#12 -- Abbey des Vaux De Cernay: Difficulty Hard with a Subaru WRX '11
"Go crazy in a Subaru WRX '11 at the Ruined Abbey."
Another spree of Skill Points that, again, should not really be rated Hard... Just find an open area like the parking lot and go crazy!
- - - - - - - - - - - - - - - - - - - - - - - - - - - - - - - - - - - - - - - - - - - - - - - - - - - - - - - - - - - - - - - -

Solo Bucket List Set 2 Challenge 13 of 15 - Qaui du Commerce
#13 -- Quai du Commerce: Difficulty Hard with a Ariel Atom
"Show off in an Ariel Atom at the Docks."
The easiest method for this one is to pick a set of ramps, then run them as fast as you can, burning the E-Brake as you come down on either end. Do that - and don't hit anything that will reset the bank, and you can very easily score the 100K that is requires.
Watch the video for guidance...
- - - - - - - - - - - - - - - - - - - - - - - - - - - - - - - - - - - - - - - - - - - - - - - - - - - - - - - - - - - - - - - -

Solo Bucket List Set 2 Challenge 14 of 15 - Western Coast
#14 -- Western Coast: Difficulty Hard with a Bugatti SS
"Get caught doing 200 MPH in a Bugatti SS."
The easiest way to do this one is to go at a fast speed around the marina and then head to the coastal road on the other side, then hammer the throttle in the far-left-lane avoiding the civilians. You can then rip through the destination point easily.
- - - - - - - - - - - - - - - - - - - - - - - - - - - - - - - - - - - - - - - - - - - - - - - - - - - - - - - - - - - - - - - -

Solo Bucket List Set 2 Challenge 15 of 15 - Tenuta Montellino
#15 -- Tenuta Montellino: Difficulty Easy with an Alfa 33 Stradale
"Take an Alfa 33 Stradale on a Cruise to the Coast."
For this last one you basically have five minutes on the timer to go from the start to the destination - and really as long as you don't take a Sunday drive, you should make it with time to burn... Once you get there, you will unlock the Achievement: Rest in Peace (20G) Complete every Solo Bucket List Challenge.
That nicely wraps up the Solo Bucket List Challenges....
- - - - - - - - - - - - - - - - - - - - - - - - - - - - - - - - - - - - - - - - - - - - - - - - - - - - - - - - - - - - - - - -
While each and every one of the Solo Bucket List Challenges are both entertaining and fun, they are also a part of the main game play scheme in the sense that they are a good source for experience, rewards, and Achievements.
On the Achievement side the following are related to the Bucket List System:
- Kick the Bucket (10G) Scratch 15 items off of your Solo Bucket List.
- One Down! (10G) Complete a Solo Bucket List challenge.
- Rest in Peace (20G) Complete every Solo Bucket List Challenge.
- Yes We Can (30G) Complete 25 Bucket List items cooperatively.
Considering how very widely popular the Achievement Scheme is under both Xbox 360 and Xbox One, having them not only include Bucket List specific Achievements, but having four of them (!) is actually pretty cool. And of course there is the bragging rights that comes from the mad skills of managing to complete all of the available Bucket List challenges.
Anything missing from this guide?
ASK A QUESTION for Forza Horizon 2
Comments for Bucket List - Solo Set 2
Add a comment
Please log in above or sign up for free to post commentsTable of ContentsClose
- Walkthrough & Guide
- Achievements
- Activities
- Collections
- Reference Pages
Guide Updates
Get notified of updates to this guide
Many of our guides get updated with additional information. To get an email when this guide is updated click below.
 Join us on Discord
Click to close
I've completed the list for the xbox 360 version but all I've received is the achievement,no car :-( something I missed?