Bucket List - Solo Set 1
Thank you for printing this page from www.SuperCheats.com.
Remember to come back to check for updates to this guide and much more content for Forza Horizon 2
Follow this guide to hear about updates
By CMBF

Last Updated:
There are two types of Bucket List event in Forza Horizon 2 - the Solo Bucket Lists (of which there are two sets) and the Online Bucket List (of which there is one set).
Each of the Bucket Lists events is distributed on the map and are available to the player via their icons - a Square Green Icon with a White Car symbol in it. The player must drive to the specific location on the map, and when they arrive they will be shown which number on the Bucket List that that particular Icon corresponds to.
On the map, when a Bucket List location is selected, the player is shown the type, the car used, and the difficulty - for example from Solo Bucket List Set 1, the 2nd Bucket List Challenge is located in the city of Nice, and is a Destination Challenge using the McLaren P1, with a Medium Difficulty.
For convenience we have laid them out by the number below, with any helpful hints or guidance we think you may find useful, and a video for each in case you want to study the challenge in advance....
Solo Bucket List Set 1 - Bucket List Challenges
The following Bucket List Challenges are for Solo Bucket List Set 1, and consist of 15 unique challenges set out over the entire map. Each of these challenges can be attempted as soon as the icon is added to your map, no matter what stage your game is in with respect to the events and Championships.
- - - - - - - - - - - - - - - - - - - - - - - - - - - - - - - - - - - - - - - - - - - - - - - - - - - - - - - - - - - - - - - -

The 1st Bucket List Challenge - Koenigsegg Agera
#01: Castelletto - Easy Difficulty Speed Trap Challenge using the Koenigsegg Agera.
This first challenge is situated just off the road next to a villa above the Castelletto Car Meet location, and offers you the opportunity to drive a moderately prized Supercar (the Agera has a sticker price of 830K Credits) that also happens to be one of the more dashing looking whips in the game. Remember style is almost everything!
Drive the Agera like you stole it! This challenge pits you against the clock and the speedometer - your goal being to race to through the Speed Trap with a speed of at least 125MPH (but faster is better!).
Scoring (and your rewards) for this challenge includes a base reward of Cr. plus Cr. for Difficulty Assists, as well as the base reward of XP with any Skills you manifest added to that score.
When you complete this you will unlock the Achievement: One Down (10g) Complete a Solo Bucket List Challenge.
Note that at the end of the race after you finish you are reminded by Ben that you can go again as often as you like, which makes this a quick way to pick up extra Credits, XP, and Skill Points. Just saying...
- - - - - - - - - - - - - - - - - - - - - - - - - - - - - - - - - - - - - - - - - - - - - - - - - - - - - - - - - - - - - - - -

The 2nd Bucket List Challenge - McLaren P1
#02: Nice - Medium Difficulty Destination Challenge with the McLaren P1.
Located on the Eastern side of Nice above the central park area in the Marina District, the second Bucket List is a traditional Destination-style race.
For this Destination Challenge you climb in to your McLaren P1 and escape to te countryside! This challenge has a Target Time of just 1m 30s.
- - - - - - - - - - - - - - - - - - - - - - - - - - - - - - - - - - - - - - - - - - - - - - - - - - - - - - - - - - - - - - - -

The 3rd Bucket List Challenge - Pagani Zonda Cinque Roadster
#03: Sisteron - Medium Difficulty Skill Mastery Challenge using the Pagani Zonda C.
This nice Skill Mastery Challenge is situated in the municiple parking lot in the midst of the West side of the city, nearby the bank and travel agency.
Only five (5) of these were ever made, and if that is not enough to make you nervous before you even think about getting in and starting the 7.3ltr V-12 engine with its top speed of 220MPH, the Pagani Zonda Cinque Roadster (which is a Hypercar Class ride) can go from 120MPH to a standing stop in just 4.3 seconds using its aircraft-grade brakes!
For this challenge you need to dodge the traffic and show off your Near-Miss Skills to the tune of a minimum of 20 Near-Misses as you race against the timer. The timer starts with 2m 30s - which should be plenty of time as you follow the defined route...
- - - - - - - - - - - - - - - - - - - - - - - - - - - - - - - - - - - - - - - - - - - - - - - - - - - - - - - - - - - - - - - -
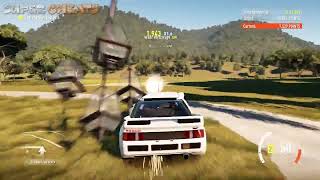
The 4th Bucket List Challenge - Ford RS200
#04: Le Prince de Provence Country Club - Medium Difficulty Skill Score Challenge using the Ford RS200.
This challenge happens to be located at what is both one of the top-100 golf courses in the world, and what may be one of the top 5 most exclusive courses in the world!
When you arrive at the scene you are presented with a 1985 Ford RS200 Evolution racer in the Group B Monsters Class for a Skill Score Challenge!
For this challenge you simply need to beat the Skill Score Target, which is 25K Skill Points. You do that by drifting, hitting things, jumping, you know, all the stuff you normally do to build a nice phat skills multiplier run!
- - - - - - - - - - - - - - - - - - - - - - - - - - - - - - - - - - - - - - - - - - - - - - - - - - - - - - - - - - - - - - - -

The 5th Bucket List Challenge - Ford GT40
#05: Castelletto (East) - Easy Difficulty Destination Challenge for the Ford GT40
This Bucket List Challenge is situated just off of the main road in a parking area near the buildings east of Castelletto, on the way to the Showcase Event and features perhaps the most exciting and wicked production-class racing car from American auto maker Ford.
What with the car for this one being the GT40 pretty much anything they asked you to do here would be lots of fun - race? Fun! Take out the garbage? Yep, fun! Have root canal done? Well, in a GT40 that would still be pretty fun!
For this one you are going to race to the destination in something under 2m 15s - no problemo!
- - - - - - - - - - - - - - - - - - - - - - - - - - - - - - - - - - - - - - - - - - - - - - - - - - - - - - - - - - - - - - - -

The 6th Bucket List Challenge - Ferrari 250 GTO
#06: Central Coast Area - Easy Difficulty Destination Challenge using the Ferrari 250 GTO.
This one is situated to the north end of the small village in the center of the coastal zone between Castelletto and Nice.
For this Easy race you simply need to reach the race destination in under 4m. Easy-peasy! Not only that, you get to do it in a classic Ferrari, while listening to the Classical Music Station on the radio - so how about that?
- - - - - - - - - - - - - - - - - - - - - - - - - - - - - - - - - - - - - - - - - - - - - - - - - - - - - - - - - - - - - - - -

The 7th Bucket List Challenge - Nissan R35 GT-R
#07: Zona Industriale - Medium Difficulty Skill Mastery Challenge using the Nissan R35 GT-R
Finding this will be no trouble at all as it is placed in the skeleton of an old warehouse building in the top part of the Industrial Zone on the map.
This Skill Mastery challenge makes use of Nissan's 2012 GT-R Modern Supercar - in this case the Black Edition - which is an S1 Class ride with very high stats as befits a whip in its class. While not too-too expensive a ride with its 100K Cr. price tag, it is likely not a ride you will already have in your garage unless you happen to be a fan of the Nissan Supercars. That said, remember the point to this is that you don't actually have to have these babies in your garage to do these challenges.
For this challenge you avail yourself of the GT-R and use the 2m 30s on the timer to get some super great air -- you know, use the ramps in this area for some jumpity-jumpity-jump-jump-jumping!
- - - - - - - - - - - - - - - - - - - - - - - - - - - - - - - - - - - - - - - - - - - - - - - - - - - - - - - - - - - - - - - -

The 8th Bucket List Challenge - with an Old-School Ferrari F40
#08: Central Coast - Medium Difficulty Destination Challenge using the Ferrari F40
This is the first Bucket List Icon situated West of Castelletto on the Coastal Highway above the dirt road in a parking area. The classic (and very desirable) Ferrari F40 sits waiting for you all by its lonesome!
This challenge is a destination race that you need to complete in under 2m 45s along the coastal roads and cliffs. But considering that you are driving a Classic F40 you may a well be flying a fighter jet! Or maybe bumper Cars? Heh... Remember it doesn't matter how much paint you scratch as long as you beat the timer!
- - - - - - - - - - - - - - - - - - - - - - - - - - - - - - - - - - - - - - - - - - - - - - - - - - - - - - - - - - - - - - - -

The 9th Bucket List Challenge - with a McLaren F1
#09: Montellino - Medium Difficulty Speed Trap Challenge using the McLaren F1.
Located just to the North of the town of Montellino, this challenge is positioned in the park-like overlook area beside the benches where the tourists take all their pictures of the countryside!
The challenge here is to get to the main road with the Speed Trap in it far enough back so that you can get the F1 above 140MPH as you pass through the Speed Trap.
The way that it appears to be laid out has you following a GPS track that cannot possibly allow you to get the car to that target speed from the roundabout to the Speed Trap.
Maybe you can, but I couldn't - so I started looking for a logical alternative and what I ended up with is this: I cut cross-country to the road that the roundabout and Speed Trap are on, but farther to the left of the roundabout. Then I cut loose headed towards the Speed Trap and simply jumped the roundabout,.
Using that tactic I was able to hit the Speed Trap at 160MPH. That is how I suggest you do it.
- - - - - - - - - - - - - - - - - - - - - - - - - - - - - - - - - - - - - - - - - - - - - - - - - - - - - - - - - - - - - - - -

The 10th Bucket List Challenge - with a Lancia Delta S4
#10: Mountain Ruins - Hard Difficulty Destination Challenge using the Lancia Delta S4.
- - - - - - - - - - - - - - - - - - - - - - - - - -
Special Note: When you arrive at each of the Bucket List Locations, due to the nature of the events chances are that the car there is unique enough so that you likely as not do not have its image already for the Horizon Promo. So popping into camera mode and taking a snap is definitely the way to go here...
- - - - - - - - - - - - - - - - - - - - - - - - - -
Another Special Note: This is possibly the hardest one of the lot, and requires more than just skill, it requires luck and good fortune. The following tips will help:
- NEVER look at the timer. Looking at the timer is just going to either cause you to panic, or cause you to give up and hit restart. Instead of looking at the timer, look at the road and drive like hell. You will notice that you get closer and closer to the target destination before you run out of time and, eventually, you will actually reach the target destination. So good on ya!
- It's always better than it looks. So don't look.
- A full 99% of whether you are going to make it to the destination marker in the time allotted is down to how fast you made it through the trees down the mountain without hitting ANY trees. Seriously it really is down to that. You have to go full-bore down the mountain through the trees and then smoothly transition onto the road. IF you manage to do that, you can pretty much make it.
In practical terms even on a perfect run there is only half-a-second of wiggle room - and that is on a perfect run...
- A Bacon, Lettuce, and Avocado Sandwich will make everything better.
- - - - - - - - - - - - - - - - - - - - - - - - - -
This challenge is placed in a very out-of-the-way location - that being the Roman Ruins at the top of the Mountain to the South of San Giovanni and to the Northwest of the Horizon Festival. When you arrive at the location you are presented with the 1986 Lancia Delta S4 (a Group B Monsters Class Car) with medium to high stats.
The idea here is a simple one - what we have is a rather typical street car - not a racer by any stretch of the imagination in the sense of wicked fast but that is not really the point here.
The point here is to somehow get down off of the mountain from the ruins through the forest as fast as you can without hitting a tree and being stopped. Because once you make it down the mountain and through the forest and arrive at the road, you have to then go like the hammers of hell to the destination in this point-to-point run.
The rub here is the timer, which is set at 1m 20s - barely enough time to make it from start to finish and no time to spare.
Getting this one may require more than one go - I recommend tho that even if you are sure that you are not going to reach the destination before the timer runs out - mostly so that you can know what to expect when you run it again.
Believe it or not, it will help a lot sorting this out when you know what to expect at each major change in surface or direction...
- - - - - - - - - - - - - - - - - - - - - - - - - - - - - - - - - - - - - - - - - - - - - - - - - - - - - - - - - - - - - - - -

The 11th Bucket List Challenge - with a LaFerrari.
#11: Central Coast - Hard Difficulty Speed Zone Challenge with the LaFerrari.
Located on the map along the Central Coast area on the Coastal Highway, Number 11 is the first Bucket List Icon that you come to East of Nice.
For this challenge you have 2m to travel from the start to the destination. At the destination you must obtain an overall average speed greater than 85MPH through the Speed Trap.
This is a challenge due to the fact that the Speed Trap starts at the top of a hill at the start of a very sharp U-Turn Curve, along which you should anticipate civilian traffic. Assuming you make no significant errors in driving to the start of the Speed Trap the timer should never be an issue for you.
If there is an issue it will come down to the speed you average and the civilian interference that is present. As you can see from the video embedded above, judicious use of the rewind and tight control of the car in the turn will result in a relatively easy win.
- - - - - - - - - - - - - - - - - - - - - - - - - - - - - - - - - - - - - - - - - - - - - - - - - - - - - - - - - - - - - - - -

The 12th Bucket List Challenge - with a Lamborghini Veneno
#12: North Central - Medium Difficulty Speed Trap using the Lamborghini Veneno.
This very limited (pretty much rare) car is placed for your Speed Trap Challenge North of SanGiovanni off of the main North road.
To put this in perspective for you, in terms of rarity, Lamborghini only built FOUR (4) of this car, and then hand-picked three customers to purchase the three that were put on sale. The fourth Veneno sits in the unofficial museum that houses the company race team.
The car needs to be traveling at 175MPH or faster when it hits the Speed Camera - the only way to make that happen is to jump the roundabout a bit off-center to the right, and land smoothly in the road so as to not lose too much in the way of speed.
This is necessary largely due to the slower top-end gearing of the Veneno, as while it goes from 0 to 150 in nothing flat, the distance required to wind it up from 150 to 175+ is almost longer than the available road between the rotary and the camera. I sat almost because if you do it perfectly there is enough distance between the roundabout (we call that a "Rotary" here) and the camera to hit 175 but only if you do it perfectly.
It is far easier to not have to fully wind it up; if you clear the rotary and arrive on the other side with 160MPH or better on the speedometer, you are virtually guaranteed this one unless you make a horrible mistake, have really bad luck, or for some odd reason you hit the brakes.,
- - - - - - - - - - - - - - - - - - - - - - - - - - - - - - - - - - - - - - - - - - - - - - - - - - - - - - - - - - - - - - - -

The 13th Bucket List Challenge - with a Bowler EXR S
#13: Southeast District - Hard Difficulty Destination Challenge using the Bowler EXR S.
This one is situated in a commercial farmyard in the midst of a woods at the top of a hill on the Southeast side of the map in what is otherwise known as the Southeast District, which is located North of Castelletto and East of the Zona Industriale.
The 2012 Bowler EXR S that is used for this challenge is classified as an Extreme Offroad vehicle, which roughly translated means that it is an All-Wheel-Drive A-Class whip with moderate-to-high stats.
When you begin this challenge the first thing you are told is to ignore the roads and for good reason...
The Bowler is an Extreme Offroad vehicle - which is a good thing because (1) you only have 1m 20s to get to the destination - and (2) you can only do that by driving as the crow flies. And like the crow you need to avoid hitting trees, houses, and low stone walls. Seriously.
This is one of the more dozen or so times you do it you will get within seconds of the destination - and still just miss victory. Eventually you will find a route that works for you through the trees and, once you do that, with judicious use of the rewind button, you will master this!
- - - - - - - - - - - - - - - - - - - - - - - - - - - - - - - - - - - - - - - - - - - - - - - - - - - - - - - - - - - - - - - -

The 14th Bucket List Challenge - with a Dodge Dart
#14: Quai du Commerce Central Container Area - Easy Difficulty Skill Mastery Challenge with the Dodge Dart.
The challenge is situated on top of one of the container stacks at the port (you go up a convenient ramp). This one uses a classic almost-muscle-car, the Dodge Dart, which all by itself is rather cool as far as whip's go.
he challenge is to show off your Air Skills - which means jumps - and you are given 3 minutes in which to accomplish 15 jumps of any height and length. That is plenty of time - particularly in this area where there are plenty of ramps - which is probably why this one is rated as easy!
When you consider how hard some of the ones we have already completed were we deserve this easy A, right? I mean this is like taking Intro to Computer Science - a course in which you learn SUCH heavy skills as "Keyboarding" and "Basic Mouse Techniques" if you see what we mean?
They really don't come much easier than this....
- - - - - - - - - - - - - - - - - - - - - - - - - - - - - - - - - - - - - - - - - - - - - - - - - - - - - - - - - - - - - - - -

The 15th Bucket List Challenge - with a Corvette C7 SR
#15: San Giovanni - Medium Difficulty Skill Mastery using the Corvette C7 SR.
The wicked hot C7 SR Corvette is positioned in the parking lot of an apartment building in San Giovanni just off of the main road, where it patiently sits waiting as the last of the entire first set.
This is actually a very easy challenge - you are given a timer of 3m 30s and a route to take that has lots of curves on it around which you are expected to show off your drifting skills either with natural drifting or e-brake drifts. Or a combo of the two.
So simply hammer down, and when you reach a curve, drift a little or a lot - either way each individual drift counts - and you only have to score 15 individual drift actions to complete this!
Seriously you almost have set out to fail not to get this one!
Completing this last challenge for Bucket List Set 1 will unlock the Achievement: Kick the Bucket (10G) Scratch 15 Items off of your Solo Bucket List.
- - - - - - - - - - - - - - - - - - - - - - - - - - - - - - - - - - - - - - - - - - - - - - - - - - - - - - - - - - - - - - - -
Remember: Once you collect all 50 Fast Travel Bonus Boards you can jump from destination to destination without having to pay as you Fast Travel is then free. If you also unlock the Fast Travel Anywhere Skill Points Perk, you can go directly to these Challenges...
While each and every one of the Solo Bucket List Challenges are both entertaining and fun, they are also a part of the main game play scheme in the sense that they are a good source for experience, rewards, and Achievement G's.
On the Achievement side the following are related to the Bucket List System:
- Kick the Bucket (10G) Scratch 15 items off of your Solo Bucket List.
- One Down! (10G) Complete a Solo Bucket List challenge.
- Rest in Peace (20G) Complete every Solo Bucket List Challenge.
- Yes We Can (30G) Complete 25 Bucket List items cooperatively.
Considering how very widely popular the Achievement Scheme is under both Xbox 360 and Xbox One, having them not only include Bucket List specific Achievements, but having four of them (!) is actually pretty cool. And of course there is the bragging rights that comes from the mad skills of managing to complete all of the available Bucket List challenges.
- - - - - - - - - - - - - - - - - - - - - - - - - - - - - - - - - - - - - - - - - - - - - - - - - - - - - - - - - - - - - - - -
Moving on to Set 2
After yo complete the first collection of 15 Solo Bucket List Challenges, open the Main Menu then select the PROGRESS Tab, and from there the Bucket List Menu. You will note that you currently have set as your active Bucket List the first one, and it now has a count of 15/15.
You now need to highlight the second list (the third was, at the time this was written, still unfilled) so that it becomes the active list. That gives you another 15 Solo Bucket List Challenges on the map to go after - and of course work on for Achievements!
Anything missing from this guide?
ASK A QUESTION for Forza Horizon 2
Comments for Bucket List - Solo Set 1
Add a comment
Please log in above or sign up for free to post commentsNo comments yet. Tell us what you think to be the first.
Table of ContentsClose
- Walkthrough & Guide
- Achievements
- Activities
- Collections
- Reference Pages
Guide Updates
Get notified of updates to this guide
Many of our guides get updated with additional information. To get an email when this guide is updated click below.
 Join us on Discord
Click to close