Collection Intro
There are a number of Collections in the game, from Road discovery to different types of Signs (Billboards), to the Bucket Lists and then there are Speed Traps, Speed Zones, and Destinations.
The Speed Traps, Zones, and Destination you will unlock and discover as part of the regular game play, and the Bucket List locations will be automatically revealed to you with map markers. But the Signs? Well those you have to hunt for!
Helpful Hint: Other racers CAN hit the Boards and, if they do, that can make them harder to find for you. So if you get confused, use the videos embedded below to Guide you!
Signs / Boards Collection
There are four types of Signs / Boards in the game, 1000 XP Boards, 7500 XP Boards, 15,000 XP Boards, and Fast Travel Boards.
The XP Board sets - all three of them - are very useful for gaining bonus XP, and since XP unlocks the Wheel Spins as well as Barn Finds and other gimmes, they are good to find! But the Fast Travel Boards are a different story for a very good reason: get them all and you Fast Travel for FREE.
Of course as you collect the Fast Travel Boards you also gain discounts on the Fast Travel service mind you - each Board is worth a specific set percentage of discount, so the more you have the less it costs. Free though, is good. No, Free is Great!
Bonus Board Collections Maps
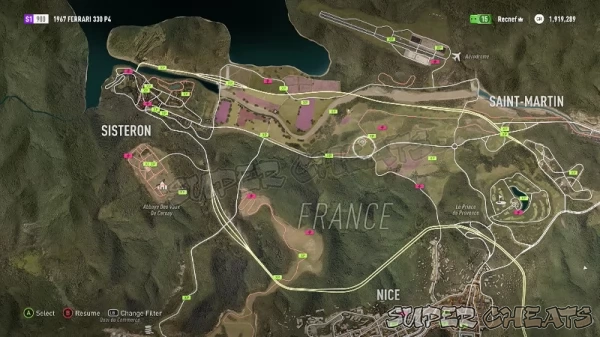
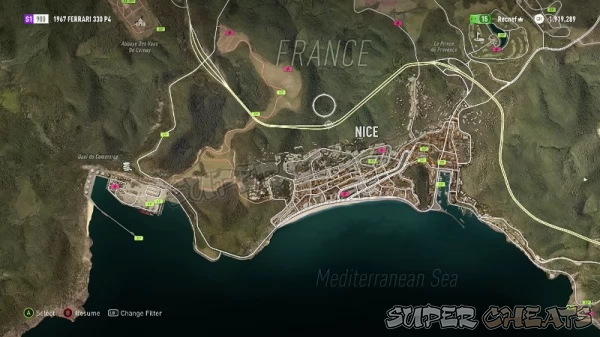
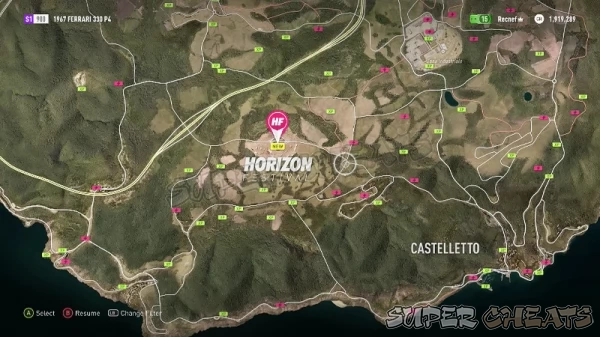
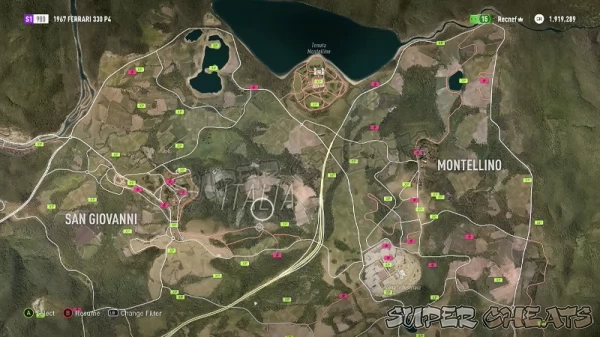
While every effort has been made to make obtaining the Bonus Boards - all of them - as easy as possible, with care being taken at the start of each of the individual videos to show you on the map where to position you car for the best results, we also thought you might find the following maps handy:


Note that the XP Boards are all grouped together as Green Icons, while the Fast Travel Boards are Red Icons...
Keeping Track: Collections
The large number of different collections in Horizon 2 (there are quite a few more than were found in the original Horizon) miught have been a bit on the daunting side as for keeping track, but the wizards on the dev team thought of that and made sure to include overview screens to help the players know what they have found, and what they have yet left to find;
Bear in mind that this does NOT include an item-by-item record - it would be nice if it did, but no, it is just tracked by the overall number of found and unfound. Fortunately you can use the Icon Marker System on the Map to get an idea of what you have found (those are the grey ones) and what you have not (the green and red ones).
Just FYI you can find the basic tracking info under the Main Menu in game by selecting the PROGRESS Tab, and then under the PROGRESS Sub-Menu, select the STATS Tab.
This sub-menu is organized as follows:
General Tab - Totals like the various Times, Increments, and Winnings.
Online Tab - All the Stats that relate to Online Progress.
Telemetry Tab - All the Physics Stuff that relates to your Cars and driving.
Discovery Tab - A summary of all of the Collection Info and then some...
Single Player Tab - Your progress through the story mode.
Skills Tab - All of the Ultimate Actions Totals.
Records Tab - Speed, Distance, and Air baby!
Of the Tabs above for our purposes the one we are the most interested in is the Discovery Tab, as that contains the numbers that mean the most to Collectors. This Tab includes the following data:
- 1,000 XP Bonus Boards Smashed (X/50)
- 7,500 XP Bonus Boards Smashed (X/35)
- 15,000 XP Bonus Boards Smashed (X/15)
- Barn Finds Discovered (X/10)
- Bucket List Progress (X/30)
- Car Meets Discovered (X/6)
- Destinations Visited (X/6)
- Fast Travel Bonus Boards Smashed (X/50)
- Roads Discovered (X/315)
- Speed Traps Triggered (X/30)
- Speed Zones Triggered (X/15)
Note that for the most part all of this stuff is marked on the map, so it should not be difficult to find in the world as long as you are comfortable with maps and know the basics of reading them.
A Few Comments about Roads
Due to some quirks in the way that the Road Collections work in the game we found that it is necessary for us to make some observations on the subject in order to help you head-off confusion that might arise due to the two separate sets of stats that are used in tracking them.
The first set is Road Discovery - which is significant largely due to the fact that there is an Achievement associated with it -- Human GPS (10g) Drive down every road in the game.
The reason that this is being remarked upon is that you do not actually have to do what it says to unlock it. In fact it is possible to discover all 315 roads in the game while only having actually driven on 201 of them. I know this because I did it.
The reason that this is possible has to do with the bubble-like cloud of discovery that travels with your car. Basically when the fog of war is removed it is not simply removed from the space in which your car physically sits or travels over, but a distance in every direction of roughly 100 in-game feet.
Due to that it is not only possible - but likely - that you will get credit for discovering roads you simply drove past as cross-streets and never actually drive on. In fact this happens a lot with the shorter roads that tend to link the north-south avenues.
Because of this phenomenon what you will end up with is two different numbers that are part of the tracking system, and that you will see constantly as you explore - those being the Roads Discovered, and the Roads Driven On Stats...
If you are a completionist and this is important to you, you will do well to remember that the map does keep track of the pieces of road you have actually driven on as opposed to simply discovered.
If you examine the map now, you will notice that the paved roads (including highways) that you have actually driven over change in color from subdued grey to bright white. Dirt roads change in color from subdued grey or dull orange (bits that are revealed by the fog bubble but that you have NOT driven on will be subdued orange) to a very bright orange.
Other Map Tips and Tricks
When you examine the map you will notice that it can grow very cluttered with all of the information it is displaying, and in particular when you are looking at an area of one of the towns or villages where a lot of information and objectives are close together.
You can de-clutter this by selecting LB while in the Map View - that will pop-up the Map Filter - and then you can select the information you actually want to see as opposed to do not need to see at the present time. So if you are just hunting Barn Finds and Bonus Boards, simply select ONLY those two options and that is all that will be marked on the map (save for the Horizon Festival Home Marker which is always on the map.
Speed Traps and Speed Zones: Speed Traps are remote cameras installed on poles with range and speed detection kit that snap a pic of both the driver and registration plate for any vehicle traveling faster than the posted Speed Limit.
Speed Zones on the other hand use the same sort of kit but track the overall average speed of the target car over a set measured distance.
These are defacto two of the Collections in the game, and there is an Achievement associated with these two collections -- Bragging Rights (10g) Beat Friends or Club Members on any 20 Speed Cameras -- which makes knowing where they are located espcially important should you want to try to unlock it.
The easy way to do that is to wait until after you have completed the Human GPS Achievement since by then you will have revealed every Speed Trap and Zone location on the map. You can then pick a particularly fast car whose characteristics you are comfie with, and go after the records with passion!
Personally I recommend the 1967 Ferrari 330 P4 as it is a particularly steady and stable platform that while it is plenty fast enough, is not overpowered, so is less likely to get you into trouble while making breaking these records a lot easier. Why is that? Simple really - just examine it to see what I mean:
The Ferrari 330 P4 is a Rear-Wheel Drive S-Class racer from the Classic Racers Class. Its basic stats include:
- 7.7 Speed
- 7.7 Handling
- 9.0 Acceleration
- 9.0 Launch
- 9.3 Braking
While these are impressive stats to begin with, you could (if you wanted to) bump them up even higher by modding the parts and kit with which the car is configured. Personally I don't recommend doing that largely due to the fact that this racer was set up for the current environment, so any changes that you make would essentially be a series of compromises. Just saying.
Using this whip you should find it relatively easy to unlock the Bragging Rights Achievement.
One other point you may find helpful - Speed Zone markers (Icons) are Yellow, while Speed Trap markers are White.
Icon Completion Markers: You will notice that for every major event there is an Icon on the map (examples include the various racing Championships associated with each destination, the five Showcase Events, and so on), and each of these Icons is a well-designed and very colorful presence on the map.
When you have successfully completed whatever the challenge is that the Icon represents on the map, its colorful and obvious Icon is changed to a rather subdued grey so as to leave it available for your reference but so that it does not interfere with finding future events or desired destinations.
You will also note that any Icon for an event that you have successfully completed within the narrowly defined terms of the game has, in addition to becoming subdued, a Green Tickmark (If you are a Yankee you would call it a "check mark" though I have no idea why).
This system is used widely for the Bucket List events - as you will see once you start racing them - but it is also used for the Championship races.
This should be sufficient to get you started exploring and using the map for collections purposes. Well met! Have fun! Take no tickets!
Anything missing from this guide?
ASK A QUESTION for Forza Horizon 2
Comments for Collection Intro
Add a comment
Please log in above or sign up for free to post comments- Walkthrough & Guide
- Achievements
- Activities
- Collections
- Reference Pages
 Join us on Discord

You get that after you progress through the first set of races.
When do u unlock the buy cars thing
Don't be sad - they actually added the Map to the Xbox One Edition now too so there is no longer any need to hunt for these.
Oh....My.....Gosh..... I am so sad💏
Theres a place on collection map two with 3 cr sings in the bottom left.the road to get there is blocked i can see it but cant get there by any ways