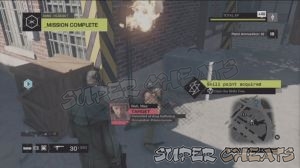
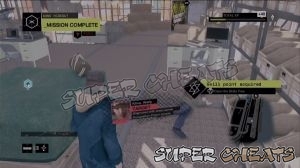
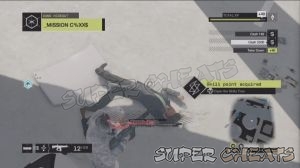
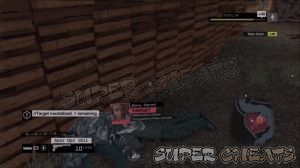
Gang Hideouts
Thank you for printing this page from www.SuperCheats.com.
Remember to come back to check for updates to this guide and much more content for Watch Dogs
Follow this guide to hear about updates
Last Updated:
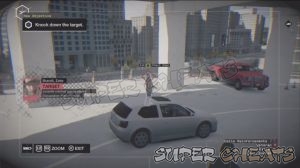
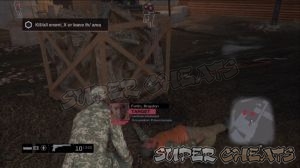
You can start doing these jobs when you're in The Loop, preferably after activating the ctOS Towers there. You have to take out the targets using non-lethal methods. The other gang members however, are fair game. Take note that some targets will attempt to escape using a nearby vehicle when you're seen by their guards. A escaping target will also call for reinforcements, making the chase a bit more difficult.
To prevent this from happening, you can carefully take out the guards silently by sneaking behind them and using melee attacks or better yet, using silenced weapons. You can also take out gang members from a distance using sniper rifles, as long as you're at a distance and you're not in their line of sight.

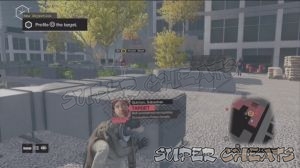
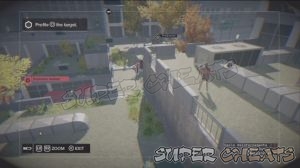
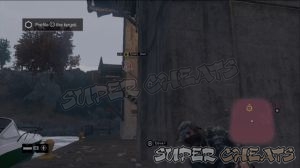
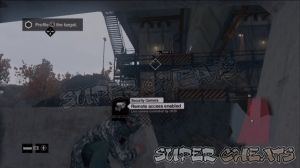
Once the mission starts, you need to head to the gang's hideout location. From there, find any nearby cameras and use it to scout the place. You need to use the camera as well to find and tag the target(s).

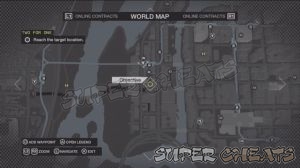
Like Criminal Convoy activities, GH missions won't appear in the map all at the same time. You have to spend some time completing other GH missions, Criminal Convoys, Fixer Contracts, etc. You'll unlock Progression Rewards after completing certain numbers of missions.
- Complete 1 Gang Hideout: Weapon: AK-47
- Complete 5 Gang Hideouts: Skill: Rapid Reload
- Complete 10 Gang Hideouts: Weapon: Spec Ops SMG-11
- Complete all 15 Gang Hideouts: Trophy/Achievement: Basest Base
Parker Square
Union Dues
This activity will become available after completing some Criminal Convoy and Gang Hideout activities in The Loop district. The marked location is just west of your railway hideout in Parker Square. The target is located in the next building. Keep switching from camera to camera to find and profile the target. The area is wide so you can use a lot of cover to make your way through.


The Loop
Two for One
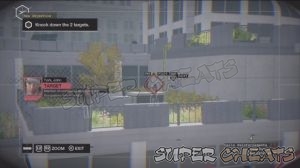
Head to the marked location. You have to find and profile the two targets first. One of the targets is on the rooftop beside some vent pipes. The other one is air boxing with a lone guard in the rooftop garden nearby. You can reach it easily by using the lift beside the street. Just be careful of the guard. There's also a sniper on the ledge in front of the target. The sniper can also call in reinforcements. Hack the nearby cameras and create diversions needed to allow you to move in and take them out one by one. Remember, the targets needs to be taken down non-lethally. The guards can be taken out of the equation. Avoid alerting them since the targets will most likely join the Combat.
The sniper can be taken out by bursting the valve in one corner of the ledge. Wait for him to get near then burst it to kill him. There are also some other guards who carry explosives with them that you can remotely trigger. If you have a silenced weapon, you can also take them out covertly.
No Parking
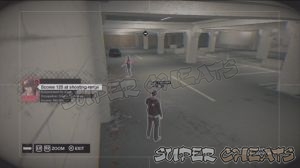
Head to the parking lot. The enemies are found on the second floor. Use the cameras to tag them and use the environment to distract the enemies or kill them. After clearing the floor, head to the next floor and use the cameras to tag the targets and scout the area. Take note that the target will attempt to escape if ever an enemy detects you so move slowly and silently. Use the camera as well to profile the target and mark him.


Street Cleaning
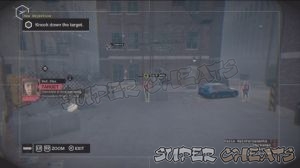
Head to the restricted area and use the cameras to tag enemies and profile the target. Once done, you can pretty much do whatever approach you want. Just remember, stealthy takedowns and executions are very effective in making sure you get the job done without alerting the target. Prioritize taking out the sniper in the ledge since he can also call in reinforcements. Once his guards are out, you can go down and beat him down.

Brandon Docks
Packing
Head to the gang hideout and infiltrate it. Use lethal force against the guards. You also have to profile the target so you can knock him out. Use the cameras to tag enemies and to use your Hacking skills, like disabling the capability of certain enemies from calling reinforcements. After taking out the guards, you can sneak behind the target by going through the open window with the help of the stacked container vans outside the warehouse he’s in.


Port Authority
Head to the shipyard and infiltrate the gang hideout. Like before, you have to carefully move in and profile the target so you can knock him out. You can clean up the perimeter guards first then silently move inside and take out the other guards. If done correctly, the target should be alone and you’re free to knock him out.


Gone in a Flash
The target is located somewhere in the middle of the docks. Use the cameras nearby to profile him before moving in. He’s in an open space so getting to him won’t be that easy. Eliminate the guards around him and thin out their numbers to make it easier for you.


The Wards
Compliments for the Cook
Head to the restricted compound then hack the cameras until you profile the target. Once tagged, you can work your way around the guards and eliminate them silently until you reach the target.
[img=GH_TW_Compliments1.jpg title]

Swap Meet
Head to the restricted compound then hack the cameras until you profile the target. Once tagged, you can work your way around the guards and eliminate them silently until you reach the target. Alternatively, if you have a sniper rifle, you can take out the guards from a distance, outside the restricted area. This will put them to alert but they won't be able to find you as long as you're at a good distance away from them.


Mad Mile
The Low Road
Find the nearest camera and hack to profile your target. Use ctOS scan to mark all enemies in the area; otherwise, manually tag them using the security cameras nearby. Like before, you can snipe the guards from a distance; just be prepared to use a Jam Coms if ever a civilian calls 911. Once you've cleaned the area, take down the target to complete the mission.


The Tower
Head to the parking building where the target is hanging out. You have to engage the guards here at close range so if you have silenced weapons, this is the best time to use them. Use the cameras to find and profile the target. Tag enemies using the camera or just use a ctOS Scan item. Take note that if the target is alerted, he may try to escape; it will make the mission go longer so a silent approach is fast and efficient in getting things done.

Pawnee
Beached
Head to the beach and profile the three targets first. The area has one camera in the middle and cameras carried by guards. After profiling the targets, it will be better to take out the guards and approach your targets silently. Spec Ops weapons are the best here. Just use Focus and headshots to eliminate armored targets.


Out of the Woodwork
Head to the wood mill and use the cameras in the area to find the target. Work your way around the guards or take them out silently until you get near the target and knock him down. The area has a lot of hiding places and the guards are placed far between each other so it shouldn't be that hard to take them out one by one. Shortly after, a second target will arrive. Make sure to tag him before moving in to eliminate him.


You can get around the first target by using the nearby lift to get to the upper ledge and jumping off behind the cover where he's leaning to get his attention. You can safely knock him down from there. Finally, eliminate all remaining non-targets to complete the mission.
Burning Bridges
There are three targets and a lot of enemies. Switch views from various cameras so you can tag and profile the targets. You can find the first target near the entrance. Kill the nearest enemy and take out the sniper on the crane. You can knock out the first target afterward.


The second target is located at the base of the bridge construction site. Just get in range to a camera and switch views until you spot him. You can take out the immediate guards then jump to the water to get near the second target. Go upstairs and find a crane with a barrier. Hide there and activate it to reach the other side of the bridge. Keep in cover and hack the cameras until you profile the last target.

Decapitated
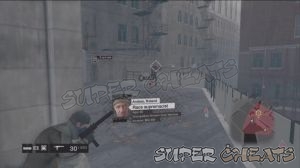
Go uphill overlooking the graveyard and take out the sniper. From there, you can hack a camera so you can profile your target. After finding him, you can kill all guards and leave him last. He will attempt to escape. Chase after him and take him down.


Anything missing from this guide?
ASK A QUESTION for Watch Dogs
Comments for Gang Hideouts
Add a comment
Please log in above or sign up for free to post commentsNo comments yet. Tell us what you think to be the first.
Table of ContentsClose
- Basics
- Skill Tree
- Act I
- Act II
- Act III
- Act IV
- Act V
- Activites: Parker Square
- Activites: The Loop
- Activities: Brandon Docks
- Activities: The Wards
- Activities: Mad Mile
- Activities: Pawnee
- Collectibles
- Investigations
- Sidequests
- Trophies / Achievements
Guide Updates
Get notified of updates to this guide
Many of our guides get updated with additional information. To get an email when this guide is updated click below.
 Join us on Discord
Click to close