Act I: Velen (No Man's Land)
After you do the small amount of things you can do in the palace it is time to hit the door and Fast Travel to Velen - aka No Man's Land. Your destination there is the Hanged Man's Tree Fast Travel Point.
When you arrive - five days later - you get an initial CS that shows you the land around you, and the landmark you arrived at. Which as it turns out was named this for a reason, heh...
Please Note: We will reference Quests by name in this walkthrough but the details will only appear in the specific quest-type page in the Reference Section of the guide. Basically we do that because (1) including all of the quests in the guide from here on out would make the story coverage too hard to follow, and (2) you will NOT flag these quests in the same order WE did - so by putting them in alphabetical order and in sections under their types will make it way easier for you to get the information you need!
So yeah, there is that.
This is when the game adds the other Main Missions to the Quests Tab - and in particular:
Mission: In Ciri's Footsteps
Emhyr var Emeries had been searching for his daughter Ciri for quite some time. Even the most dubious sighting of an ashen-haired young woman with a scar on her cheek would send imperial spies scurrying.
Not even the harsh conditions of war-ravaged Velen deterred them - indeed, it is thre they had been most successful, determining that Ciri had been, and possibly still was, in the region. Reports of a similar nature has also come in from Novigrad, but remained unconfirmed.
Emhyr's spooks had gathered nothing concrete from Skellige, but an explosion of magical energy had taken place on one of the isles, and it seemed likely that Ciri had been somehow involved.
Objectives
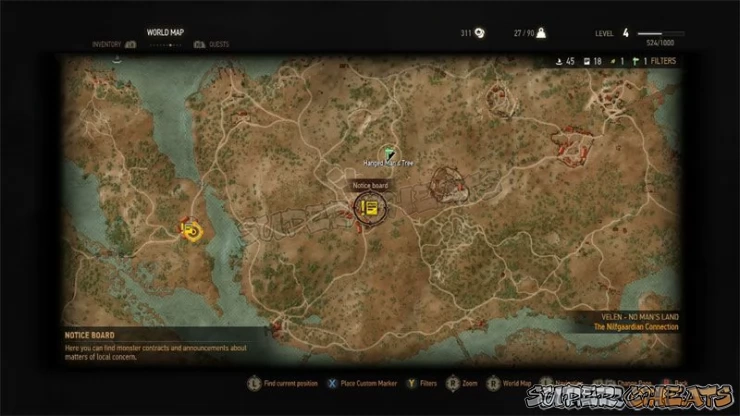
The Nilfgaardian Connection Continued
Our first step for this mission was of course arriving in Velen. The next step is to head to the Inn at the Crossroads - but before we do that take a look at the map - as the first point that needs to be driven home is that this land is HUGE.
You will notice that in addition to lots of boats, there are also more than just a few Notice Boards and, on them more than just a few quests.
We will endeavor to address the story and quests as orderly as we can, but this is going to get messy quick! Because of that we wanted to remind you that in addition to covering the quests and missions HERE in the walkthrough, we ALSO cover them in the type-sections of the Reference Section of the Guide. So if you get confused, or you want to focus on a specific quest, you may find it easier to follow the quest in its appropriate section in the Reference Section. Just saying.
The Nearby Village
While the Crossroads Inn is a bit farther in the distance there is a village nearby that has a Notice Board. Since we have to pass through it anyway to go to the Crossroads, why not check it out now?
Flagging this first Notice Board Quest also results in revealing the location markers for nearby locations. It is actually a pretty good idea to go ahead and work our way through these locations to ID them before we progress to the next village at the Crossroads...
What we decided to do was head back to the Hanged Man's Tree and then continue north and west to the closest Undiscovered Location to kick this off!
Monster Den
That location turned out to be a Monster Den - and of course this turned out to be interesting if only because it is entirely a new experience over the Monster Nests we have seen before!
The Monster in this Monster Den turned out to be Nekkers, which are a type of Ogroid. They are also the first Monster we have encountered with a higher chance of dropping Mutagen as loot!
Inside there is loot to be had but a lot more Monsters - so you may want to take it slow and try to lure out a few at a time to combat - or wait until you are closer to their level (which is Level 6).
This experience was sufficient to suggest that perhaps wandering around looking into the Location Markers was not such a good idea after all - we need to level up a bit and get better Kit in this new land! So back to the road and headed for the Crossroads Inn are we!
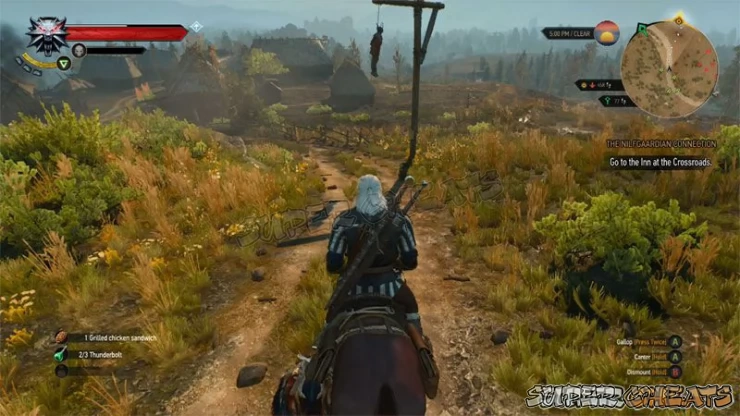
The Inn at the Crossroads
When we arrive we talk to the Innkeeper and ask about Henrik - but company arrives in the form of some soldiers. You could do combat I suppose, but telling them you are a Witcher instead will defuse the situation, allowing you to progress the quest.
Your conversation with the Innkeeper reveals the general location of the man you are seeking - which is good enough for now. You can talk to him to learn some Background about the Bloody Baron, and of course you can do business with him - he has some Cards.
The village we are seeking is farther to the west - before we head there though there is a Notice Board outside!
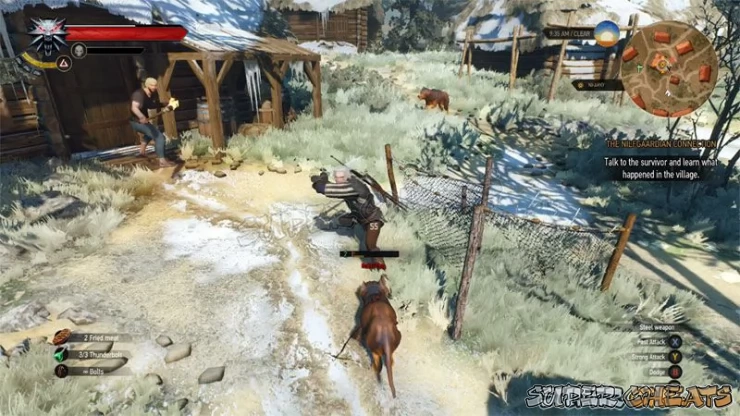
When we arrive at the village where the marker is located we find it covered in frost and a pack of wild dogs attacking. We jump to the rescue of the farmer and after we defeat the dogs the farmer tells us what happened to Hendrik... And it is not good. We get a CS of he man's story - the THEY in this case being The Wild Hunt.
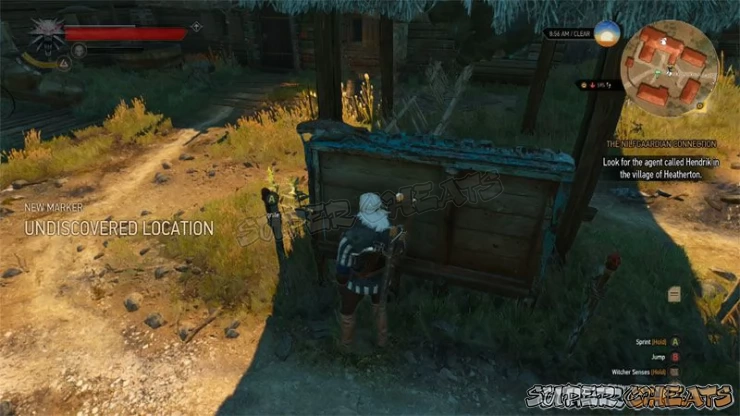
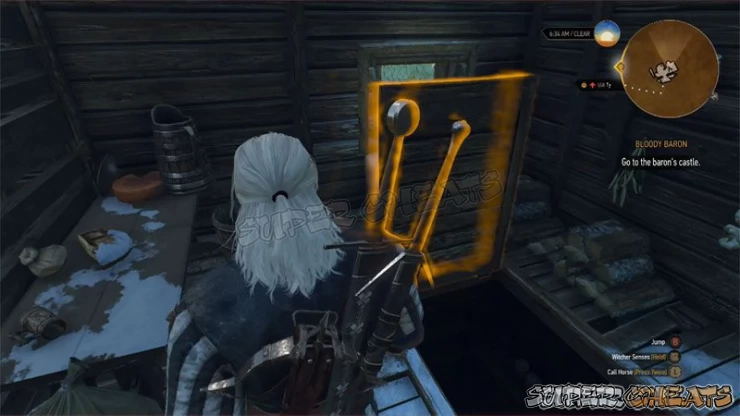
Heading into the agents house you find his body and search it to find a hidden key. Using your Witcher Sense you find the concealed space in which you find a lever on the wall that opens a hiding place and reveals his ledger.
You decipher the notes written among the ledger entries - and find leads to the Baron and a witch. That wraps up the mission and flags two more Missions - Bloody Baron and Hunting a Witch.
Assuming that you were not expecting the basic game play experience to suddenly explode into the free-for-all that it has - this open world with barely any guidance - Do Not Panic!
While it is true that the guidance in the game consists almost exclusively of prompting you to follow the story line - and you CAN do that if you want - a small amount of effort and keep attention to details (read that Situational Awareness) will allow you to thrive here.
Basically what you want to do is start leveling now - by doing that it will make doing the story all that much easier on you - but basically what that means is finding mobs to kill, and quests that you can do. Since there are a hella lot of quests that should not be a real problem!
- - - - - - - - - - - - - - - - - - - - - - - - - - - - - - - - - - - - - - - - - - - - - - - - - - - - - - - - - - - -
Did you Know?
Many of the items and objects that you loot that the Game Inventory System classifies as "Junk" are actually far from it?
In fact many of those "Junk" items can be dismantled to create valuable crafting components! A few examples to get you thinking about the subject include:
- Flowers - Dismantling provides Fiber
- Gold Ruby Ring - Dismantling provides Gold Nugget + Ruby
- Horse Hide - Dismantling provides Hardened Leather + Leather Scraps
- Old Goat Hides - Dismantling provides Leather Scraps
- Rotting Flesh - Dismantling provides Ashes
- Smoking Pipe - Dismantling provides Timber
What can all those raw resources be used for?
- Black Pearl = Black Pearl Dust
- Fiber = Twine
- Nails = Iron Ore
- Pearl = Powdered Pearl
- Resin + Twine = Rope
Most Gems will dismantle into their corresponding dust that is used in crafting, and most metal plates will dismantle into ingots of the type used for their making - but with metal plates you are best keeping them in plate form since that is often the path that you take with their ingots in order to make armor and weapons from them. Just saying.
Items that are classified as Magic Items, Relics and Master Items are best left in their original state since they may be used as a crafting ingredient. When you need the resources that they can create by being dismantled you can do that as needed.
Remember just because the game classifies an object as "Junk" does not mean it truly is. Just because you can dismantle something does not mean you should. Learning the various formula for crafted objects can lead to a better understanding of the true value of the objects that you loot.
- - - - - - - - - - - - - - - - - - - - - - - - - - - - - - - - - - - - - - - - - - - - - - - - - - - - - - - - - - - -
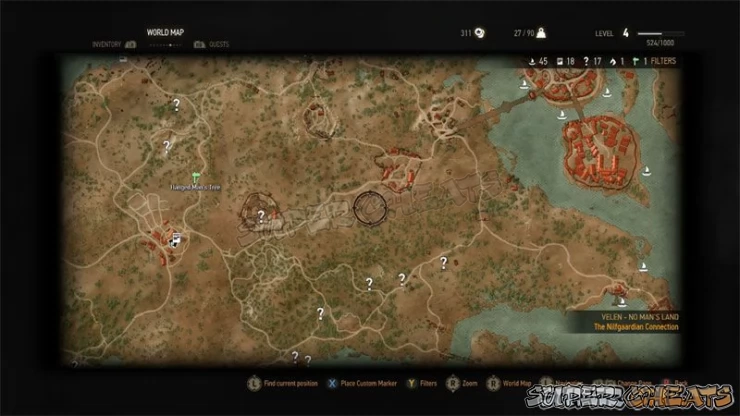
Adding Villages
What we desperately need are to add some villages to our map - and in particular locations with merchants of every type. The more of those we have the more power we have for leveling - getting upgrades to Kit - and just in general questing.
While there is always risk involved with traveling in a strange land, there is less risk if we stick to the roads - and we can do that - on our horse - and visit the villages to the south to see which have resource we can use. Plus that will add Fast Travel Signs to the map, which can only be a good thing!
Just outside the first village - Blackbough - we will reveal an Alchemy Supply, and in Blackbough two merchants and a Blacksmith! Excellent!
The next village - Midcopse - has an Armorer and another Shopkeeper, as well as a Notice Board. As this is also the village we needed to find to do the Witch Mission, hey, bonus! But for now we are not stopping - as way way down south are two more villages...
Far to the south is Byways Village - but it has no merchants just a Ghoul infestation - which we can deal with later. Farther south of Byways is an Abandoned Village that is infested with Bandits who are higher level than we - so that should be escaped as well. The small village to the east - Frischlow - is also infested with wraiths - man this area is going to require a ton of work to clear out!
Grabbing the boat at to the north and east we can then sail north to the next village, which is Drudge. Nothing to mention here so ride to the north and west to Oreton which, in addition to having a Notice Board, also sports a Blacksmith and Shopkeeper!
To the north is Claywich - which just has a Grindstone. East is a small no-name settlement and east of that an Abandoned Site near the Boatmaker's Hut.
East of the Baron's Castle is Lindenvale, which also has an Inn, Shopkeeper, Blacksmith and Notice Board.
East and a bit south from there is the Orphan's Crookback Bog with nothing to recommend it, and north of that is Downwarren, which has a Shopkeeper and a Notice Board. North of here is Reardon Manor - which is an Abandoned Estate that is infested with Wraiths.
To the west is Lurtch - which does not have much to recommend it, and north is an Abandoned Site with a Hidden Treasure. To the east of that is Toderas, which has an Armorer's Table.
To the south is Benek which has some quest givers, and to the far south and east is a huge military camp - The Nilfgaardian Central Army Camp -- and when you enter you run into the soldier that Lena (the girl you made the potion for in White Orchard) and learn that she survived. Well survived, yes, but not really recovered. But you did warn her.
You will find a few quest givers here and an Alchemy Shop as well as some merchants.
If you examine the Notice Boards for each town or village that has one that will reveal the "?" for nearby Undiscovered Locations even if you do not read or flag any of the quests that each board may have...
While there are still a few towns far to the north you cannot actually get to the other cities just now - when you try at the bridges you will be told you need a pass (and you can then flag the quest for that) so it is good to do that for that reason, though there is no hurry to actually obtain access just now.
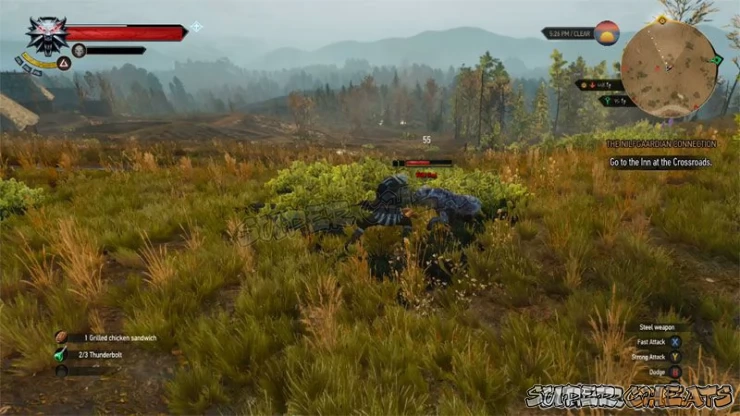
The basic drive-by exploration you have done gives access to the Fast Travel network and will make questing easier. Plus you have plenty of merchant and smith options as well as alchemist and armorer so that means getting good Kit and keeping ours repaired will be dead easy!
The bridge north and west of The Hanged Man's Tree is one of the closed routes (it actually leads to Novigrad to the north and west) but you should go ahead and visit it (and access its Notice Board to add the Undiscovered Locations to the map) so you can flag its quest...
To the north and east of the Hanged Man's Tree is Codgers Quarry, and south and east of that is the Velen Stonecutter's Settlement. North of that - by the bridge - is a burned village that is now occupied by an army unit. When you ttry to cross to the other side of the bridge you encounter another blocked bridge that requires a pass.
To pass into this city you will need a Transit Pass - but they do not offer a quest for that here.
South of the bridge on the main path is a guard post with a tower, and south and to the east of that is the Ferry Station - which has an infestation of Level 9 Ghouls that with a little luck you can clear away!
Be sure to loot the corpses and containers here as there is some good stuff. Farther to the east is an Abandoned Site with Level 9 Ghouls - you can try to clear them out carefully as well... But there are more than just a few so you may want to level up a bit first.
At this point you have pretty much revealed all of the important bits in terms of locations and Unmarked Locations, Fast Travel Signs, Villages, and the like, so now is the time to start doing Side Quests and clearing infestations and the many other tasks that we can do to get loot - and XP - to level up!
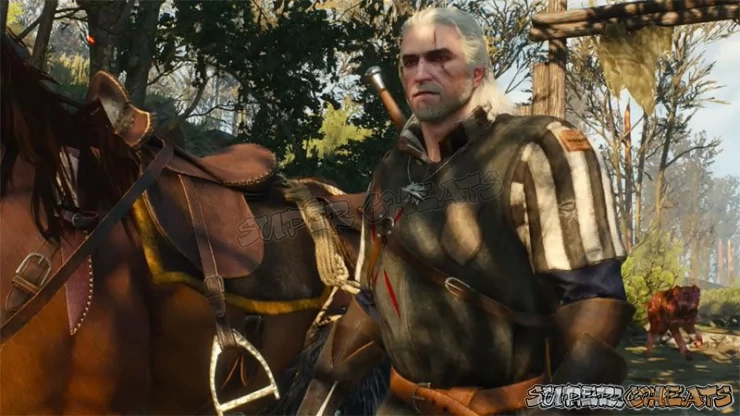
Leveling Up in No Man's Land
Right so, as noted, clearing infestations and doing side-quests are the fast route to XP - and of course you want to loot loot loot! Because money is good!
Heading back to Mulbrydale we can flag a quest on the road from a Priest of the Eternal Fire.
With that done we may as well head back to Midcopse and get started looking for that Witch... Fast Travel or Ride, it is all the same to me, but get there we will!
Mission: Hunting a Witch
Flagged from the Ledger in Hendrik's Hut
The notes left by Hendrik, the Nilfgaardian agent, mentioned that Ciri had quarreled with some witch, and that the newt-stewer in question could be found near the village of Midcopse. Exactly where, Geralt did not know - and so he was forced to swallow his manly pride and ask the locals for directions.
The thing about this quest is it may make it sound like the Witch actually lives in the village but no, not so... She lives in a hunt OUTSIDE the village which is to the north and east - see where the three roads come together at a point that is to the west of the bridve over the lake? THAT is her house!
When you arrive you get a CS of her being consulted by the locals. What she does is really clever - she knows that part of the problem is the filthy barn, so she offers them a placebo but insists that they have to clean the barn first. Smart.
After the CS it is time to speak with the Witch.
When you go inside the Witch is vanished. Carefully search - and loot - the hut both upstairs and down - then use the Skull on the shelf to open the portal and step into it. The portal instantly transports you to a spot about a league to the north of the hut.
She was expecting you - more to the point she knows you and you know her! And hey, you get to see her naked!
She is Keira Metz - you know her from the previous game. You can talk to her about the past (and you probably should) before using the gold option.
After a lengthy conversation you both set for some nearby Elvaan Ruins to see the Elf she told you about.
Another CS plays out and then you flag a new Mission Segment (they call it a Quest but this is actually part of the mission). By the way at this point you have completed Hunting a Witch! Did you happen to notice the two rabbits having sex in the Background?
Objectives
- Find the witch in your own or ask the residents of Micopse about her.
- Eavesdrop on the gossiping women
- Find the Witch's hut.
- Talk to the Witch in her hut.
- Search the Witch's hut using your Witcher Sense
Enter the portal in the Witch's Hut
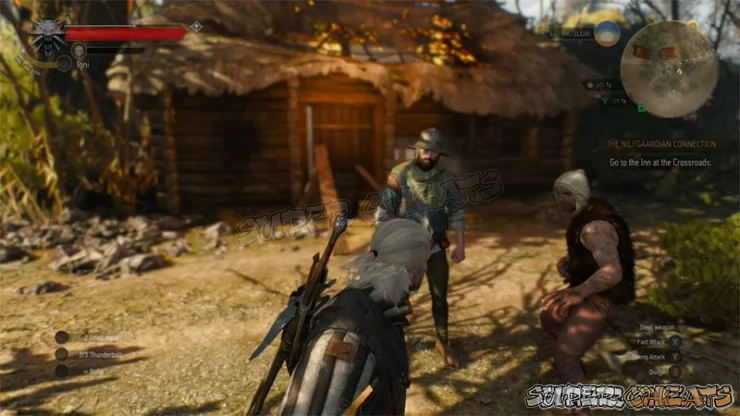
Mission: Wandering in the Dark
Follow Keira to meet up with the Elf
Flagged when you complete Hunting a Witch - Suggested Level 6
Finding Ciri in Velen had proven harder than tracking a swallow on a rainy day. According to Keira, an elven mage had been tracking this particular swallow as well. Had he found her? Did he know more about her fate?
Geralt knew he had to find out, and Keira, well, she had unfinished business of her own with the mage. And so the Witcher and sorceress set out together on a journey into the darkness to find the mysterious elf's underground hideout.
As you enter the underground you spot members of The Wild Hunt! Keira had no idea that they were a real thing - she thought them a myth - but you know better. You get her to teleport you across in order to follow them -
Once she casts the portal go through and then use your Senses to find her. I would save if I were you. NOW.
As you move forward you have to deal with a group of Drowners, and then head into the water and swim under, Once you deal with the Drowners be sure you loot the chest under the water as it has some useful things in it .
On the other side the path splits - there is a side-path to the right you can follow. Use the Aard Sign to blast open the door, and then loot and light until you battle the Foglet (new monster!).
So here is the thing - you CAN head back and take the main path if you want to but, that will just take you to where the side path meets up with it but at the top of a broken bridge. When means you will have to drop down and deal with a pair of Drowners on their own terms.
OR you can stay on the side path which takes you to a different bridge, and which allows you to start the same battle but on the OTHER side of the water. I prefer the side path myself.
As you are searching and fighting do NOT neglect your looting. There are some really nice items to be had down here!
After you go up the stairs and hear Keira scream there will be some new monsters below - man you got to be very careful of them, they are nasty and dangerous!
Continuing along the path you trigger an update - you need to destroy some Rat nests!. Just use Igni - do not waste bombs... After you do that you get another CS that moves the story forward, and then
When you reach the next chamber you see a message from the Elven Mage that appears to have been for Ciri... Fortunately Geralt is pretty clever and he figures out the message - so you need to follow the Swallow Symbols from here.
Directly ahead there are some Wraiths you can kill for extra points. We should also point out that exploring side-paths is almost never a bad idea, as you will be amazed at the loot you can find. Just saying.
Once you are happy with your exploring and killing follow the symbols to the next chamber, where the quest updates - you need to search the chamber using your Witcher Senses.
Using the Witcher Sense find the sea monster symbol and touch it to trigger a battle with - yourselves! Well that was not optimal...
Look down into the pool in the well below and you will see a horse symbol - jump in and use the symbol then swim along the path and you will find another symbol - use that and it causes something to happen. Keira calls you to come back, saying you did something.
Head up the stairs and then drop back down into the chamber and return to Keira. Join her to explore the new chamber you have opened up.
Inside the next chamber you see a Swallow symbol p use it to open a new portal... Then enter it.
Inside you get trapped by a Golem and need to defeat it in order to get out. No worries - cast the Quen Sign as needed, dodge when it attacks and beat it to a pulp.
Following that head back through the path and in the next trap-chamber you fight a Gargoyle, then keep exploring and you will enter a chamber with another Swallow Symbol. Use it to open another portal and head in,
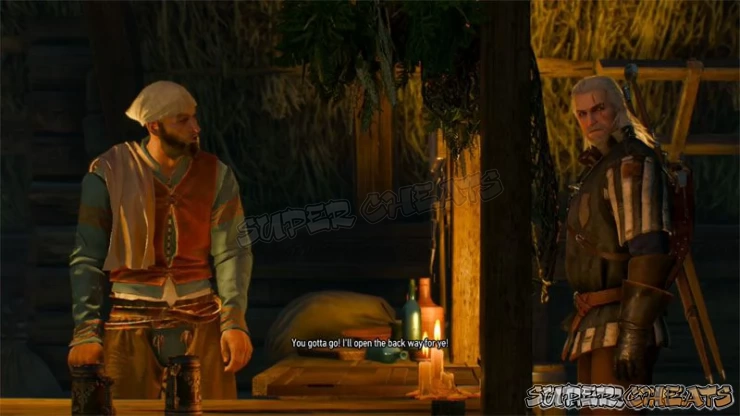
As you pass through you get a CS that reveals you have crossed the broken bridge from the first large chamber, and up the stairs where you are prompted to follow the Wild Hunt warriors.
Passing through the next chamber earns you another CS in which you observe the Wild Hunt blokes - and then you watch helplessly as the Hunt Mage casts the frost spell. You need to stick close to Keira now or die!
So here is the deal - as Keira is trying to close each rift some creatures get through. You have to kill them. but you also need to keep an eye on your health bar because you WILL end up leaving the shield as you attack and it WILL hurt you!
Try to heal up quickly and do an many attacks under the shield as you can... Eventually she will get all three closed, and then she faints! Well sort of.
After her episode you need to follow her, and she opens the way, at which point you are prompted to chase The Hunt's warriors! Doing so results in a CS in which you confront the Hunt Leader - you have to damage him to the point that he opens a portal for some Rift Dogs - kill them - then rinse and repeat again until you finally vanquish him!
Make sure you loot the heck outta him, the dogs, and the chamber!
You get a CS with Keira and watch the final mage message and then you have another revealing conversation with Keira and learn about a group of Witches that are known to be in the area and that Keira knows about. You feel betrayed!
Keira then tells you what she knows about the Witches - including how to reach them. She gives you the book - read that.
Once you are sure that you have everything you want from this chamber use the illusion door to cause Keira to remove it, and follow Keira out to trigger a CS in which she remembers the Magic Lamp the Elf Mage promised her! She asks for your help - and of course you do - adn that completes the Wandering in the Dark Mission!
Objectives
- Follow Keira
- Go through Keira's Portal
- Use your Witcher Senses to find Keira
- Destroy the rat nests with Signs or bombs 2/2
- Explore the Ruins and look for information about the mage.
- Explore the Ruins and follow the swallow symbols.
- Search the chamber using your Witcher Senses.
- Use your Witcher Senses to find something associated with Ciri's horse Kelpie.
- Explore new chambers with Keira
- Enter the Portal
- Examine the next room using your Witcher Sense
- Continue exploring the ruinis and follow the swallow symbols.
- Enter the Portal
- Follow the Wild Hunt warriors
- Keep close to Keira and stay under her magic shield.
- Kill the creatures emerging from the rift
- Follow Keira
- Chase the Hunt's warriors
- Use the Eye of Nehaleni to dispel the illusion.
- Follow Keira
Having completed Wandering in the Dark agreeing to help her find the Magic Lamp flags the next Mission in the line:
Mission: Magic Lamp
Find the Magic Lamp with Keira
Flagged by completing the Wandering in the Dark Mission - Suggested Level 6
Kiera Metz had helped Geralt in his search for Ciri, so the Witcher decided to return the favor. The sorceress sought a magic lamp which the mysterious elven mage had promised to give her. Since the object was nowhere in sight, our heroes drew the only possible conclusion: that it lay concealed somewhere in the underground passageways.
In the next chamber you need to get Keira to translate the inscription on the closed door in order to figure out how to open it... The riddle is:
Four guardians, four flames, standing proud in a line.
The First to light his fire, dared not march on the end.
The Second beside the First, played a woeful lament.
The Third kept close to his faithful beast.
The Fourth, marched not beside the First, yet like the Second played a tune.
And thus the stood o'er their queen, who slept beneath flickering stars.
Right so, going by that puzzle the answer should be 3-2-4-1 (facing and counting left to right). So light them in that order - and that should open the blocked door!
As you enter there is a path to the left - go to the end of the main chamber for the CS and then you can climb up to that alternate path to make yoru way to the surface.
This has a Place of Power. Go hit that - and then head past it to the Hidden Treasure and a Level 6 Golem to battle! After you defeat it make sure you look it AND all of the chests in the chamber as they have some good things in them...
Using the Aard Sign blow open the door panel and then loot in there. Once you have done that backtrack past the lab and up the stairs where you can dispel the illusion blocking the exit. And there you go, you are outside!
As you exit you get another CS with Keira and find yourself outside of the caves on the shore of the lake, where there is a boat. Keira leaves by a portal and that ends the mission!
Objectives
- Follow Kiera
- Search the room using your Witcher Senses
- Light the braziers in the correct order
- Look for the Lamp in the mage's laboratory using your Witcher Senses
- Find an exit leading to the surface
- - - - - - - - - - - - - - - - - - - - - - - - - - - - - - - - - - - - - - - - - - - - - - - - - - - - - - - - - - - -
Did you Know?
Weapons and Armor that has very low resale value is often worth more to you dismantled than through selling?
The typical weapon and armor piece that you loot that has a value of less than 10 gold pieces when sold to a Merchant, Smith, or Armorer can contain resources as its component parts that are worth far more than the paltry sum that you are offered for them!
Before you sell low-valued items like Armor and Weapons to a merchant, take a look at what you will get from dismantling them. That should be your constant guide when you are considering how to dispose of the loot you obtain!
- - - - - - - - - - - - - - - - - - - - - - - - - - - - - - - - - - - - - - - - - - - - - - - - - - - - - - - - - - - -
Mission: Ladies of the Wood
Find the Witch that Ciri argued with
Flagged automatically after completing Wandering in the Dark
Information found in the home of Hendrik, the Nilfgaardian agent, indicated Ciri had entered into conflict with some witch in Velen. At first Geralt thought this "witch" was Keira Metz, but he later learned Hendrik had meant a different individual, one who dwelt in Crookback Bog. So the Witcher ventured into the swamps, determined to find this bog-dwelling witch and ask her about Ciri.
Having wrapped up the Wandering and Magic Lamp Mission this is the next logical step on our adventure... That actually works out good as we can grab the boat that is outside of the exit from the caves and sail very close to the next marker for this mission. So how about that?
When you arrive at the site you easily spot the shrine - so use your Witcher Sense At the end of the Trail you get a CS in which you see some kids playing. The conversation that you have with them and then with the woman named Gran does not lead to the direct knowledge you seek - but there are some hints.
But it does lead you to the hut - and the boy...
After playing a game with the kids you talk to the boy who tells you hot to find Johnny. Then it is off to the swamp and some light tracking for you!
Eventually his tracks lead you to a burrow - and you need to lure him out of it. You talk for a bit - YOU talk because he cannot. Then you follow him and defeat some Drowners - Follow him again and give him the bottle from the best - this releases his voice.
In the CS and Q&A you learn what he knows - and then he agrees to help with Gran so you follow him to the village. Once you get there you get a CS and Johnny does what he promised to do - and Gran agrees to help.
She takes you to the Ladies - sort of - and after a lengthy conversation you strike a deal with them... You need to take the dagger and speak with the ealdorman of Downwarren about the village problems. So go do that!
When you arrive you have the chat and then head for the marker in the woods and start investigating the bodies for clues as to what sort of monster this is...
Note: As you approach the marker you will automatically flag a new Side-Quest called The Whispering Hillock.
Completing Whispering Hillock also advances this quest - at which point you can let the ealdorman know that the problem has been fixed. He does not take it well - but hands over the payment agreed upon with the Ladies - his ear!
You get a CS and after it plays out you get to meet the three ladies... Urgh!
They may be ugly but they deliver on their end of the deal and you get to see what happened with Siri...
You briefly play as her as she escapes the bog - with the Wild Hunt leader in chase. After that the CS ends and the debt is paid. The Witcher is NOT happy! Well yeah, of course...
This completes the mission but you are left with a decision - battle the Ladies of the Wood or not.... You have two choices:
1. I won't let you get away with it.
2. I'll find her. And come back for you.
It's a conundrum - on the one hand they really need killing, on the other you sort of have a mission to find Ciri... And what if you need more information from them later? Which moral imperative applies?
No matter what you choose they are not going to die at your hands here. So go with your gut.
Objectives
- Read "The Ladies of the Wood"
- Find the Crones of Crookback Bog
- Use your Witcher Senses to find the shrine that marks the start of the Trail of Treats.
- Follow the Trail of Treats using your Witcher Sense
- Go to the hut and talk to the boy
- Ask the children in the swamp village about Johnny
- Find a way to lure Gran away from the hut
- Find the hidden children using your Witcher Sense
- Look for Johnny in teh swamp using your Witcher Senses
- Find Johnny's footprints
- Follow Johnny's footprints using your Witcher Senses
- Lure Johnny out of his burrow
- Follow Johnny
- Defeat the Monsters
- Follow Johnny
- Follow Johnny to the Village
- Defeat the Monsters
- Follow Johnny to the Village
- Speak to the ealdorman of Downwarren about the village's problems
- Find out what's killing the villagers of Downwarren
- Find a passage leading under the hill using your Witcher Senses
- Solve Downwarren's problem
- Tell the ealdorman of Downwarren you took care of the problem
Mission: Ciri's Story: Fleeing the Bog
Escape from Crookback Bog (as Ciri)
Flagged and completed automatically as part of the Main Story - Suggested Level 5
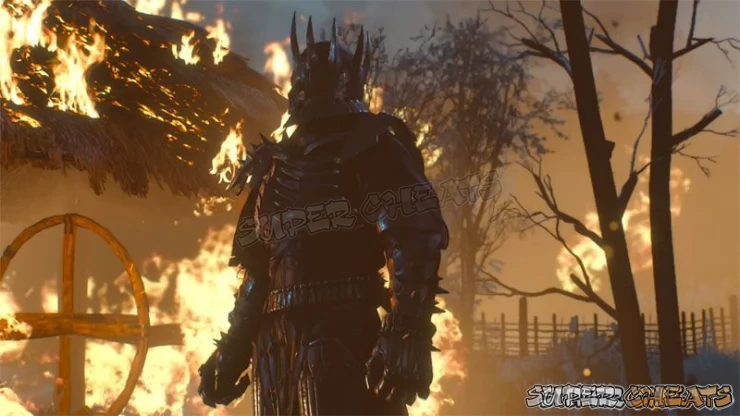
Crookback Bog is home to more than its fair share of horrifying beasts, but none of them hold a candle to the general fo the Wild Hunt who chased Ciri now. Imlerith - for that was his name - had arrived on teh Crones' summons to take Ciri back to his king. The young Witcher was able to give her pursuer the slip, but the two foes were destined to meet again in the future.
When Ciri arrived in Velen, she found herself in the very heart of the notorious Crookback Bog. Exhausted, she sought shlter, but instead found herself in the clutches of three demonic sisters known to the local peasants as the Ladies of the Wood.
Ciri quickly realized how poorly that name fit these bloodthirsty hags and fled. She escaped with her life by a hair's breadth, but still had a long and dangerous trek through the marshes ahead of her.
Once you gain control of Ciri do not mess around - RUN! You just need to reach the marker without being captured.
Objective
- Escape from Crookback Bog
As you proceed from here we strongly recommend that you focus on completing all of the quests that are given by Kiera Metz the Sorceress BEFORE you proceed to the Baron Subplot. Right, have that done? That was a shocker! But good on ya!
Non-Story Quests Part II
Now that you DO have it done, it is time once again to turn our attention to the many Side Quests, Contracts and Treasure/Scavenger Hunts that have been stacking up in our Quests Journal...
It is not that we cannot simply continue the story missions - we could do that if we wanted to - and it is not so much that we need to level up more - we are at a sufficient level to do the missions now.
What it is, to be blunt, is very simple really: If we allow too many side-quests, Treasure or Scavenger Hunts, and of course Witcher Contracts - to build up in our Quest Journal - not only will that make it harder to keep track of the active quests we ARE working (because we will constantly trip over elements from OTHER quests) but we will also have to deal with the fact that once we progress past key points in the story a LOT of those quests will immediately fail, and once THAT happens we cannot complete them.
So to avoid falling into the trap of having quests fail due to story progress, we will instead keep them tame and under control by completing them. Easy Peasy!
Check your Quest Journal - I prefer to focus on the outstanding quests in the following order of precedence:
- Witcher Contracts
- Secondary Quests
- Treasure Hunts
- Scavenger Hunts
Witcher Contracts: Of these the ones that are the most fun are the sort that involve hunting down and killing legendary monsters. And why not? That is after all what Witchers DO...
The first outstanding Contract we chose was The Merry Widow, followed by Swamp Thing, then Jenny of the Woods. Of the available Contracts those were the only ones that we had any chance of actually completing without instantly dying...
Secondary Quests: There are a few available - but we should really pay a mind to hitting any "!" markers or Notice Boards we have yet to access. So since we do have some we thought we would do them in the order of A Greedy God then Defender of the Faith, followed by any Gwent matches we can find as those also pay off in cards that may (or may not) improve our deck!
Treasure Hunts: Unfortunately - or fortunately depending how you look at it - we actually have completed all of the outstanding Treasure Hunts for Velen. And as we are not prepared to head into either of the other regions at the moment, we need to look for and flag new ones.
Scavenger Hunts: The same deal prevails with Scavenger Hunts - we have completed all of the ones in Velen we can actually do - and while there are some within our reach in Novigrad now is not the time to venture into that realm. So we need to keep an eye out to flag Velen based SH's.
- - - - - - - - - - - - - - - - - - - - - - - - - - - - - - - - - - - - - - - - - - - - - - - - - - - - - - - - - - - -
Did you Know?
When you open the map and pull back on the Right Joystick the map will change from the local map for the current region to the World Map?
Did you know that you can then drill down into any of the regions you have actually visited before, and that you can then select any Fast Travel Point in that previous region and, using the action button, Fast Travel to THAT Fast Travel Point?
That's right, you can almost instantly return to previous regions and make use of the Merchants, Innkeepers, and Alchemists not to mention Blacksmiths that may be in that region! That may be a very important resource when you find that you have too much loot and you don't want to have to rest for days to wait for the locals to get more money / resources for you to buy / sell!
This can be especially important when there were merchants with Gwent Cards that you could not afford the last time you were in their area.
- - - - - - - - - - - - - - - - - - - - - - - - - - - - - - - - - - - - - - - - - - - - - - - - - - - - - - - - - - - -
Back on the Trail of the Bloody Baron
Eventually you are going to arrive at a point where you are going to have completed all of the Side Quests that you can - assuming you do not just decide to go see the Bloody Baron before that which is certainly possible!
In any event the point will come when stepping back on the story path makes sense. And to start in on the next logical subplot path we need to head to the castle that is the Baron's seat of power in the region.
When you arrive you will find a reasonably friendly reception - at least from the peasants and merchants anyway :)
Upon arrival is a good time to hit up the merchants, sell unwanted stuff, make repairs, craft - you know the drill. You can also play some Gwent.
Eventually you will make your way through the gate at the end of the compound and arrive at the challenge point where you are confronted by soldiers. You have a chat and then go in. Before you start to follow the Sergeant pause for a moment and let the conversation between he and you play out. Reading between the lines you can learn a bit about the situation here.
After the conversation ends turn to your left and you will spot the Notice Board for the Baron's Keep. A quick check of that should reveal five notices and a Contract, the latter being for Contract: Shrieker, while the notices cover the death of Bilberry, a notice of Mandatory Conscription, some free puppies, a Flogging Warrant, and an offer of Thatching Services. Pretty average.
Now you can continue to follow him to the inner courtyard. You CAN stop and do business with the Smith and the Merchant if you like - the Sarge will not like it but he will not stop you. This is actually a good opportunity for you to see a smith who actually has a small amount of talent - among other things as a Journeyman Armorer he can make some of the items you have not been able to obtain elsewhere.
Whether or not you opt to have armor or weapons made will largely depend on how successful you have been in looting good magical Kit, right?
After a very long walk you finally reach the place where the Bloody Baron is sitting with one of his partners in business and you are treated to a CS of the end of their conversation and then the CS turns into a chat between you and the Bloody Baron - and THAT officially flags the mission.
Mission: Bloody Baron
Flagged from the Ledger in Hendrik's Hut
Nilfgaard's agent had determined Ciri had stayed with the baron - the self-proclaimed ruler of Velen. This man was known for his violent temper and three-mile-long cruel streak, hence his moniker: the Bloody Baron.
Geralt, however, was not one to be frightened by nicknames, least of all those taken from bodily fluids, and so made his way to Crow's Perch, the baron's seat, to ask about Cirilla.
Inside the Keep the Baron begins to lay out the situation for you - and reveals that he knows who you are (and when he says that he MEANS he knows more than just that you are Witcher, but that you are Geralt of Rivia - and more than that, he knows about your relationship with Cilla!
The Baron finally confirms that Ciri was there - you already knew that but having him confirm it was important to you... At least you know that he is being honest on that count. As he describes the story that she told him the game changes focus and you go from being Geralt to being Cilla (in the flashback of the events that she related to the Baron).
Ciri's Story: The King of the Wolves
Help Ciri Escape
Flagged as part of The Bloody Baron Story - Suggested Level 5
Once again you need to assist Ciri in having her escape from the swamp in this very brief sub-mission section. This is officially the Side-Mission called Ciri's Story: The King of the Wolves...
Since these events are a sub-mission that take place enveloped inside the main Bloody Baron Mission it made sense to keep the sub-mission inside the structure of this one, which is why it is not split-out on its own like we usually do... Just saying.
As she makes her way along the riverbed she gets attacked by a pack of Wild Dogs and, after defeating them, she runs into a little girl during a CS and conversation, Ciri chats with the little girl and it works out that she is the most recent sacrifice to the hags - I mean the Ladies of the Wood - and Ciri is going to try to save her from being those three hags dinner!
The problem is the little girl is pretty much convinced she is out of options in terms of going home again.
So the little girl turns out to be named Gretka - which clearly is an homage to Gretal from the Grimm's Fairy Tale Hansel und Gretal in which a Witch who lives in the woods has this nasty habit of eating children.
Anyway the Witch captures them and etc. The original story being something of a cautionary tale that just because some old lady looks like your Großmutter - because even kindly old ladies sometimes eat children.
Actually the story pre-dates the 1812 book published by the Brothers Grimm - they were basically writing down stories that had previously been passed down from generation-to-generation as verbal lore and story telling. But still, yeah, total homage!
During the next stage and challenge Ciri must defeat another pack of Wild Wolves / Dogs preferably without dying because of course if SHE dies then Gretka is dead too!
There is actually a trick to this - the Wolves are not actually after you so much as they are trying to protect the pi;e of meat that used to be an animal that they recently killed-- the idea being they were feeding as a pack and Ciri and Gretka blundered in on that.
So yeah, the trick here is this: all that Ciri needs to do is retreat far enough back and away so that they lose interest in her; then she just needs to stand still while her body naturally recovers the health bar (hit points).
Once she has recovered her HP she can then resume the process of luring just two or three at a time away from the meat so that she can dispatch them.
After you deal with the pack a brief examination of the dead cow? It looked like a cow to me - tells you that whatever it was that killed it was NOT the Wolves... Food for thought.
As you push ahead you get another CS in which you encounter half the body of a man and his boat - pretty gross yeah? As you examine the body for clues you learn that he died recently - that he died in immense pain, with a crushed chest (you speculate something large picked him up and literally threw hi against a tree). Whatever it was gnawed off the man's legs and sucked out the marrow from his bones.
This is starting to sound familiar... Ciri discovers that the man's liver is gone - and she realizes that the Wolf King is actually a Werewolf!
Ciri lacks her Witcher Swords - but she decides that the only option is to make an Oil to coat her Steel Blade with - so she sets out to gather the ingredients required to make the Oil... You need to harvest the following reagents:
- x2 Fool's Parsley
- x3 Wolfsbane
For the record the purple flower plants are Wolfsbane and the very tall light-green leafy plants that grow near the water are Fool's Parsley. The reason we are telling you that is because while she has completed most of her Witcher training,
Ciri never underwent the Mutagen treatments that would have granted her the classic Witcher Powers - among them being Witcher Senses - so she actually has to FIND the plants and reagents she is looking for, she can't just sense them.
Once she has the required reagents she has to find a spot to build a fire and brew the Oil - which we see her doing in the CS. With that mischief managed Gretka goes to hide in the weeds and you do battle with the King of the Wolves - the local Werewolf...
As you move along the stream bed you encounter another Pack of Wolves who are feeding on a dead animal - and you see that they react very differently when you cut them with your freshly oiled blade (which we assume was the point)....
When you examine the body of a Wold Dog that they were feeding on you recognize immediately that the Wolves did not kill it either...
Gretka leads you along the stream bed and it is instantly evident that she is very familiar with this forest - and as you make your way through the cave you trigger another CS and the Werewolf! If you are fast enough with your attacks you should be able to kill it without it ever actually hitting you with its claws.
After the battle you meet a man in the cave who tries to tell you his story - but you are not interested!
You tell him the way things need to be - and he tells you about his Lord - leading you off to meet none other than the Bloody Baron himself!
The King of the Wolves Objectives
- Follow the riverbed and find help
- Kill the Wolves
- Follow Gretka
- Protect Gretka from the Wolves
- Kill the Wolves
- Follow Gretka
- Protect Gretka from the Wolves
- Kill the Wolves
- Gather Wolfsbane 3/3
- Gather Fool's Parsley 2/2
- Kill the Werewolf
At Crow's Perch (The Bloody Baron's Keep)
The CS at this point shows Ciri and Gretka eating - the Baron gets very upset with the peasant - it seems that the peasant had told him that he had found the man's missing wife and daughter!
That concludes the sub-mission, and the game then resolves back to Geralt and the Baron - but the Baron is reluctant to tell all it seems. In fact he refuses...
The conversation option: "I know what you're after" will move the story along quicker as the Baron makes a deal with you - you help him to find his missing wife and daughter, he will tell all. A straight-up quid-pro-quo that has to be taken at the word of the Baron as he has no way to prove that you can trust him on the matter or compel his honesty!
Basically it is a deal you have to make - you don't really have a choice. And once you make that deal the Baron informs his men that you are under his protection and they are not to mess with you at all or in any way.
The Baron then shares with you what details he knows of the night that his family disappeared. Working your way through the chat options really does not add much more detail other than confirming the awareness of the Baron of his violent preferences.
The Baron does not believe that he has any enemies brave or stupid enough to touch his family - then you convince him to let you examine their private rooms. This updates the current mission and adds a new Side Quest: Ciri's Room.
The completion of this conversation ALSO triggers the end - the completion - of the main mission The Bloody Baron at the same time as it adds the side quest Ciri's Room and flags the next main mission for the story line: Family Matters.
Back to the Bloody Baron - Objectives!
The odd structure of this mission and the quests that sort of fold inside of it like paper in an envelope meant that we had to stick the following bit at the end in order to fit the rest in with some order...
The Bloody Baron Mission Objectives
- Go to the Baron's castle
- Follow the sergeant
- Find the Baron
- Talk to the Baron
With this stage of the main story line and main mission now completed and the next stage properly flagged it is time to move forward into it!
- - - - - - - - - - - - - - - - - - - - - - - - - - - - - - - - - - - - - - - - - - - - - - - - - - - - - - - - - - - -
Did you Know?
The Skill Level of the Blacksmith / Armorer has a Hidden Effect on their Services?
When you use a Blacksmith or Armorer to repair your Kit or dismantle items there is more an effect than just the marginally higher costs they charge... The higher level Smith/Armorer is naturally more effective at the jobs - which means you are much less likely to lose upgrades when you ask them to dismantle a weapon or piece of armor that has upgrades installed!
Perhaps even more significant though is the outright crafting results - which while not always the case can sometimes cause the item to have slightly better stats and effects than the lower level Smith or Armorer is capable of.
For that reason you are best off in Velen seeking out the services of the Armorer in Crow's Perch - who is a Journeyman Level - than the one in The bottom line though is this: Even if you don't obtain any special results, you are still better off with a Journeyman Armorer over an Amateur. Just saying.
- - - - - - - - - - - - - - - - - - - - - - - - - - - - - - - - - - - - - - - - - - - - - - - - - - - - - - - - - - - -
Mission: Family Matters Pt. I
Locate the missing mother and daughter
Automatically flagged at the completion of Bloody Baron - Suggested Level 6
The Baron turned out to be a tough negotiator who knew the full value of the information he possessed. He agreed to tell Geralt about Ciri on one condition: Geralt had to find his (missing) wife and daughter first.
The women had mysteriously disappeared a short time before. Though the Baron had moved heaven and earth to find them, all his efforts had proved fruitless.
After making the deal you convince the Baron to allow you to search the private rooms that belonged to his wife and daughter - and Geralt then followed him to them (the Baron was not willing to allow him to search alone).
Considering that the Baron is right there I did not try to loot any containers because well, because I did not think he would like that very much...
The clues highlight in red. Whether they are actually of any use? Well who can say?? But anyways we found the following:
- Broken Wooden Candlestick
- Missing Painting on Wall
- Painting of the Baron and his Wife conceals a hole in the wall
- Piece of Wooden Candlestick inside of the Armoire
- Fresh flowers on table
- Deep nicks in the post
- Wine Stains
- Wine Scent Trail
- Talisman on stair landing
Once you obtain the final clue it is time to chat with the Bloody Baron again...
Ask him about the Amulet and you learn about its source and purpose... Tell him that there were signs of a fight... Tell him about the Wine...
You tell him that it is time for you to go and have a chat with Pellar about that Amulet and the Baron walks off without even wishing you good luck!
On your way out of the main Keep Compound area and BEFORE you head through the gate turn around and speak with the Armorer at his forge - and specifically ask about the Master Armorer. That will trigger a CS and brief conversation in which the subject of master armorers comes up and it is revealed that the biggest issue with obtaining armor that is of the Master Level is down to the tools!
This flags the Secondary Quest Master Armorers... See that quest in the Velen Side Quests for the details.
Objectives
- Follow the Baron
- Use your Witcher Senses to search the room
- Talk to the Baron about what you found
- Find the Pellar's hut
- Talk to the Pellar
After you depart the Keep and make your way along the highway you will encounter an old woman by a bridge outside of Blackbough who as a golden "!" quest symbol. Stop and talk to her to learn that she is being haunted by her long-dead husband, who wants her to place her wedding band in his grave. She cannot do it herself so she asks you to do it. This flags the Side Quest Last Rites.
When you arrive in the village outskirts you trigger a CS in which there are a bunch of soldiers looking to kill the Pellar. Unfortunately you need him alive - you have a choice. If your skill is high enough you can befuddle them with a Sign, if not you could pay them. Or you could fight them. There is another option that is not so obvious - simply ask them why they want to do the Pellar.
You learn that they blame his bad advice for their mate's illness. You can thus offer to cure their mate, and they accept. You tell them the cure and off they go, so you can bang on the Pellar's door.
A lengthy conversation ensues in which you learn that the man is really strange but actually does have certain powers...
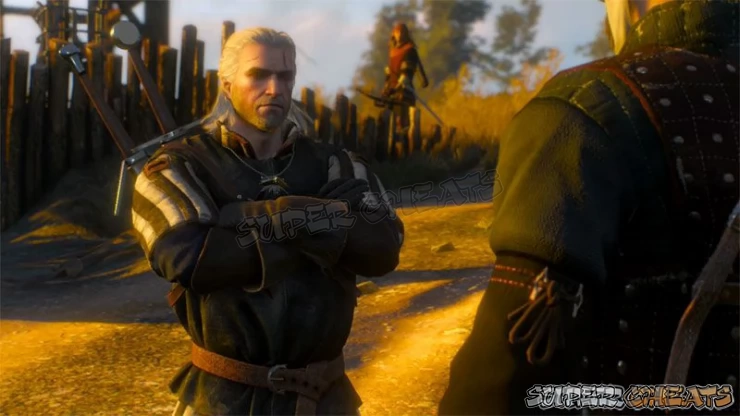
Mission: A Princess in Distress
You will automatically flag this sub-mission after you obtain the bell and go looking for - and find - the goat named Princess. When you find the goat you will have to battle a pack of Wolves. Once they are defeated this sub-mission is flagged.
Lead the goat by ringing the bell to have it follow you. When you reach the area with the bear the mission updates and then you need to kill the bear.
After that just keep ringing the bell and leading the goat until you reach the Pellar and voila! Sub-mission completed!
Objectives
- Find the Pellar's goat using the bell and your Witcher Senses
- Bring the goat to the Pellar
- Defend the goat from the bear
- Use the bell to lead the goat to the Pellar
Mission: Family Matters Pt. II
After you conclude the conversation with the Pellar you need to read the Bestiary to learn about Botchlings and then head back to the Keep to confront the Baron.
When you arrive you see lightning strike the stables and set them on fire - you run up but nobody is doing anything and then you learn that the horses - and the Stable Hand - are trapped inside the burning stables! You rush into save them all!
Basically what you need to do is go up the ladder on the outside to gain access tot he hay loft - from there work your way around and down then through the wreckage to the main doors. Open them to trigger a CS in which the horses and Stable Hand escape, after which you confront the Baron and enrage him so that he attacks you.
You then have a fistfight with him that you win - at which point you interrogate him to learn what REALLY happened the night that his family disappeared.
In the rather lengthy conversation you end up explaining to the Baron what has to happen, starting with the two of you dealing with the Botchling.
The Baron leads you to the location of the grace - but it is empty! Then you both see the Botchling crawling up from the weeds. You have a choice - attack it or turn it. You want to turn it so select the second option, then have the Baron pick it up and carry it back to the Keep (better him then us!)
He picks it up and carries it back to the Keep, as you protect him from Wraith attacks and keep it subdued as necessary until you reach the new grave where you have him repeat the invocation and then the Botchling is named and embraced and then placed in the grave under the threshold and buried. Mischief managed!
That completes this part of the mission - and hey, well done! You order the Baron to go home even though he argues - but then he does not know WHY you want him gone does he?
Objectives for Family Matters II
- Read the Beastiary to learn more about botchlings
- Talk to the Baron
- Save the stable hand and horses trapped in the burning stable
- Open the main gate to the stables
- Defeat the Baron in a fistfight
- Talk to the Baron about what you found
- Follow the Baron.
- Follow the Baron to the castle's entrance
- Protect the Baron from the Wraiths
- Use hte Axii SIgn to calm the Botchling
- Follow the Baron to the castle's entrance
- Protect the Baron from the Wraiths
- Use hte Axii SIgn to calm the Botchling
- Follow the Baron to the castle's entrance
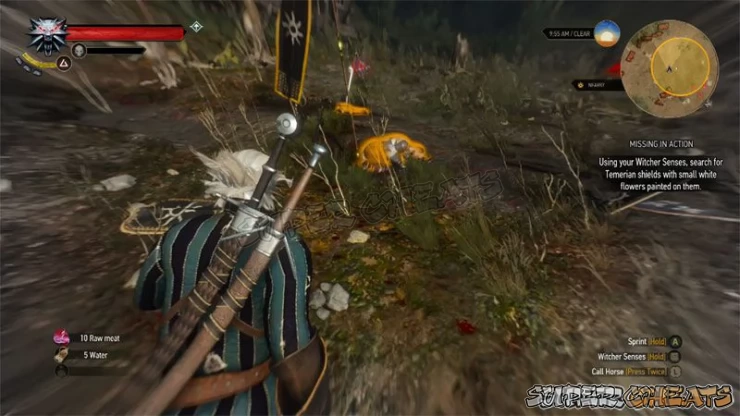
===Mission: Family Matters Pt. III ===
You sit and wait for the change to happen then, once it is a Lubberkin you are ready to proceed. You use its spirit to locate the other members of the missing family - namely Anna and Tamara.
To accomplish this you perform a ritual that summons the spirit of the baby and then you follow the spirit as it leads you to the hut where the pair changed - then you find a dead horse and examine and then you are lead to a Fisherman's hut where you learn that Tamara is safe with the Fisherman's brother in Oxenfurt - but Anna? Not so much.
The Fisherman describes what he saw, and based on what he tells you about the marks you work out not only what happened, who made it happen, but where Anna is now! With that mystery solved you depart and dismiss the spirit.
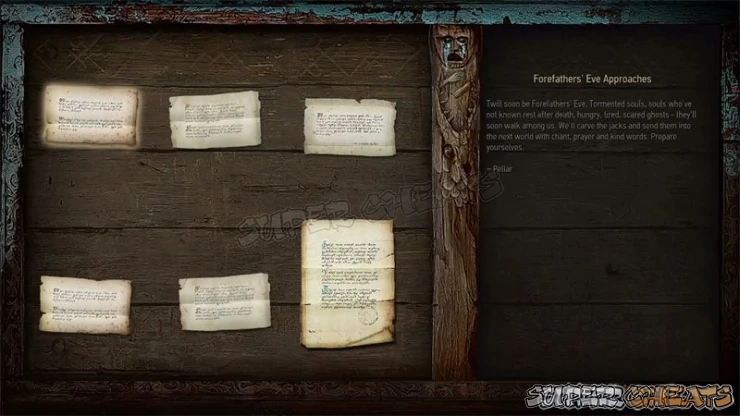
When you return to the Keep you are confronted by the Pellar, who confronts you and asks for help with the ritual he wants to perform in order to free the trapped spirits. Once you agree to help he outlines what needs to happen and you flag the Side Quest Forefather's Eve.
When you pass through the inner keep gate the Stable Hand you saved stops you to give you a reward in thanks, and then as you approach the marker where the Baron is his Captain of the Guard stops you and tries to get you to tell him what went on that night.
You finally get to meet up with the Baron and talk to him - at which point you brief the Baron on the details of what you have discovered. He does not react well to that -convincing you to at least go check in on his daughter.
The Baron give you a letter of Safe Conduct to help you get to Oxenfurt - then he tells you about Ciri!
Objectives for Family Matters III
- Summon the Lubberkin where the Botchling is buried
- Follow the Lubberkin
- Search the area around the smokehouse using your Witcher Senses
- Follow the Lubberkin
- Find Tamara, the Baron's daughter, in Oxenfurt.
- Talk to the Baron about his family
Mission: Ciri's Story: The Race
As the Baron relates the events of Ciri's visit you get a flashback in which you once again take control of Ciri - this time for a Horse Race in which she has bet her sword against the Baron's finest black horse.
You race against the Baron and beat him, but as you are about to celebrate your victory a giant Basilisk attacks! Which is where the story temporarily ends.
Objectives
- Beat the Baron in the horse race
Mission: Family Matters Pt. IV
It is at this point that the Baron tells you that to hear any more you will have to go to Oxenfurt and verify that his daughter is healthy and well... But the conversation than digresses as he argues that while he is certainly not innocent in all of this he is not entirely at fault - that the blame is shared.
He realizes you don't think much of him so he insists on having his say, his attempt to convince you that he is telling the truth...
In the process you end up telling him about his wife - where she is, how she got there, and what it all means - and of course he reacts very badly to all of that. He insists he will march in with his men and remove his wife no matter what the Ladies think!
Of course now you have delivered the final element of the deal you struck, so it is his turn to deliver the rest of the story....
Mission: Ciri's Story: Out of the Shadows
As Ciri's story resumes she and the Baron are battling the Basilisk and it ends up mostly dead but alive enough to grab the Baron and fly off with him to the top of the nearby tower!
Ciri gives chase, and ends up Saving the Baron's life. Well of course she does! And that made a big impression on him. Big. But it is time for Ciri to depart it seems as she is sure that using her power has tipped The Wild Hunt to her location.
Objectives
- Kill the Basilisk
- Get to the top of teh tower and rescue the Baron
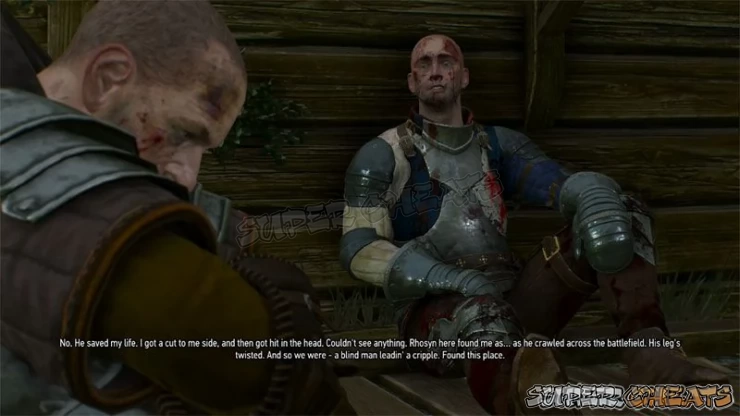
Mission: Family Matters Pt. V
With the sub-mission completed your conversations with the Baron continues and you learn that he provided Ciri with a Letter of Safe Passage into Novigrad as well when she departed. You decide that you have to go to Novigrad - but before you go the Baron asks you to help him go and free his wife.
You try to convince him what a bad idea that is but he is going to go so you may as well go with him... Besides you sort of have to - well, if you want to complete the mission that is.
You then meet Uma - man? monster? - and the Baron tells you what he knows about it and how he acquired it.
That fully completes the Mission Family Matters and unlocks the Achievement: Family Counselor (15g) Find the baron's wife and daughter.
Completing this mission automatically flags the Side Quest Return to Crookback Bog.
The adventure in Crookback Bog will result in the completion of the Bloody Baron story line, and you can get the details for that in the appropriate mission/quest section of the guide. Note that once you complete that portion of the regional missions and quests, it will mark the end point of the story in Velen.
Summary Conclusions
At this point you have completed all of the story missions for this stage of the game, which is Act I. Velen. That doers NOT mean you are done in Velen mind you, just that the story now will progress to another region and the next section.
With that in mind we though it would be helpful for you to know what quests you will be returning here for, and around what Level you will be doing that at...
The outstanding quests for the Velen Region are:
- Contract: Missing Brother (Suggested Level: 33)
- Contract: They Mystery of the Byway Murders (Suggested Level: 22)
- Contract: Mysterious Tracks (Suggested Level: 20)
- Contract: Phantom of the Trade Route (Suggested Level: 23)
- Ghost of the Past - Optional - Only available if Letho is alive in your game.
- Scavenger Hunt: Cat School Gear Upgrade Diagram Part 2 (Suggested Level: 23)
In addition to the above there are also some quests that span multiple regions so you will be tending to them all along. These include:
- Collect 'Em All (Suggested Level: None)
- Master Armorer (Suggested Level: 24)
- Treasure Hunt: Blood Gold (Suggested Level: 18)
Note that the above are the remaining incomplete quests for the Velen Region / No Man's Land, and do not include quests for the other regions that you flagged IN the Velen Region, since those quests properly belong to (and will be undertaken and completed in) their respective regions, regardless of where they were flagged.
Before you Depart for Novigrad
Before you depart No Man's Land for the relative comforts of the big city ti would be an idea to double check the map to make sure that you are leaving behind absolutely NO undiscovered locations or unclaimed Treasure spots that are within your Level range. Just saying....
When you are sure that you have it all, why then make for the bridge and the Novigrad Highway mates!
Anything missing from this guide?
ASK A QUESTION for The Witcher 3: The Wild Hunt
 Join us on Discord
