The Stolen Body
Prototype Walkthrough and Guide
Prototype Guide - Walkthrough
The Stolen Body
Hit the yellow marker outside of Dr. Ragland's Morgue to get started.
Mission Objective: Get Transport for Ragland
You need to hijack a tank and drive it back to the morgue to pick up Dr. Ragland. Armoured vehicles can be found most readily near military bases. There should be a base nearby, so check the city map and make your way there. If a tank can't be found near the perimeter of the base, you'll need to alert the military to have them send one over. When a tank reaches the scene, hijack it and destroy any other tanks in the vicinity. Level the Military Base if you wish, and then evade the military.
Mission Objective: Get Samples from the Penn Station Corpses
Drive the tank back to Dr. Ragland's Morgue and hit the marker there to pick him up. With Dr. Ragland in tow, start toward the blue marker at the north end of the city.
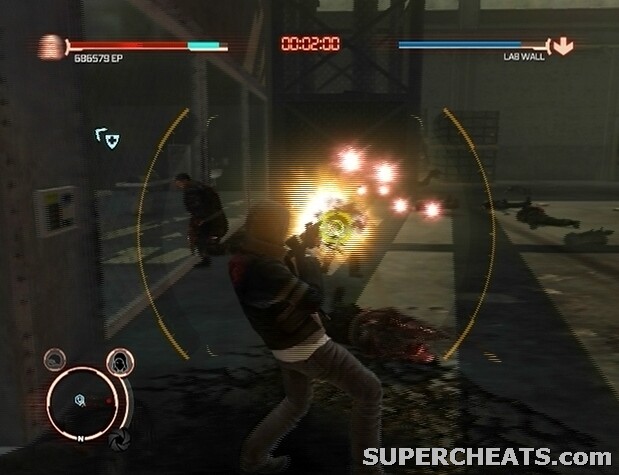
While Ragland collects samples from the corpses in the lab, you must prevent the Infected from breaking through the Lab Wall. The meter in the top-right corner of the screen indicates how much more damage the Lab Wall can sustain. The timer at the top of the screen counts down from four minutes, so you must fight off the Infected until the timer reaches zero. A considerably difficult task without the powers you've acquired.
Luckily, there are guns scattered on the floor of the abandoned base. There is a great variety of weapons here, but to start with, pick up a Machine Gun or an Assault Rifle. There should be a Machine Gun on the floor in front of you, right by a Grenade Launcher. Avoid firing a Missile Launcher or Grenade Launcher at Infected that are right at the Lab Wall, as doing so will damage the wall significantly. Since your own attacks can damage the Lab Wall, you'll want to stick with an Assault Rifle or a Machine Gun while facing Evolved Infected.
 Prevent the Infected from breaking through the Lab Wall! |
Move up to the large hole in the wall at the other end of the base and wait for the first wave of Infected to come through. When the Infected appear, lock-on to one of them and hold down the trigger. If one of the approaching Infected runs past you, spin around and gun it down before it can reach the Lab Wall. Always prioritize the Infected closest to the Lab Wall, and don't be afraid to leave a target standing in favour of pursuing another.
Luckily, staying alive won't be a problem, as each Evolved Infected yields two red EP orbs when killed, which serve to restore a bit of health when collected.
When the first few Infected have been dealt with, Sprint back to the Lab Wall and ready for the next wave. This time, Infected will drop down from the platforms on either side of the Lab Wall. Wait until the first Infected lands before gunning him down. Then, immediately spin around and take out the Infected that dropped down from the other side. Eliminate the Infected that emerged from the hole at the other end of the base to clear this wave.
Things get a bit more hectic after the few waves. A Hunter is due through the hole shortly after the second wave; you'll need to use a Missile Launcher to take him out. Keep an eye on the mini-map, as a larger red blip is telling of a Hunter. These guys are far more interested in clobbering you than breaking through the Lab Wall, so you'll need to take the time to get them off your back. When you spot a large red blip on the mini-map, throw down your current weapon and pick up a Missile Launcher. Then, jump up into the air, lock-on to the Hunter, and fire off a couple of missiles. Provided you've upgraded your Missile Launcher skill by infiltrating bases and consuming marked officers between missions, it should only take two direct hits to bring down a Hunter. Just be sure not to shoot at the Hunter if it is near the Lab Wall, as doing so is likely to damage it. Glide to the middle of the room to lure the Hunter away from the wall to avoid damaging it.
When the Hunter has been dealt with, empty the Missile Launcher on any Infected that are not yet by the Lab Wall, and then immediately return to the wall to pull off the Infected that have gathered there. This is where the Knuckle Shockwave upgrade comes in; it deals a minimal amount of damage to the wall, but can effectively knock away the Infected working to break through. To perform this move, press B/Circle and Y/Triangle together. Spam this attack if there are a lot of Infected swarming around the Lab Wall. You can also Grab and Throw Infected at each other, consume them, and use standard attacks as well.
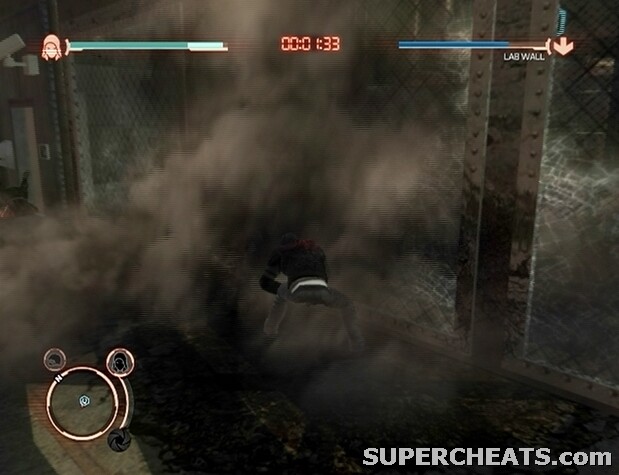 Use Knuckle Shockwave to knock the Infected away from the Lab Wall. |
If there is any downtime between waves, look for a Missile Launcher on the ground that can quickly grabbed in the event that a Hunter appears. As the timer counts down and the number of Infected increases, ditch the guns in favour of Knuckle Shockwave to clear away the Infected gathered at the Lab Wall. With about thirty seconds left on the clock, two Hunters will enter the base; at this point it is best to just ignore them, and instead continue using Knuckle Shockwave to keep the Lab Wall clear. If the Hunters have made it to the wall, Glide and Airdash to the middle of the base to lure them over, and then quickly return to the wall and take to the Infected there.
Mission Objective: Get Ragland to Safety
When the timer reaches zero, clear out the Infected that remain in the base so Ragland can exit the lab. Then, you'll have to drive Ragland back to the morgue. Let the military deal with the Hydra that pop-up along the way and just concentrate on getting to the marker. Hit the blue marker outside of the morgue to complete the mission.
by the time I returned Ragland to safety I.e to the morgue the tank hold without moving but still d features are still moving, please assist me in what to do
when reach the morgue with doc nothing happen and nothing work. . . . tell me the file or the problem bcoz i just keep looking aroung
i have returned with ragland to his morgue when i enter the blue marker nothing happened he's not come out
Ragland is not getting out of tank and i am fkng stuck,anyone any advise plz
When I return ragland to the morgue as I enter the blue marker the game stops and ragland does not come out the tank .Could you help me donload the missing files from the game so that I can continue the game?
When I return ragland to the morgue as I enter the blue marker ragland do not come out the tank. Could you help me make the game move on or can you help donload the missing files from the game.
when reach the morgue with doc nothing happen and nothing work
i have never failed in any mission just in the door in the wall i didnot got to catch the leader hunter becuse i didnot pruchace the sprint upgrade max or the jump upgrade 3 i forgot about those upgrades completly
I have failed in only 1 mission that was men like gods.
Otherwise i never get failed in any mission(and never got killed in entire game)
God, this mission was a pain in the ass. It took me a couple tries to realize I damage the wall, too. After that it wasn't too difficult. :P
How to solve that regland mission