Something to Build Upon - Levels 2 thru 5
Note: You will probably have noticed how incredibly quickly getting the first level-up went in the game, and it did go very fast. In fact the next few level-ups will also go very fast since they require only small amounts of XP before you reach the target level-up point.
Even though these seem to go fast, bear in mind that once we get past Level 5 those level-up experiences are going to start to take longer and longer, but that is Okay really, since the point to all of this is not just to level up but to have fun playing the game, and there is a lot more to it than simply looking for the XP to level up!
The primary focus for this unofficial walkthrough and guide is not just to help you in leveling up your farm, but to help you play the game effectively and get to the entertaining bits as well. In that respect I think we do a very good job, but if there are any perceived deficiencies or you feel like we either missed something that you wanted covered or did not provide enough detail, we encourage you to let us know that via the comments system at the bottom of each page in the guide.
Welcome to Level 2!
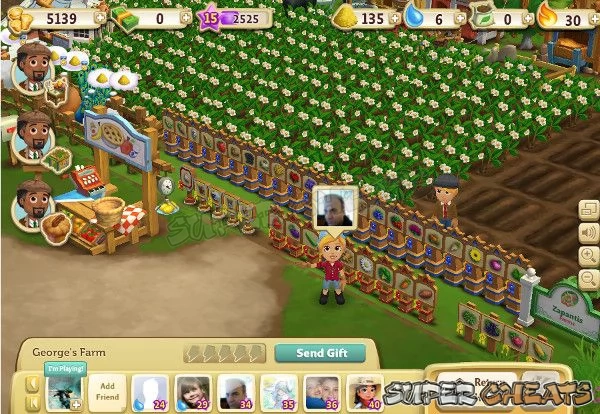
Your first official Welcome to Level 2 move is to open the Tools menu and sell all nine of the starting Crop Squares. The reason that we want to do this is so that we can a narrow open strip of grass all the way along the front of the farm on the border with the road edge so that we have someplace to put our Mastery Signs later for both crops and animals, as this way they neatly run along the front property line rather than our being forced to find places to stick them deeper on the sections later. It is always better to have things planned out than it is to have to improvise, I am just saying.
Establishing your Crop Size
Officially you have three open Sections of land, which means that in theory you could place up to 29 Crop Squares -- but we do not want to do that actually, and largely for practical reasons. The limit on Crop Squares is expanded with each subsection of your farm you unlock, but when you are in the process of considering how much of that quota to use bear in mind that you are going to need room to place and expand other aspects of the game.
The reason you should be conservative with respect to how many Crop Squares you place has more to do with just needing open space to place structures, but also plays into certain factors that can easily catch you by surprise, the first of which is that you need to keep your planting capabilities in line with your Water Resource Unit (WRU) availability, and until you get some extra Water Wells dug and deployed, that basically means all that all you have to work with is the standard 30 Water Units that are part of the Resource Bank.
Since the Water Units in the Resource Bank are time-based for their resupply, there is a natural bit of overhead to be observed there. Ideally your primary goal is to obtain a minimum of three extra Water Wells as soon as you can manage that, because doing so gives you a full second set of 30 Water Units when all three Water Wells are harvested.
Bearing in mind that in addition to the total crop square size, you also need to factor in support for Tree Crops and watering, and after a decent amount of experience with the game we have arrived at the conclusion that the optimal initial total crop capacity size is 24 Crop Squares in the form of three rows of 8 Crop Squares per row.
In addition to providing a decent number of available Crop Units, this plan and Layout also provides free space for the placement of the various buildings and structures that the game will push onto you as you play, both for the regularly scheduled builds as well as the holiday and Special Events. This also leaves you plenty of room to layout your Tree Crops so that you do not find yourself having to go to the extended effort of constantly shuffling your layout around to get everything to fit in.
Basically the choice to not max-out the Crop Squares allotted to you for having three open Sections does not really have that significant an impact upon capabilities with respect to crop growth, and as you are very unlikely to find yourself being asked to grow more than 24 strategic crop units at any given time anyway, that really is a non-issue. On the other hand, being able to deploy multiple medium-footprint structures and objects makes game play far smoother
Your Immediate Goals
The first strategic act that you can (and should) make is to plan out your immediate goals. The most obvious of those are to work to unlock the sections that are within reach of your present state in order to expand your farm as quickly as possible.
Your farm is divided into a total of sixteen subsections that are laid out in four rows of four subsections per row, as follows:
13-14-15-16
09-10-11-12
05-06-07-08
01-02-03-04
If you look at the section grid above you will note that at present you have started with sections 03 & 03 already unlocked, and as part of game play through the tutorial for Level 1 with Marie's help you unlocked section 07, giving you a total of three subsections presently available to you.
When you click on the remaining locked subsections you will note that you are only able to access the unlock menu pop-ups for only those sections that are directly touching the sections you have presently unlocked, so when a subsection is not touching them, you can only see its name and a brief description of the additional assets or resources that it contains.
As an example when you click on the first subsection in the second row (the subsection immediately behind subsection 01 which contains the Crafting Kitchen) you are presented with a Pop-Up that informs you that the subsection name is West Meadow, that you need to “Expand to nearby land” and that successfully unlocking the West Meadow subsection will also unlock the farm animal Cottontail Rabbits.
The contents of the first two rows of subsections on your farm includes the following in detail:
Row 1, Subsection 01: The Farmstead Kitchen
Special Contents: The Crafting Kitchen Building (allows you to craft food Items).
Unlock Condition 1: Have 5 Trees planted on your farm.
Unlock Condition 2: Sell x4 Bottles of Milk from your Farm Stand.
Unlock Condition 3: Pay $2K FVC to unlock.
Row 1, Subsection 02: Starting Section
No Actions Required.
Row 1, Subsection 03: Starting Section
No Actions Required.
Row 1, Subsection 04: Camarillo Country
Special Contents: Camarillo Horse + Hitching Post.
Unlock Condition 1: Reach Level 30 + Craft x10 Apricot Trifles.
Unlock Condition 2: Collect x20 Garden Clippers from your Friends / Neighbors.
Unlock Condition 3: Pay $1M FVC to unlock.
Row 2, Subsection 05: West Meadows
Special Contents: Baby Cottontail Rabbit.
Unlock Condition 1: Reach Level 5 + Craft 2 Apple Scones
Unlock Condition 2: Collect x5 Garden Clippers from your Friends / Neighbors.
Unlock Condition 3: Pay $20K FVC to unlock.
Row 2, Subsection 06: The Family Well
Special Contents: Water Well Construction Project + Wind Chimes Decoration.
Unlock Condition 1: Sell 8 Chicken Eggs from your Farm Stand.
Unlock Condition 2: Plant and Harvest x16 Wheat on your farm.
Unlock Condition 3: Pay $1K FVC to unlock.
Row 2, Subsection 07: Unlocked during the Level 1 Tutorial Phase
Special Contents: Lemon Tree + Feed Mill
No Actions Required.
Row 2, Subsection 08: Apricot Acres
Special Contents: Apricot Tree + Dinner Bells.
Unlock Condition 1: Reach Level 5 + Sell x10 Horseshoes.
Unlock Condition 2: Collect x18 Garden Gloves from your Friends / Neighbors.
Unlock Condition 3: Pay $750K FVC to unlock.
So when we examine the list above, the clear path and goals are to work towards unlocking, in this order, The Family Well (R2/S06, The Farmstead Kitchen Subsection (R1/S01) and The West Meadows (R2/S05). Completing that short-range set of goals provides a total of six subsections unlocked; while Apricot Acres is theoretically achievable once we reach Level 5, the actual cost for unlocking it ($750K) technically puts it well out of our reach for quite some time to come!
Obtaining the various resources required to unlock the subsections that we can reasonably expect to unlock means that we need to work towards those goals in the usual way, which is to plant crops and harvest them, and tend to our animals and tree. Ideally we are also going to want to purchase and place additional trees, but at the moment the only trees that are unlocked in the store are Lemon and Apple Trees.
Stage 1: Adding Trees
What we want to do is purchase and place an additional x2 Lemon Trees plus x2 Apple Trees. If you are tempted to just buy Lemon Trees to get the five trees you need try to avoid that temptation. While it is true that the Lemon Trees are cheaper (Lemon Trees cost $260c while Apple Trees cost $320c), the real reason that we want to have both types of Trees rather than just five Lemon is due to the fact that unlocking the West Meadow Section will require us to have some Apples in order to craft the Items required for that unlock.
Since we have to buy five trees anyway, and as the price tag for unlocking West Meadows will mean that we will have plenty of time to build up a reserve of Apples from those two trees, well, it really is a no-brainer mates.
It is also important for us to diversify our holdings because we will be using both the Lemons and Apples for other things later as well, and not just for creating Animal Feed we from the fruit that we will be needing in the Feed Mill, which we will be doing to be sure, but also because it expands our options and abilities to have the two types.
Stage 2: White Chickens
At this point you should have either x1 Adult Chicken, x1 baby Chicken, and x1 Adult Red Goat on your farm if you have not evolved the Baby Chicken. If you have evolved it, then you should have x2 Adult White Chicken and x1 Adult Red Goat.
At the start of your present game session you should have harvested from the Wall feed some Baby Bottles. If you have not done that, log out of the game and harvest the Wall Feed now, taking special care to harvest as many Baby Bottles as you can (up to 12 as 12 is the hard limit of Baby Bottles you are permitted to have in Storage. You do not want to harvest more than 12 as you will not be able to keep any over 12 that you do harvest).
Using two of the Baby Bottles you harvested, evolve the Baby Chicken into an Adult White Chicken now. Before you proceed from here you should grab your favorite beverage in real life, and a snack if you have some handy, then sit down and read the section titled “Establishing Good Play Habits” which is located in the first Segment of this WTG. That section deals with establishing useful and effective game play Habits, among which is harvesting from the Wall feed with details about why that is important.
From here forward we will occasionally Reference information that is contained in that section of the guide, so it will be very helpful for you to have read it. Go ahead and do that now, I will wait for you...
Adding Another Chicken
The next strategic goal is to purchase and evolve one more White Chicken, which should give us a total of x3 White Chickens and x1 Red Goat on our farm. To accomplish that, you need to complete the following steps:
(1) Open the General Store Menu in the game.
The General Store Menu is opened by left-clicking your mouse on the middle button of the Nav Menu on the bottom right corner of the game play window (directly to the right of the neighbors buttons). This is the button with the image of a Cornucopia in it.
(2) Purchasing a Baby Chicken
In the General Store Menu that you just opened you will see that a wide variety of buttons and other information is presented.
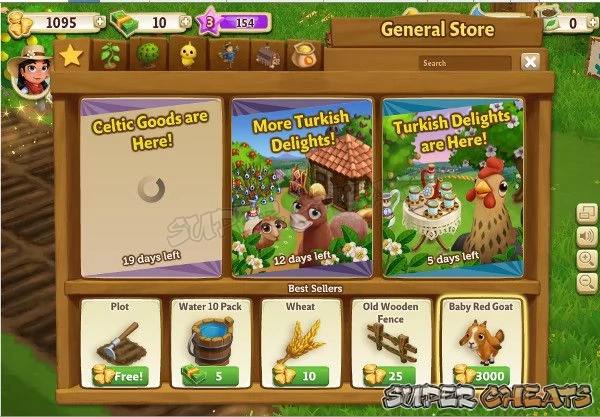
Along the top-left-hand corner there are seven small buttons with iconic images on each that are intended to illustrate what each button is for. From left-to-right these are a Gold Star (The Specials Menu which is what is displayed in the image embedded above), A Plant (The Seeds Menu), An Apple Tree (The Tree Menu), A Yellow Baby Chicken (The Farm Animals Menu), A Scarecrow (The Decorations Menu), A Barn (The Buildings Menu), and A Bag of Seeds (The Consumables Menu).
In the top center of this first menu (The Specials Menu) you will see that it is divided into three unique sections that present to you the three most recent theme-based Items Collections as well as an indication of how much time in days remains for you to make purchases from them. While these will change depending upon when you view them, at the time that this was written as you can see the following Special Collections were active and available:
Left Box: Celtic Goods (19 Days Remaining)
Middle Box: More Turkish Delights (12 Days Remaining)
Right Box: Turkish Delights (5 Days Remaining)
The bottom of the menu consists of either special offers or Items that the game developers want to draw your attention to, and in this instance they consist of, from left-to-right:
(a) The Plot Tool -- a Free option that allows for placing Crop Squares.
(b) Water 10 Pack for 5 FVB -- A 10-pack of WRU's.
(c) Wheat Seeds -- standard crop seeds with a cost of 10c per use.
(d) Old Wooden Fence -- a decoration that costs 25c per fence section.
(e) Baby Red Goat -- a Farm Animal which costs $3K FVC to purchase.
With respect to the middle specials section it should be noted that the “Turkish Delights” and the “More Turkish Delights” were actually two separate and distinct item collections, and not a repeat of the same item collection, we are just saying.
None of that really matters however, since the whole point behind this step in the process is for you to left-click the mouse on the button with the image of the Yellow Baby Chicken on it -- do do that now to open the Farm Animals Menu.
(3) The Farm Animals Menu
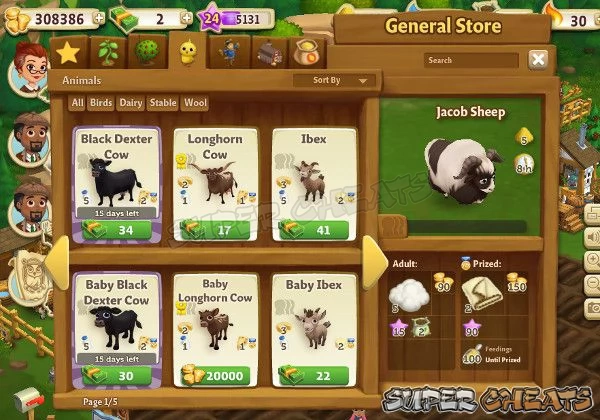
With this sub-menu now open you will notice that just below the section buttons in the top-right corner there is a new set of buttons that represent the animal types, which are from left-to-right, All, Birds, Dairy, Stable, and Wool, with the current selection defaulted to “All.”
Left-click the mouse on Birds to access the Birds sub-menu.
You will notice that the bottom rank of these menus presents the Baby version of the animals you can buy, and the top rank has the corresponding Adult version. All of the Adult versions in the top rank will be priced in Farmville Bucks (FVB), while some of the Baby versions in the bottom rank will also be priced in FVB, with some priced in Farmville Coins (FVC).
At present we are only interested in the animals priced in FVC, and in particular we are interested only in the Baby White Chicken, which is priced at $1500c. We want to purchase ONE of these, which means we will need a total of $1500c to accomplish that.
If you do not presently possess that much FVC you should grow some crops to sell, harvest animals and trees, and otherwise work towards obtaining that amount of money.
Once you have the $1500c required, click on the button for the Baby White Chicken and place the animal somewhere on the open area of your farm. Excellent job mates! We are done with the General Store Menu for the moment...
(4) Evolving Your Baby Chicken
Using the Baby Bottles that you harvested from the Wall feed of your neighbors (using the Game Feed Menu options in Facebook) begin feeding the bottles to your Baby Chicken.
Each Baby White Chicken will require two (2) Baby Bottles to be evolved into an adult White Chicken. Once you complete that and you have the three adult White Chickens (plus one adult Red Goat) we have basically completed this stage of play. You can immediately feed your new adult White Chicken, and that should provide the last egg(s) needed in order to have the number we need to sell to comply with that requirement!
Why did we do all this?
The reason is simple - this was necessary to set up the conditions that are required to unlock the targeted subsections of the farm. If you review the requirements you will note that we need to have five trees on our farm (tick that off the list now), sell 8 Chicken Eggs (thanks to our new population of adult Chickens that will be easily accomplished), and sell four (4) bottles of milk.
The milk will come from our Red Goat -- but if you are not getting the yield you need fast enough, it is Okay if you want to purchase a Baby Red Goat (cost is $3Kc and they are found in the Dairy subsection of the Animal Menu in the General Store), and once placed, you will need to feed it two (2) Baby Bottles in order to evolve it to its adult form.
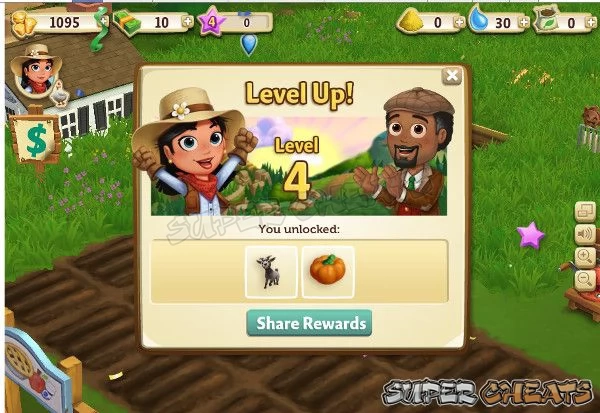
The process of doing everything you needed to do to reach this point will easily unlock Level 4 on your farm, and possibly Level 5 -- but even if it does unlock Level 5 there are still a few outstanding matters that we need to cover in this section prior to moving on to the next section of the guide, which covers Levels 6 thru 10, so bear with me alright mates?
Unlocking the new Sections
First thing first, go to your Farm Stand, open it, and sell 8 Chicken Eggs. Now sell 4 Bottles of Milk.
Collect your stack of FVC and then left-click your mouse on one of the Crop Squares and plant Wheat Seeds. Now keep planting Wheat Seeds until you have planted a total of 16 Crop Squares of Wheat Seeds. Now water all 16 Crop Squares.
The Wheat will require four hours to grow completely so that you can harvest it -- the condition that we need to meet to unlock this section is to Harvest (not plant or water) 16 Wheat, so you will need to go do something else for four hours while you wait for the Wheat to grow.
You could walk the dog or perhaps do a load of laundry? Spend a few hours surfing the web? I cannot be responsible for finding things to keep you entertained mates, I am already doing this bloody guide for you! You will have to take care of your own entertainment while we wait for the Wheat to grow! Go ahead, I will wait here...
Four Hours Later...
Ah, you are back! Excellent! And look, your Wheat Crop is ready to harvest! Well, what are you waiting for?! Harvest that Wheat!
Right then, now that you have done that, we have fulfilled all of the conditions that are required to unlock the Farmstead Kitchen and Family Well Sections, and well done you! All that is left is for us to pay Marie to bring her trained goats in and clear off the brush, so let us do that now. This will require a total of $3000c but you should easily have that at this point...
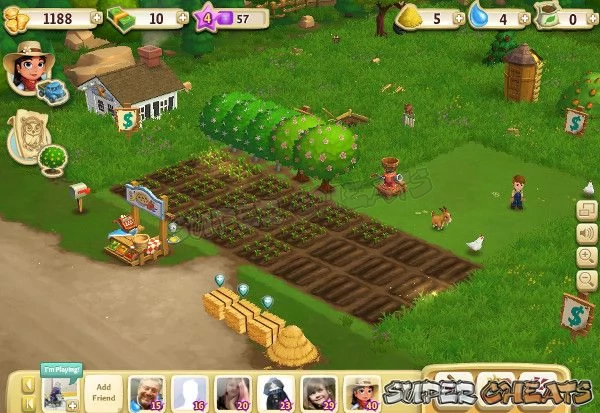
Some Questing Action
Now that we have unlocked the first two of the three new sections of our farm there are a few things we will need to do, like organize our new space and relocate the Crating Kitchen -- but before we do that chances are pretty good that you have completed the outstanding quest(s) by now, and if not, check them and the active quest should only require you to plant four Tomatoes in order to complete it.
Do that now and, once it is completed it will open a new quest that can quickly (almost instantly) be completed as all that it requires you to do is zoom in once, and out once using the wheel on your mouse. After you do that, you will get two new quests:
Branching Out Quest
Part 1: Buy 1 Lemon Tree
Part 2: Water 1 Lemon Tree
Part 3: Purchase the Family Well Farm Area to Expand your Farm
Quickie Coins Quest
Part 1: Harvest 4 Tomatoes
Part 2: Sell 4 Tomatoes at your Farm Stand
Part 3: Sell 1 Bottle of Milk at your Farm Stand
Well this works out quite nicely doesn't it? We needed to buy the trees and we did, and that takes care of that bit. Watering them is also a no-brainer since we needed to do that in order to fully place them. We already planned to purchase the Family Well Area so hey, natural completion!
With respect to the second quest, since we had to plant those four Tomatoes for the previous quest, we have them ready to harvest now, so that is ticked off the list. Selling them and the Bottle of Milk at the Farm Stand completes that quest! Well done you!
Completing the Quickie Coin Quest adds a new quest to the list -- part 3 of 3 for this quest series -- and conveniently enough it has conditions we can easily meet thanks to the Wheat we needed to plant!
Waiting for Wheat Quest
Part 1: harvest 6 Wheat
Part 2: Harvest 12 Tomatoes
Part 3: Earn 250c by selling goods at our Farm Stand
If the Wheat is not fully grown yet, while you wait you can plant and harvest the Tomatoes since they are a two-minute crop, and then sell some Items at the Farm Stand to complete the 250c requirement. As soon as the Wheat is ready, harvest it to complete that part and thus finish this quest series. Good on ya mates!
Unlocking The Family Well Section
The last remaining part to completing the unlocking of the Family Well Section is paying the $1Kc so do that and Marie's goats will pile in and clear away the bush, at which point you will discover that under the bush we the partially completed Water Well construction project, the Wind Chimes Decoration, and a completely unexpected Baby White Chicken, so bonus!
Unlocking this also completed the quest Branching Out, activating a new quest called Proper Farm Decoration. It also gave you access to the West Meadow Section. The $20Kc price tag for clearing the brush on that one means that it will take a bit of work to unlock, so that is what we should be focused upon from here on out -- well that and completing any new quests that pop up as well as getting our farm organized.
Proper Farm Decoration Quest
Part 1: Place the Farm Sign (it is in your Inventory).
Part 2: Purchase and Place a Scarecrow.
Part 3: Rotate the Scarecrow using the Rotate Object Tool from the Tools Menu.
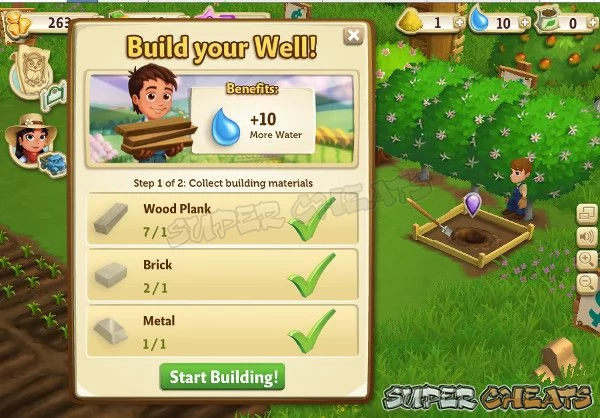
Building Our First Water Well
You should notice that there is a purple drop over the Water Well construction project -- that purple drop means that it has an available action, and when you click on it you should see that it is ready to start building since you have all of the resources that it requires. That being the case go ahead and click on the “Start Building!” button in the pop-up, at which point you will discover that to complete this construction project you will need a little help from your friends!
IMPORTANT WARNING AND NOTICE
Yeah, it is all in caps because this is a really important point that needs to be made here...
When you click on the Ask Friends button you will be presented with the Friends interface -- the first thing you should do is make sure you do NOT click on the “Select All and Send” button. If you do that it will select all of the friends that are listed and send the request to all of them, but it will ALSO result in your using up ALL of the Help Requests that you can make today!
Since you may very soon have the need to request even more help, what you should do -- and what you should get in the habit of doing in the future (which means this is one of those points where we are establishing a good play habit) is select ONLY the friends you NEED to complete this project.
If you looked at the details of the Hire Builders Pop-Up you will have noticed that this project requires the help of only TWO friends, so pick two from the list that you know will help you, and then send it with just those two selected. That way if you need more help today it will be available, as otherwise, well, it won't.
Remember that Baby Chicken?
There was a Baby Chicken in the bush that was revealed after you paid to clear The Family Well Section, so find that Baby on your far and feed it the two Baby Bottles that are required to evolve it into an adult now.
That was nicely done, and now you have a total of four adult White Chickens and one adult Red Goat, which means you are well on your way to generating a useful amount of animal resources in the form of eggs, milk, cheese, and fertilizer so go you!
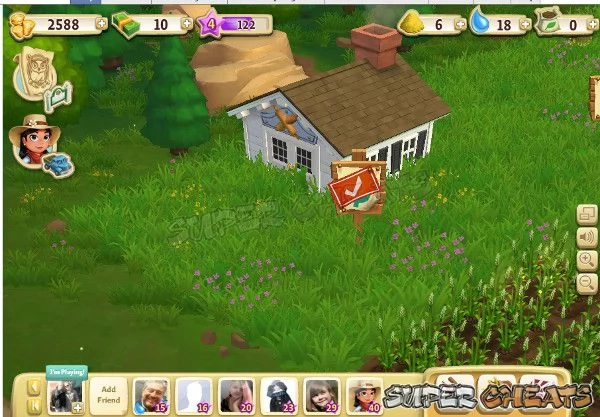
Unlocking the Farmstead Kitchen Section
This was obviously just a question of how long it would take to crop-up and harvest animals and trees to the point that you had $2Kx worth of product to sell, and once you did you should notice that the sign in the section changed to a tick-mark which means you can finally unlock it!
Once you have it unlocked and the Ninja Goats have come and cleared away the brush, what you find is the Crafting Kitchen (and no other surprises). With the present Layout the most efficient use of the available space is to move the Kitchen to the section above the crops and use the entirety of the space that is the Farmstead Kitchen Section as your designated animal area.
That means purchasing the cheapest fence option and fending in the section (see the image embeded below), which gives you a start on a better organized farm.
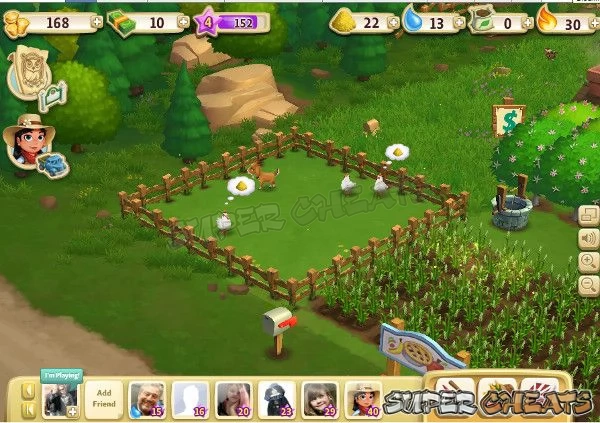
Once you have that set up, you may want to consolidate the other Items around the Kitchen which again allows you to use the available space more efficiently. Bear in mind that you will soon need to add additional structures and the buildings and structures that the game will push onto you once you reach key levels, so having some open space is not just a good idea, it is necessary.
While you can set your farm up any way you like, check the image embedded below to see how we did it in a way that uses the available space most efficiently.
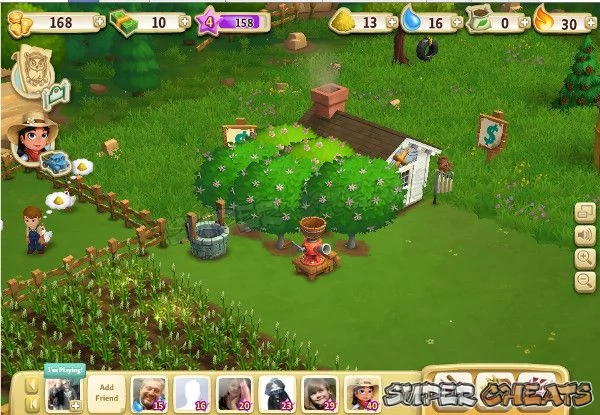
Note that while you have unlocked the Crafting Kitchen if you have yet to get to Level 5 you cannot actually craft anything, but don't worry about that; if you have not reached Level 5 yet you soon will, and in the meantime you can spend some time harvesting fast-crops like Tomatoes and Blueberries, harvesting your Trees, and tending to your animals.
At this point your only goal is to build up your bank account to obtain the $20Kc that is required to unlock the next section, and on that note we have come to the end of this section of the guide. What comes next comes in the next section, so well done you! See you there.
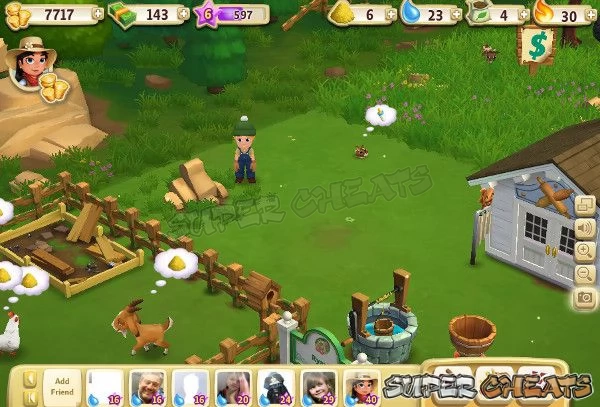
Unlocking the West Meadows Section
Life has a way of underplaying great accomplishments, especially when there is nobody around with a video camera to record them. You should know that you did great mates. The vast majority of players when they reached this stage in the game basically wallowed around and took weeks to get their act together. You did it in mere DAYS. You managed to take what is essentially a bare and ill-equipped farm and, using the tools you had available, you stockpiled resources, began to build a War Chest, and kept your eye on your goal, which was to raise the $20Kc needed to unlock that next Section. Well done!
After the Ninja Goats do their thing you will notice that you now have a new Farm Animal that has been added to your Farm in the process: A Baby Cottontail Rabbit. You should have plenty of Baby Bottles so go ahead and evolve this to its Adult form and place it in the Animal Pen to be with its buds.
But what is this?! There is something new here we have never seen before! A mucking huge boulder that is half-buried under the surface of the turf and that is clearly in the way... Since we don't have any C4 available it looks like we are going to have to remove this impediment to progress by hand, but doing that requires a supply of Pickaxe Tools that we do not have, so the first thing we need to do is ask our friends for those.
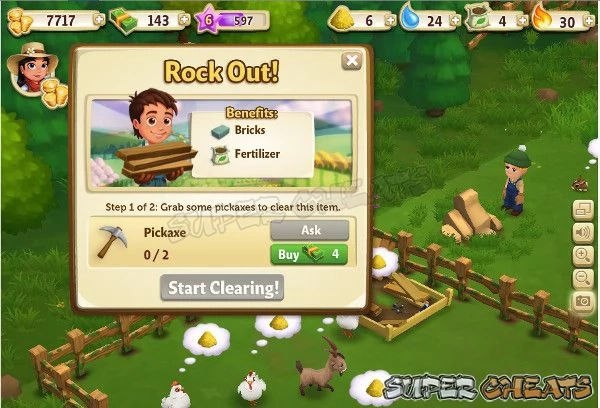
Fortunately we have a great group of friends and neighbors who are very responsive to requests of that sort, largely because when we set out to create that group one of the things that we did was create a private communications system in the form of a Twitter hashtag that we then use to communicate any requests, special notices, hints, Tricks, discoveries, and the like with the small but tight unit of friends who we are playing the game with. I sincerely suggest that you may benefit by doing the same.
How this works is very simple really -- after I cleared off the s West Meadow section and discovered that there was a large boulder that was strategically blocking full use of the area, examining the obscuration was a natural reaction. In the process of clicking on it the requirements for its removal became very obvious, as was the necessity to seek the assistance of friends and neighbors.
At that point I Tweeted that fact with a note that I had already issued requests in the game; the very gratifying direct result of this was that a sufficient number of my mates logged in over the course of the following five minutes to click on the help link so that stage one of the removal of the boulder was accomplished just like that! This is an example of how well the Tweet-based mutual assistance system that we created works in that we all try to be responsive and helpful to each other if it is possible to be so; really that system will only work well when its members are responsive, which ours are.
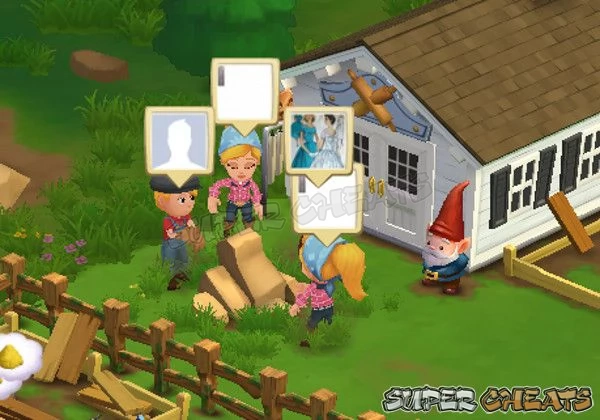
Stage two for removal of the Boulder required the direct help of two friends in the form of voluntary labor - so I Tweeted that I had sent the request specifically to those two neighbors, and they kindly logged in and clicked the appropriate button and voila! In under 15 minutes I had dealt with that pesky Boulder and now had full access to this new Section, which in case you are keeping track, is the final section that needed clearing in order to create my now unblocked and unbroken six-section large farm, and go me / go you!
At this point in the plan the unlocking of that sixth section basically completed Stage I of the short-term goals that we are working towards for this guide. The fact that the timing on game play for the guide was tight and effective is not really an important element of the guide and its Strategies, so if it takes you an extra waking/work/play cycle in order to accomplish the same ends that is perfectly acceptable and not a deviation from this WTG just so you are aware.
Completing Stage I of the Strategy here necessitates revising the manner in which we are making use of the space that is available to us. In addition to that, our expansion in terms of open and useable land area also results in the expansion of our crop capabilities -- the details for that are now rapidly approaching, but one thing at a time, right?
At this point we need to restructure our Layout, and that is our next immediate task -- if you take a close look at the image that is embedded below you will get the general idea for how we are doing tis, and specifically this should make better sense when you view the detailed assessments for each of the themes which are covered below...
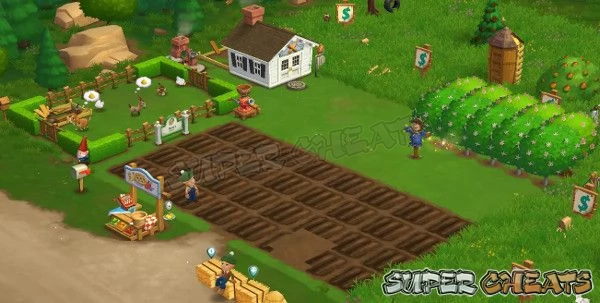
Our Strategic Space Utilization
This marks the completion of the first collection of intermediary goals, or Stage I, and now that we have reached that point in both the game and this walkthrough-guide, it is time to examine more closely the manner in which we have revised our use of the available land on our farm.
I apologize in advance if this is not what you were expecting to happen, but hey, you really only have to work through this all just one time, and then it is done, so why not get it done now?
The West Meadows Section that we just unlocked is the last new section we will be unlocking for a good long while mates, mostly due to the expense in terms of FCV and resources but also because getting to the point where we can unlock additional sections will require time and play that is designed to work towards those goals. Just be aware that those are ends that are part of the plan.
If you look at the grid pattern that represents the farm what you have now looks like this:
13-14-15-16
09-10-11-12
S5-S6-S7-08
S1-S2-S3-04
The S#'s represent the sections that you have unlocked while the other numbers correspond to the numbers we have assigned to ID the additional sections. The important bit here is that you have a now unbroken and fully accessible position upon which to build. The trick to fast-tracking your success from here on out is to make the most effective use that you can for these now unlocked sections.
We already have a good start on doing that, but with this new section unlocked we need to make some minor adjustments to the deployment of our present resources as well as prepare the way in advance for the additional resources that we know our soon to arrive (based upon leveling.
The first thing we need to do is define our new Strategies; this will increase the efficiency with which we are using the space that is available to us, so with that in mind here are the new resource positions:
S1: Designated Farm Animal Space
S2: Designated Crop Space
S3: Designated Crop Space
S5: Farm Buildings/Structures Space
S6: Mixed Use and Temporary Staging Area
S7: Designated Orchard/Tree Space
You should easily be able to picture this in your mind, as essentially what we have done is extend the logical division of the open space that we have into easily manageable strategic zones, but thanks to the magic of the World Wide Web you do not need to imagine it, you can SEE it by looking at the image embedded above for the overall view and then at the images in each subsection below for a more detailed examination of what we are doing and why.
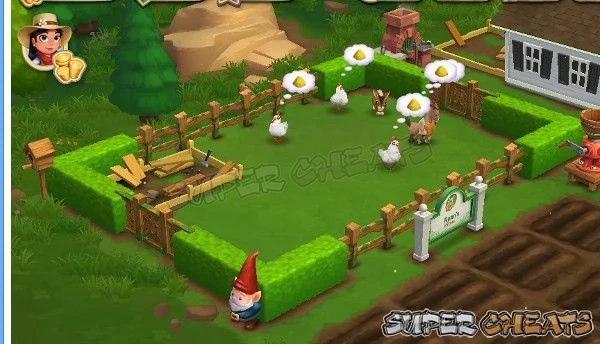
Adjusting the Layout: The Animal Pen
Before we get too far into this I wanted to point out that we are not really honoring the boundaries that the game defined for each of the sections. For one thing bleeding over the edges is helpful to us, and for another there is nothing written in stone that says we have to color inside the lines, I am just saying. So get used to the idea that we are resizing the sections on-the-fly and as we go along, alright mates?
The first thing we will be doing is extending the size of the animal pen so that there is sufficient room inside to eventually contain the following structures in addition to our Farm Animals:
(1) The Shady Trough (A watering and shade structure for our animals + extends the animal quota)
(2) Hen House (the home and mechanism for the Exotic Egg Collection System)
(3) Chicken Coop (Home for Prized Chickens)
(4) Goat Shelter (Home for Prized Goats)
(5) Sheep Shack (Home for Prized Sheep)
(6) Water Troughs (Used to water them + increase our max quota of Farm Animals)
That covers the structures that will be placed inside the pen, and even with extending the pen by one fence-unit-length that is still going to be a tight fit but we can manage it. You will notice that I got rather fancy in the design of my Animal Pen -- there is no reason not to do that if you like, but you can also just keep it simple and stick with Fence Units if you like.
Outside of the pen in the Structures area and eventually using part of the staging area we will need to find places for the following:
(1) Crafting Kitchen (to craft food-Items)
(2) Crafting Workshop (to craft non-food-Items)
(3) Yogurt Creamery (for the Yogurt Collection Mission)
(4) Grain Silo (increases Animal Feed Storage)
(5) Water Wells (ideally a minimum of three and they can be adjacent to the Trees/Orchards)
(5) Spinning Wheel (for making Yarn/Fine Yarn)
(6) Fertilizer Bin (a new structure whose full use has not been defined yet)
(7) Furnace (provides an extra 10 Power Resource Units on-demand)
Fortunately most of these structures are relatively small, so finding ways to fit them into the available space while still having the farm appear to be a farm rather than a disparate collection of structures and buildings all jammed together will not be all that great a challenge.
While this is obviously a utilitarian setup with a focus on practical use, there will still be room for the odd decoration you will want to add -- and you will want to do that -- plus the Mastery Signs for Animals and Crops, which we already built-in a space for by reserving that narrow strip of dirt along the front edge of the farm where it borders the road.
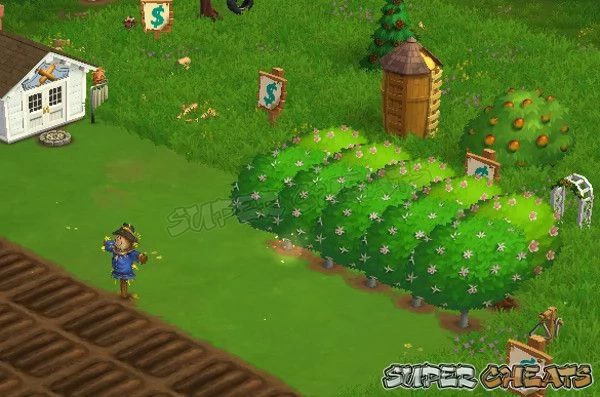
Designated Tree / Orchard Section
We did not actually need to relocate the Trees since they are in the same place they were before, but it should be noted that in addition to expanding the collection of Trees to fulfill our resource production goals (outlined below) once we reach the point where we can construct the actual Orchard Structure in which we can contain our Trees that will be a priority.
If you have yet to give much thought to the whole Tree situation, well no worries mates, because we did. Under ideal circumstances and placing the Trees with the larger ones towards the back of the area to make them all visible to you for casual assessment of state, the designated single section in the top-right corner that was the first new section that Marie helped us unlock is capable of holding quite a few Trees as-is, and it will hold even more once we have access to the Orchard Structures.
For the time being our goal is to have 20 Trees laid out in four rows of five Trees per row, and possible 25 Trees in five rows of five depending upon how much tweaking will be required to get the flow of Tree-based resources into the farm that we will actually require.
While it is not possible to complete the Tree Inventory immediately due to Level restrictions, and it is a certainty that the basic plan will not survive the actual building process, since we are speaking in theory at the moment anyway, in theory the desired results are:
- x5 Lemon Trees
- x5 Apple Trees
- x2 Pine Trees
- x1 Olive Tree
- x2 Orange Trees
- x2 Peach Trees
- x1 Fig Tree
- x2 Pecan Trees
- x2 Pear Trees
- x1 Mango Tree
- x1 Banana Tree
- x1 Lime Tree
Despite the large number of Tree types with small numbers of individual Trees, we can get away with this due to the fact that we will not be utilizing the resources that each Tree type produces on a daily basis, which means that there will be time to build up a reserve supply of each type. On a Tree-by-Tree basis it may be necessary to temporarily adjust the number for a given Tree in order to boost production of its resource but that is the beauty of our approaching this in a fluid and flexible manner.
You will note in the image embedded above that it depicts the Tree area with the Crop Squares already expanded to 32 units from 24.
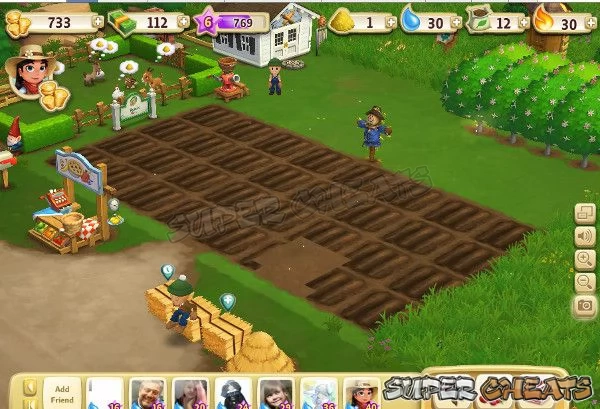
The Expanded Crop Section
Prior to our unlocking and gaining access to the entire six contiguous sections for our farm it made sense to limit the number of Crop Squares to just 24, that being a manageable number that was up to the task of supporting our goals and the availability of the various resource units we had. At present the only issue that has changed is having more land available, but as our next project is to build and deploy two additional Water Wells, which will bring our total to 3, thus providing an additional predictable on-demand supply of 30 WRU's (theoretically doubling our supply on hand at any given time) we can go ahead and add an 4th rank of 8 Crop Squares now.
The Basic Resource Stockpile Rules
- Rule #1: The Number for our Reserve Pool is 100 Units, and 100 Units is the number.
- Rule #2: Until a resource type reaches 100 Units, we don't have any of that resource.
- Rule #3: Unless the use is required for a quest, we don't dip into the resource stockpile.
- Rule #4: Time is our friend; fast kills, slow and steady wins the race. Save don't crash.
- Rule #5: Rare Resources are outside the rules; we NEVER sell Rare Resources.
- Rule #6: Think twice before using Request-based Resources (like Sugar, Powdered Sugar, etc).
The first four simple to follow rules can make our life a lot easier by eliminating the shock that your average surprise can create. The first four rules are the universal rules, while the others are simply guidelines, try to remember that.
If you follow these rules, whether you have one animal/tree or twenty, until the resource that specific animal/tree provides reaches 100 Units, you don't have any of that resource. Once it does reach 100 Units and passes that number, 100 Units is the baseline for Zero. If you check your inventory and you have 120 Units of Peaches, then you have 20 Units of Peaches. You can use those 20 Units any way you like, but you only have 20 Units to use.
Certain other resources range from being harder to obtain to being very difficult to obtain, and because of that you have to treat them differently than you do the sort you grow/harvest.
If you read Rule #5 it says that Rare Resources are outside of the basic rules set, and we never sell them. That is a very good policy and rule to follow, so you are probably wondering what qualifies as a rare resource, right? Well, they are basically Items that are more difficult to get even though you can theoretically harvest them from your resource-producing system on your farm. Under Rule #5 the following items qualify as Rare Resources:
- (x) Fine Rabbit Wool
- (x) Fine Saddle
- (x) Fine Sheep Fleece
- (x) Fur
- (x) Goat Cheese
- (x) Piece of Wood
- (x) Swiss Cheese
Note: The list above is subject to change. If you think a new resource is Rare, it probably is, and you should therefore treat it accordingly.
Rule #6 suggests that whenever you are answering the question of whether to craft an item that uses a Request-based Resource, you should seriously think twice before proceeding. A Request-based Resource is any resource that you have to go to your friends, neighbors, or best mate to obtain. In other words it is any resource that has the “Ask” button beside or under it when you go to use it as an ingredient.
Because resources of this type depend upon the kindness of relative strangers in order to obtain them, and because this type of resource almost ALWAYS has a small limit cap on how much you can possess at any one time, it should only be used when you have no choice about using it, such as to create Items for quests or missions. Under no circumstances should you EVER use a Request-based Resource as part of a Crafting session for profit.
The following list of resources qualify as Request-based Resources:
- (x) Crafting Nail
- (x) Empty Spool
- (x) Flask
- (x) Paprika
- (x) Pickling Spice[
- (x) Powdered Sugar
- (x) Salt
- (x) Sugar
- (x) White Turkey Feather
Note: The list above is subject to change. If you think a new resource is a Request-based Resource and is therefore a Rare Resource, it probably is, and you should therefore treat it accordingly.
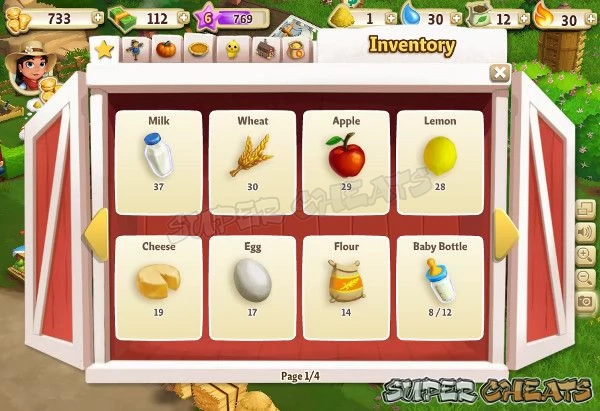
Wrapping the “Something to Build Upon - Levels 2 thru 5” Guide Section Up
At this point I will be completely in shock if you are not very very close to Level 6. If you have been keeping track, the point at which we reach Level 6 is also the point where this section of the guide is completed, and we move on to the next section, which is appropriately titled “Planning for the Future - Levels 6 through 10” and believe it or not represents the final segment of game play in the game where we can honestly think about the Levels we are working on in terms of groups of Levels. Because once we reach Level 10 the gloves have finally come off, and the process of unlocking each level thereafter will be one in which the individual level factors as part of the challenge.
So hey, that is good News / bad news. Call it the bittersweet exit of childhood and the entrance to that inevitable transition that is the highway leading to teenhood and all that comes with puberty on the farm. Okay, enough sexual joking, we are about to embark upon the second focus stage in our game play adventures in Farmville 2, so let's try to enjoy this, right?
At this point you should be very comfortable with crops, trees, and farm animals, you should have the Mission and Quest system down cold, you should have a rudimentary grasp of the Crafting scheme in the game, and a comfortable understanding of why our revenue stream is largely attached to the Crafting Kitchen at this point and time.
You should be well on your way to having established a diverse resource pool and you should be very familiar with managing that resource pool. You should have your eye out for income opportunities and you should be eager for the game to start pushing new structures on you, with all of the extra play elements that come with them.
The notion of the animal-based collections that will be appearing in your game should have you a bit excited, and with any luck there is a holiday or special event either taking place now or about to, so you have something to focus your attention upon outside of the mundane routine that largely makes up game play outside of Special Events. The reason that I say you should be happy for that or at the very least looking forward to it is that those types of events and their related content really do make the game and game play more interesting, as well as offer you special Items that you can work towards unlocking so you can display them on your farm... And while we are on that subject, wrapping up this section by examining that particular aspect of the game is a great way to do it with a bang!
The “I Love Me Wall”
Okay there really isn't an I Love Me Wall in the game, but the concept applies. If you are a younger gamer or you are an adult gamer who never had the opportunity to serve in the military or work inside of corporate culture, the concept of the I Love Me Wall is probably foreign to you, so I think we should start this by defining what that is. If you are already familiar with the phenomenon you can skip ahead to the paragraph that starts with “If you found that shocking you should go hang out in the typical office of a movie director in Hollywood some time...”
So yeah, the “I Love Me Wall” can take many different forms, but the two most common are found in the office of a senior military official (Full-Bird Colonel and up) and the typical Corporate Management Suit's office (Vice President of whatever and up), and tend to include the following:
Military Version: A collection of framed photographs showing the officer posing with heads of state or other (in)famous military characters from third-world countries, with Bonus Points for a photo of the officer standing beside and/or shaking hands with any of the following:
- King Mswati III, Swaziland
- Hu Jintao, China
- King Abdullah bin Abdul-Aziz, Saudi Arabia
- Teodoro Obiang Nguema Mbasogo, Equatorial Guinea
- Muammar al-Gaddafi, Libya
- Than Shwe, Burma (Extra Bonus Points if he is in his uniform showing the 5th star on his shoulders)
- Robert Mugabe, Zimbabwe
- Omar al-Bashir, Sudan (Extra Bonus Points if he is smiling and you can see the gap in his teeth)
- Kim Jong-Il, North Korea (Extra Bonus Points if he is NOT saluting)
In addition to their collection of famous people photographs, there will be citations for the different medals for bravery or heroism that they have received, and a framed glass-encased hardware set that represents all of the awards that they have received from their own nation, including medals, unit citations, qualification hardware, and the patch for whatever unit that they served with (even if only for a few hours) that has a balls-forward bad-ass reputation, and finally the collection of medals and awards that they received from foreign military.
That should give you an idea of what the typical military ILM wall contains.
The Corporate ILM Wall would be similar in that there will be photos that show the subject with notable or famous people, government officials, and more likely than not, Hollywood stars, but it is also likely to contain trophies in the form of award plaques, statues, medals and the like. Public Service Awards, certificates from governments and charities, and often the odd letter of thanks or testimonial that has been framed and included in the ILM Wall display.
Among the more interesting objects that I have personally witnessed on Corporate ILM Walls were framed ticket stubs from Woodstock, and other famous concert venues and specific shows I have my own ticket stub from the last UK performance of The Sex Pistols but it is not framed), and other famous venues like the Moscow Opera. You get the idea, right?
The point is to show how well-connected the person is, how many famous people they know, what social circles that they move in, and the like.
Well, in games like Farmville and Farmville 2 part of the subculture in the game is the active practice of demonstrating accomplishments, with your farm serving as a surrogate I Love Me Wall and the rare and uber rare Items you possess being the trophies that are on display. You get the idea.
Showing Off Your Chops
Considering that in most cases the only real effort that the player must make to score a significant bit of bragging rights is just to show up and have been there, but that does not prevent the practice from proliferating and keep the players from placing a lot of value in those displays of personal heft and accomplishment...
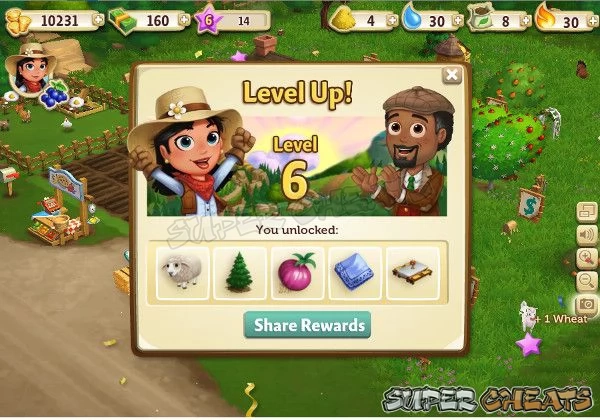
In the original Farmville the symbols that represented that sort of thing were, for the most part, rare and unusual farm animals, decorative farm buildings, and the rarest of all, decorative objects. One of the most desirable and its display unofficially considered to be mandatory would be the rare and limited edition hot air balloons and dirigibles for which the game is well known.
It's a Farmville Thing
The phenomenon of putting rarities on display as outward proof of both your prowess as a simulation farmer and your success in the games is the practice of placing your uber-rare Items on display for the world (and any visitor to your farm) to see - and in fact that bragging gesture would soon morph into something far less casual and far broader in that as trends it quickly began manifesting itself into real-world and real-life situations.
When I first heard the story about the Stock Broker in Singapore who started an invitation-only social club called “The Elephant Club” for which he hired an artist to custom-design a special T-Shirt that was hand-made using traditional silk-screen methods, and which depicted the limited edition Baby Elephant that was released in the original Farmville in September of 2009, I thought that it was an unlikely event and certainly a unique one. Then I heard about a social club for Farmville Fanatics that is called “The Jockey Club”and that meets once a year on the first Saturday in May at a place called Churchill Downs in the bucolic outskirts of a place called Louisville, Kentucky.
Membership in this club is restricted to veteran Farmville gamers who own the uber-rare in-game Lawn Jockey decoration, a decoration that would have been naturally rare anyway since it was part of the pre-beta phase of the game and so only a few thousand people were able to play it at that point, but is even more rare it seems as a result of the fact that it was only available in the game for eight days (?!).
The Lawn Jockey was originally released on 20 August 2009, and was a Level 1 Decoration that sold for $8 FVB and granted the owner 10XP in addition to possession of a cute little Lawn Jockey. The decoration was withdrawn from sale in the game on 28 August 2009 after allegations that were made online that despite the fact that the object in the game depicted a Caucasian-appearing cartoonish man wearing traditional a Jockey uniform, it was believed nevertheless to be a racist image.
If you happen to be one of the few hundred gamers in Farmville who own the Lawn Jockey decoration, you meet the requirements for membership in “The Jockey Club” and therefore can show up at the bar at Churchill Downs on the opening day of the Kentucky Derby each May, where you can enjoy the traditional Mint Julep beverage that is the signature and official beverage for the club, eat a few specially-prepared Farmville themed hors d'oeuvres, and perhaps win a gazillion dollars at the races! And how cool is that?
The point to all of this is that showing off your rare in-game Items -- in-game -- is not considered to be rude or bragging really, but rather is a traditional part of identity in the game. That being the case, gamers who begin playing Farmville 2 as early as they can will be well-advised to keep some of the special event-related objects and decorations rather than deleting them when the Special Events have concluded, and if you have been playing during the Winter-Spring of 2013, the items you should probably refrain from deleting include:
- Arc de Arachne (Event Item / Decoration)
- Candy Shack (Event Item / Decoration)
- Cat-O-Lantern (Event Item / Decoration)
- Cauldron (Event Item / Decoration)
- Cobweb Fence (Event Item / Decoration)
- Fresh Plot Marker (Event Item / Decoration)
- Holiday Tree (Event Item / Decoration)
- Jack-O-Lantern (Smiling Version -- Event Item / Decoration)
- Old Feast Table (Event Item / Decoration)
- Old Florist's Table (Event Item / Decoration)
- Sweetheart Tree (Event Item / Decoration)
Who knows? It is impossible to say what most players dropped into storage or sold off to get rid of, so these could end up being the newest and first uber-rares in Farmville 2... We will just have to wait for three or four years from now in order to find out! When that day comes you may want to set aside a little space on your fully-expanded farm to show off your rares to prove that you were there and are a veteran of the game! Heck maybe someone will start a new social club called the Old Florist's Society that meets once a year to enjoy a meal of nothing but edible flowers. Probably not, but still...
A New Trend in Leveling Up
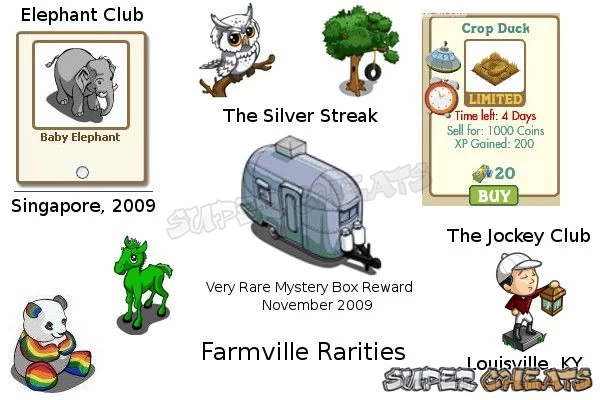
When you finally gather unto yourself the XP that is required to attain that magical Level-Up sound and finally achieve Level Six in this most excellent Agribusiness Simulation Game otherwise known as Farmville 2, you will very likely notice a new and emerging trend in the game, which is the presence of small square icons with images in them that depict the Items that you have unlocked in the game as the result of the leveling process.
In the case of Level Six you have just unlocked:
- Prized Galway Sheep
- Pine Trees
- Onion Seeds
- Blue Handkerchief Recipe in the Crafting Workshop
- The Feast Table (past event item)
The thrust of the matter is to illustrate for the player the selection of new options that are now available thanks to their persisting in playing the game and how their new level expands their opportunities, which if you think about it is pretty cool!
But in addition to adding to the different opportunities that are now available to you in the game, the unlocking of this pivotal level also has the natural consequence of bringing to a close this section of the guide. Thanks for playing, thanks for reading the guide, and thank you!
Planning for the Future - Levels 6 through 10Previous Page
First Steps - The Level 1 Farm
Anything missing from this guide?
ASK A QUESTION for FarmVille 2
Comments for Something to Build Upon - Levels 2 thru 5
Add a comment
Please log in above or sign up for free to post comments- Introduction
- New Version Changes
- The Plight of the Small Farmer in Farmville
- Starting Tips, Tricks, Strategies, and Good Game Play Habits
- The Farmville 2 Economics Overview
- Establishing Good Play Habits
- The Missions and Quests Primer
- Known Bugs and Server Issues
- Current and Recent News
- Walkthrough / Guide
- Reference Sections
- Structures
- Special Events
- Addendum
 Join us on Discord

You have done an outstanding job on FV2. It has been very helpful I was about ready to hang it up. Now I have Knowledge, and knowledge creates wisdom if used properly... Thank you again
Just curious, do you have any suggestions about what is best to grind for animal feed in these lower levels?