Advanced Farming - Levels 16 thru 20
Depending upon the manner in which you have been using this walkthrough/guide your arrival at this section represents a significant mile marker due in part to the young age of the game, and in part to the Changes in Strategy shift that are now required to help increase the pace at which progress is made.
Your understanding of these Changes are important, which is why that is the topic that we are using as the opener for this section...
The Guide as a Road Map
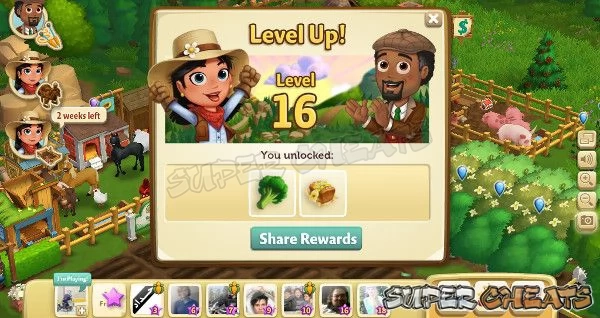
If you have been using the guide as your road map - meaning that you began playing the game from Level 1 at the same point that you began using this guide - your arrival at Level 16 represents the starting point of a significant shift in your play style and Strategy, specifically with respect to your approach towards the primary source for the XP that is the fuel to progress in the game.
The actual shift in Strategy swings into full-effect as you approach Level 19, not because that is an important level but rather due to your need to have the required resources to quickly unlock the next expansion section of the farm, Mango Gardens, which in addition to requiring your farm to be at Level 20 also requires you to have the following resources in place:
(1) One adult Brown Swiss Cow;
(2) x13 Chainsaws (acquired by direct request to friends/neighbors);
(3) $300Kc in Farm Coins
Mango Gardens is the third section of the row that we began unlocking in the last section of the guide, with the Old Silo section that we unlocked at Level 15 being directly to the left of Mango Gardens (Note that the next “regular” expansion section is the Golden Chicken Colony that is directly to the right of Mango Gardens in the same row. The emphasis upon “regular” is due to other Changes in the expansion requirements that will kick into effect following unlocking Mango Gardens, which are characterized by less emphasis upon levels and more emphasis upon resources).
Following your unlocking and clearing of Mango Gardens the next very important expansion section is the one directly below the Golden Chicken Colony section, which is called Apricot Acres. We will be focusing upon the requirements for unlocking this section out of sequence due primarily to the extreme nature of those requirements, which I have to say seems to me to be more than a little on the overkill side but there you have it. Those requirements are:
(1) Prove your farm skills by selling x10 Horseshoes;
(2) Obtain x18 Garden Gloves resource units by direct request to friends/neighbors;
(3) Pay $750kc in Farm Coins to unlock the section.
While the first two requirements are addressed by sending requests and adding horses to your farm if you do not already have some - which is not really all that egregious and represents a step you would eventually have taken anyway when you pause to consider that Horseshoes (along with the Fine Saddles that are obtained from Prized horses) are a key Crafting element and resource for both the Crafting Workshop AND the Crafting Kiln, the real challenge is going to be raising the coin for this one.
Considering that almost every strategic choice that we have made and practically all of the improvements that we have added to the farm up until this point have all been focused primarily upon boosting the efficiency of acquiring XP and, you probably have realized, the secondary focus of providing a reliable supply stream for resources, the issue that we now will be addressing, which is changing our footing from an XP-centric one to a coin-centric one, represents a significant change in the way that we have been playing the game.
While there is no point in overstating the complexity of these Changes, it does help to remind you that operating a farm with a focus upon profits as opposed to XP is a very significant change. In some ways it is a lot more difficult to do, especially when you realize that you have to accomplish it without dismantling the XP-focused foundation with which the farm has been designed. The reason you need to make that shift without damaging the infrastructure of the farm is that this is a temporary shift, not a permanent one, and once the need for a river of profits has been met you will revert to the XP-focused Strategies one again, so damaging that structure is not a good idea.
To sum this all up, strictly from a coin-based position your needs over the short term, for expansion efforts, include the following:
(1) Mango Gardens (Level 20) $300Kc
(2) Apricot Acres (No Level Requirements) $750Kc
(3) Golden Chicken Colony (Level 24) $500Kc
(4) Camarillo Country (Level 30) 1Mc
This should put the issue of tooling up for coin production into focus for you, in that it defines the facts that you will be requiring access to a total of a minimum of $2,550,000 Farmville Coins in order to complete the expansion process for the four sections detailed in the list above. Obtaining just over 2.5Mc using the current setup for the farm, assuming that you do not alter your Strategy for play, will take around six months at the current rate of progress, so obviously some Changes will need to be made to your game play Strategies, right? Right!
As the sections that follow in the guide unfold you will discover that shifting over to a profit-based approach to game play is not as complex as you might think, and more important, that this footing can be obtained without destroying the infrastructure that you already have worked very hard to put into place. That is good News by the way...
The immediate future for your game play will be a mixture of XP and profit at first, and then will shift towards profit for a while before shifting back to XP; being aware of that, it is a good idea for you to take stock of your existing resource-producer population among both the animals and the plants that make up the active portion of your farm, with an eye towards the most efficient way you can translate each into coin.
That means taking full control over the Crafting side of the game for a while, and thinking in terms of the best use for each resource - and while we are on that subject, if you are starting to suspect that developing some measure of the hoarder in your farming personality might be a good thing, well hey! Good! As you proceed remember that you should NEVER sell off crafting components for quick profits; turning crafting components into Finished Goods (and especially when you have Items that you could either sell for profit or continue to craft with to increase their value). Just saying...
The Guide as a Reference Source
If you started playing Farmville 2 prior to finding this walkthrough/guide considering how deep into game play you are at this point, you already have a mixture of capabilities in place - though your use of them may not be as efficient as it would have been if you had been using the Unofficial SuperCheats Walkthrough and Guide for Farmville 2 (yeah, that is us ringing our bell) but fortunately you are here now, and so your opportunities to benefit are now firmly within your grasp! Dumbledore would be very proud of you!
SEARCHing for a Clue
The first point that we should jump on is the search box that you will find at the top of every page of the guide, which takes the form of a dark blue box that reads “Search this guide:” and the search box where you can type in the key words or the search phrase you are looking for...
The Search System does not just use the active page you are reading, but is configured to include the entire guide and its contents, which is a good thing when you consider that the spread of activities in the game are largely disconnected from the level system.
A good example of how the search system works can be seen by typing the words “Prized animal” into the search box and hitting the search button, at which point it will return a list of the documents in the guide that include those words. When I did it the results including the following pages:
Planning for the Future - Levels 6 through 10
Reviewing the Expansion Process
There are several reasons that I included the list above in this - primarily to illustrate that the search system that we use at SuperCheats is actually a lot more useful than the systems you might have experienced at other sites, especially considering that it does not simply parse the titles of a page and restrict its output to that!
The return of the Prized Animal System page is an obvious one, but when you realize that at the time of the search that was an empty page (I had yet to populate it) it illustrates that the search engine does use the titles as part of the process, but the other three pages that were returned confirms that the search system uses the contents of the pages as well.
The tighter you refine your search terms, the more effective the search system is at helping you to find the information that you are seeking.
An Alternate Approach
In addition to making good use of the search system that is part of the site and guide, another approach that you can use for finding the information that you need is to skim the Contents Tables for the guide and each page. There are actually two distinct tables you can use - the permanent Table of Contents tables that appear on every page of the guide in the large grey box on the right-hand-side of the page, under the heading of “Table of Contents” (go figure) and a page-specific table that appears in the upper right-hand side of each document of the guide in the text area. For our purposes we will call the second table the Page TOC.
The Page TOC basically uses the heading system in the website markup, listing any section headers - for example when you load the first page of the proper section of the guide (First Steps - The Level 1 Farm) you will see the following makes up the Page TOC:
- Your Starting Status
- The Farm Animal Feeding Mini-Tutorial
- Adding Mates to your Agribusiness Social Network
- Making a Little Money
- Expanding Your New Farm
- Your First Quest
- A Summary of What we have Learned
From those header listings you should not have much trouble figuring out what information is likely to be contained in that section of the section (heh), and while there is not a lot of intentional uniformity between each of the sections, when you are looking for information about common or important elements such as Farm Expansion you should have no trouble getting to the specifics you are seeking.
Each of the Page TOC's are active links - which means that once you find the section within that section of the guide that contains the information you want, all you need to do is click on it in the Page TOC and it will take you directly to that part of the active page.
We think it is a good idea for you to review and read the sections of the guide that cover the levels you have already played past in the game, since they likely will contain additional information that you can still make use of. The supporting sections (basically the pages that are organized outside of the Walkthrough/Guide section in the main Table of Contents and in particular the pages listed in the third section of the Table of Contents headed “Reference Sections” are meant to contain, in addition to observations that may be level-specific, additional hints, Tips, and Strategies that all contribute to more effective play.
When you are using this guide as a Reference resource rather than as a walkthrough, making effective use of the TOC's is your best approach, but bear in mind that you have the option on each page to print out each page, which you may find is a helpful approach in that it allows you to pull out your trusty highlighter and mark up the important information you need on the printed pages, just saying...
While the Unofficial SuperCheats Guide to Farmville 2 was created to provide you with everything that you need to know to play, as well as to serve as the go-to source for Reference Data about the game, you may find that the unofficial Farmville 2 forums can be a useful tool as well in asking questions that may not have been covered yet in the guide...
Getting Information Not Contained in the Guide
We mention the forums for two reasons - the first is that gamers who are members of the SuperCheats community tend to be a more helpful sort, so asking a question on the SuperCheats forum for a given game title usually results in obtaining an answer, but also because we actually read the forums on a regular basis as well, and so when we see a question about information that is not covered in the guide being asked about in the forums, we are likely to include that information in the next update to the guide!
You may also find that asking us directly can be an effective means of obtaining the information that you are seeking - one of the reasons why our guides take so long to create is that the writer who has been assigned the guide project for a game here at SuperCheats is actually not simply regurgitating information from the Interwebs, but rather plays the game they are writing about in order to write and speak from a position of both experience and informed knowledge.
To ask us directly about something not in the guide or to suggest that we add a subject that is not presently in the guide, your best choice is to use the Comments System at the bottom of each page to ask your question or make your request.
The Comments System is restricted to 1000 characters per post so if your request requires more than that you can either break it up into several comments, or alternatively, you can click on the link that is the guide author's name at the top of each page and write a personal message via the site's message system.
Either way you can be assured that we will see the request and act upon it! Remember that we write these walkthrough/guides and SuperCheats publishes them specifically with you in mind.
Mission and Quest Resources Beyond Your Current Level
Another issue that will routinely crop up at this point in your game play is the requirement for mission and quest resources that are beyond your current level.
While the developers made considerable efforts to see to it that none of the quests in the complex mission system that is part of the game include resources that would require the player to spend Real-World Money on resource-producer plants, animals, and trees, one area that they did not apply so fine an eye to is missions that contain quests which require resources that require higher levels than you may actually have at the time that the quest is flagged.
Bearing in mind that the logic behind dividing this guide up into what amounts to four-and-five level blocks has more to do with the way that the logistics are set up in the game itself than they do the convenience of the player or the guide writer, you will be extremely lucky if you do not find yourself dealing with quests that require resources you cannot obtain yourself by planting the related source plant or animal, so we need to address that to provide you with the Strategies you need to complete these quests without spending Real-World Money.
That is the rub and it bears emphasis: the inclusion of resources that are beyond your current level were not included as an accident, and you will note that none of the quests and missions that these outside-of-level resources are included in represent critical-path events. That is to say you can fail those missions when their timers run out without any real harm to your game.
Of course nobody sets out to fail, and you will note that the developers helpfully include the option for you to spend Farm Bucks (the currency in the game that you can only obtain through purchasing it with Real-World Money) to obtain the resource Items that are required should you find that you lack the capability to actually grow/harvest said items at your present level. Yes, that's right, they built into the game another means of parting you with your money should you feel the desire to succeed rather than stare blankly at a constant reminder of failure in the form of a ticking clock.
Well we have your back mates - it may seem like the only way to successfully complete those quests is to either (A) go into hyper-XP mode and level up faster than usual so you CAN grow/harvest the resources, or (B) spend some money and buy them - we have an alternative for you: get the out-of-level resources from your friends and neighbors farms!
This is actually a variation of the method that is used to obtain a constant and reliable supply of Mud Buckets from your neighbors farms by leveraging the bug in the Tree Grove system that guarantees that servicing a friend/neighbor's grove will result in automatically obtaining the resource for any animal you service afterward -- basically each grove contains four trees, you get five helper Actions, so by servicing the grove you use up four of the five helper actions and may or may not obtain one or more of the resources from the trees in the grove but will absolutely and without fail obtain the resource for any single animal you service with your fifth and final helper action for that visit.
For pigs that means a guaranteed mud bucket (or for a Prized Pig a guaranteed Truffle) but for our purposes this can be any desired resource.
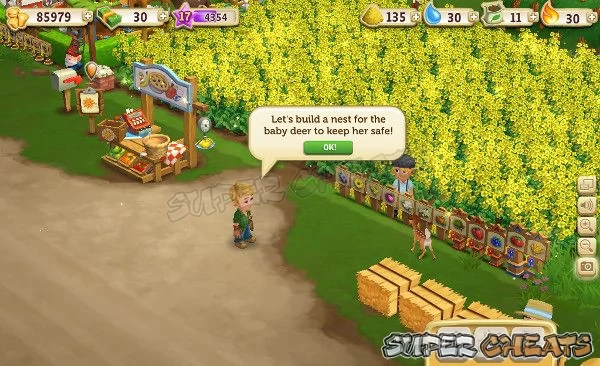
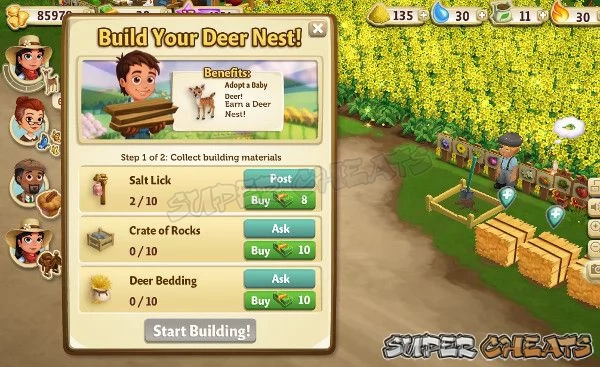
A good example of this sort of situation is the Deer Friends and Bee All You Can Bee Missions, both of which require you to first grow some Pumpkin Crops (which you should be able to do yourself) in order to craft 1 Orange Flower Bouquet. It is the latter item - the Orange Flower Bouquet - that is usually the out-of-level crafted object, primarily due to its requirement for some elements needed to craft the Orange Yarn Flower and the Wool Thread Spindle used in its construction.
This does not necessarily represent an out-of-level resource but it could - for example in our case the missing resource is the Fine Rabbit Wool, which is a component of the Wool Thread Spindle, and which naturally requires the player to have some Prized Rabbits in their Farm Animal population, which they likely as not do not, as was the case for our farm that was used in creating this guide.
Don't Spend Money
Our response to this issue was not to simply sit by and wait for the timer to run out, and the quest -- and ultimately the entire mission -- to fail, especially considering that we had already invested time and effort into completing the previous four quests that were part of the Deer Friends Mission. That and the fact that the second quest in the Bee All You Can Bee Mission ALSO required the same crafted item - the Orange Yarn Flower Bouquet - and you should see that there is some motivation to solving the problem.
The solution in this case (and it is one you can apply to any similar case) was to utilize the five helper Actions we have available to us when we make our daily visit to each of the farmers on our friends and neighbors list!
When you arrive, simply pick out a Tree Grove to service (you may as well pick a Grove that contains trees that produce OTHER out-of-level resources since that sort of kills two birds with one stone in that you may get lucky and spawn some of those resources to add to your stored resource collection for use in other missions and quests), and then select a Prized Rabbit (any type that will produce the Fine Rabbit Wool we are seeking), the end result being that we obtain a resource for Crafting that we cannot naturally obtain on our own!
Once you have a sufficient quantity of the resource desired, you can apply that same Strategy to other out-of-level resources or resources that you do not have the ability to obtain normally, to stock them away for future use, and we recommend you do that.
This Strategy neatly solves the challenge without requiring you to use up valuable resources in order to speed level, and of course prevents you from having to purchase and use Farm Bucks, so it is win-win all the way around mates! Good on ya for doing it!
Note: this method is particularly effective when you need to obtain either Brown or White Feathers (but more often White) to craft a component for an out-of-level item, particularly due to the rarity of feather-producing animals for most players at this level of play in the game. Bearing in mind that you can obtain the Brown Feathers from any adult feather-producing bird such as Turkey and Peacock varieties, and the White Feather from the Prized-versions of the same animals.
Ongoing Construction Project Problems
At this point any of the construction projects for outstanding buildings that you have not yet received should start to show up quickly. You will want to stay on top of those of course, and you will also need to stay on top of the collections and the Special Events. Speaking of which...
Special Animal Events
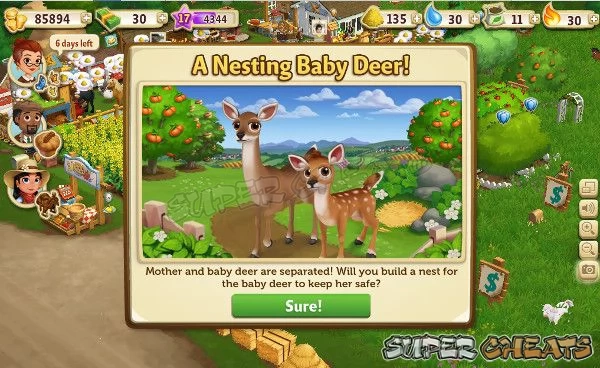
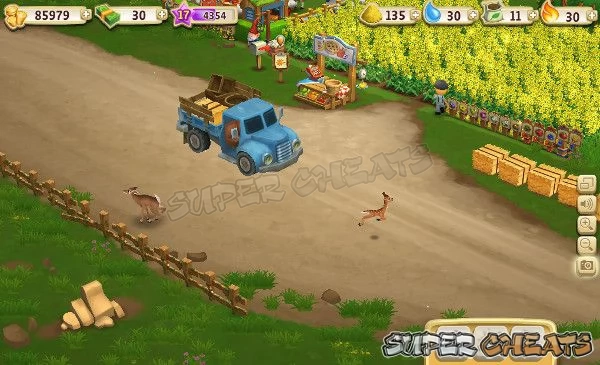
While this may not necessarily apply to you in the here and now, the game uses special animal events to introduce new and mission/quest required animals. The most recent at the time of writing this is the Baby Deer, for which you are prompted to complete a Mission that involves building it a “nest” to keep it out of the road, where it nearly was run down by a truck.
The objective is to introduce the new animal in an interesting way (with a story) and prompt you to commit to completing the special event in order to obtain the animal. This is almost always a good idea, as a lot of the time it is the only way to obtain one of that animal without spending Real-World Money -- which is to say if you happen to have missed one of these events, that is how you will be getting your own one of them.
Try to stay on top of the event as well as your other missions/quests, and again, complete your buildings as quickly as you can manage. Work towards building a solid set of neighbors so that you have all the help that you need, and this really should be a smooth process.
The anatomy of these events should be fairly obvious to you at this point in your game experience, as they basically consist of an event involving one of the NPC characters who is known to you, and the special animal that will present as part of the story - in the past that has included the Thanksgiving Turkey, a special horse (not the horse that is part of the Butterfly Event, that was a different one), a rabbit, and most recently the deer.
Associated with these events are a Mission with a series of quests that relate to the story, and which require you to seek the assistance of your friends in order to acquire the Items needed both to complete whatever the construction project is for the animal as well as the associated quest - but that is not the crux of the matter - that being to make this as easy on yourself as you can.
It will not have escaped your notice that invariably there will be, attached to the construction sequence for these events, at least one and possibly more Items that are connected to the Wall Posts for you and your mates. That is to say that the construction project will have one element, and the Mission may have an element or two, that you will can easily benefit through harvesting the Wall Posts and the give and get posts that are present there.
That being the case, I strongly urge you to avail yourself of those resources, since it can quickly resolve the number you need without you having to depend upon anyone else hitting your Wall Posts!

As you unlock the first level in this new segment of play there is an element that will become more and more important from here on out, and so it is time for us to turn to discussing it at length, and that element is your farm animals and their management.
Advanced Farm Animal Issues
In general you should be aware that the maximum number of animals that you can have on your farm is largely based upon the number of population-expanding objects or structures that you have built. The most obvious being the different Prized Animal structures and the Shady Trough, which each will have in their own way contributed to expanding your maximum number of animals, but do not ignore the value of the Water Trough, each of which will add +5 to the total cap for your farm.
You may not think this is so important that it warrants its own specific section, but there you would be wrong, because as it turns out, your Farm Animals are not only the fastest track to leveling in the game (in fact to a point at which they may be unbalanced in the overall scheme of things) but they are also the key to great wealth through Crafting, some of them in obvious ways, and others in much more subtle ways.
Before we get to the Strategies that you will want to be following from here on out, we should discuss those factors...
Farm Animals vs. Prized Animals
When Farmville 2 was first launched there was no real Prized Animal Scheme when it came to Crafting - that is to say that the Prized Animals did not really fit in to the crafting system in the very specific way that they do now. In fact early on in the game the “Prized” state was a thing of disgust for most of the players, whose basic reaction to an animal reaching that state was to immediately sell it and replace it with a regular of that type.
The reason for that had to do with the fact that at that time those animals, once they reached the Prized State, actually failed to enhance their own value! What they did was, at each new feeding cycle, were “off to the County Fair” to be shown. Sure, they gained you a bit more XP and some gold, but that was all that they did. As the special population-expanding buildings had yet to be added to the game, having your valuable animal population slots taken up by animals that did not contribute to your Crafting Supplies - which arguably was the whole point of the farm animals in the first place, was certainly a thing of resentment.
What added even more to the resentment and outright anger for many players was the fact that animals that they paid REAL money for had a ticking clock on them and would, once fed X number of times, revert to a form that was useless to them, and there can be little doubt that once players realized that, the attraction of buying a Farmville Card in order to get some new and cute animal lost a good deal of its attraction.
It did not take long for the development team to realize that the whole Prized Animal business had been poorly implemented, and they quickly moved to redraft and expand the Crafting system to make these Prized Animals an integral part. The end result? Other than selling off the abundance of Prized White Chickens we seem to easily end up with, very few players will sell any other type of Prized Animal simply because they pay dividends not just in rarer crafting resources, but very good XP and money!
The problem is that while having those Prized Animals is a benefit, the craft objects for which they contribute resources tends to be on the higher end of the scale, rather than the regular crafted Items that players need to make more of for Missions and Quests, and that being the case, even though they now have solid value, there is still the issue of maintaining a balance between the Prized Animals and the regular Adult Animals that are absolutely required in order to keep not just your Crafting system supplied, but also to maintain key collection objects like the Hen House, Fertilizer Bin, and Yogurt Creamery, not to mention the new Mud Wallow...
Prior to the Introduction of Prized Structures that were created to remove Prized Animals from the population, every player had to make some tough decisions on what senior animals needed to be removed to make room for additional craft resource-producers.
Managing Prized Animals
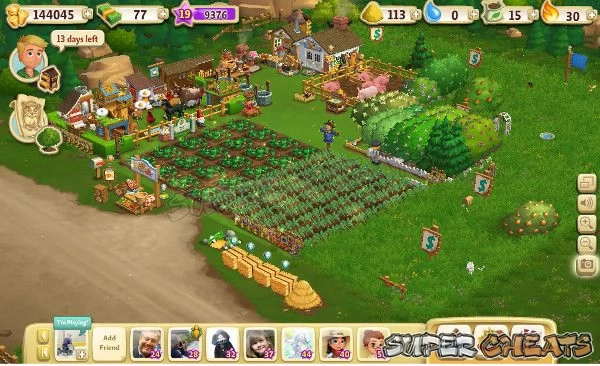
The Introduction of the Prized Animal Structures went a long way towards solving part of the problem, but they in turn introduce a new level at which animal management must be pursued if the player is to accrue the maximum benefit from their population of Prized Animals.
For our example we will take one of the first Prized Structures that was introduced to the game - the Prized Chicken Coop - which has a total population cap of just nine (9) Prized Chickens.
Due to the insatiable appetite of the Hen House for X number of Adult Chickens, for most of the players this has created a cycle by which they place baby White Chickens and then evolve them into adults, and continue through the process, selling the loose ones once the Prized Hen House is full.
But in addition to the White Chickens they may also have more valuable (from a resource production point of view) types of chickens on their farm. For instance the Rhode Island Red and Gold Laced Cochin types, which can both be purchased with coin, produce a higher rate of resources as their return on investment, and then there is the Polish Silver Laced Chicken that is the prize for the Exotic Egg Collection that is part of the Hen House.
In this case it is in the best interest of the player to monitor the population of the Hen House and, when a Polish Silver Laced, a Gold Laced Cochin, or a Rhode Island Red (in that order of preference) matures to Prized state, they should then remove one of the Prized White Chicken from their Prized Chicken Coop and replace it with the rarer and arguably more valuable bird, selling off the Prized White Chicken to free up the slot it now occupies in the animal population outside of the Prized Structures.
Remember: Prized Farm Animals who are housed in a Prized Animal structure DO NOT count against the overall total farm animal population limit!
The same basic management approach should be taken with the Goat Shelter and Sheep Shack, and when they are added to the game, with the Pig Pen, the Rabbit Hutch, the Horse Barn, and the Cow Pen. It is reasonable to expect that the Rabbit Hutch and perhaps the Pig Pen will be created and made available within the span of Levels 16 through 25, since the farm at those levels seems large enough in available space to hold those added structures, but we would not expect to see any of the other Prized Structures added to the game until after Level 30 or so, when the remaining farm segments become unlockable...
In any event you are going to want to keep a close eye upon the residents of your Prized Structures just as you will want to keep an eye upon the farm animals that make up your animal population to see to it that you are receiving the best value for each slot.
Knowing Which Animals to Sell Off
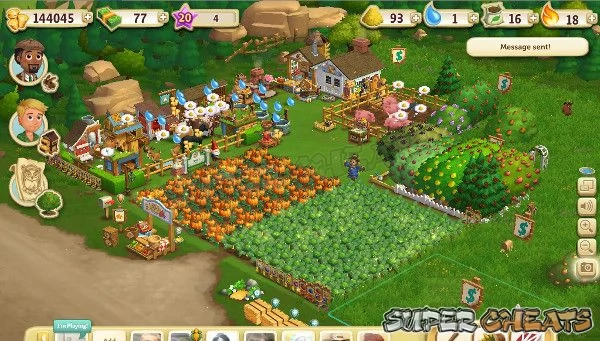
As was pointed out above, the Prized White Chicken has very little value to most farmers due primarily to the increased value of the other types of Chicken that are readily (and in the case of the Silver Laced FREELY) available to them. The same can be said for other basic animal types in the game.
The White Sheep is easily obtained and deployed, and for what it costs and the effort that goes into it, does offer a decent return, but as you acquire more valuable sheep either via events or by purchasing them, you will be gradually rotating them out of the Sheep Shack, which has a capacity of 12 Sheep, in favor of the more productive and valuable ones, and that means that you will eventually find yourself selling off any Prized White Sheep you have on your Farm in order to replace them with new White Sheep or with more productive versions.
When the subject is Goats, whose Goat Shelter can hold 12 Prized Goats, the most common you will have on your farm is the Red Goat. As you fill your Goat Shelter with the “keeper” versions, that will include the Prized Ibex, the Prized Mummy Goat if you availed yourself of the opportunity to obtain one last Halloween, the Prized Nubian, the Prized Saanen, and Prized LaMancha Goats, pretty much in that order - the latter ones being more valuable than the former with the exception of the Mummy Goat...
Managing Prized Animals without Prized Structures
It is at this point that we move from the realm of the known quantity to that of pure speculation - and in particular this applies to the collection of animals that includes Rabbits, Cows, Horses, and Pigs, bit also the odd special ones like Turkey, Deer, and Peacocks, just to name a few.
Until they each have a Prized Shelter version, they will continue to represent a potential source of difficulty as you must decide just how valuable the resources that are produced by their Prized Version are compared to Adult version resources you could be obtaining by replacing the slot they fill.
BEFORE you conclude that you are best off selling the prized versions of harder to obtain animals, good examples of which include the Black Arabian and Andalusian horses, and collection-based or prize animals like the Highland Cow and the Pot Bellied Pig, you need to remember that you have an alternative to selling off those animals!
Prized Animals can be stored in your Storage Bin with no real impact on the animal other than to reset its feeding clock. That is to say that you can place the animal into storage rather than selling it off, which is certainly what you should be doing with the more valuable resource producers when you have more than you need of them rather than selling them, since we know that eventually they will be adding Prized Structures for them into the game, at which point you will be able to bring then out of storage and place them to make use of them without the doing of it impacting the bulk of your Animal Management plans.
As for animals that you can easily sell off rather than store, that would certainly include the Cottontail Rabbit, the White Sheep, White Chicken, Red Goat, and Pink Landrace Pigs, considering how easy and cheaply they all are to obtain and how inconveniently quick they make the transition from Adult to Prized states. Just saying.
Expanding Your Population Limits
The practical approach to expanding the farm animal population limits on your farm have to include the effects that buildings have on that limit, and as a result in addition to the Shady Trough you will see plenty of players building a lot of Water Troughs, but even with the extra population slots that these all provide, you should bear in mind that there is still a hard cap limit in the game of 45 animal population and that has NOT changed.
What that means is simple: once you have reached the 45 farm animal population expansion point, building and deploying additional cap-expanding structures or objects will NOT raise the cap. Once you hit 45 you are done. At least for now.
According to interviews that the dev team has given in the past there is actually a logical reason for that, as was explained in a Q&A Interview that was published April 7, 2013 online at CEGamers.com (http://tinyurl.com/cej2otb):
Q3. Why is there an animal cap of 45 and when will it change? (Cyndi Samuels)
Answer: We have an Animal Population Cap to ensure our players have the best possible experience when playing FarmVille 2. Having too many animals on your farm at one time can seriously reduce performance, which is no fun at all! While some computers might be able to handle more than 45 animals on-screen at a time, this isn’t the case for all of our players. We are always making little technical optimizations that allow us to increase it slightly, but we are very careful to not make the game harder to play for anyone.
In the same interview the development team confirmed that the Prized Rabbit Hutch is currently under construction (just as we speculated!) and they confirmed that the future would hold Prized Structures for Cows and Horses (again, at a “later time” which conforms to the logical assumptions that we have made regarding the space requirements).
With all of this in mind, you should seriously think about retaining in storage the Prized Animals of the various types that you can place in these upcoming structures - and you may want to hold on to those Prized Cottontails or at least an even dozen or so of each of the lower-end but Prized Animals until you have an even dozen or so of more valuable ones, rotating them into storage the same way you would into a Prized Structure until you actually have a Prized Structure to use. That is just a common sense approach to the issue.
Arriving at a Balanced Population
The final element to Animal Management on your farm is to find a balance for the population. We cannot tell you the perfect formula, because that really honestly will depend upon your play style, the craft recipes you prefer to make, and how committed you are to mastering each animal type. But we can share with you the approach that we have taken on the advanced farm (not the one we did for this guide, but the one we began in preparation for it)...
Bearing in mind that this will be partially speculation because the current animal cap on the advanced farm is at 40 animals and not 45 (we are saving up to unlock the Apricot Acres expansion section for the farm, which requires $750Kc and so have to hold off on the $50Kc it would cost for another Water Trough to hit the 45 cap), this is what we chose to do for the active animal population:
Chickens: 3 Total: (x3 Rhode Island Red)*
Cows: 5 Total (x1 Swiss / x1 Jersey / x1 Longhorn / x2 Highland)
Goats: 5 Total (x3 Red / x1 Spotted Boar / x1 Saanen)
Horses: 6 Total (x3 Black Arabian / x2 Mustang / x1 Appaloosa)
Pigs: 7 Total (x1 Yorkshire / x4 Landrace / x1 Hereford / x1 Pot Bellied)
Rabbits: 5 Total (x2 Cottontail / x1 White / x1 Angora / x1 Witch Bunny)**
Sheep: 5 Total (x4 White Sheep / x1 Manx Loughtan)***
Turkey: 1 Total (x1 Wild Turkey from Event for Feather Production)
* When we have a new Polish Silver Laced it replaces one of the RIR types. Only 3 Adults are required to keep the clock on the Hen House ticking for the Exotic Egg Collection.
** Some of these may be Prized. Their value is offset by White Sheep for Wool Production.
*** The Manx is retained for its production of Brown Wool.
As you can see there is room for a few other animals to be added to the mix - either special ones that you choose simply because you like them, or because you need more of a particular resource. You will notice that we intentionally fall a few short of the cap and we seriously recommend that you do the same, leaving open two or three slots simply because you never know when the game is going to GIVE you an animal as part of an event, and it would totally suck to not be able to get that animal if you were already at capacity.
The plan - when we have the money to expand to the 45 cap - is to only have 42 animals on the farm, leaving a safety margin of 3 slots for event and special animals. While it is not really all that likely that the game could give more than one event animal to you at a go, there is the possibility that it will give you an event animal at the same time that one or more of the collections pay off, which could put you in an awkward position with respect to the cap, hence leaving a margin for error of three animals.
Approaching the End of the Section
As you arrive at Level 20 (and thus approach the end of this section of the walkthrough/guide), as we have already mentioned you are now at a juncture in the game where a change in play Strategy is required, as otherwise progress in the game will slow down considerably.
After you unlock Level 18 you should have set your sights partly upon obtaining the resources that you will need in order to unlock and clear the Mango Gardens expansion section of the farm as quickly as you can.
Making Use of Mango Gardens
If you have been following along in the guide and using it as a walkthrough, chances are your Layout is pretty similar to the one we are using, which means that your crop area occupies the lower right section of your farm and your Crafting stations and other buildings are situated on the lower left-hand section of the farm.
The support buildings as well as your animal pens will be spread along the top edge of the farm and if you are logically separating animals by resource and size, will likely include at least two and possibly three separate pens (three for sure if you have reached the point where you are actively farming your Pigs since having them in their own area is a good idea for a number of reasons, which we are about to cover).
The issue of your Trees and Tree Groves is a sort of in-the-air matter since it can be addressed in a number of ways. If you are meaning to be efficient about them then placing the Groves in clusters or along one edge of the farm is probably the best way to deal with them, as doing so makes it much easier for your friends and neighbors to identify the high-resource requirement Groves in order to make the most effective use of their helper Actions, but there are some Tips for both animals and trees that you can use below that will refine their effectiveness and make life for your friends and neighbors that much easier (and their helper actions much more effective) as a result.
More Efficient Use of Groves
The use of Tree Groves on your farm all by itself considerably increases the effectiveness of tree farming thanks to the resource savings that placing four of the same type of tree in a Grove offers you automatically, but you can make that process even more effective by applying a Basic Strategy to how you deploy your Tree Groves as well, making it very easy for the players who visit your farm to make the most of their helper Actions while, at the same time, helping you make the most of them as well.
The first rule in constructing your Grove clusters or lines is not to hide the Groves that contain trees that have higher resource requirements.
If you are placing your Groves in a line along one edge of your farm (the left side of the farm or the top edge is generally the preferred choice in that regard) you want to always remember to place the Groves containing high-resource trees (basically Lime Trees, Walnut Trees, Pineapple Trees, Pine Trees, and the like) in a prominent position - as the first Groves in the line starting at the bottom left side, or if you are lining them along the top, the first Groves in the line starting at the top right.
When you are clustering your Groves into groups you should place the higher-resource Groves on the outside edge of the cluster, which basically means putting them closer to the visitor's PoV so that they are more likely to use their helper Actions on those rather than lesser choices - as clearly you are better off having them use their helper actions on, say, a Grove of Pine or Pineapple Trees than you are on a Grove of Apple Trees.
More Efficient Animal Placement
One of the most common mistakes that players make is in NOT creating Animal Pens for their Farm Animal population. It may seem like an easier method for dealing with the issue by having them spread all over the farm, but the problem that this creates is that your crops, trees, buildings, and farm objects can lead to a confusing and often difficult ID process for your visitors, especially when you are growing a crop like Wheat for example, which tends to conceal the smaller animals on your farm!
The addition of Pigs and the related special Crafting resources that they add to the game is another matter that segregation will often help to improve results on - specifically with respect to making life easier for your friends and neighbors, who may be making use of the Tree Grove Strategy for obtaining the best results of their Helper Actions...
Having to hunt for a Pig among your crops and farm structures just makes the process all that much more difficult, and you cannot blame a visitor if they end up giving up rather than playing Where's Waldo in the confusing theme park that you farm can become. Just saying.
So when Pigs (and specific class animals like dairy and wool) are being placed, you will almost always find that it makes more sense to set up a designated pen area for them -- in fact that applies to ANY farm animal that has a related support structure for it!
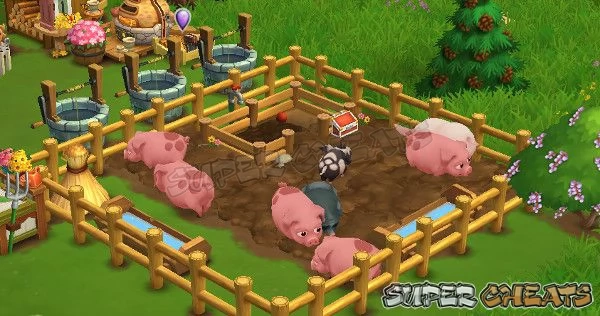
If you look at many of the illustrations in the guide you will see how this approach has been very effective in creating the Layout for the farm that was used in creating this guide - and in particular with respect to what became the designated Pig Pen, which in addition to containing the muddy ground around the Pig Wallow in which the pigs can roll, play, and sleep, also contains the Mud Wallow that doubles as the Pig Collection focus.
For Goats the same deal applies, with the Goat Shelter being included in the designated Goat Pen. You may also want to place the Shady Trough and your Deer and Horses in the same animal pen area...
Remember that anything that you can do to make effective use of helper Actions easier on your friends and neighbors is a good idea.
Unlocking Mango Gardens
We have now reached the final major element for this part of the guide, which is unlocking the Farm Expansion section called Mango Gardens. Adding this section to your farm not only gives you additional space in which to have animals, trees, or crops not to mention relieving the structure crowding issues that you are surely facing at this point in your game, it also has additional benefits you may not be aware of, which include:
(1) Adding Swiss Cows to your Farm;
(2) Adding Mango Trees (and their fruit) to your Farm;
(3) Making Mango Trees available for purchase via the Farm Store
Getting together the set of requirements to unlock this new expansion section is not just restricted to the challenge of raising the $300Kc you will need, but also includes $65Kc for the Brown Swiss Cow, and coordinating your efforts with the process of changing over from XP-focused play to Coin-focused play, but do not lose sight of the point that arriving at Level 20 with most of those resources in place was a major focus for this part of the game play!
Spending the $65Kc to buy the Brown Swiss Cow is just the start of getting it deployed and completing that particular requirement - there is also the reality that evolving it from baby Brown Swiss Cow to adult Brown Swiss Cow requires a whopping 17 (seventeen!) Baby Bottles!
As you are restricted to having just 12 Baby Bottles in your supply stores at any given time, that likely means that once you have unlocked Level 20, which is required in order to unlock the Brown Swiss Cow in the Farm Store, you are still looking at a full day or even two of play in order to obtain the Baby Bottles required to evolve your Swiss Cow. The more active your Wall is with respect to your friends and neighbors the less time and effort that will likely take, but still, the costs associated with buying the baby cow will surely cut into your bank total you have set aside for unlocking the expansion sections.

Wrapping Up Loose Ends @ Level 20
Having reached and unlocked Level 20 you are now about to embark upon a different path and focus in the game, and in view of that now would be a really good and convenient time to wrap up any and all of the incomplete construction projects, outstanding Missions/Quests obtained before you unlocked Level 20, and any lingering odds and ends like the organizing your Prized Animals so that the best of them occupy the appropriate Prized Animal Structure and you have sold off the low-level Prized versions that may be knocking about your farm yard (basically the White Chickens, White Sheep, and etc. that are of little further use to you).
You may want to consider this a pause-point while you focus upon wrapping up the aforementioned loose ends - this is one of those times in the game where coordinating with and requesting the help of a handful of your friends/neighbors really will make this go much faster.
By narrowing the focus of play with these goals in mind you should be able to manage this relatively quickly... While getting it done is not absolutely required, you may notice that having all of the above Items and tasks neatly concluded will give you an extra bounce in your step and the good feeling of being well organized! Yep! Good on ya!
And with all of that completed that nicely wraps up what is essentially the half-way point in the game as, while there really is not an “End Game” to speak of, at least for the moment Level 20 is the halfway point in the sense that Level 40 is the right-hand end of the spectrum (though we are told that there will be levels added to the game beyond 40, it is just that details about those higher levels are sparse at the moment.
This concludes the “Advanced Farming - Working Your Way through Levels 16 thru 20” section and is the point in your game play where you should take a step back, grab your favorite and preferred ice cold libation, and pat yourself on the back. Ah hell, go ahead and hug yourself! You deserve it!
Anything missing from this guide?
ASK A QUESTION for FarmVille 2
Comments for Advanced Farming - Levels 16 thru 20
Add a comment
Please log in above or sign up for free to post comments- Introduction
- New Version Changes
- The Plight of the Small Farmer in Farmville
- Starting Tips, Tricks, Strategies, and Good Game Play Habits
- The Farmville 2 Economics Overview
- Establishing Good Play Habits
- The Missions and Quests Primer
- Known Bugs and Server Issues
- Current and Recent News
- Walkthrough / Guide
- Reference Sections
- Structures
- Special Events
- Addendum
 Join us on Discord

How do download the cheat app