Reviewing the Expansion Process
General Farming - Levels 11 thru 15Previous Page
Planning for the Future - Levels 6 through 10
First I want to congratulate you on getting this far this fast.
The vast majority of gamers who start playing Farmville 2 take an average of around five weeks to reach Level 10, but if you have been following this guide you did it in less than two weeks (or thereabouts) so good on ya!
Now that you have been properly praised, it is time for us to mentally pause and review what we have accomplished, what we need to accomplish, and what our goals are for the immediate AND the far reaching future are.
The fact that we have arrived at a point in our strategic game play at which we now enjoy a solid foundation upon which to build a great small farming operation is a genuine cause for celebration, but there is still a lot left to do.
Before we get to that though, now that you have what amounts to a veteran experience in the game with respect to basic Strategies, the mechanisms, the importance of building a solid support system among your friends and neighbors, and a better understanding of how the game structure is built to encourage the player to exchange Real-World Money for time and resources (which is the exact opposite of our goals), you are now in a position to fully appreciate an advanced examination of the game and its play processes.
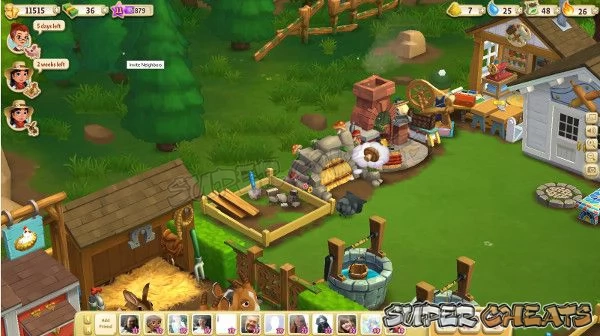
The “Back 40” Concept
To begin with we should define what is meant by developing the Back 40 - a phrase with origins found in the language of small-scale farming in western culture, while its concept and philosophy spans from the far north to the deep south on practically every continent, and is commonly used in practically every type of agribusiness, from the Sheep Station to Cattle Ranch, Truck Farm to the typical Family Farm (aka Small Farm), and everything in between.
The phrase “The Back 40” is actually the shortened form of "Back 40 Acres" and though it originally was intended to Reference a particular type of land, the challenges it poses, and its location on a small farm, the phrase and its meaning have expanded over the past 100 years to include any difficult piece of remote land or a series of difficult problems, among other meanings.
In one of the greatest periods of agricultural growth in North America, the era spanning from about 1860 through the Great Depression of the 1930's saw the typical small farm infrastructure greatly expand to meet the demands placed upon the family farm due primarily to the constant westward spread of civilization and the establishment of the great Urban Sprawls that would become modern day Los Angeles, Seattle, and Portland.
Typically the small farm was established on a set-size parcel of land created by the government for the purposes of land grant licenses in newly opened territories prior to their establishment as formal (and legal) states. While this is largely anecdotal information in terms of the game, it is included here in order to help you to understand the basic logistics in terms of size and land use as well as the expansion of the same, which may help you as you mentally approach the concept of land use on YOUR small farm.
In Australia, the land set aside for agribusiness (spanning stations, ranches and farms) is usually measured in hectares, with a hectare being the metric unit of land that measures 10,000 square metres (100m x 100m), which was adopted in 1795 with the Introduction of the metric system.
The 'are' is '100 square metres' thus the hectare ('hecto' + 'are') is 100 'ares.' In North America where they still use acres as the preferred system for land measurement, a hectare of land works out to a roughly square parcel of 2.47 acres.
According to the US Department of Agriculture at the height of the great agricultural expansion in what became known as the Great American Breadbasket (basically the Midwestern states that are situated in the vast agricultural zone between the Rocky Mountains and the Mississippi River) saw an averaging of the farm sizes for what was at that time considered to be “small farming” that basically increased in size with each following decade until it leveled out with the typical sizes found in the 1990's.
It is generally acknowledged by historians that rather than the natural logistical influences for each of the unique farm or animal farm types dictating the expansion sizes and use, it was 'The Homestead Act of 1862' that resulted in the easy to grasp expansion patterns we see today.
The historical impact upon what was destined to become the typical family-formed and run agribusiness model for the era, and its natural expansion (though in this case it is tempting to define that expansion as an unnatural process due to the influences that the Homestead Act and its resulting processes had) through the examination of land ownership and farm bureau records for each of the corresponding decades, the model that resulted in today's rather uniform distribution of land and its use are easily evident.
As you have likely realized, the Act influenced the process of expansion through acquisition of neighboring parcels, which explains the unnatural uniformity of farm sizes today. These size limitations had tremendous impact on land utilization patters, and specifically tended to influence the percentages of land for each agribusiness portioned off for each of the key use types. The examination of the resulting portioning provides gamers with a firm understanding of the general percentages that they should be considering for the use of their land in the game.
Typical Small Farm Land Use Portions
The Homestead: Examples of this include the generalized portions equal to 5% homestead (the 'homestead' portion of land in use on the farm/ranch property includes the domicile or farmhouse as well as bunkhouse or shared Housing on ranches, and the personal barn/stable use which includes horse and buggy storage and the like). This portion of land was almost always the least useful part of the farm in terms of agriculture, with the homestead and supporting structures built upon land that was not useful for farming purposes.
Personal Food Resources: Between 5% and 7% of the land was set aside for personal food-based resources, including what is commonly called the “Kitchen Garden” as well as herb garden, chicken coops, small dairy resources, and other domestic animal production, as well as a smoke house used to preserve meats, and for farms in the northern area of the farming region an ice house for the storage of ice for drinking, cooking, and for food preservation.
Farming: Generally the farming (or crop) portions of the typical small farm were equal to 75% of the total land area, with this figure not including support structures, grain and seed storage, or the like, which along with roads and paths made up the remaining land area. Note that for dual-use farms any pasture, pen, barn, and processing structures would be included in the 75% apportionment.
When all of the portions are added up for the three major elements of land use on the typical small farm these equal roughly 87% of the total land owned, with the remaining 13% consisting of unused space, lawn-type area around the homestead, access paths or roads, and pen or grazing space for riding and farm animals.
Typical Farm Size Data
The following examples are based upon the official Data from the 19th century that was defined by the official U.S. Census Office for the Eighth Census in 1860, from the report “Agriculture of the United States in 1860, Washington, D.C., 1864” while the data for the 20th century is obtained from the USDA National Agricultural Statistics Service reports, and together these averages should help to clarify the relationship between national population and consumption and its impact upon the small farm.
- 20.24h / 50a - 150h / 372a - Illinois Small Farm *
- 19.83h / 49a - 105.66h / 261a - Indiana Small Farm *
- 20.24h / 50a - 138.86h / 343a - Iowa Small Farm *
- 50.6h / 125a - 302.83h / 748a - Kansas Small Farm **
- 32.38h / 80a - 87.04h / 215a - Michigan Small Farm *
- 80.97h / 200a - 143.31h / 354a - Minnesota Small Farm *
- 32.38h / 80a - 118.21h / 292a - Missouri Small Farm **
- 80.97h / 200a - 358.29h / 885a - Nebraska Small Farm **
- 50.6h / 125a - 522.26h / 1,290a - North Dakota Small Farm **
- 60.72h / 150a - 83.4h / 206a - Ohio Small Farm */**
- 50.6h / 125a - 522.26h / 1,418a - South Dakota Small Farm **
- 32.38h / 80a - 91.9h / 227a - Wisconsin Small Farm *
- 32.38h / 80a - 197.16h / 487a - USA Average Small Farm +
1930 Size - 1990 Size - US State
h = Hectares / a = Acres
* Dairy Farms are the dominant Animal-based Agribusiness in this state.
** Cattle Farms are the dominant Animal-based Agribusiness in this state.
+ These figures do NOT include Animal-based Agribusiness.
The general experience for the typical land owner / farmer in establishing the farming operation begins with the exploitation of the richest soil portion for planted crops or, in the case of ranching operations, the land most suited for cattle grazing, generally refer to this portion of the farm as the farm itself when speaking in terms of identification, while the initially unused portions of the farm are referred to as the "back X," where X is some number of acres.
The use of "40" has become the popular as the expression largely because the typical farm unit was around 80a with the initial development taking place on the front half of the property, or that portion that has easy access to road and rail.
This expression applies very well to Farmville 2, largely due to the way that it naturally follows that trend, with the first six Sections of land, or the “Front 40,” being easily accessible and quickly put into use, while the six rear or back sections (the “Back 40”) requiring a great deal of preparation and activity in order to make use of them. The process of making the Back 40 useable requires the player to complete all of the required steps in order to unlock access to each individual portion, including minimal level requirements as well as Crafting and resources, and then paying to have each portion cleared individually, which means that each section only becomes useful and accessible to the player after the expenditure of both effort, resources, and money, in a pattern that is similar in the broadest of terms to that encountered in the real world.
Moving Forward with Farm Expansion
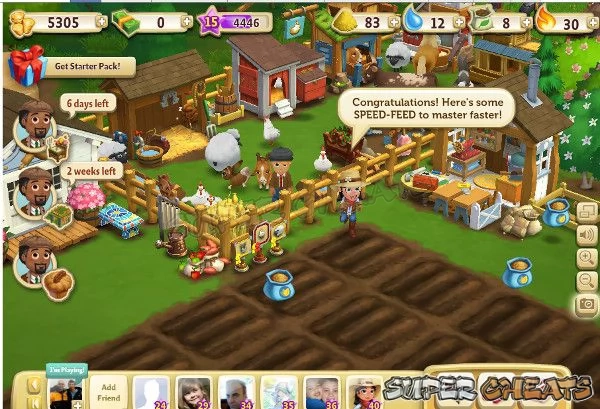
We have now reached the point in the game where space is at a premium and the player is in a position at which they must force each new game element or structure to fit into their farm in a place-as-where-possible approach while they work to unlock additional sections of their farm in order to better place the structures.
It should be well understood at this point in play that placement of structures, regardless of the type of resource that they produce, is a key element in the proper and more effective use of your farm and its land.
Being able to deploy the optimal number of crop spaces while at the same time maintaining an orderly and profitable Farm Animal population, with the numerous structures that are absolutely required in order to obtain the highest levels of profit from the animals in their different forms (Regular Adult vs. Prized Adult) as well as the need for a maximum population for both to the extent that the overall Farm Animal limits will allow, are each critical elements for profitability.
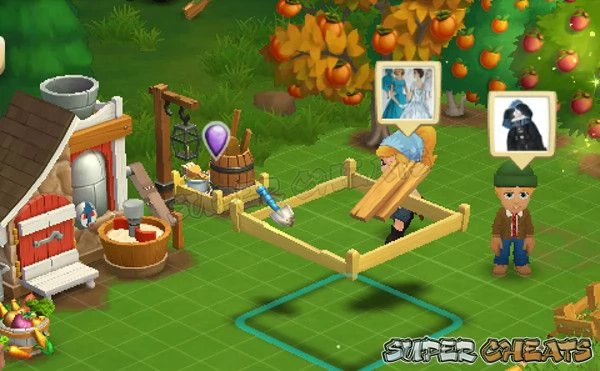
While finding a balance between the crop spaces and animal spaces is relatively easy to accomplish, when the third element of Tree production and the fourth element, Crafting, are introduced, the challenges become considerably more difficult to manage. Even with the initial six Sections available within the first week of play (or so), once your farm reaches Level 10 the challenges that you will face becomes a significant challenge for most players.
At first you will have no choice but to stick these structures and resource-producer squares wherever you can find space for them. This is bad, not so much because it looks like hell (looks are not really a major concern here) but because it tends to promote a less efficient method for play, and that IS an issue that can be troublesome.
The solution to this is to eliminate these problems as quickly as you can, and the quickest way to do that is to prioritize them and then play the game strategically with your sights set on meeting the priorities that you have established. In simple terms that means completing the construction projects in an order that best facilitates forward progress.
Active and Passive Resources
By now you will have more than just a few construction projects going, and you will have noticed that they are slaved to the 18 and 24 hour clock cycles - that is to say that movement on any of the two strategic elements for each, which are the second set of resources that are needed to complete them - is largely restricted by your ability to request the resources from your mates, that being a key element in forward progress.
There are a few ways that you can deal with this in order to functionally work on more than one project at a time, beginning with establishing a LARGE base of neighbors and friends from whom you can request these Items. In the most obvious terms you should be looking at your neighbors for what they really represent in the game, and that is a constant source for three major resources in the game:
1. Helper-Exchange: This is a two-pronged system, the first part being the active assistance that your friends and neighbors provide when they actively visit your farm and select five Actions to “help” you with your farming. While this alone is an incredibly valuable resource and shared action in the game, if you can provide minimal guidance to your friends and neighbors with respect to the objects you would prefer that they “help” you with, this activity becomes a far more valuable asset to your daily farming activities.
The second element to the Helper-Exchange system is the passive assistance that your friends/neighbors provide when they click on the button in their in-box that results from you requesting their assistance in the form of the Hay Bales placed near the road on your farm. Bearing in mind that this type of helper action is unguided on the part of your neighbors in the sense that all that is required for this resource to be available is for them to click the button in their in-box to answer your request in the affirmative, the end result is four Actions per helper that YOU control.
At first you may view these as mutually exclusive Actions - they are not really - and you may find yourself making use of them in very obvious ways... The most common use for the second type of help, which is the sort you have actual influence upon, is to use them as a source for Water Resource Units (WRU's) to help you with getting your crops going, but you may be surprised to learn that they have other uses beyond either Watering or the forced evolving and harvesting of crops!
There are certain things your Hay-Bale Helpers cannot do - such as Water Trees or Groves, or Feed Animals - basically Actions on the farm that require different counts of their related resource. The first type of helper (the active help that your mates provide by visiting your farm in their game play and selecting the five actions that they want to contribute to your farm) CAN function to complete actions that require different resource amounts, and that makes them a uniquely special resource that should be encouraged. We are strong advocates for directed assistance, and strongly suggest that you coordinate your helper actions both for your farm and for theirs, so that you are exchanging value-for-value, which is more likely to result in their consistently providing you help.
As implied above, there are more uses for the four Actions that your Hay-Bale Helpers can provide, most notably by picking them up and dropping them on your Kitchen building, which will result in their providing you with an additional x5 PRU's (Power Resource Units) which you can then use for Crafting.
Bear in mind that this sort of help has no relationship with the request-based Actions you will direct at these same neighbors.

2. Mission and Quest Resources: A very important element for game play and another reason that justifies recruiting a good supply of friends and neighbors in the game is the Mission and Quest Request-based resources.
Each of the quests in a mission will typically include a set of resources that you acquire by posting a notice to your Wall that you need them, at which point your friends, upon logging into the game and seeing that post, can click on it to send you that resource, as well as two additional types of resource that you must directly request from your friends and neighbors.
Bear in mind that the basic mechanism for acquiring the second two resources per quest takes the form of a request that you can make as a one-click action, but that is the worst approach that you can take, generally speaking, towards acquiring these resources.
Since you generally only require a small number of each of these resources, sending a blanket request to all 30 or more of your mates, while it is certain to result in an flood of that resource coming in, will also result in ONLY that resource appearing in your game. You are always better served by requesting only the number of each item you need from the specific neighbors you specify, as assuming you have a group of neighbors who not only play the game each day, but play with an eye towards helping you as much as you help them, you will find this a far more efficient and what is more, speedy approach.
There are exceptions to every rule of course, for example considering that you will be building a large number of Tree Groves, doing bulk requests for, say, Rakes or Fence Nails can actually be a positive action to take. In addition to that, when you spot a post to the Game Feed or your friend or neighbor's wall that is requesting Fence Posts you may reliably assure yourself that helping them helps you - you certainly will benefit for having a plethora of spare posts. Seriously.
When you have a construction project that requires a large supply of Wood Planks, you should bear in mind that as Wood Planks are one of the more popular choices for gifting each session, and the fact that there is a hard limit of just 12 units that you can store in your Storage Bin, unless you intend to stay on top of and use the Supplies of Wood Planks as quickly as they come in, that would NOT be the ideal choice for you to make in using your day's 18-hour Timer based requests on.
While we are on that subject, bear in mind that the direct resource requests that you make to your mates and neighbors ARE on an 18-hour timer, what that means is that each time you request a specific item from a friend/neighbor you are forced to wait out that 18-hour timer before you can request that or ANY OTHER item from that friend/neighbor.
Making blanket requests for an item that you only need 3 of is a waste of that request and will result in a relatively dismal outcome with respect to progress. Even though it takes extra time and effort on your part, making specific and directed requests allows you to work on more than one construction project or mission/quest at a time, and that should be your priority.
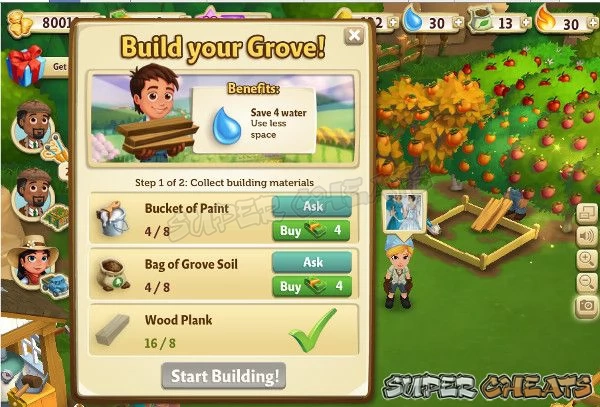
3. Construction Assistance: This generally takes two forms, the first being the directly requested building resources, and the second being the requested labor in actually building the structure. This is another instance in which it is common for casual players to over-request assistance, which ends up slowing the over-all progress. Your best practice here is to request the assistance of neighbors or friends who you know will respond quickly.
All three of these basic neighbor-based Actions are critical to your success in the game.
Mark that in your mind with some emphasis, because the reality is simple - if you lack adequate friends and neighbors, you will have no choice but to spend Real-World Money to accomplish the various Actions that their assistance is designed into the game to provide.
As the whole point of this guide and the information and tactics it shares is to accomplish all of these activities without spending Real-World Money, you should be eager to expand your friends and neighbors! That bears repeating - you will need a large number of neighbors and friends in order to make progress on more than one project at a time.
Bear in mind that when you are harvesting Items and resources from the Game Feed or the Walls you can collect items for upcoming missions, quests, and construction projects that you have yet to flag since the game allows you to store up to a specific number of each resource (the number depends upon the resource and its type basically) which allows you to help your neighbors to achieve their goals while getting a jump on the mission and quest for yourself.
Back to the individual Items you need to obtain for your present goals, how you do that is to tactically request resources - which means requesting specific resources from specific people, and not simply hitting the “ask all” button, which while it may get you a lot of that resource really quick, pretty much limits you to THAT resource for this clock cycle. You see the problem?
By requesting only what you need, and making the requests from people you feel you can reasonably expect a reply - that is to say friends and neighbors that are actually playing the game on a daily basis - you should see quick and excellent results for your efforts.
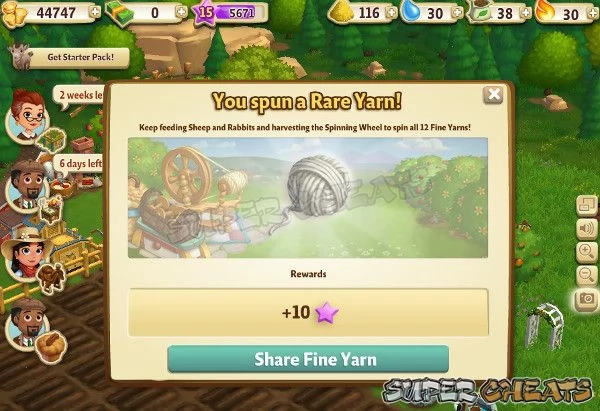
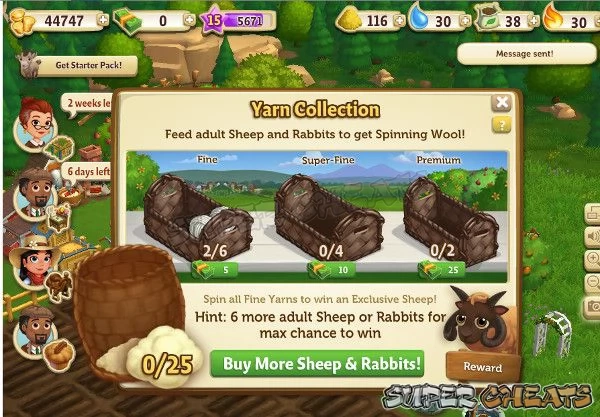
The need to complete these projects goes far beyond just completing them, because several of them play into future (and current!) missions and quests. For example you will find yourself with a quest that requires you to make red yarn, which requires the Spinning Wheel be constructed so you have a source for the raw yarn, and for you to grow Strawberries in order to dye the yarn red... Obviously unless you are willing to spend Real-World Money to BUY the Yarn, you need to get that Spinning Wheel construction project completed ASAP.
You are going to find that a lot of the other projects generate resources you will need for other missions and quests, and that is why we place so high an emphasis upon completing these projects as quickly and as efficiently as you can manage.
Obtaining More Land
At the present time you have six acres of land unlocked, and the next three acres are situated directly behind the ones you are working now, and each one has a Level requirement as well as other steps you must complete to gain access to it. The fact that ALL three of these will be unlocked in the next two game guide sections is significant.
The first of the three will be available to you as soon as you reach Level 11, at which point you will need to plant some Peach Trees since Peach Lemonade is the primary crafted item for it. You will also need to raise $50k but that should be fairly easy at this point - in fact you should have close to or more than that banked now.
The second Section of the Back 40 requires Level 15, and in addition to the x10 Pitchforks you need to ask your mates for, you will also need to craft x3 Apple Pies and pay the $125K purchase fee to clear it. This will all take place in the next section of the guide, which covers Levels 11 through 15, and in relative terms it should happen pretty quickly.
In the section of the guide that covers Levels 16 through 20 you will unlock the final (third) Section of the Back 40, which will require you to reach Level 20, get 13 Chainsaws from your mates, and obtain one Adult Brown Swiss Cow. You will also have to spend $300K which is the most expensive price for a Section yet, though not the most expensive for any Section as you will soon see.

The “New” Back 40
Once you have unlocked the three Sections noted above, the new Back 40 is represented by the last three sections at the back in this grid, but it will be quite a while before you can unlock those considering that they require Level 34, Level 38, and Level 43 respectively. Don't worry about those for now, you have your sights set on a completely different set of Section goals!
If you look along the left-hand-side of your Farm you will notice that there are three more Sections that are contiguous of the rows we will have unlocked when you finish the current Back 40 at Level 20. Those three sections are, from back-to-front, the Golden Chicken Colony, which requires Level 24, Apricot Acres, which has no Level requirements but will require you to spend a massive $750Kc to unlock (in addition to selling x10 Horseshoes and getting x18 Garden Gloves from your mates), and finally Camarillo Country, which requires Level 30, and the outlay of a cool Million coins as well as collecting x20 Garden Clippers from your mates and Crafting x10 Apricot Trifles.
You can pretty much ignore the Camarillo Country Section for now, since it has a higher Level requirement, but you may want to try to plan on unlocking Apricot Acres around the time that you unlock the Golden Chicken Colony if only because doing so is possible and will give your farm a much-needed boost in land at that point.
Bear this in mind - the best way to be in a position to unlock both at or near the same time is to constantly remember to use your Crafting turns during each session, as that is the best way for you to turn your raw resources into Finished Goods and thus rake in decent profits in coins for your efforts. Being very choosey about what you spend your coins on will also help, and adopting the attitude that you only spend what you absolutely must spend to keep moving forward is the best tactic to adopt.
When you are not working on other projects, using your friend requests to obtain the different Items that those Sections require is also a good idea.
Common Issues
Among the more common issues that you will face is the process of managing your animal population - but to keep that from being an expense that drains away your coins you will only want to add new animals when you have to... For example to keep the Yogurt Creamery running, to keep the Hen House running, and etc. The game prompts you for those additions by placing a Purple Water Drop above the specific structure, and when you mouse-over it the number of new Adult Animals that are required is revealed.
Simply add that number and just that number of the appropriate animal types, go with the cheapest selection from that type, and remember to move your newly graduated Prized Animals into their respective structures to help cut down on the overhead of feed and water.
The Animal Feed Challenge
One of the most common issues that you will be facing is managing to keep an adequate supply of Animal Feed available, especially once you begin to increase the population of Prized Animals on your farm. You should ALWAYS feed the animals when they have the hungry icon over their heads, so planning ahead to ensure an adequate supply of fruits, plants, or veggies is a must-do.
Experienced gamers tend to utilize the resources that are not in frequent demand for this, with the Olives from the Olive Tree being the most often chosen go-to resource, but unless you are keeping a larger than normal number of those trees on your farm, you will quickly find that you easily burn through your available Olive supply too quickly!
Each Olive you grind in the Feed Grinder will produce x5 Animal Feed Resource Units (AFRU's), which is not a bad ratio, but once you have your Farm Animal population near the current cap you will end up burning through a lot of Olives. A good alternative is to plant an entire crop of Strawberries and to Fertilize that entire crop every few days, since each x1 Strawberry will create x10 AFRU's when it is placed in the Grinder!
If you are keeping with the guide, you should currently have x40 Crop Squares on your farm, which when planted with Strawberries and Fertilizer will yield x80 Strawberries per crop harvest, which works out to x800 AFRU's. By planting a full Strawberry crop every third or fourth day, you will be creating more resources (Strawberries) than you can possibly use, which will allow you to build up a ready reserve over a few weeks so that you can stop rotating to Strawberries in order to focus upon the crops that are required by the Missions/Quests or Special Events, without this causing a strain on your Animal Feed supply.
While Olives (a 12h crop) and Strawberries (a 24h crop) are obvious choices, you can also go with Sunflowers (a 24h crop) which translate into x11 AFRU's per x1 Sunflower when run through the grinder, but once you unlock Level 18 on your farm Carrots (a 24h crop) are the a better choice, since each x1 Carrot translates to x14 AFRU's when they are run through the Grinder.
Finally once you reach the Level at which you can plant the Blackberry Crop that becomes the most obvious choice for creating AFRU's not because it makes more -- it only makes x8 AFRU's per x1 Blackberry -- but rather because its grow time is only 2 Minutes! That allows you to do a partial Crop run and quickly obtain the required resources in one brief go rather than having to put your Crop Squares into a fixed 24-hour schedule.
Making the Best Use of Power
Another common challenge that you will find yourself facing is how to use up the PRU's you have during a session when there is nothing that you actually need to craft for your current load of missions and quests or Special Events.
The following craft Items are obvious choices under these circumstances, since they will always retain their value and be useful to you... In fact by creating a pre-crafted supply of each of these resources, you make the most efficient use of your PRU's in the here-and-now so that you do not have to stop to craft these items later, when you actually need them to make the crafted goods you need to create.
Bearing in mind that these are all crafted Items that serve as components in more advanced Crafting recipes AND that you should only be making these when you have an excess supply of their specific ingredients, the following are good choices for your Kitchen Crafting, in this order:
- Butter Stick - provides 2XP per crafted unit.
- Flour Bag - provides 2XP per crafted unit.
- Lemon Water - provides 2XP per crafted unit.
- Tomato Paste - provides 2XP per crafted unit.
- Apple Juice - provides 3XP per crafted unit.
- Corn Meal - provides 3XP per crafted unit.
- Pumpkin Filling - provides 3XP per crafted unit.
- Lemonade - provides 4XP per crafted unit.
- Crate of Eggs - provides 5XP per crafted unit.
- Pie Crust - provides 6XP per crafted unit.
- Strawberry Yogurt - provides 6XP per crafted unit.
- Red Egg Carton - provides 7XP per crafted unit.
Bearing in mind that these are all crafted Items that serve as components in more advanced Crafting recipes AND that you should only be making these when you have an excess supply of their specific ingredients, the following are good choices for your Workshop Crafting, in this order:
- Felt Roll - provides 3XP per unit crafted.
- Leather - provides 3XP per unit crafted.
- Wool Bolt - provides 5XP per unit crafted.
- Wool Thread Spindle - provides 5XP per unit crafted.
- Wool Padding - provides 7XP per unit crafted.
- Lumber - provides 8XP per unit crafted.
- Metal Sheet - provides 8XP per unit crafted.
- Gold Thread - provides 9XP per unit crafted.
- Olive Oil - provides 10XP per unit crafted.
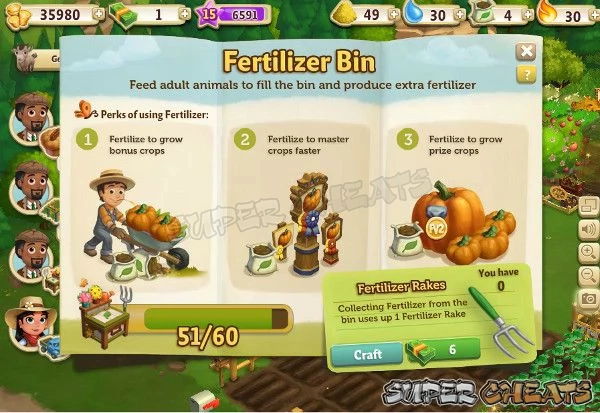
- Fertilizer Rake - provides 20XP per unit crafted.*
* The Fertilizer Rake is required in order to harvest your Fertilizer Bin, so maintaining a supply of five or ten of these is prudent under normal circumstances.
Bearing in mind that these are all crafted Items that serve as components in more advanced Crafting recipes AND that you should only be making these when you have an excess supply of their specific ingredients, the following are good choices for your Crafting Kiln, in this order:
- Raw Clay Pot - provides 4XP per unit crafted.
- Pottery Slip - provides 7 XP per unit crafted.
- Porcelain - provides 11XP per unit crafted.
- Yellow Glaze - provides 13XP per unit crafted.
- Blue Glaze - provides 15XP per unit crafted.
- Ceramic Mold - provides 24XP per unit crafted.
- Eggshell Glaze - provides 25XP per unit crafted.
- Terracotta - provides 28XP per unit crafted.
- Green Glaze - provides 29XP per unit crafted.
You should be aware that as you use your Crafting Kiln repeatedly the temperature builds up as per the inset Temperature Meter on the Crafting Kiln Interface Pop-Up, and with each level that you reach on the way to and including the “All Fired Up” level you receive specific bonus Items and XP. These are:
- Level 1: Free XP, PRU's, and Glass.
- Level 2: Free XP, PRU's, Glass, and Pigments.
- Level 3: Double XP plus random bonus resources.
Because of the above bonus structure, choosing the Crafting Kiln as the first Crafting Station for using PRU's in a game session makes a lot of sense. As long as you have the extra basic Kiln Crafting resources (bearing in mind that you should be setting aside a specific and reasonable number as your ready reserve, say between x25 and x50 units to start with) making this your first choice for translating your PRU's into Farm XP is a good approach.
The basic philosophy here is that you are converting your free and available PRU's into a combination of XP and component resources, and since you can store a considerable amount of each in your Storage Shed, they do not “expire” and you will eventually have a use for them, maintaining a reasonable supply of each of the above components is good play strategically.
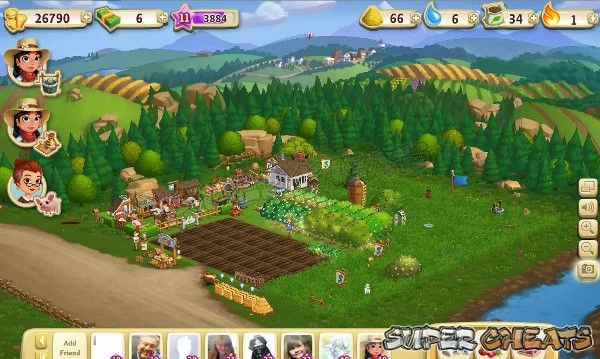
Proceeding along the basic scheme laid out above and in the previous and following sections of the guide you will find that you have slightly more than the minimum space that you need thanks to the revised farm Layout.
Dividing up the farm into zones offers an efficient approach towards minding the three economic Strategies upon which the farm, in its present form, is based: x40 Crop Squares for the primary farming activities; a well-defined and apportioned Animal Pen that keeps both the Farm Animals and their related structures separate from the rest of the farm proper, allowinf it to coexist without interference; and finally the Orchard operations, which are made up of a variety of tree types (though there is a decided emphasis upon Fruit Trees).
The Expanded Orchard / Grove
Your Orchard Operations are an integral part of the income-producing elements of your farm as well as the resource supply chain, and in particular for the support of your Farm Animal population.
While the scope of the Orchard Farming efforts on the Farm in its present form only represents a fraction of the land use, the income in terms of coin and resources actually represents around 40% of your farm production levels.
The process for maintaining that level of efficiency and profit requires that you tend to the Orchard side of the Farm by incorporating Grove Structures (really they are containers) as rapidly as possible, but not at the expense of the previously placed construction projects for the Prized Animal habitats and the Collections structures.
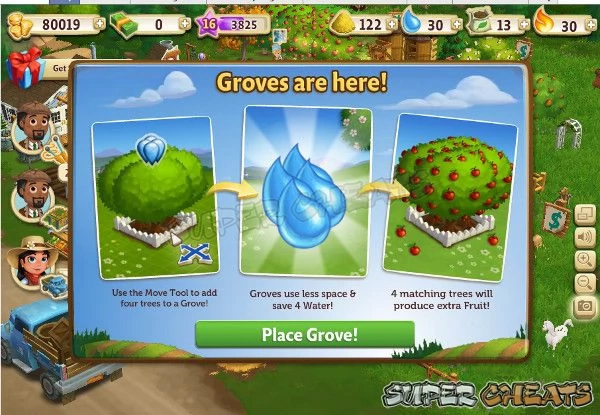
Suffice it to say that, following the established order, your focus should be on completing the previous two types of structures via the outstanding construction projects but, once they are completed, your focus should then be aimed towards constructing a number of Groves sufficient to house the trees for your Orchards (based upon a quantity of x4 of the specific tree types per x1 Grove Structure so as to take full advantage of the bonus that the Grove structures offer).
Bear in mind though that you will not be constructing one Grove for every single type of tree you have access to at each key level due to the relative use and value of the specific tree types. What that translates to - in simple terms - is that some trees are more important (and useful) than others, so while you will want and need a Grove for the more useful and productive trees, the presence of the less useful and productive trees will likely number either as singles or pairs, which you can place in Groves to save space but without any expectations for the Grove bonus elements, which will not appear for Groves with mixed contents.
Note that the list below includes the planned present and expansion listing for the numbered Groves, their contents, the target level of your farm when this Grove should be placed with its contents, and the average projected harvest numbers. A second list that follows this one below lists the “Mixed Groves” and their contents minus the speculative production numbers.
This information is useful to you in that it provides estimates for both resources and, by extrapolation, the potential profits once those resources are converted into Finished Goods (you should figure that last bit out on your own based upon your preference for Crafting with those resources).
Note that the following lists and the Orchard Production Scheme is based upon the core trees, and naturally excludes limited edition, rare, and event-centric trees, as those do not factor as part of the underlying foundation either for ongoing resources or for ongoing Crafting.
The Trees that are part of the Grove structures below can be considered foundation elements for your Farm Economy, but bear in mind that there is a presumption that you will adjust the inventory for the Mixed Type Groves based upon your specific needs and Crafting preferences... The Mixed Type groupings below are suggestions, and represent the Strategy that was used for this guide. YMMV.
Core Tree Types by Grove
Grove # - Tree Type - Grow Time / Level Unlocked (Harvest Range)
- 01 - Lemon - 12h / Level 1 (x4 to x13 Lemons).
- 02 - Apple - 4h / Level 3 (x2 to x13 Apples).
- 03 - Pine - 24h / Level X1 (x4 to x13 Pieces of Wood).
- 04 - Orange - 8h / Level 7 (x2 to x13 Oranges).
- 05 - Peach - 2h / Level 11 (x2 to x13 Peaches).
- 06 - Pecan - 12h / Level 13 (x2 to x13 Pecans).
- 07 - Lime - 12h / Level 19 (x2 to x13 Limes).
- 08 - Plum - 12h / Level 27 (x2 to x13 Plums).
- 09 - Cherry - 8h / Level 31 (x2 to x13 Cherries).
- 10 - Walnut - 10h / Level 39 (x2 to x13 Walnuts).
Level X1 = Unlocked by clearing the East Woodlands Farm Section.
Mixed Tree Groves
You will note that the Grove numbering continues from the previous listing above, while the actual contents for the Mixed Grove list below focuses upon the Trees that make up each Grove rather than the projected production.
Please be reminded that the following Mixed Type groupings are simply the Strategy that was used for this guide; you will likely find that you require a different ratio or you may decide to break some of these trees out into their own 4-unit Groves. As previously stated this is for guidance only, and Your Mileage May Vary!
Grove # - X Tree Type (Grow Time / Level Unlocked) + X Tree Type (Grow Time / Level Unlocked)
- 11 - x2 Olive (12h / Lvl 5) + x2 Fig (12h / Lvl 9).
- 12 - x2 Grapefruit (18h / Lvl 35) + x2 Pear (24h / Lvl 15).
- 13 - x2 Banana (20h / Lvl 23) + x2 Nutmeg (8h / Lvl 25).
- 14 - x2 Mango (2h / Lvl X2) + x2 Apricot (2h / Lvl X3).
X2 = Unlocked by clearing the Mango Gardens Farm Section.
X3 = Unlocked by clearing the Apricot Acres Farm Section.
General Farming - Levels 11 thru 15Previous Page
Planning for the Future - Levels 6 through 10
Anything missing from this guide?
ASK A QUESTION for FarmVille 2
Comments for Reviewing the Expansion Process
Add a comment
Please log in above or sign up for free to post comments- Introduction
- New Version Changes
- The Plight of the Small Farmer in Farmville
- Starting Tips, Tricks, Strategies, and Good Game Play Habits
- The Farmville 2 Economics Overview
- Establishing Good Play Habits
- The Missions and Quests Primer
- Known Bugs and Server Issues
- Current and Recent News
- Walkthrough / Guide
- Reference Sections
- Structures
- Special Events
- Addendum
 Join us on Discord

how do I get my animals out of the pasture across the road, I get fuel, but don't feed them? Melacak hp
We cannot say if that is the way that it will always be - we don't actually make the game, we write about it. So in terms of what will and will not change, we are in the same boat you are in.
question regarding land expansion... land can not be expanded by only paying real $... is that going to be that way all the time now? I don't use real $.
As far as I know you can only farm where you can place a field - so if you can place a field on both sides, then yeah. If not, then no...
Is is possible to farm both sides of the river or just the one?
That is supposed to be automatic when you tap the fence?
how do I get my animals out of the pasture across the road, I get fuel, but don't feed them ..............???? do I get their rewards? cheese, wool.........eggs....???
how can I get another lock stock and finish expanding my barn