Overview
You can access Norende Village from the menu in the left side of the lower screen. This will become available early in the game and will allow you to access more powerful equipment, items, materials and other useful items not found in normal gameplay.
The idea for this mini-game is simple. You have to assign "villagers" to clear out obstacles and upgrade their shops. These take real-time hours to complete. Multiple villagers assigned to the same shop or obstacle will drastically reduce the completion time.
Acquiring Villagers
If you played the demo version of the game and was able to recruit at least 20 villagers there, you can transfer up to 20 villagers to the full version. (2 of which can be acquired by default. See the Demo Bonuses page to learn how to acquire more villagers)
You can get more villagers via Streetpass as long as the other 3DS owners has the demo or full version of Bravely Default. You can still acquire another villager if you Streetpass the same person as long as there's at least an 8 hour interval since the last Streetpass.
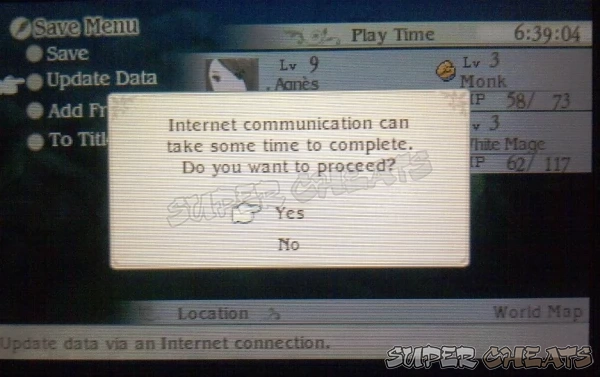
You can also receive villagers by connecting to the internet and selecting "Update Data". Doing this will allow you to receive a random number of Net Friend invites. Aside from getting a villager, a Net Friend will also allow you to use a Summon Guest move though you can't use them for Abilink.
Free Items
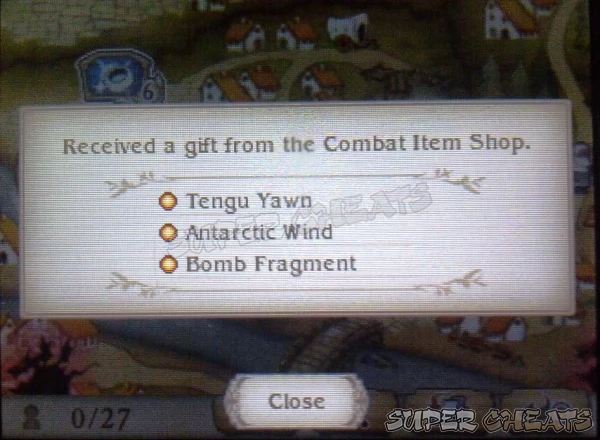
Once in a while, villagers will give you various gifts. Make sure to check your town regularly. The number and quality of gifts will increase as the shops' levels increase as well.
Obstacles
This are the areas you can reclaim and the shops they'll unlock.
| Area | Time | Shops |
| Tangled Woods | 2:00 | Special Move Shop, Blackwater Fen, Downstream Area |
| Ancient Boulder | 10:00 | Weapons Shop, Hill Parts Shop, Collapsed Bridge, Rigid Crag |
| Blackwater Fen | 30:00 | Accessory Shop, River Parts Shop |
| Collapsed Bridge | 50:00 | Combat Item Shop, Cape Parts Shop |
| Downstream Area | 70:00 | Compounding Shop |
| Rigid Crag | 99:00 | Valley Parts Shop |
Shops
These shops will be listed in alphabetical order.
Accessory Shop
| Level | Time | Items |
| 1 | 02:00 | Venture Badge |
| 2 | 03:00 | Smiley Badge |
| 3 | 05:00 | Gale Hairpin |
| 4 | 09:00 | Normalizer |
| 5 | 14:00 | Red Muleta |
| 6 | 24:00 | Reflect Ring |
| 7 | 32:00 | Alarm Earrings |
| 8 | 48:00 | Taunt Bangle |
| 9 | 68:00 | Golden Egg |
| 10 | 80:00 | Growth Egg |
| 11 | 99:00 | Melodist's Shirt (Bonus Equipment) |
Armor Shop
| Level | Time | Items |
| 1 | 00:30 | Bronze Armor |
| 2 | 01:30 | Brigandine |
| 3 | 03:00 | Red Cap |
| 4 | 05:30 | Rainbow Dress |
| 5 | 08:30 | Lambent Hat |
| 6 | 12:00 | Blessed Shield |
| 7 | 17:00 | Bloody Shield |
| 8 | 24:00 | Heike Gloves |
| 9 | 36:00 | Heike Helm |
| 10 | 48:00 | Heike Armor |
| 11 | 99:00 | Onion Shirt (Bonus Equipment) |
Combat Item Shop
| Level | Time | Items |
| 1 | 01:30 | HP Recovery Lv.1, Poison Touch, Poison Res Down |
| 2 | 03:00 | MP Recovery Lv.1, Blind Touch, Blind Res Down |
| 3 | 05:30 | HP Recovery Lv.2, Silence Touch, Silence Res Down |
| 4 | 11:00 | MP Recovery Lv.2, Sleep Touch, Sleep Res Down |
| 5 | 22:00 | HP Recovery Lv.3, Paralyze Touch, Paralyze Res Down |
| 6 | 32:00 | MP Recovery Lv.3, Dread Touch, Dread Res Down |
| 7 | 42:00 | HP Recovery Lv.4, Stop Touch, Stop Res Down |
| 8 | 60:00 | MP Recovery Lv.4, Confuse Touch, Confuse Res Down |
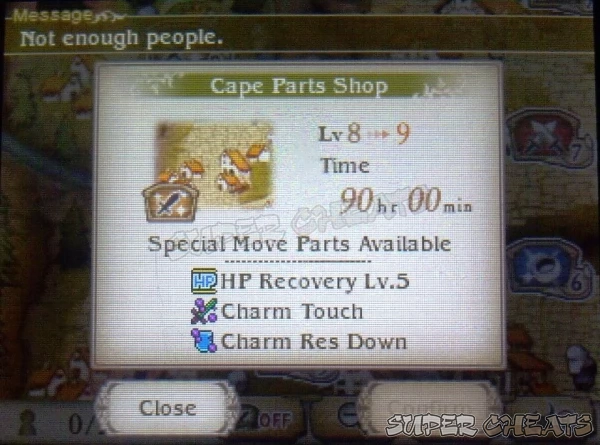
| 9 | 90:00 | HP Recovery Lv.5, Charm Touch, Charm Res Down |
| 10 | 99:00 | MP Recovery Lv.5, Death Touch, Death Res Down |
| 11 | 99:00 | Fox Tail (Bonus Equipment) |
Combat Item Shop
| Level | Time | Items |
| 1 | 01:00 | Bomb Fragment |
| 2 | 01:00 | Antarctic Wind |
| 3 | 04:30 | Zeus's Wrath |
| 4 | 08:00 | Tengu Yawn |
| 5 | 12:00 | Earth Drum |
| 6 | 20:00 | Bomb Arm |
| 7 | 28:00 | Arctic Wind |
| 8 | 45:00 | Pantheon's Wrath |
| 9 | 60:00 | Tengu Sneeze |
| 10 | 72:00 | Earth Mallet |
| 11 | 99:00 | Edea's Garb (Bonus Equipment) |
Compound Shop
| Level | Time | Items |
| 1 | 01:00 | Beast Liver |
| 2 | 02:30 | Hard Scale, Phlogiston |
| 3 | 04:00 | Insect Antenna, Permacrystal |
| 4 | 05:30 | Monster Fiber, Fairy Wing |
| 5 | 14:00 | Spirit Bone, Fulmen Shard |
| 6 | 26:00 | Desert Rose |
| 7 | 35:00 | Glitterbug |
| 8 | 56:00 | Dark Matter |
| 9 | 78:00 | Demon Tail |
| 10 | 84:00 | Dragon Fang |
| 11 | 99:00 | Plain Tunic (Bonus Equipment) |
Hill Parts Shop
| Level | Time | Items |
| 1 | 02:00 | Fire, Fire Res Up, Fire Res Down |
| 2 | 03:00 | Water, Water Res Up, Water Res Down |
| 3 | 05:30 | Lightning, Lightning Res Up, Lightning Res Down |
| 4 | 09:00 | Wind, Wind Res Up, Wind Res Down |
| 5 | 15:00 | Earth, Earth Res Up, Earth Res Down |
| 6 | 26:00 | Speed Up, Speed Down |
| 7 | 42:00 | Light, Light Res Up, Light Res Down |
| 8 | 60:00 | Evade Up, Accuracy Down |
| 9 | 90:00 | Dark, Dark Res Up, Dark Res Down |
| 10 | 99:00 | Cure Doom, Doom Res Up, Death Res U |
| 11 | 99:00 | Labrys (Bonus Equipment) |
River Parts Shop
| Level | Time | Items |
| 1 | 01:00 | Beast Slaying, Cure Poison, Poison Res Up |
| 2 | 02:30 | Plant Slaying, Cure Blind, Blind Res Up |
| 3 | 04:00 | Aquatic Slaying, Cure Silence, Silence Res Up |
| 4 | 08:00 | Insect Slaying, Cure Sleep, Sleep Res Up |
| 5 | 15:00 | Flier Slaying, Cure Paralyse, Paralyse Res Up |
| 6 | 26:00 | Undead Slaying, Cure Dread, Dread Res Up |
| 7 | 42:00 | Demon Slaying, Cure Berserk, Berserk Res Up |
| 8 | 52:00 | Dragon Slaying, Cure Stop, Stop Res Up |
| 9 | 81:00 | Crit Rate Up, Cure Confuse, Confuse Res Up |
| 10 | 99:00 | Cure K.O., Cure Charm, Charm Res Up |
| 11 | 99:00 | Silver Glaive (Bonus Equipment) |
Special Move Shop
| Level | Time | Items |
| 1 | 02:00 | Infinity (Daggers), Rejuvenation (Staves) |
| 2 | 03:00 | Piercing Bolt (Rods), Horizon (Spears), Maximum Draw (Bows) |
| 3 | 03:00 | Moonbeam (Knuckles), Grand Strike (Axes), Moonshadow (Katanas) |
| 4 | 48:00 | Air Splitter (Swords), Blade Storm (Daggers) |
| 5 | 48:00 | Overpower (Spears), Withering Ripple (Rods) |
| 6 | 48:00 | Lux (Staves), Rapid Fire (Bows) |
| 7 | 72:00 | Breaking Wave (Katanas), Maelstrom (Axes), Ascendant Palm (Knuckles) |
| 8 | 99:00 | Holy Weapon (Rods), Divine Light (Staves), Cross Divide (Daggers) |
| 9 | 99:00 | Megiddo Flame (Spears), Angelic Pillar (Bows), Thunderburst (Knuckles) |
| 10 | 99:00 | Sonic Wave (Swords), Gigaton Swing (Axes), Petal Swirl (Katanas) |
| 11 | 99:00 | Falcon Knife (Bonus Equipment) |
Trader
| Level | Time | Items |
| 1 | 00:15 | Potion, Teleport Stone |
| 2 | 01:00 | Antidote, Eyes Drops |
| 3 | 02:30 | Echo Herbs, Phoenix Down |
| 4 | 03:30 | Wakeup Bell |
| 5 | 05:00 | Hi-Potion |
| 6 | 08:00 | Ether |
| 7 | 11:00 | Balsam |
| 8 | 15:00 | Remedy |
| 9 | 24:00 | X-Potion |
| 10 | 36:00 | Turbo Ether |
| 11 | 99:00 | Knight's Tunic (Bonus Equipment) |
Weapons Shop
| Level | Time | Items |
| 1 | 01:30 | Carving Knife |
| 2 | 02:30 | Simian Staff |
| 3 | 04:30 | Ogre's Club |
| 4 | 05:30 | Bastet Claws |
| 5 | 09:30 | Sage's Staff |
| 6 | 16:00 | Angel's Bow |
| 7 | 28:00 | Lu Bu's Spear |
| 8 | 38:00 | Grinder Axe |
| 9 | 54:00 | Mutsu-no-Kami |
| 10 | 60:00 | Night Emperor |
| 11 | 99:00 | Magic Knife (Bonus Equipment) |
Valley Parts Shop
| Level | Time | Items |
| 1 | 03:00 | 10% Power Boost, +1 Turn |
| 2 | 05:00 | M.ATK Up, M.ATK Down |
| 3 | 07:30 | 20% Power Boost, +2 Turns |
| 4 | 15:00 | P.ATK Up, P.ATK Down |
| 5 | 24:00 | 30% Power Boost, +3 Turns |
| 6 | 32:00 | M.DEF Up, M.DEF Down |
| 7 | 42:00 | 40% Power Boost, +4 Turns |
| 8 | 75:00 | P.DEF Up, P.DEF Down |
| 9 | 99:00 | 50% Power Boost, BP Bonus Lv.1 |
| 10 | 99:00 | Turns, BP Bonus Lv.2 |
| 11 | 99:00 | Donnerschlag (Bonus Equipment) |


 Join us on Discord

It actually doesn't matter which ones get the villagers first, as long as you keep all of your villagers constantly employed. Your equation assumes that you don't put the villager from the 10hr job on the remainder of the 30hr job when he finishes. If you put them each in the separate job sat hour 0, and then 10 hours later there are 20 hours left on the 30hr job, adding the second villager will drop the time to 10 hours, earning you the same 20 hour total work time. I found it most beneficial to set the villagers so that jobs would complete overnight, just before I would be getting up, and then reassigning them for job completion when I would again have time to take care of them, this using sleep mode to my advantage. I had all of Norende completed before leaving Florem.
This is a function for the fastest way to complete everything. It will tell you where to place your individual unit (villager) on the margin. It basically just means to put your individual villager wherever it counts for the most time or the most time reduction. For example, if I have 2 villages and 2 items and item 1 takes 10 hours while item 2 takes 30 hours, it'd be better to put the two villagers on the item 30 first reducing it to 15 hours and then when that's done put it on the 10 reducing it to five, so what otherwise would take forty if you put 1 on each, now only takes 20.
The key is to make it so all your items are at about the same time of completion at all times, and that's the check; You'll know you did it right if the completion times of all the items are as close to being the same as they can be.
x=time to complete item 1
y=time to complete item 2
Pattern Z=1, 1/2, 1/3, 1/5....
function A must be less than function B (A
if you streetpass people with the game then do it again over and over then you get more villagers. I got 17 from the same people, including the first three
Hopefully someone can answer me quickly, but how do you transfer villagers from the demo? I played the demo version and only had like 3 villagers. I got the full game yesterday and started, then realized there was a cheat to get "free" villagers. While I feel dirty doing it, it's the only way I can get them as I do not live any where with a lot of 3DS holders, especially any that will play BD. So I started the game before I used the cheat, does that prevent me from transferring them over?