Thank you for printing this page from www.SuperCheats.com.
Remember to come back to check for updates to this guide and much more content for Bravely Default
You can battle most of the asterisk bearers again in this chapter. The strategies against them pretty much stay the same, and the main difference is that some of them have much higher HP than the previous chapter. You’ll also find some interesting new scenes and party chats after defeating them.
The following bosses will be part of another sidequest and you won’t be able to fight them with normal means:
These two are found in the lake southwest of Caldisla. And they seem to remember your first encounter with them. Their pattern is still the same. Holly will use Protect to give them extra protection while Barras will use Invigorate to power himself up and set for an attack. Like before, take out Holly first since she has lesser HP and lower defense. Holly can also deal decent damage with Aero.
Ominas
HP: 80,000 Weakness: None FAM: Human
Reward: Turbo Ether, Ise-no-Kami
Steal: Wizard’s Rod
This boss is found in the first floor of Centro Keep. Just talk to him to engage him in battle. He can inflict status ailments like Silence and Sleep and deal medium black magic damage. Other than that, his attack pattern is still the same.
Heinkel
HP: 80,000 Weakness: Lightning FAM: Human
Reward: X-Potion
Steal: IceFlame Shield
He is found in Lontano Villa’s third floor, right after the adventurer. He will be accompanied by two Sky Archers as well. The archers can still cause poison with their Poison Arrow and Henkel will still protect them with his Knight abilities. They all dead considerable damage now so don’t hesitate to heal often. Heinkel can be pretty sturdy thanks to his Ironclad but you can negate its effect if you have access to Pirate skills. He is also weak to lightning so exploit that instead in case you can’t deal that much physical damage to him. Once the archers are out, you can now store up some BP and hit him with all you got.
Head to the Thieve’s Den in Harena Ruins and talk to the Jackal to engage him in battle. Khint will be assisting him in battle like the last time but will leave once either of them reaches 50% HP. Khint will either be using Sword Magic Fire or Silence but beware since he can also deal heavy damage with considerable critical chance. The Jackal can steal a few of your potions and use it to heal himself. Concentrate your attacks on the Jackal until he is defeated.
Head to the Merchantry building in Ancheim and talk to Chairman Profiteur to engage him in battle. Khint will assist him again like before. Like the Jackal, concentrate your attacks on the Profiteur until Khint leaves. Takeover does a lot of damage now than before but it can still be evaded. Beware when he stacks on BP; expect that he’ll do a double Takeover in the next turn, which is powerful enough to take out a character that got hit by both attacks.
Khamer
HP: 60,000 Weakness: None FAM: Human
Khint
HP: 80,000 Weakness: None FAM: Human
Reward: Gold Hourglass, Turbo Ether
Steal: None
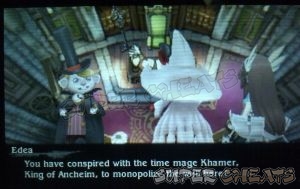
You have to visit the Grand Mill at night. Make your way to the third floor and save your game. Ride the elevator and proceed to the palace’s upper level. Peek over the edge again to fight Khamer and Khint. You have to target Khamer first since his magic can be annoying; besides his HP is a lot lower compared to Khint. You can use Reflect however that will also bounce off the healing spells you’ll cast on your character. Khamer can use Quara to deal moderate earth damage to all your party members, increase his and Khint’s evasion rate through Veilga and even cast Stop to disrupt your moves.
DeRosa.
HP: 80,000 Weakness: None FAM: Human
Reward: Bravo Bikini
Steal: Hermes Sandals
During the battle, you can use your Spiritmaster skills to weaken or nullify DeRosa’s elemental attacks. He’ll be able to deal considerable damage at this point and he will still heal himself using Cura. He can still inflict Dread status to multiple characters so having Esunaga will be a great help here. Be careful of his Revenge support ability as well since it will help him build up his BP for the damage he receives.
Mephilia
HP: 60,000 Weakness: None FAM: Human
Reward: Turbo Ether
Steal: Fairy Wing
Head to the same spot in the Florem Gardens where you first fought Mephilia. Before fighting her, equip Abate Earth or Earth Charms to help minimize the damage from her earth summon, Girtablulu. If you have a good-leveled Spiritmaster, you can use his/her elemental buffs to protect you from it.
Artemia
HP: 80,000 Weakness: Fire FAM: Human
Reward: Artisan Gloves
Steal: None
Take out the Mage first since she can inflict Silence. You only need to watch out for Artemia’s Multi-burst and her ever powerful shots. Fortunately, these can be evaded or countered so a Ninja or Swordmaster will be very effective against her. It will be a good idea to stack up BP and chain your attacks and buffs to make the most out of your turns.
Einheria
HP: 80,000 Weakness: None FAM: Human
Reward: Power Bracers
Steal: Holy Lance
All of her attacks are physical so you can make this battle easy by having a Ninja and/or Swordmaster at your side. When you see her jump, just order everyone to go on Default to avoid getting too damaged. There’s really no special tactics needed to defeat her.
Praline
HP: 80,000 Weakness: None FAM: Human
Reward: Stardust, Star Corset
Steal: Star Pendant
You won’t be able to enter Hartschild without talking to Commander Goodman first. Head to Eisen Bridge and talk to the commander to trigger a scene and give you permission to enter the town. Talk to him again to fight Praline. She will be a Black Blade and Black Axefighter. Praline will boost the attacks of these minions and they can also debuff your characters and confuse them. It is recommended to have your own Performer here to compensate with the buffs and debuffs. Having access to Pirate skills is also good since you can further turn the battle to your advantage. Don’t take out both guards since Praline will re-summon a fresh pair during the battle. Defeat one and leave the other so you only have to concentrate your attacks on Praline.
Qada
HP: 60,000 Weakness: None FAM: Human
Reward: Dragon Fang
Steal: Dragon Fang
Qada is still located in the third floor of Starkfort, in the same room where you fought him the first time. Like before, have your characters equip poison-proof skills or accessories before facing him. He can use Water of Life to enable him to regenerate his HP every turn. You can remove this via Dispel. His Dark Breath can still take out your characters in one hit but can be avoided by the Ninja’s Ususemi. As long as you can repel his poison status, you can concentrate in healing and attacking.
Victoria
HP: 70,000 Weakness: Light FAM: Human
Victor
HP: 80,000 Weakness: Dark FAM: Human
Reward: Force Armlets, Amulet
Steal: Poison Rod (Victoria), Yggdrasil Staff (Victor)
Enter Central Command either through the open space to the west or through the front gate for a scene. After that, head inside and follow them to the White Magic Circulation Hub. Like before, you have to concentrate your attacks on Victoria first. The same tactics will work here just like the last time. The only difference is you have access to light-based weapons that will work well against Victoria and the Dark Shield which will make you immune against her dark attacks.
Barbarossa
HP: 90,000 Weakness: Lightning FAM: Human
Reward: Bacchus’ Wine
Steal: Heavy Axe
You can only fight him after clearing the Temple of Water again. You have to visit the Old House by the Sea to trigger a conversation with the shieldbearer watchman. Now fly over the seas around Grandship and land on the fog. Select to board the ship and you’ll find him in the Funky Francisca. Be careful since his attacks are even more powerful than before with the aid of his debuffs. His double damage will surely one-hit-KO your characters, especially when their defense is lowered. If you have the Salve-Maker support ability Auto-Phoenix, you can instantly bring back an KO’ed ally to life without wasting a turn. Keep everyone healed. It will be better if you can also bring a Performer to mitigate the stat debuffs your party gets from his attacks. Since his attacks are all physical-based, you can use a Swordmaster or Ninja to help you deal extra damage through counterattacks.
Kikyo
HP: 85,000 Weakness: None FAM: Human
Reward: Kunai
Steal: Kunai
To fight Kikyo again, you have to visit Commander Goodman first in Eisen Bridge. Once done, head to Hartschild and enter the commander's home. Eleanor will welcome you in a short scene. After that, leave the house and enter again to trigger the event for a banquet. The event will take a different turn this time, with the party unveiling Kikyo's plan and preventing her from killing anyone.
Like before, be careful of Kikyo’s high evasion and effective counterattacks. If you see her in positive BP, she’ll use a priority move called Shippurinjai consecutively. She can also use Utsusemi Technique that will make the next physical attack miss and allow her to counterattack. This is not a pretty hard battle if you also play defensively.
Kamiizumi
HP: 85,000 Weakness: NoneFAM: Human
Reward: Masamune
Steal: None
You’ll find him in Starkfort after awakening the fire crystal. After fighting Qada, leave the fort and come back to trigger his appearance. Kamiizumi’s a Swordmaster and he specializes in counterattacking. You have to change your attacks accordingly, depending on his moves. Nothing Ventured counterattacks Physical attacks only while Before Swine counters spells. Take note of the character he targets with Know Thine Enemy. If that character hits him with a single-target attack within the same turn, Kamiizumi will counterattack with 400% damage.
Be careful when he’s a positive BP or neutral BP. He will attack three times consecutively. After that, take one turn to revive your allies and heal them up. Use your stacked BPs to boost your stats and attack at the same turn.
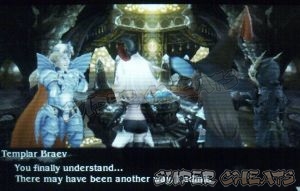
You just need to make it to the council room where Breav is waiting. Like before, he will stack up his BP by defaulting and use it to unleash powerful attacks all at once. This will also make him sturdier against multiple attacks. If you have a Spiritmaster in your team, use Stillness to stall Breav's attacks and allow you to cast your buffs and debuffs. A Performer's party-buffs can be perfect for this as well. You can also use moves that bypass Default defense buffs like Qigong Wave or Targeting. Ninjas and Swordmasters work well against Braev's single-target attacks.
Heart Strike always deals critical damage, Giant Slayer deals a ton of damage and Radiant Strike is a light-based attack that deals ranged damage. He won't revive three times anymore but will make up for it with a larger HP pool.
Lord De Rosso
HP: 150,000 Weakness: Light FAM: Human
Reward: Megalixir
Steal: Megalixir
This is practically the same as the last battle so you just need to apply the same tactics you used the first time to defeat him. Graviga deals damage based on the percentage of your max HP. He can also steal stored BP using Battle Thirst which he will then follow up using an all-party attack called Energy Burst. If you see him steal a BP from you, put your characters on Default the next turn since he will surely use Energy Burst. Prioritize keeping everybody healed up since he has another move called Bone Crush that will specifically target characters with low HP. This move will deal no damage as long as your party is pretty much healed up. The Templar’s Radiant Blast has good damage output by default but you can further enhance it by buffs and by debuffing DeRosso.
Anything missing from this guide? ASK A QUESTION for Bravely Default
Comments for Boss Rematch Battles
Add a comment
Please log in above or sign up for free to post comments
6 comments, latest first.
This is to report a problem with the comment to the staff for moderation. It does not reply to the comment.
Why are you reporting this comment?
Reply to this comment
May 7th 2015
Guest
EXCALIBUR: This guide says that there's nothing to steal from Braev, but apparently you can actually steal Excalibur from him - the only way to get additional excaliburs besides the one you find in the prison.
Apr 23rd 2015
Guest
QUICK NOTE: In Ancheim, fight Khamer and Khint first. Since Khint dies in that fight, he won't appear when fighting Profiteur or Jackal, making their fights a helluva lot easier.
Sep 1st 2014
Guest
I can't find my way back to the council room -_- Do you have to fight Victor and Victoria first? Or was there a doorway or something I missed on the prison floors?
Mar 1st 2014
Guest
Thanks. Couldn't find any info on stealing things from bosses for chapter 6. Best thing too steal looks like the shield from knight that nullifies fire and water.


 Join us on Discord
EXCALIBUR: This guide says that there's nothing to steal from Braev, but apparently you can actually steal Excalibur from him - the only way to get additional excaliburs besides the one you find in the prison.
QUICK NOTE: In Ancheim, fight Khamer and Khint first. Since Khint dies in that fight, he won't appear when fighting Profiteur or Jackal, making their fights a helluva lot easier.
allowed cwpd lying truth shame you nick insane battle sleeve
[video][/video]
Erm... What...?
I can't find my way back to the council room -_- Do you have to fight Victor and Victoria first? Or was there a doorway or something I missed on the prison floors?
Thanks. Couldn't find any info on stealing things from bosses for chapter 6. Best thing too steal looks like the shield from knight that nullifies fire and water.