Yesterday's Scenery
Thank you for printing this page from www.SuperCheats.com.
Remember to come back to check for updates to this guide and much more content for Bravely Default
Follow this guide to hear about updates
Last Updated:
After the scenes, Tiz will be alone for now. Alternis' Journal will also be added to the lower screen menu if you want to read some of his entries. Leave the city and head to Norende Ravine. Make your way to the great chasm to continue with the story. Agnes will re-join the party again. A new party chat will be available as well. (A Recent Genesis) Leave the Ravine and head back to the city.
Next, talk to Ringabel past the burned house east of the inn. After the conversation, he’ll join the party again and open up another party chat. (The Two Journals) Next, find Edea along the way leading to the cemetery. Talk to her and she’ll join the party again. Another party chat will be unlocked. (The Two of You) Now you can return back to the inn for another scene. Here you’ll meet Datz and discover that him, Zatz and the prorietress are on board the Grandship with all their memories intact.

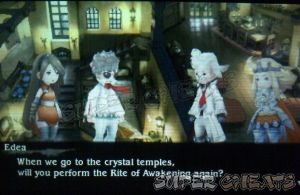
You now have to awaken the four crystals again. Take note that the bosses will be stronger as well as the enemies in the field. Aside from the beasts that corrupt the crystals, you can fight most of the other optional bosses (asterisk-bearers) by finding them in the locations you have found them. Their locations will also appear as blue markers on the map. Refer to this link for any updated strategies against them. Aside from that, the game will tell you that you can now surpass 9999 damage and store more than 9999 HP by utilizing Bravely Second.
| TIP: The roads outside Eternia now have different enemies. The enemies called Frosti are the equivalents of Mandragora which can be farmed for good experience and JP points. If you have a Growth Egg equipped, you can even gain twice the EXP and JP on top the bonuses you'll get. |
  |
Once in control of the Grandship, more party chats will be available. (Naval Attachment, Ringabel’s Sleep Talk) You can now proceed with the battles as you please.

Temple of Wind
| Orthros (Blue) |
| HP: 55000, Weakness: Fire, Immune: Water FAM: Beast |
| Orthros (Yellow) |
| HP: 55000, Weakness: Water, Immune: Fire FAM: Beast |
 |
| This battle will be easier by equipping Iceflame Shields to your characters, especially your healer(s). You can steal one from Heinkel or from the Kobold Slashers in Caldisla overworld map. If you don’t have enough shields, you can rely on a spirit master since his/her skills will allow you to block or mitigate much of the fire and water damage from these bosses. They can still deal heavy damage with Deep Freeze or Hellfire, as well as Blazzard and their Bite and Flaming Fangs. It will be a good idea to stack up BP by defaulting and attacking all at once. Just heal up whenever necessary. |
After defeating the beast, you’ll have to perform the Rite of Awakening again. After that, another party chat will be available. (Inevitability) Leave the temple and head to the next one.
Temple of Water
| Boss: Rusalka |
| HP: 60,000 Weakness: Lightning, Absorb: Fire, FAM: Aquatic |
 |
| Rusalka is still weak to lightning and can be exploited with the Hunter’s Aquatic Slayer. However, its clones will have more HP. It is important to Examine Rusalka at the start of the battle so that you can keep track of it once it replicates itself. The Iceflame Shield will still provide water immunity here against its Seep + Dark Flow and Aqua Regia attacks, and you should have your main attacker or healer equip an accessory that will provide charm immunity to keep them in the game. If you have a Summoner, you can deal even greater damage using Deus Ex. After taking out the original, clean up the remaining clones to finish the battle. |
After defeating Rusalka, you have to awaken the Water Crystal again. After the Rite, Agnes‘ vestal garb will be in tatters; which will prompt the group to visit Yulyana Woods Needleworks.

| Tip: After clearing the Temple of Water and cleansing the seas once more, you can visit this world’s version of Grandship. If you have defeated Praline in Eisen Bridge earlier, you can see her performing in the ship’s tavern. You can also unlock a new party chat after viewing the scene at the tavern. (The Sea Slug) You can also fight Barbarossa again in the SS Funky Francisca by entering the fog in the seas around Grandship. |
Yulyana Woods Needleworks
Head to the Yulyana Woods Needleworks to meet up with the Sage. He will tell Agnes to head to the Vestment Cave southwest from his place and that she can only bring the ally she trusts the most. After the scenes, Agnes will bring Tiz along.

Leave the Needleworks and proceed to the Vestment Cave. Make your way to B3. Approach the Sage to continue with the story. After getting Agnes' vestal garb repaired, use a teleport stone to return to the entrance to regroup with Edea and Ringable. After regrouping, a new party chat will be available. (Ringabel's Tears) You can then resume awakening the two remaining crystals.


Temple of Fire
| Boss: Chaugmar |
| HP: 70,000 Weakness: Lightning, FAM: Demon |
 |
| Chaugnar has move that will steal HP, MP and even BP. That said, it will be risky to stack up BP like you normally do with the other bosses. When it is covered with energy, it will be resistant against any type of damage, even when hit by its elemental weakness. This is where you have to compound items or use the attack items as is. Like the other bosses, you have to use Default once you see it has positive BP. Play defensively when it is in its invulnerable state and heal up any damage you immediately receive. |
| Since you have access to more skills at this point, you have to put them to good use. Defensive skills like the Templar's Rampart or Spiritmaster's Stillness should protect you from the heavy damage of Energy Burst. You can also equip the Vampire job class' Absorb P.Damage to help you recover some of the damage. |
| Having a healer with Healing Lore or Holy One will allow you to heal your party much effectively. Hopefully, your stacked BP won't be stolen during the boss' previous attack; use the stacked BP to executive extra actions while the boss is in vulnerable state. Be careful of its Energy Burst as it can knock out several characters at once. If not, your characters will have critical HP. With the Salve-Maker's Healing Lore and Widen Area, you can use an X-Potion to heal 3000 HP to all your characters. Same goes with Phoenix Down that can resurrect multiple characters. |
| Since the boss has the tendency to drain your MP, an Ether deployed by the Salve-Maker's Widen Area is very effective and efficient. The Salve-maker's Auto-Phoenix ability will also help a lot in instantly reviving downed characters. |
After awakening the Fire Crystal, you can view a new party chat. (Unfathomable) You can also now have a rematch against Kamiizumi in Starkfort. You can also visit the Goodman Residence in Hartschild to open a new party chat (Shopping in Hartschild) and to trigger the event to fight Kikyo. You can just need to leave the commander's house and enter again. More details about these bosses are found in this link.
Temple of Earth
| Boss: Gigas Lich |
| HP: 100,000 Weakness: Light, FAM: Undead |
 |
| This world's version of Gigas has increased stats and can cast Death. Make sure to equip your characters with Safety Rings to give them immunity against this. If you don't have enough Safety Rings, you can rely on the Salve-Maker's Auto-Phoenix or Widen Area + Phoenix Down skills and the Vampire's Rise from the Dead skill. |
| Gigas' Slam deals a lot of damage to everyone while it can use Quaga to deal high earth damage to a single target. Gigas can also use this move on himself to recover a bit of HP. It will use Negative Power to boost its p.attack and m.attack stats. You can use dispel to remove this boost. It will also use Fear to inflict the dread status. |
After defeating Gigas and awakening the crystal, the pillar of light will appear again. Head to fight Alternis once again.


The Pillar of Light
| Boss: Alternis Dim |
| HP: 110,000 Weakness: None, FAM: Human |
| Alternis Dim's Black Bane deals medium dark damage to all party members while Dark Bane deals damage to a single target. If one of them has the dark shield equipped, he/she will be immune against this attack. This battle shouldn't be that hard since Alternis will keep using Dark Bane. Don't keep anybody in low HP since he can use Minus Strike to deal more damage. Aside from those attacks and the constant chatter, you don't have to apply any special tactics in defeating him. |
After defeating Alternis, watch the following scenes. The chapter will be complete afterward.
Anything missing from this guide?
ASK A QUESTION for Bravely Default
Comments for Yesterday's Scenery
Add a comment
Please log in above or sign up for free to post commentsNo comments yet. Tell us what you think to be the first.
Table of ContentsClose
- Basics
- Asterisks / Job Classes
- Jobs Guide
- Extras
- Intro
- Chapter 1
- Chapter 2
- Chapter 3
- Chapter 4
- Chapter 5
- Chapter 6
- Chapter 7
- Chapter 8
- The End
- Sub-Scenarios (Ch1)
- Sub-Scenarios (Ch2)
- Sub-Scenarios (Ch3)
- Sub-Scenarios (Ch4)
- Sub-Scenarios (Ch5)
- Sub-Scenarios (Ch6)
- Sub-Scenarios (Ch7)
- Sub-Scenarios (Ch8)
Guide Updates
Get notified of updates to this guide
Many of our guides get updated with additional information. To get an email when this guide is updated click below.
 Join us on Discord
Click to close