Eternian Central Command
Thank you for printing this page from www.SuperCheats.com.
Remember to come back to check for updates to this guide and much more content for Bravely Default
Follow this guide to hear about updates
Last Updated:

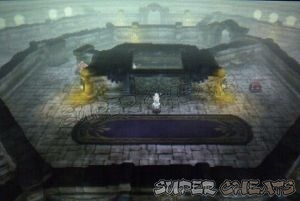
After the scene, enter the building. Save via the adventurer then head to the corridor to the right. Enter the next door for another scene.
| Victoria |
| HP: 70,000 Weakness: Light, FAM: Human |
| Victor |
| HP: 80,000 Weakness: Dark, FAM: Human |
 |
| Target Victoria first since she can cast Poison to your characters then use Exterminate as a follow-up attack. The latter will deal heavy damage to any poisoned characters but will miss as long as no one is poisoned in your party. Her Dark attack can be resisted by having high M. Def stats. Victor will use Holy as a counterpart of Victoria's dark attack. Victoria can also cast Doom which will cause the inflicted character to faint in 4 turns. Victor's Fairy's Aid will increase the power of elemental attacks and heal using Curada. If you have a Performer job command, it will be a good idea to use your various buffs often. Just concentrate your attacks on Victoria since she's doing most of the offensive damage. Once she's down, Victor will become a total pushover. |
Aside from the Poison Rod and Yggdrasil Staff you can steal from the two, you'll also get Force Armlets and Amulet after the battle. You'll receive the Arcanist and Spiritmaster asterisks. After the battle, you'll have a new party chat as well (Let's Hurry) Return to the previous room and save your game. If your path back to Eternia is safe, you can walk there and heal up – even train your characters with their new jobs.
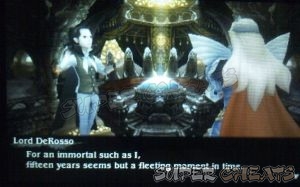
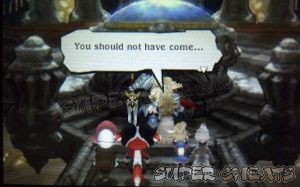
If you're ready to continue, head to the room in the middle and watch the following scenes.
Grand Marshal's Daughter's Room
Edea will be alone for now. There are no hidden items in the room, just an option for you to sleep. Head to the door to proceed with the story. After the scenes, you'll be in the prison.
Central Command Prison B2
Once in control, a new party chat will be available (Four Birds in a Cage) Your party members are kept on different cells. You can retrieve them in any order. The closest one is Agnes; just go down and you'll find her inside a cell to the right. There's a chest containing a Light Curtain south of Agnes' cell.
You'll find Tiz inside the cell to the south. After he rejoins your party, you'll be able to view another party chat. (Glad You're Alright, Tiz) There's 5000pg in a chest to the west of Tiz's cell. Further west lies the stairs. Don't go up yet but instead, go through the hidden passage southeast of the stairs and follow it until you reach the chest inside the locked cell to the right. Obtain the Excalibur from the chest, then head north.

You can get an X-Potion from the chest to the northwest and 3000pg from the chest in the middle. Finally, talk to Ringabel to free him. After freeing Ringabel, another party chat will be available. (Glad You're Alright, Ringabel) Once you've opened all the chests and got the party together, take the stairs to the southwest.

Central Command Prison B1
Head north and grab the Light Charm along the way. This floor has a maze-like structure. After getting the light-charm, head all the way to the right to get an X-Potion. Next, backtrack a bit then go south on the first corridor that should lead you to a dead-end with the chest that has a Dragon Fang.
Follow the main path and find the chest to the northeast near the mission marker. Open it to get a Zeus' Wrath. Make your way to the southeast to find another chest that has a Bacchus's Wine inside. Now head north towards the gate for another scene. Once done, go upstairs.


Central Command 1F
Make your way to the southeast to reach the area's entrance. Save your game and head to the northwest first. You'll find a chest there containing a Pantheon's Wrath. The door west leads to the world map so ignore it for now. You can use the open space there to land your airship just in case you want to make a return trip to Central Command later in the game. Make your way to the mission marker to the northeast then ride the lift to proceed.
Central Command 47F
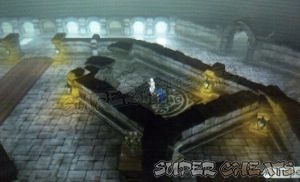
After the scenes, you'll reach 47F. Head to the southwest to reach the center of the room then go to the southeast. Head to the north to find a chest in the dead-end. Loot the Gold Hourglass from it. Follow the path to the southwest to find another chest containing a Lilith's Kiss. Backtrack to the middle of the floor then head northwest this time. The last chest in the floor is due north and it contains a Turbo Ether. Make your way to the southwest this time to find the stairs.

Central Command 48F
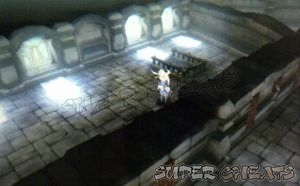
Edea's room is found in the northeast corner of the map. Enter it for a scene and to rest up in case you're exploring the area with random encounters on. There's a locked blue chest located southwest of Edea's room. Just take note of its location for now and loot the other chests in the floor. You can find an Assassin's Dagger to the south and Divine Fists in a small room to the southwest. Once done, follow the corridor south of Edea's room then take the stairs to the next floor. A scene will be triggered as well.

Central Command 49F
Follow the straightfoward corridors until you get the access the doorway to the west that leads to a staircase in the northwest. Go downstairs to retrieve the Holy Lance from the chest in the lower floor. Go back up and head all the way to the end of the corridor to find a Stardust. Backtrack to the main path and return to the inner corridors. Once you've reached the middle, open the chest on the right-side of the lift to get an Elixir. Prepare your party for the upcoming boss battle. The next boss is mainly a physical attacker so concentrate on boosting your party's P.Def stats and use excellent physical job classes like ninjas and swordmasters. Once ready, ride the elevator. After the scene, the battle will ensue.
| Boss: Breav Lee the Templar |
| HP: 35,000 Weakness: Dark, FAM: Human |
 |
| Breav will stack up his BP and use it to unleash powerful attacks all at once. This will also make him sturdier against multiple attacks. The Swordmaster's Squeaky Wheel should work well in keeping his BP down, at a cost of your own. If you have a Spiritmaster in your team, use Stillness to stall Breav's attacks and allow you to cast your buffs and debuffs. A Performer's party-buffs can be perfect for this as well. You can also use moves that bypass Default defense buffs |
| Heart Strike always deals critical damage, Giant Slayer deals a ton of damage and Radiant Strike is a light-based attack that deals ranged damage. You have to defeat him a total of three times since Breav will fully restore his HP twice upon defeat. |
After defeating him, you'll get the Templar asterisk. You're now free to head to Everlast Tower. A new party chat will become available as well. (Let's Press On) Since you're also back in Central Command's first floor, you can walk back to Eternia and rest up before moving on. At this point, you can now also take on a new sub-scenario; however, you'll need an airship to the tasks needed so just proceed with your mission to the Everlast Tower. Refer to this link for details.
Exit the Central Command to the world map and continue following the path until you reach the tower in the east.

Anything missing from this guide?
ASK A QUESTION for Bravely Default
Comments for Eternian Central Command
Add a comment
Please log in above or sign up for free to post commentsNo comments yet. Tell us what you think to be the first.
Table of ContentsClose
- Basics
- Asterisks / Job Classes
- Jobs Guide
- Extras
- Intro
- Chapter 1
- Chapter 2
- Chapter 3
- Chapter 4
- Chapter 5
- Chapter 6
- Chapter 7
- Chapter 8
- The End
- Sub-Scenarios (Ch1)
- Sub-Scenarios (Ch2)
- Sub-Scenarios (Ch3)
- Sub-Scenarios (Ch4)
- Sub-Scenarios (Ch5)
- Sub-Scenarios (Ch6)
- Sub-Scenarios (Ch7)
- Sub-Scenarios (Ch8)
Guide Updates
Get notified of updates to this guide
Many of our guides get updated with additional information. To get an email when this guide is updated click below.
 Join us on Discord
Click to close