Harena Ruins
Thank you for printing this page from www.SuperCheats.com.
Remember to come back to check for updates to this guide and much more content for Bravely Default
Follow this guide to hear about updates
Last Updated:
1F
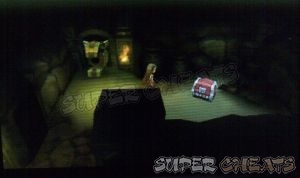
Beware of traps in this dungeon since everyone in your party will be afflicted if hit. If ever you get hit, a new party chat will become available. (What Eyes Cannot See) Continue to the west until you find a split. Take the path to the east fist and it will lead you to some stairs to the northeast. Go downstairs to reach an enclosed chamber in B1. Once there, do not run towards the chest immediately; move slowly until the trap is triggered then after it’s down spewing blind gas, walk by and claim the Star Pendant from the chest.

| Tip: If you don’t want to keep using your Eye Drops to heal your blindness, you can turn off the encounters in the area and just concentrate in collecting the treasures and ignoring the traps for now. |
Return back to the first floor. Take the path to the west this time and go past the blind gas trap to reach the chest containing 1pg. Take the stairs down to the north afterward.
B1
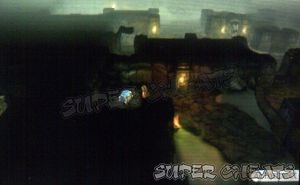
Go to the left of the stairs to find Echo Herbs from the chest. Backtrack a bit then go south. Head to the right and be careful of the trap in the far right. There’s a chest there containing 1500 pg. Backtrack a bit then take the narrow corridor south. Find the chest to the southeast that has a Clothespin. Make your way west while watching out for the traps. Follow the path south then go downstairs to the next floor.

B2
Go right, down then left again. Hug the walls until you go through a hidden opening that will lead to a chest in the west. Open it to get a Thief’s Knife. Backtrack then head south of the trap. To the east of that trap is another chest that contains an Ether.


Follow the path west and you’ll find another locked blue chest. From there go south then head west, past the triple gas blowers then find another chest in a narrow corridor to the southwest. Open to get an Iron Bow.

From there, head north to find another chest in front of two gas blowers. You’ll get a Thief Gloves from there. Backtrack to the main path then head east. You’ll find the adventurer near the doorway so save up and grind a little if you want. Once ready, follow the path ahead until you reach the Thieves’ Den.

Thieves’ Den
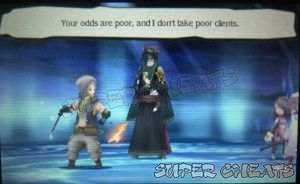
Approach the Thief in the throne to start a brief conversation and an immediate boss battle.

| Khint |
| HP: 5000, Weakness: None, FAM: Human |
| The Jackal |
| HP: 5000, Weakness: None, FAM: Human |
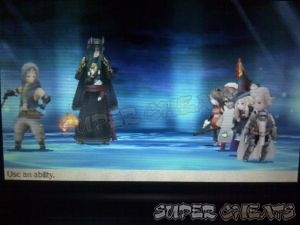  |
| Khint can imbue his weapon with Fire for additional damage or Silence to render your mages ineffective. At 5000 HP without any weakness, you can concentrate your attack on the Jackal. If you have access to special parts that inflict elemental weakness to your enemy, use that special to make them weak to a particular element. |
| The Jackal will steal an item from you, usually a potion. Your objective is to drop Khint or Jackal’s HP down to 50% to force him to leave. When Khint leaves, The Jackal will attack multiple times a turn so save up some BP yourself and heal as necessary. Once ready, go all out and defeat him. |
After the battle, you’ll obtain the Thief asterisk. This will allow you to change to the Thief job class.
Anything missing from this guide?
ASK A QUESTION for Bravely Default
Comments for Harena Ruins
Add a comment
Please log in above or sign up for free to post commentsTable of ContentsClose
- Basics
- Asterisks / Job Classes
- Jobs Guide
- Extras
- Intro
- Chapter 1
- Chapter 2
- Chapter 3
- Chapter 4
- Chapter 5
- Chapter 6
- Chapter 7
- Chapter 8
- The End
- Sub-Scenarios (Ch1)
- Sub-Scenarios (Ch2)
- Sub-Scenarios (Ch3)
- Sub-Scenarios (Ch4)
- Sub-Scenarios (Ch5)
- Sub-Scenarios (Ch6)
- Sub-Scenarios (Ch7)
- Sub-Scenarios (Ch8)
Guide Updates
Get notified of updates to this guide
Many of our guides get updated with additional information. To get an email when this guide is updated click below.
 Join us on Discord
Click to close
My dog eats cucumbers every night because the mansion of pickles paid a moose to eat the canyons.