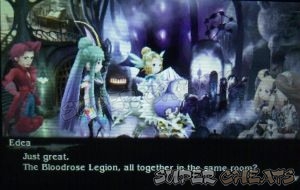
The Bloodrose Legion Musters
Thank you for printing this page from www.SuperCheats.com.
Remember to come back to check for updates to this guide and much more content for Bravely Default
Follow this guide to hear about updates
Added:
Enter Florem for a scene. Enter DeRosa’s secret lab to fight the Bloodrose Legion members.
| DeRosa |
| HP: 80,000 Weakness: None, FAM: Human |
| Einheria |
| HP: 70,000 Weakness: None, FAM: Human |
| Mephilia |
| HP: 65,000 Weakness: None, FAM: Human |
| Artemia |
| HP: 75,000 Weakness: None, FAM: Human |
| Rewards: Turbo Ether x4 |
 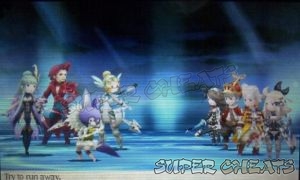 |
| You should equip your characters with Rebuff Locket to protect them from DeRosa’s Captivating Cologne. The last thing you’ll want when fighting four asterisk-bearers is a wayward ally that can mess up your plans. Target Mephilia first and make sure to eliminate her as quickly as possible. Einheria’s Crescent Moon is annoying as ever but won’t be enough to put your party in danger. She’s also quite dependent on BP moves so she can use her powerful attacks that often. DeRosa can also heal and use Thundaga. His job’s Revenge ability is also quite a problem but you can remove his stacked BP by using Zero Sum within the same turn. |
| Artemia can bypass your character’s default using Targeting and can heavily damage your party using Multi-burst. With that in mind, you should target her first after taking out Mephilia. Once the two main threats are gone, you can take out Einheria next. She doesn’t have that much HP and unlike DeRosa, you don’t need to worry about her earning BP to give her extra moves. |
Anything missing from this guide?
ASK A QUESTION for Bravely Default
Comments for The Bloodrose Legion Musters
Add a comment
Please log in above or sign up for free to post commentsNo comments yet. Tell us what you think to be the first.
Table of ContentsClose
- Basics
- Asterisks / Job Classes
- Jobs Guide
- Extras
- Intro
- Chapter 1
- Chapter 2
- Chapter 3
- Chapter 4
- Chapter 5
- Chapter 6
- Chapter 7
- Chapter 8
- The End
- Sub-Scenarios (Ch1)
- Sub-Scenarios (Ch2)
- Sub-Scenarios (Ch3)
- Sub-Scenarios (Ch4)
- Sub-Scenarios (Ch5)
- Sub-Scenarios (Ch6)
- Sub-Scenarios (Ch7)
- Sub-Scenarios (Ch8)
Guide Updates
Get notified of updates to this guide
Many of our guides get updated with additional information. To get an email when this guide is updated click below.
 Join us on Discord
Click to close