Cathedral of Oblivion
Thank you for printing this page from www.SuperCheats.com.
Remember to come back to check for updates to this guide and much more content for Star Ocean 5: Integrity and Faithlessness
Follow this guide to hear about updates
Last Updated:
Overview
This cryptic and sacrilegious structure can only be accessed by passing through special atramentous gates that gates that appear out of nowhere. Once you proceed down its unholy halls, you will not be able to leave. Should you neglect to purge the requisite evil from within it, you shall be damned to wander its corridor for eternity. Therefore, you are encouraged to turn back unless you are truly confident in your skills.
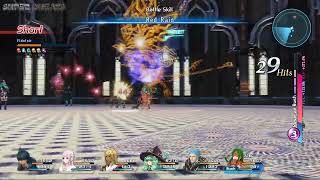
The Cathedral of Oblivion is composed of several rooms where you need to defeat the enemies inside before you can move on to the next. The last room contains a powerful abomination that you must defeat to clear the Cathedral and get the treasure chest containing a rare equipment. Cathedral bosses are divided to three generations (by level range), the first one is a flying eyeball monster called an Eyebalone, the second set of Cathedrals are guarded by an avian boss called Vidofnir, and the last set of higher-level Cathedrals has the mighty Storm Dragon. The entrances of the cathedrals are fixed; only the enemies and bosses you'll find inside will be changed as you progress in the story.
First set: Chapter 3-6 up until the siege of Eastern Trei'kur
Second set: Chapter 7-10
Last Set: Chapter 10
Some of the late level locations won't have first and second sets of enemies. Trei'kuran Dunes will only have instances with Vidofnir and Storm Dragon in it while the Cathedral instance in the Alcaraz of the Golden Age will only have the instance with the Storm Dragon since the location is only accessible near the end of the game.
You can only get the prize inside the treasure chests in the Cathedrals once though you can always go back and clear it again for the experience and possible item drops. For example, if you skipped the first instance of Cathedrals in the earlier chapters of the main story then come back again later, the item will still be there for the taking.
Locations
Coast of Minoz

| Set | Room 1 | Room 2 | Room 3 | Room 4 | Room 5 | Room 6 | Room 7 |
| 1st | Apprentice Scumbag x 3 | Axe Beak x 2, Stone Golem | Eyebalone x1 (Lv. 25), Reward: Blue Talisman | N/A | N/A | N/A | N/A |
| 2nd | Lizard Warrior x 3 | Corpse Bat x 2, Ridiculer | Adephaga Milies x 3 | Devil Child x 2, Seventh Core | Vidofnir (Lv. 45), Reward: Blood Chain Mail | N/A | N/A |
| 3rd | Bone Knight x 3 | Toy Soldier x 3 | Lamia Radix x 2, Welwitschia | Dinosaurus x 3 | Guiafairo x 2, Jatayu | Chaotic Cell x 2, Sacred Guard | Storm Dragon (Lv. 80), Reward: Asclepius |
Resulian Plains

| Set | Room 1 | Room 2 | Room 3 | Room 4 | Room 5 | Room 6 | Room 7 |
| 1st | Apprentice Scumbag x 3 | Harpyia x 2, Carnivorous Plant | Eyebalone x1 (Lv. 30), Reward: Green Talisman | N/A | N/A | N/A | N/A |
| 2nd | Lizard Warrior x 3 | Corpse Bat x 2, Ridiculer | Stroper x 3 | Devil Child x 2, Cursed Horror | Vidofnir (Lv. 50), Reward: Duel Armor | N/A | N/A |
| 3rd | Adephaga Prox x 3 | Toy Soldier x 3 | Lamia Radix x 2, Welwitschia | Dinosaurus x 3 | Guiafairo x 2, Jatayu | Chaotic Cell x 2, Sacred Guard | Storm Dragon (Lv. 85), Reward: Arcadian Serenity |
West of the Eastern Eihieds

| Set | Room 1 | Room 2 | Room 3 | Room 4 | Room 5 | Room 6 | Room 7 |
| 1st | Saber-Toothed Tiger x 3 | Kobold Bandit x 3 | Eyebalone (Lv. 35), Reward: Red Talisman | N/A | N/A | N/A | N/A |
| 2nd | Lizard Shaman x 3 | Corpse Bat x 2, Ridiculer | Stroper x 3 | Devil Child x 2, Cursed Horror | Vidofnir (Lv. 55), Reward: Atrementous Usurper | N/A | N/A |
| 3rd | Great Scumbag x 3 | Toy Soldier x 3 | Lamia Radix x 2, Welwitschia | Dinosaurus x 3 | Guiafairo x 2, Jatayu | Chaotic Cell x 2, Sacred Guard | Storm Dragon (Lv. 88), Reward: Carbuncle’s Prison |
Trei’kuran Dunes

| Set | Room 1 | Room 2 | Room 3 | Room 4 | Room 5 | Room 6 | Room 7 |
| 2nd | Metal Golem x 3 | Vampire Bat x 2, Cursed Horror | Hades Crab x 3 | Lesser Dragon x 3 | Vidofnir (Lv. 60), Reward: Faerie Band | N/A | N/A |
| 3rd | Kobold Ranger x 3 | Skeleton Soldier x 2, Doleful Lord Brahms | Amber Princess x 3 | Chaotic Cell x 2, Sacred Guard | Avenger x 3 | Valiant Conscript x 2, Blutgang | Storm Dragon (Lv. 92), Reward: Bloody Knuckles |
Northern Territory of Sohma

| Set | Room 1 | Room 2 | Room 3 | Room 4 | Room 5 | Room 6 | Room 7 |
| 2nd | Metal Golem x 3 | Stroper x 2, Cursed Horror | Adephaga Prox x 3 | Antlered Tortoise x 3 | Vidofnir (Lv. 65), Reward: Healing Band | N/A | N/A |
| 3rd | Kobold Knave x 3 | Skeleton Soldier x 2, Doleful Lord Brahms | Amber Princess x 3 | Chaotic Cell x 2, Sacred Guard | Avenger x 3 | Valiant Conscript x 2, Blutgang | Storm Dragon (Lv. 96), Reward: Chrome Nightmare |
Alcazar of the Golden Age: A2

| Set | Room 1 | Room 2 | Room 3 | Room 4 | Room 5 | Room 6 | Room 7 |
| 3rd | Avenger x 3 | Valiant Conscript x 2, Blutgang | Bane Dragon x 3 | Maidenly Blossom x 3 | Gust Hornet x 2, Polyphaga Gamboge | Melusine x 3 | Storm Dragon (Lv. 99), Reward: Farwell |
Bosses
Eyebalone

This Corrupt-type flying enemy is the boss in the first set of Cathedral instances. It has powerful eye beams that can deal heavy damage to anyone nearby. Fortunately, it doesn't have long-ranged attacks that can span across the battlefield. That said, as long as you keep Miki, Fiore, and Emmerson away, they'll be able to heal and attack without the fear of getting sniped from afar. However, you may need to move them out of the way in case the Eyebalone moves closes in. It also has a spinning move that can damage anyone around it and a pound that causes area damage and may cause paralysis; however, its eye beams remain as its most dangerous arsenal.

Eyebalone
Vidofnir

This is an avian-type enemy that will replace the Eyebalone as the second boss of the Cathedral instances as you progress in the main story. It excels in fire and wind-based attacks. Tornado is its most dangerous move that can sweep away characters caught in the gust that can travel across the battlefield. It will be imperative to keep your ranged characters, especially Miki at a good distance from each other. Volcanic Burst is an annoying AoE spell since it gives little warning when the eruption will occur. Divergent Shade is its ranged move but not as dangerous as the other two.
Vidofnir
Storm Dragon

This is the last and the most powerful boss of the last set of Cathedral instances. It has high HP and defense so you'll be spending more time in battle in order to defeat it. It belongs to the avian-type of enemies as well making it susceptible to the bonus damage and defense given by the Raven Slayer role. Also, this boss can dish out tons of damage so you have to ensure that Miki's healing can catch up. Equip her with roles that will allow her to focus on healing, increase her casting speed, and have her equipped with items that increases her healing factor. Furthermore, you may need to control her manually so you can keep her out of danger, especially when the Storm Dragon sets its eyes on her.
Like the Vidofnir, the Storm Dragon can cast Tornado but it seems that it uses it more often and deals more damage, capable of instantly killing any characters caught in it. The dragon can also switch targets so if ever your melee fighters gets caught up in a damaging whirlwind and being swept away, expect it to target your ranged characters next. In addition, the dragon can also cast Enshelter, which will further enhance its already high defense. It will help a lot if Fiore has learned the Void spell which can remove any buff an enemy casted on itself.

The Storm Dragon also absorbs wind-based attacks. So make sure Fiore doesn't have any wind-based spells enabled and your characters doesn't have Weapons or skills with wind attributes equipped during this battle.
Prioritize keeping Miki alive and control her as much as needed. If she ever gets knocked out, make sure to revive her first then control her to take control of the healing.

Storm Dragon
Anything missing from this guide?
ASK A QUESTION for Star Ocean 5: Integrity and Faithlessness
Comments for Cathedral of Oblivion
Add a comment
Please log in above or sign up for free to post commentsNo comments yet. Tell us what you think to be the first.
Table of ContentsClose
- Basics
- Walkthrough - Chapter 1
- Walkthrough - Chapter 2
- Walkthrough - Chapter 3
- Walkthrough - Chapter 4
- Walkthrough - Chapter 5
- Walkthrough - Chapter 6
- Walkthrough - Chapter 7
- Walkthrough - Chapter 8
- Walkthrough - Chapter 9
- Walkthrough - Chapter 10
- Walkthrough - Chapter 11
- Walkthrough - Chapter 12
- Sidequests
- Maps
- Optional
- Battle Skills
- Roles
- Specialties
- Creation Menu
- Item Creation
- Encyclopedia
- Trophies
Guide Updates
Get notified of updates to this guide
Many of our guides get updated with additional information. To get an email when this guide is updated click below.
 Join us on Discord
Click to close