Panama Canal
Battlefield: Bad Company 2 Walkthrough and Guide
Panama Canal
Overview:
Currently the only four-base map in Conquest, Panama Canal is a square area with two bases on either side of the canal. The spawns are similar, located at either end of a long road which passes along the bottom of the map. The US Deployment is closest to Alpha, while RU Deployment is closer to Bravo. Charlie base is similar to the Factory on White Pass and the Lumber Mill on Laguna Alta, sitting to one side of the main road route across the canal. Delta is protected by buildings on two sides, and is easily accessible by road. There are three main routes to cross the canal. First is a small path from Alpha, second is the main causeway across the middle of the map, open to enemy fire, while the third is a road from Bravo to Delta. Additionally the boats in the canal can be crossed, with difficulty, for a less predictable route to the other side. Panama Canal is one of few maps where every flag is directly accessible in a tank. This is a very diverse map, with plenty of opportunity for short and medium range combat, but lots of sniping
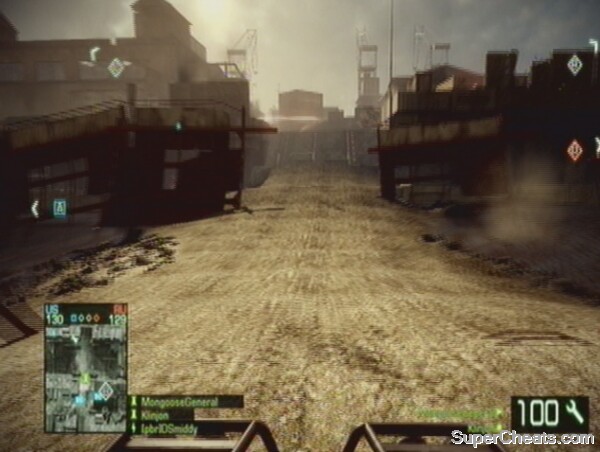 The causeway across the centre of the map is key, but risky to cross without a tank. |
Class Recommendations:
1) Engineer: There are too many vehicles on this map to avoid recommending the engineer class. It is essential both to keep repairing allied vehicles and to stop enemy vehicles from dominating the bases. Bravo in particular is prone to vehicular onslaught, and a good selection of engineers must be used to stand any chance of conquering this map. They can also place anti-tank mines in the bases and on the main causeway.
2) Recon: Although in terms of area and distance between bases this map is not the largest, there are plenty of opportunities for snipers. The top of Charlie building and the jungle between the two Deployment zones in particular are excellent positions. The mortar strike ability can be used to assist engineers in dealing with vehicles.
3) Assault: The range of the assault rifles is useful for picking people off across the canals, though 40mm grenades are not as effective on this map as on some of the others. Engineers will need constant resupplies of their RPG ammunition, while the powerful shooting of this class will be useful when assaulting the more open bases of Alpha and Delta, and attacking snipers on the roof of Charlie.
4) Medic: Most of the bases are too far apart for medics to successfully help team mates in multiple areas, but some function as killing zones, with many allied deaths often occurring. Bases such as Bravo and Alpha in particular can become bogged down in combat, and having medics there to revive team mates and suppress the enemy can tip the balance.
Deployments:
US Deployment:
There is a variety of vehicles available at the US Deployment, including both varieties of American tank. In addition to one M1A2 Abrams, and one M3A3 Bradley, there are two quad bikes, allowing quick access to Charlie and Delta.
RU Deployment:
RU Deployment shares the vehicles of the American spawn. It has two quad bikes, a T-90 MBT and a BMD-3 Bakhcha. These allow a balance to be struck between anti-infantry and anti-tank combat. Russian players should be able to take both Bravo and Delta from their spawn on that side of the map.
Bases
Alpha Base (Comm Center):
Alpha is a very difficult base to defend. Although there are numerous buildings surrounding the flag, and a machine gun emplacement guarding the road towards it, the difficulties come when enemies hide in those nearby structures. The flag can be captured while an enemy is in one of many places out of sight of the flag, and attackers can pick off defenders with ease when they search for the mystery invader. The machine gun backs onto a building itself, making it easy to flank. To assist with defence, however, there is a M3A3 Bradley that spawns here. There are paths behind the buildings adjacent to the canal at Alpha which lead past the boat in the water to Charlie. This is the most popular infantry route into Alpha base, and is one of the most hotly contested areas for infantry on the map. The main road to Bravo is also frequently travelled, while infantry like to move through the fences and rubble that lie between that road and the road linking the two Deployments. The road adjoining the Deployment bases is also one of the chief ways for tanks to flank round behind Alpha, and should be guarded against with anti-tank mines. If you are playing as the Americans, beware of tanks coming to Alpha from RU Deployment.
 The gun emplacement at Alpha is in a good position, but can be flanked from behind. |
Bravo Base (Warehouse):
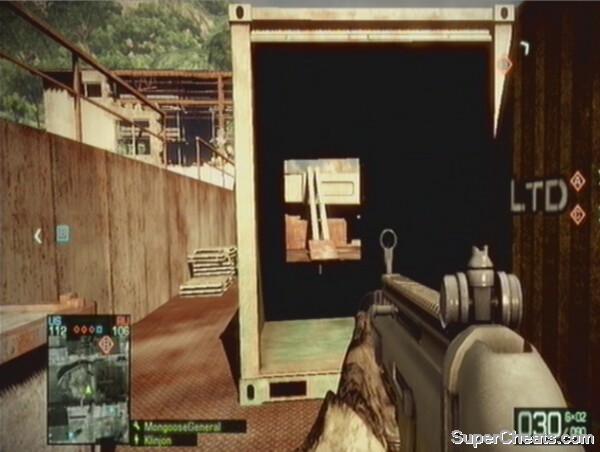
Bravo is primarily accessible directly from RU Deployment, or along the road from Alpha. It can also be reached via a path from Delta, or across the causeway from Charlie. This makes it, like Alpha, very difficult to defend. Because of its ease of access by road, it is popular with tank drivers. Tanks can roll right inside the warehouse (from the front and back) and monopolise the area. Once they do this, they can easily be destroyed using C4, anti-tank mines or RPG attacks to the rear, but nonetheless, they can clean out any defenders very quickly upon arrival. In addition to the vehicular threat, infantry attacks can come from both flanks and through a number of entrances. On the side of the canal, steps leading down to the water can be used, as well as a thin path alongside the warehouse itself. On the opposite side, an area filled with rubble and debris is a haven for sneaky infantry. With this in mind, there are only one or two decent positions for defenders of Bravo. Behind the cargo container as you enter via the main opening is a popular location to camp and wait for attackers. Other than that, any of the four corners of the room at least keep players protected from one direction. The tall structure overlooking Bravo is probably the best defensive position available, though snipers from Charlie can pick you off once there.
 One of many more secretive routes into Bravo. |
Charlie Base (Factory):
As always with this type of building, tanks can drive right inside and sit next to the flag. It is one of the easiest to defend, however, as it boasts cargo containers for infantry to hide in. It also carries the UAV station on the roof, and supports snipers with its height and commanding position on the map. The stairwells can be used to get to the roof and then jump down on any defenders below with the element of surprise. It is exposed to attacks on one side and through various doors and openings on the other. Anti-tank mines should be placed around the flag, while any engineers in the building can wait for a tank to come all the way in before dropping down behind it and getting a crucial shot on the engine. The building is indestructible, but is vulnerable through the gaps in the roof and from tank shells through the large openings in the walls. It is an important base to hold due to its value to snipers and proximity to Alpha. The main threats come in infantry form from Alpha, and in vehicular form from Delta and across the causeway crossing the canal.
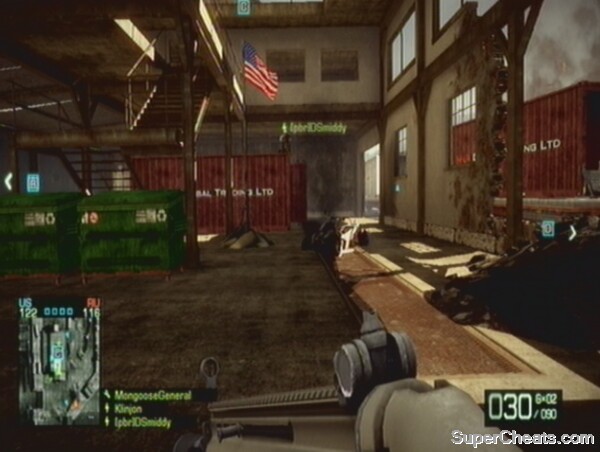 There are lots of hiding places at Charlie. |
Delta Base (Train Yard):
The train yard is across the water from Bravo, but is linked with this base by a stretch of road that allows tanks to roll between the two sides of the canal with ease. There is a main road connecting it to Charlie, as well as a large run of warehouses at the back of the map, which allow infantry to pass from base to base with little chance of detection. The flag is in a good position to attack, because it is nestled next to a high wall underneath a building, allowing players to principally watch the directions of Bravo and Charlie. It also has defensive benefits, however. There is a mounted machine gun opposite the flag towards Bravo (though this can be as useful for attackers as defenders), but the real key is the large warehouse behind the flag. This has many nooks and crannies to hide in, as well as an upper floor and a further area behind it, meaning defenders can retreat against impossible odds or if they are ill equipped to deal with a tank, and then retake the base when the danger has passed. There is also a train carriage on the flank of the flag, which is very difficult to see into, making it another good hiding place. Delta is of little use to snipers, but other classes can get many kills from exploiting its defensive advantages. It is a vital base for launching a successful attack on Bravo.
The sheltered position of Delta's flag has advantages for attackers and defenders. |
[size=12]
How do u get on the roofs of the warehouse things cos i keep tring but i doesnt work, can u tell me please.
Thanks
Liam