Laguna Presa Conquest
Battlefield: Bad Company 2 Walkthrough and Guide
Laguna Presa Conquest
Overview:
Laguna Presa is a jungle map, also featuring patches of water and some elevated terrain. The two deployment bases are in very different positions, with the US base overlooking Charlie base, while the Russian deployment is nearer to Bravo and Alpha. Bravo is the focal point, being located on top of a hill. While this is not a terribly useful sniper position, the wooded slopes around Alpha provide superb cover. There are tanks to mix things up, though they do not dominate the map as with some other Conquest levels. The UAV is located at Alpha, where fiery wreckage provides good cover, making it a very difficult base to assault. Bravo can be attacked from two sides, and there are numerous places to camp on top of the hill when defending. Charlie boasts wooden houses and piers, providing limited cover, but also places to hide. It can be accessed from the water. The water effectively forms a moat around the three bases and can be traversed using jet-skis.
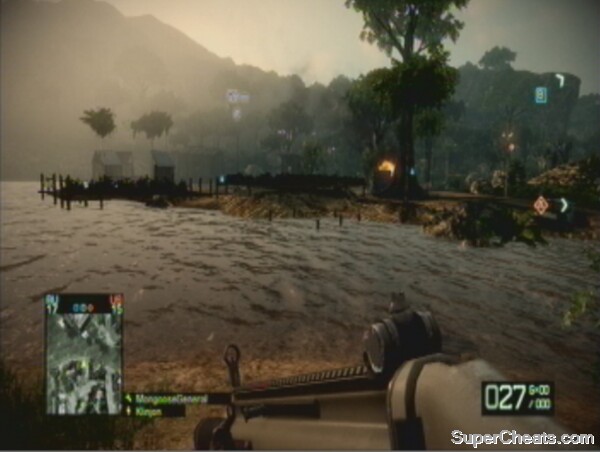 The dynamics of Charlie base really change towards the end of the game. |
Class Recommendations:
1) Assault: While vehicles play an important part on this map, they are not the main threat. Due to the nature of the environment, providing many places for enemies to hide in camouflage and making spotting particularly tough, it is crucial to get the extra stopping power provided by the assault rifles. The 40mm grenade attachment, or indeed the smoke grenade upgrade can, in the case of the former, blow chunks out of the wooden houses and combat the quad bikes on this level, or for the latter to provide cover to allow snipers to C4 enemy tanks.
2) Recon: With the jungle foliage on offer, there are many places to hide and stay relatively undetected, particularly behind the Alpha base. When you combine this with the fact that RU Deployment is raised up and that there is much of the terrain free from infantry-friendly cover and with good line of sight, you have a veritable haven for Snipers. This is despite the enclosed nature of this level. Motion sensors are incredibly useful to help your team find enemy snipers similarly camped in the bushes.
3) Medic: With the wooden buildings of Charlie base the LMGs that Medics utilise can rip through enemy cover very effectively. The rest of the level is quite open, and while a medic will struggle to effectively assault Bravo up the hill, guarding Alpha is a bit easier. It is also a short distance from the Deployments to the bases, and a quick Medic could get many revives on this tight map.
4) Engineer: There is not much between any of the classes on this map, but the weaker nature of the SMGs that the engineer specialises in makes them the least effective class on Laguna Presa. Nonetheless, it is important to have some engineers to deal with the enemy tank that will pop-up every so often, and to pepper Alpha and Charlie with anti-tank mines.
Deployments:
US Deployment:
There are two quad bikes at the US Deployment, as well as one M3A3 Bradley. The base itself overlooks Charlie, and as such that base should be an easy capture for the US team. The quad bikes can be used to reach Alpha, and while they cannot mount the hill at Bravo, you can use them to get close. The base is of little danger from spawn killing due to its raised position.
RU Deployment:
As with the US Deployment, the Russians have two quad bikes and a tank, coming in the form of the BMD-3 Bakhcha. RU Deployment can sometimes be prone to spawn killing as it can be attacked all the way along the banks of the water between Alpha and Bravo. It is, however, more useful for firing out of as a result.
Alpha Base (Crash Site):
Crash Site has little in the way of solid cover, though the downed helicopter's cargo can provide something in the way of protection. You can also use the flames, which are harmless to your character, as a visible screen against snipers and other enemies. The UAV is at Alpha, and is protected by a metal sheet. Some players may wish to flank round Alpha using the hills at the edge of the level. Spotting players who are in this area is almost impossible with the dense vegetation as cover, and it is a haven for snipers. If attacking Alpha, be sure to remain crouched as there are many objects littered about the base which will help to obscure the view of any defenders who may be looking for you. Defending Alpha is very difficult, and three people are really required: one to watch the direction of RU Deployment, one to watch US Deployment, and one to watch the area towards Bravo. Of course, depending on your nationality you can relax your concentration towards one of the Deployment bases. There is a jet-ski available at Alpha, near the UAV.
 The UAV is located at Alpha. |
Bravo Base (Hill):
The Hill has two main methods of approach. The most popular is via the path through the shipping yard, replete with cargo containers and point of cover. You can then move through the gap in the fence and up to the summit of the hill. The second is on the opposite side to the first, leading off from the main road heading from RU Deployment to Charlie base. In addition to these, you can climb up the hill and squeeze through various holes in the fence, from all sides. This allows you to surprise enemy defenders who may be watching the more popular entrances. In terms of defending, there are some bushes at the summit which offer excellent camouflage. Players tend to check left and right when coming through the main, first entrance described above to watch for people camping behind the fences. If you camp elsewhere, you should therefore be able to get a good few shots off before they see you. If attacking, be sure to grenade the hill first, as there is not much space up there and you can likely get some splash damage and send any defenders out of their hiding places to avoid your grenades.
Use a more imaginative route to surprise enemies atop the hill.
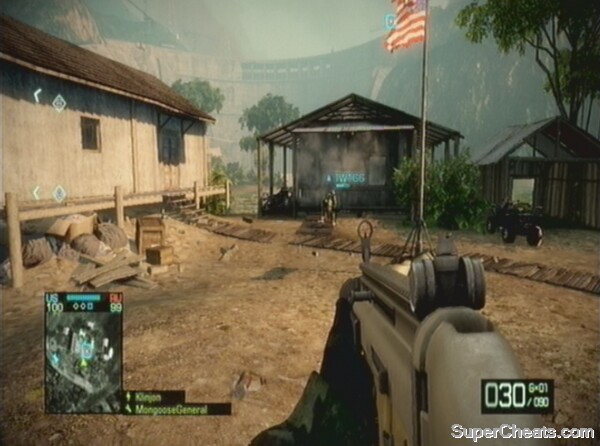
Charlie Base (Village):
Charlie is on a small, flat area of ground surrounded by wooden shacks. It is flanked on one side by water, towards the dam. It is frequently attacked by enemy tanks, being so close to US Deployment and easily accessible by vehicle along the road from RU Deployment. These tanks will often roll right into the centre of the base, by the flag itself – laying anti-tank mines here can be very profitable. There is also a jet-ski available from the boat-house on the waterfront. Hiding in the boat-houses or indeed in the water is an effective means of defence or attack at Charlie, while under one of the buildings (the one nearest to Bravo) you can crouch beneath the floor on the corner in something of a glitch-spot to surprise the enemy. By the end of the match Charlie will look very different indeed, as in all probability the wooden buildings will have been flattened, leaving very little cover for defenders.
 The corner near the water under the floor of the building to the left is a great spot to camp and survey Charlie. |
No comments yet. Tell us what you think to be the first.