11: Zero Dark Thirty
Battlefield: Bad Company 2 Walkthrough and Guide
Level 11: Zero Dark Thirty
Story:
Having given the device to Aguire, he then betrays B Company. It turns out he was allied with Kirilenko all along. Aguire is, in fact, the son of Thomas Wyatt, the commando we played as on the Operation Aurora level. The fact that his father died for the scalar weapon is the reason for Aguire’s deception. It is a day of double-crossing, and Kirilenko does so to Aguire, killing his partner. Fortunately, Flynn intervenes to save B Company, before being shot down (for good).
Collectibles:
None
Other Collectibles:
None
M-COMS:
4
Walkthrough:
Everyone is torn up about handing the weapon to Kirilenko, not to mention Flynn’s death. Follow the path past the dead soldier to trigger our first objective.
Assault Through Village:
We are now in pursuit of Kirilenko. Continue along the path and make use of the supply crate. It is worth picking up the Gustav here. You come out overlooking a town. There are two guards down below, but you should begin by RPG’ing the mounted turret on a rooftop nearby. You can then mop up any infantry in sight from your high position:
M-COM Station #1: Before entering the village, locate the two sheds on the left-hand side of the level. The M-COM is to the left of them amongst the trees.
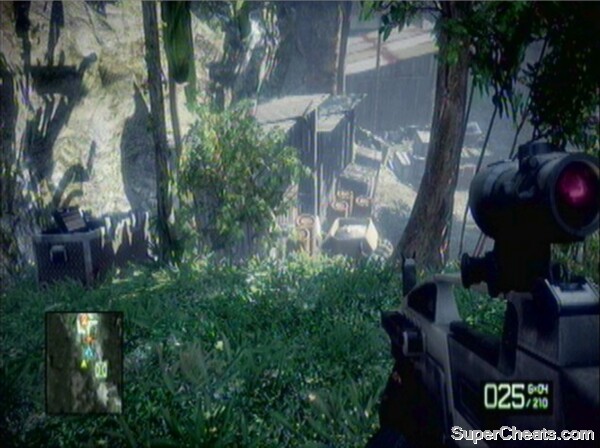 Look for these sheds to locate the first M-COM station. |
You can now move down into the village. It’s a good idea to pick up a shotgun and move through the houses where possible. Soon you’ll come to an area overlooked by a variety of balconies and rooftops. Look out for a machine gun emplacement too. 40mm grenades can take down entire buildings, so use them wherever possible.
There is a marketplace below, bustling with hostile infantry. Grenade the area and clear the way before moving down, as the cover and flanking opportunities are better from above. You will come to a steep alleyway, from where you will be able to take out more rooftop enemies. Drop down towards the objective marker, shotgunning anyone within range (look for explosive barrels). Another marketplace area holds lots more enemies, so proceed with caution.
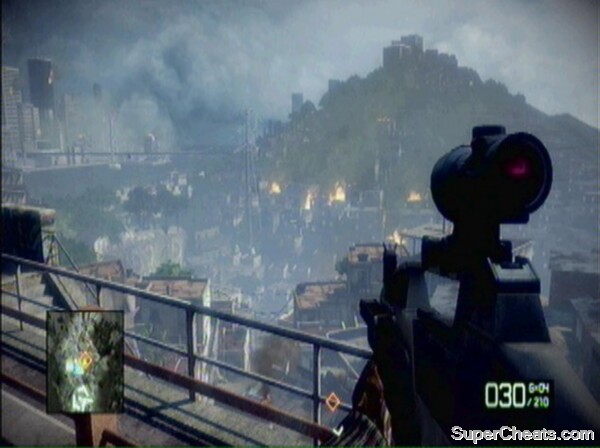 This is a very busy city, though the level is much more linear than it looks. |
As you move down the steps into the second part of the city, the enemy begin to retreat.
Enter the Canal:
Mortar strikes are inbound and you will be killed by them if you move while they are landing. The best tactic is to follow Sarge, crouching where he crouches and sprinting where he sprints. You will receive damage but shouldn’t be killed if you cover next to your squad. Once you reach the bottom of another set of steps you can sprint for the canal.
Reach Surveillance Position:
Inside the canal you are safe from mortars and there are no enemies in the immediate vicinity.
M-COM Station #2: This is on the right as you begin to move down the canal.
 The M-COM is to the right. |
Once you are past the M-COM position, enemies will engage you from the building under-construction above. There are lots of snipers up there, so use the walls of the canal for cover against them. You can move underneath with the building clear. As you reach the yellow bus suspended over the canal, more enemies attack. Pick up a shotgun where possible, because the fighting becomes very close-quarters from here on.
M-COM Station #3: The third M-COM is in a similar position to the last, nestled on the right hand side of the canal past the yellow bus.
 This M-COM is on the route you take through the canal, to the right. |
Enemies will come in as you move near the M-COM, including two Vodniks on the bridge above. Infantry will move on your level, while the Vodniks will remain next to each other up ahead. You may need to move forward if all you have at your disposal is 40mm grenades, though you can pick up a Gustav from the gun icon to the left of this area.
Push up once the Vodniks are down, battling through more shotgun infantry. As you pass under the bridge, a pair of helicopters will move overhead. You can use your Gustav to take down at least one of these, though because two shots are needed getting them both may be a lot to ask. Ensure you retreat before long, as enemy soldiers will rush your position. Fall back into the tunnel to take them out as they pass through the bottleneck.
You can then move up, past the broken bus and into the sanitation system. Prime a grenade as you move inside and throw it at the door ahead. You will be flashbanged as enemies pour in. Throwing a grenade at the opening can take them out and make your life easier. Shotgun anyone remaining before moving through.
Back outside the drainage tunnel are more enemies to the right. Cover behind the pillar and thin out the horde before risking moving.
M-COM Station #4: As you emerge from the sewer, this is to the left against the wall.
 You should clear the area before arming this station. |
Move over the rushing water (don’t fall in or you die!) and resupply by the objective marker. The tunnel up ahead has a nasty and odd surprise waiting for you – a burning truck. You can take it out with a RPG (from the supply crate), a 40mm grenade, machine gun fire, or you can duck into the centre of the channel having blown open the grates below your feet to have it go over your head.
Follow the objective marker up some stairs to trigger a cut-scene and the end of this level.
No comments yet. Tell us what you think to be the first.