05: Memory 0Y-8K7D
Thank you for printing this page from www.SuperCheats.com.
Remember to come back to check for updates to this guide and much more content for Fallout 4: Far Harbor
Follow this guide to hear about updates
Last Updated:
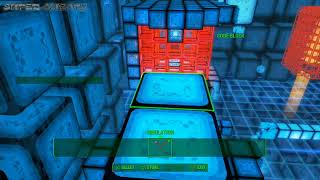
This is the last and largest puzzle stage you have to solve, which will require you in making makeshift bridges for you to cross. The memory data stream is located very near your starting point so place your defense turrets around your base. First, start by collecting as many code blocks as you can in the starting platform. Create a makeshift bridge to reach the “pyramid” platform where the decoder beam is originating.

Once you reach the pyramid, collect all movable code blocks. Inside the formation, create a decoder stack so that the beam passes through the single opening in the upper part of the pyramid and hits the nearby firewall.

Once the other platform’s firewall is cleared, create another makeshift bridge then go there to pick up the decoder relay. Create a stack of three code blocks in the middle and the fourth/ top block is the decoder relay facing the other firewall. This will divert the beam and destroy that firewall.

(There’s a lone platform near the memory data stream that contains a lot of spare code blocks. You can make a detour and collect the code blocks there if you want)

Make a makeshift bridge to reach the newly cleared platform and pick up the decoder relay there. Now create a stack of three code blocks again then place the decoder relay on top. Rotate it so it bends the beam towards the second enclosed platform. Make sure to remove the bricks blocking the beam’s path towards the extension platform in the far end of the area. If done correctly, you should see the decoder beam firing from below of the “inverted pyramid” platform in the far corner of the room.


Return to your starting point and make a walkway leading to the other platform. Pick up the decoder relay there then use the “steps” to reach the enclosed platform where the beam is hitting. Like the others, make sure to clear up the blocked openings. Before placing new blocks, make sure to get another relay on the ledge above the nearby firewall.


Now get back to the enclosed platform and place a code block on the hole in the middle. Now place a decoder relay on top of it and rotate it so it points towards the firewall. This is very important since what we’re planning to do is to remove the “plug” block from the bottom. Once that’s done, you can’t rotate the relay anymore so make sure it’s pointing at the right direction.


Once done, create ledges using your stock code blocks to get close enough so you can remove the bottom brick and allow the beam to pass through the relay once again. If done correctly, this should remove the second-to-the-last firewall, which will give you access to the last relay.

After getting the last relay, remember the makeshift ledges you created to remove the bottom block earlier? Rearrange them and make a straight ledge at the same level of the topmost ledge of the “stairs”. Like before, you can temporarily block the spot where the beam is firing using a code block, place a relay on top of it, then remove the code block to bend the beam towards the direction you came from.


Now backtrack to the previous platform and follow the beam. Now create a 3-stack pillar, the relay on top and rotate it so it bends the beam towards the starting point.

Finally, return to the starting point and place all your defensive turrets all around if you haven’t done it yet. Now create another 3-stack pillar and bend the beam towards the last firewall’s weak point. Once the firewall’s done, relocate some of your turrets if necessary then wait until the indexers collect all the necessary data bits you need. Congratulations!


Video Solution
Anything missing from this guide?
ASK A QUESTION for Fallout 4: Far Harbor
Comments for 05: Memory 0Y-8K7D
Add a comment
Please log in above or sign up for free to post commentsNo comments yet. Tell us what you think to be the first.
Table of ContentsClose
- Main Quests
- Memory Retrieval Puzzles
- Acadia Side Quests
- Children of Atom Side Quests
- Far Harbor Side Quests
- Other Side Quests
- Radiant Quests
- Locations
- Extras and Trophies
Guide Updates
Get notified of updates to this guide
Many of our guides get updated with additional information. To get an email when this guide is updated click below.
 Join us on Discord
Click to close