Enemies Dossier and Tips
The enemies that you will face in the Quarantine Zone are not all infected, though the Zombie-infested humans do represent the major threat. In addition to them however you will also face uninfected humans who may very well be the more dangerous of the threats, because they want what you have or they want you dead - or both.
Bandits
Uninfected humans who offer an unpredictable threat.
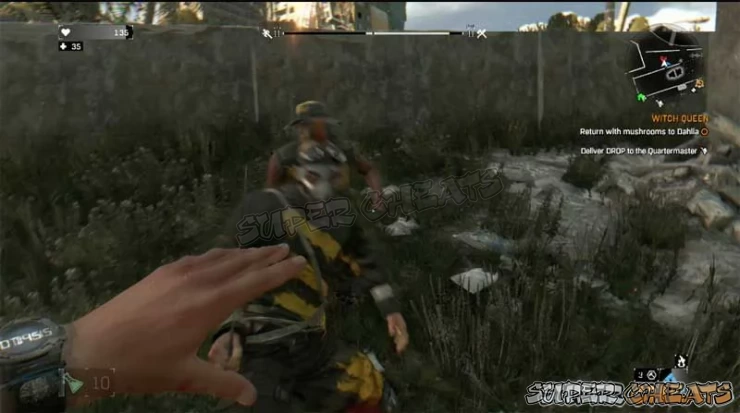
Bandits often outfit themselves in yellow and black stripped clothing with armor - presumably so that other Bandits can recognize them as part of the group... They often use guns - so they also happen to be an excellent source for both guns and ammunition.
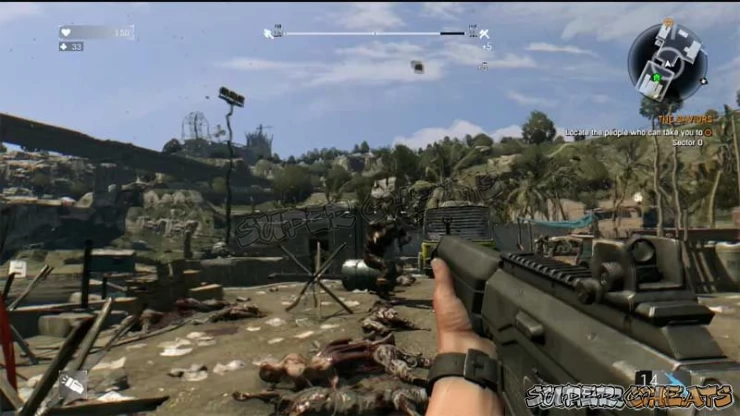
While they are certainly NOT a commonly encountered weapon, it is possible to find Bandits in possession of Assault Rifles (though most of them will be armed with melee weapons or pistols).
Bandits come in several types - Leaders are very obvious as they are shown to be leading, while Lieutenants tend to be identifiable thanks to their being armed with long-weapons. Thugs look like the typical human survivor, though they are usually wearing some sort of covering over their face - examples include balaclavas (a type of ski mask), dust and medical masks.

For the most part Bandits are part of Kadir "Rais" Suleiman's crew - a significant point in that their presence is not random. They are either guarding a strategic location, seeking supplies, or have been put on patrol around strategic locations.
Bandits are thought to be former convicts who were liberated from the local jails and prisons, those being oddly among the last places that the infection happened, so there tend to be more than a few criminals amng the uninfected.
Do not assume that their status as uninfected makes them less of a threat to you - in fact it is safer to presume that they are a more significant threat because as humans Bandits are among the most deadly enemies other humans can face!
They are clever, committed, and unpredictable. They are motivated by what motivates most humans - safety, shelter, food, sex, and power basically.
They will often raid any supply drops they encounter and can be counted on to track them from the air to the district that they likely landed in - and immediately following a supply drop you can anticipate that there will be a Bandit Patrol in the area. That is actually a strategically important point - since knowing that they will be there presents you an opportunity to take them out and acquire THEIR resources - specifically weapons and ammunition!
One other point needs emphasis - not all of the Bandits will be part of Rais' Crew. There are some that are independent and, as a result, may be more of a danger to you due to their lack of predicable behavior. Case in point - we have seen independent Bandits lay in ambush for Rais' Bandits near Supply Drop locations.
Recommended Tactics
As Bandits tend to be a good source for high-quality firearms and ammunition, it makes sense that you should seek them out - the best way to do that is to do the Side-Quests, which seem to feature a lot more Bandits - and a lot more well-armed Bandits - than are found during the story missions.
Biters
The most common of the infected who are arguably the weakest type when encountered during the day, but are a very serious threat when encountered at night and especially at night in groups.
By and far the most common of the infected, Biters are a shambling sort of enemy that closer resemble what most players will think of when they think Zombie... Their priorities are to find, eat, and kill the uninfected. In that order.
Unlike the typical newly infected, Biters also tend to have bits missing from them. They have played hard and have the scars to show for it - if by scars we mean missing bits.
Difficult to spot in the darker shadows - mostly because they tend to move slower and make less noise than other infected. They may congregate in groups - which makes them more dangerous as it compensates for their slower speed.
The ones with a sort of green-glow to them are putting out lots of gases from decomposition - something you want to be aware of because when they are hit with a flame-based weapon they tend to explode. While the explosion damage that they do is minimal all things considered, the noise that it makes does tend to attract attention - and other infected - to the area rather quickly.
As they begin to decompose their bodies create lots of acids - and when they are attacked with any sort of toxic weapon that can trigger them to spew - and you want to make sure you don't get that spew on you as it is acidic and will damage you.
As a rule they seem to like to hide in small spaces, which means that walking too close to a wrecked car or other rubble can be dangerous since they may be hiding under or in it.
They are able to navigate low obstacles, and can even climb with limited success, but like the other infected they cannot swim - so knocking them into deep water is a sure method to kill them.
When a Biter is crippled - when they lose feet, legs, hands, or arms, they will revert to a lunging biting attack - hence the name. Always remember that crippling a Biter is NO guarantee that they have been rendered safe!
NEVER assume that just because the corpse does not LOOK like a Biter it cannot BE a Biter. While it is true that most of the Biters look like what they are, if the person was killed shortly after being infected it is entirely possible that they look much cleaner and less dangerous than they really are. This is especially true of lone Biters you sometimes find in houses and buildings. Always be wary around bodies and you will not go wrong.
Bear in mind that when darkness falls, like other infected it is possible for Biters to mutate into another form - a faster and more dangerous Biter can result. Always best to maintain situational awareness when you are around these guys.
Recommended Tactics
Aiming for their heads tends to take down Biters rather quickly.
When you are facing a larger number or they have managed to get close though, any sort of crippling attack will be to your advantage.
Biters seem to have a shared mob-think, which makes them very dangerous in numbers. When you are faced with larger groups it is always best to pick the area you will engage them in, choosing narrow spaces that prevent more than two or so attacking at the same time, as that interferes with their group think ability.
As they decompose they create both acid that is part of their attacks and also large boils filled with acidic puss that will rupture or even explode when struck. You need to keep that in mind if you are battling Biters who are further into the decomposition phase as it can be a direct threat to you.
Bombers
Numbering among the less common of the infected, Bombers are a particularly dangerous mutation in which large and explosive growths have occurred on their back and chests that will cause damage to the player and other infected when they are detonated.
The basic attack style of the Bomber is, once it detects a non-infected, to run faster AT the target, and then it starts to pulse and convulse, which is the warning sign that it is about to share its special gift with you!
A Bomber will explode when it gets within range of you - or if it cannot get in range but it CAN see you, it will still explode. Whether it hurts you or not you are in trouble - because the Bomber going off is going to call in any Virals in the area!
So when you are dealing with a Bomber you need to plan your moves ahead for how you will deal with the Virals that will come - even if that just means climbing the nearest telephone pole to wait them out!
Recommended Tactics
Thrown weapons - or shooting them with a gun - are the most effective ways of dealing with Bombers - and since they are going to call in Virals anyway, this is the one case where shooting them is actually pretty much justified.
The ultimate best way to deal with these guys though is firecrackers - when you toss them nearby it will trick the Bomber into blowing up. Again remember that Virals are going to come - but with any luck, and when dealing with more than one Bomber - the sounds of the firecrackers and the previous Bomber blowing might pull the Virals inside the blast radius and help to take them out!
Demolishers
These guys are one of the Heavy Mobs and are really to be avoided if possible. For one thing, they are wicked strong - as in can pick up cars and toss them as weapons - and for another if they get hold of you it is almost always a one-hit-kill.
Their preferred attack mode upon spotting the player is to charge at them - but as they are slow to modify their attack they are pretty easy to avoid by dodging.
Recommended Tactics
One of the most effective strategies of dealign with a Demo is to lure it into charging into objects that will explode - like propane tanks. Setting them on fire also works pretty well.
As Demos have rudimentary armor it is generally a good idea to lure them into making charge attacks into solid objects - like walls - so that they end up breaking their armor and getting dazed. Once they have lost all of their armor the dazed periods last longer, which makes them a lot easier to kill with thrown weapons.
Demolishers are particularly vulnerable to Freezing Throwing Stars and Stasis Field Grenades.

Goons
These guys are similar to Demos in that they are larger, stronger, bulkier infected. Goons typically are armed with a sledgehammer (usually a section of concrete with rebar serving as handle) which they use to smash the player with.
They swing their hammer slowly, giving pretty clear advance notice of the attack, with a recharging pause between attacks. Just like the Demo the Goon can be tricked into killing other infected.
Their special attack is to slam their hammer into the ground which generates a shock-wave effect that can stun the player.
Recommended Tactics
The best tactic to take with Goons is to avoid them.
When you cannot avoid them, the next best tactic is to get above them and use Molotov Cocktails or some other means to set them on fire.
Goons are immune to Freezing Throwing Stars, but they are vulnerable to Stasis Field Grenades. That is something to keep in mind.
Night Hunters
This fearsome mob is only encountered in Be The Zombie mode - and it is player controlled.
Depending on its level Night Hunters will have different abilities, and use different attacks. Using a special scream they can sense the presence of others in their immediate area, and in addition to being deadly H2H they have distance spitting attacks - one that explodes and another that disables UV lights.
Recommended Tactics
UV light reduces the Night Hunter's stamina.
Hunter spits sticks to surfaces and humans.
The Chameleon Perk is very effective against Hunters; when you camouflage the Hunter's scream is misdirected so that it does not accurately sense where you are.
Screamers
These guys are a nightmare for more than the obvious reasons. First, they are infected undead children - which tends to disturb the typical player. Second, their screams - hence the name - have the ability to disorient player vision, causing you to be unable to fight.
Worse still, their screams will draw other infected to the area - which means the player is half-blind and now dealing with more deadly foes!
The scream itself is damaging to the player - so escaping the house they were found in and putting distance between them and you is a given.
Recommended Tactics
Camouflage before approaching them will prevent a Screamer from screaming.
Distance weapons are the best approach - and nothing beats burning them.
Toads
While they are relatively uncommon compared to all of the other types of infected you will be seeing more often, the Toad is known for its ranged attack in which it fires off a green spit that is very very acidic. That is bad for you for a number of reasons, not the least being ouch! It not only hurts you with the acid but it can temporarily blind you!
Another factor that increases the danger in dealing with the Toad is its higher level of agility - which includes the ability to hop over rooftops (hence the name) and its seeming focus for attacking the player. If it attacks the player while other infected are around and they get splashed they can go a little nuts, which can end up causing even more damage for the player.
That said these guys are pretty easy to kill
Recommended Tactics
Toads will very clearly indicate when they are about to attack - the most effective way to deal with them then is to wait until they attack and then quickly kill them either with ranged or melee attacks. Ranged is particularly effective as is melee when you are very close to them.
Bear in mind that its secondary attack is a spit bomb that has area-of-effect impact.
If you have the bad luck to encounter a Toad that has a strong partner of another type of infected your best tactic is to run. Remember there is no shame in living to fight another day.

Virals
These are the first-stage of infected - bearing in mind that ALL of the humans who are infected go through this stage. What that means is that they are the least-infected-appearing, and of course that at night they can morph into another type of infected.
These guys are more dangerous than the typical infected due to their greater agility and intelligence. They are quick runners, they easily pursue over obstacles, and they instinctively respond to pretty much any loud noise (gunshot, explosions) in attack mode.
That said their attacks are similar to that of the Biters - though perhaps more effective due to their being a lot smarter...
Recommended Tactics
Virals are smart - so you need to treat them like a human in the sense that getting away from them will mean breaking line-of-sight, and then hiding and being quiet.
Due to their intelligence and response to noise any time you attack them you want to make it a fast and fatal attack, not a drawn-out one since that just risks getting more Virals into the fray. Knocking them down and stomping or kicking seems to work very well.
Even if you manage to freeze them with a Frozen Throwing Star do not expect that to take them out of the fight.
Volatiles
These guys are only encountered at night - so if you are playing it safe and seeking Safe Houses every night you are not likely to encounter them.
That is actually a good thing, because unlike all of the infected you are used to these guys are practically boss mobs in their own right, in that they are not real easy to kill...
They tend to be large and strong and worthy opponents who require a lot of damage to kill - which is why they should be avoided until you have really amped up your stats. This is especially important for lower-level players because their primary attack will be an insta-kill on them.
Another factor that makes them dangerous is that they are not really all that stupid - and once they have detected the player, they are very dangerous because they are as fast as the player and just about as good at climbing and navigating obstacles.
On the plus side though they probably will not sneak up on you too easily since they make a lot of noise - heavy breathing and screeching - so you will certainly know that they are near.
Recommended Tactics
Unless you are a well-advanced player in terms of stats, skills, and good weapons, your best tactic is to avoid them at all costs. The Grappling Hook can help a lot here as it allows the player to quickly put distance between them - so that they can really run.
UV Light will stun them and can be used to draw them into stumbling into traps - but that is a risky strategy.
If you are getting the impression that these guys are the equivalent of the Agents in The Matrix movies you are getting the right impression. Because until you are a heavy hitter your best defense is to run.
Anything missing from this guide?
ASK A QUESTION for Dying Light
Comments for Enemies Dossier and Tips
Add a comment
Please log in above or sign up for free to post comments- Collections
- Walkthrough
- Walkthrough: Side-Quests
- Reference
 Join us on Discord
