6B: (Twilight Princess) – The Shadow King
Thank you for printing this page from www.SuperCheats.com.
Remember to come back to check for updates to this guide and much more content for Hyrule Warriors
Follow this guide to hear about updates
Last Updated:
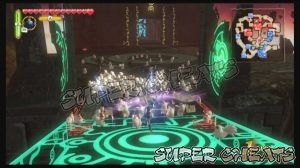
Map: Palace of Twilight
Recommended Element: Lightning
Heart Container: Midna
Heart Piece: Lana
Skulltula: Defeat 1,000 enemies
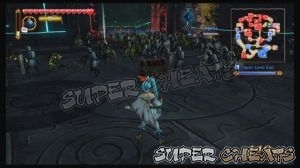
Head to the east and capture the first outpost there. Your next objective is to capture the lower levels. Defeat the enemies and Keep Boss in the Lower Level East to get a Sealed Weapon. Proceed to the Upper Level East and capture it as well to reveal a red chest containing a Hook Shot. This is one of valuable Tools in the game, allowing you to use it as a grappling hook to reach higher and far away ledges.

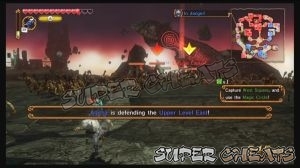
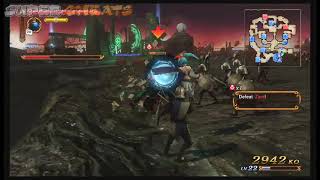
After getting the Hook Shot, Argorok, an armored dragon will appear from the west. Head back and intercept it. Equip the Hook Shot to reach the upper ledges from the destroyed bridges. Midna will head towards West Square. You have to help her reach it by defeating any of Zant's forces that may intercept her.

Note: Using the Hook Shot against the Fiery Aeralfos while they're airborne will bring them to the ground and reveal their weakness gauge.
While clearing the path for her, don't forget about some of Zant's forces that will attack the main camp at the same time. Hurry there and defeat the lead monsters to lessen the threat to your main base. Once done, rush towards the West Square and capture it. Once Midna creates the magic circle, step in the circle and activate it to damage the dragon.

Next, find Agitha's location and run towards her. Enemy commandos will appear and will attempt to kidnap her. Intercept the commandos and defeat them. If ever they successfully grabbed Agitha, she'll be taken to the North Palace. Just head there and defeat all enemies to rescue her. Once done, proceed with capturing more enemy positions and taking out higher-ranked targets to farm their Materials.

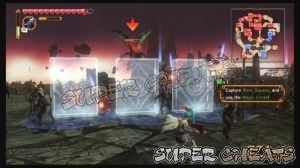
Argorok will attack again and this time, it will take control of the Central Square. Head there and capture so Midna can deploy her magic circle. Once the circle is deployed, activate it to damage the dragon once more.

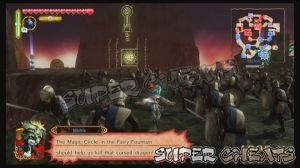
Stay around the area since the Argorok will appear again for the third time. This time, head to the east towards the Fairy Fountain. Activate the magic circle there to prevent Argorok from fleeing. There's also a Cuckoo here that you can ignore or instigate. (And fight an army of chickens while dealing with Argorok is a challenge and at the same time entertaining enough to watch)
Now you have to defeat Argorok. To defeat it, you have to equip the Hook Shot and wait for its tail to turn blue. Make sure you're locked on to it. Once it starts to charge up, use the Hook Shot so your warrior captures Argorok and slams it to the ground, revealing its Weak Point Gauge. Keep attacking it until you completely smash the gauge and deal heavy damage. Keep repeating the process until you completely defeat it.


How to Chain your Dragon
After taking out Argorok, Zant himself will leave his base and attack. Zant's not that difficult to deal with. His attacks are slow and triggers at a distance from him. It's possible to corner him and deal damage using fast attacks. The attack that will reveal Zant's weakness is when he summons an underground totem which also deals area damage. Other than that, Zant is surprisingly weaker compared to Argorok so you shouldn't have problems dealing with him.
Pushover Shadow King
Next Page
6C: (Skyward Sword) Sealed AmbitionPrevious Page
6A: (Ocarina of Time) The Water Temple
6C: (Skyward Sword) Sealed AmbitionPrevious Page
6A: (Ocarina of Time) The Water Temple
Guide Menu
Anything missing from this guide?
ASK A QUESTION for Hyrule Warriors
Comments for 6B: (Twilight Princess) – The Shadow King
Add a comment
Please log in above or sign up for free to post commentsNo comments yet. Tell us what you think to be the first.
Table of ContentsClose
- Basics
- Weapons
- Legend Mode
- Adventure Mode
- Collectibles: Skulltulas
- Collectibles: Heart Containers
- Collectibles: Heart Pieces
- Bazaar
- Badges
Guide Updates
Get notified of updates to this guide
Many of our guides get updated with additional information. To get an email when this guide is updated click below.
 Join us on Discord
Click to close