13: Enduring Resolve
Thank you for printing this page from www.SuperCheats.com.
Remember to come back to check for updates to this guide and much more content for Hyrule Warriors
Follow this guide to hear about updates
Last Updated:
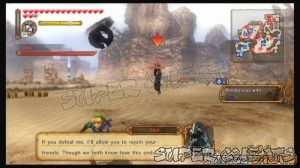
Map: Gerudo Desert
Recommended Element: Light
Heart Container: Link
Heart Piece: Lana
Skulltula: Defeat 1,000 enemies
Make your way to the South Oasis where Ghirahim is located. (Note: You may want to wait for the mission to appear first; otherwise, it will probably cause a bug that will make Ghirahim immortal) Reduce his HP to critical level to force him to flee. During this fight, you'll hear Lana complain about the desert heat. This will reduce her HP to 1/2. Since you have to protect her and Zelda, you need to concentrate on taking out any enemy that will advance towards them.

Capture the South Oasis!
After dealing enough damage, Ghirahim will flee. A Big Poe will also advance towards Lana. Check the Battlefield Info to learn the location of this enemy and intercept it. You don't have to pursue Ghirahim for now since his HP will be locked at critical level and you won't defeat him for now, no matter how much you attack him. Let him flee for now and take care of the Big Poe. Make sure to capture the South Oasis as well by removing the two Deku Babas and defeating the Keep Boss. This will protect your allied forces to the south from the heat.

Head to Lana's location and capture the North Oasis. This will protect her and your allies in that area from heat exhaustion. Next, head to Ghirahim's location and defeat him. Lana will have doubts, especially how fast you defeated him. The unnamed Keep's gates where you defeated him will close, just in time as Zant appears. This will lower Lana's troops' morale and will force them to rendezvous to the main camp. The only way to get out is by following the path to the east then turn to the south to reach Clifftop Keep. Defeat the Shield Moblin there and capture the base.

After defeating the Shield Moblin and capturing the keep, jump over the ledge and engage Zant to battle. You won't be able to reach Lana until you defeat him since he has locked down the southern desert area with the Central Gates. Zant will also teleport in different locations in this area in order to stall for time. Head over to his position and defeat him quickly. Once the gates are done, rush towards Lana to trigger a cutscene.


After the scene, the allied forces will turn the tide of battle with the arrival of the allied warriors from other eras. At the same time, Ganondorf's forces will also receive reinforcements. This massive army will march towards the allied main base. You can choose whichever bulk of the force you want to deal with first.
After a few moments, you'll get the objective to hunt down Zant and Ghirahim. Proceed with capturing enemy strongholds and defeating as many enemies as you can along the way. The two of them are located in the Sacred Grounds, in the northeast corner of the map. If you didn't have problems dealing with them individually, then fighting the two of them at the same time isn't that hard either. Just remain mobile and exploit the openings they create after their attacks. Defeating the two of them will secure your victory in this scenario.

Two villains in one sword.
Anything missing from this guide?
ASK A QUESTION for Hyrule Warriors
Comments for 13: Enduring Resolve
Add a comment
Please log in above or sign up for free to post commentsNo comments yet. Tell us what you think to be the first.
Table of ContentsClose
- Basics
- Weapons
- Legend Mode
- Adventure Mode
- Collectibles: Skulltulas
- Collectibles: Heart Containers
- Collectibles: Heart Pieces
- Bazaar
- Badges
Guide Updates
Get notified of updates to this guide
Many of our guides get updated with additional information. To get an email when this guide is updated click below.
 Join us on Discord
Click to close