07: The Sacred Sword
Thank you for printing this page from www.SuperCheats.com.
Remember to come back to check for updates to this guide and much more content for Hyrule Warriors
Follow this guide to hear about updates
Last Updated:
Map: Temple of the Sacred Sword
Recommended Element: Lightning
Heart Container: Zelda
Heart Piece: Lana
Skulltula: Defeat 1,000 enemies
Link is the only playable character for this story mission so make sure to set him up by visiting the Bazaar. (After completing this scenario for the first time, you can use any character afterward) Once the mission starts, stay put until your objective is updated. You have to activate three sealed statues. While searching for the statues, the Ghost Forces will appear in the battlefield. Keep clearing their outposts and other occupied areas while your allies search for the statues.
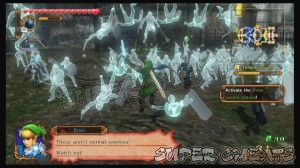
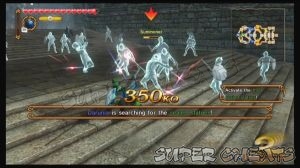
Impa will find outh to the south. Defeat the enemies around her so she can activate the statue. Find the other two statues in the North and South Squares. You need Darunia's fire ability to activate the statue to the south while Midna need to activate the statue to the north. You need to escort both allies (one at a time or at the same time) until they reach their respective assigned spots.

After waking up all statues, more ghost units will appear. There are a couple of summoners to the northwest and southwest squares. Take them out to ease the burden to your troops. You have to find the commander of the Ghost Units and it has disguised itself as Lana. Check your map for the allied markers. If there's a lone marker that doesn't have any other soldiers near them, there's a high chance that this is the impostor. You should also take note of your allies location and if they're fighting actively or not. Fake Lana is located in the middle of the map, near the outpost.

After defeating the impostor, the Ghost Forces will be free. The Main Temple gate will also be opened. Capture any fallen outposts and Keeps then head inside the Temple. Impa, Midna, and Darunia will leave the battlefield. Once inside the temple, start capturing the bases. You can also find a Sealed Weapon by capturing the South Temple Hall.

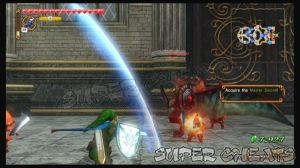
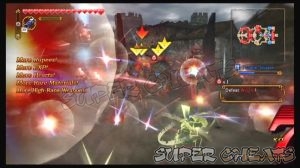
Fight your way through the Dark Forces until you reach the gate where the Master Sword is kept. Defeat the Gatekeeper to gain entrance. Approach the sword for a scene. After the scene, you have to fight Wizzro. You won't be able to defeat him in this area so just fight him and deal enough damage to force him to retreat.

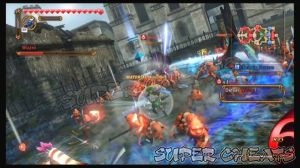
Head outside the temple and regroup with Zelda. The Dark Forces reinforcements will arrive and will attempt to attack her all at the same time. Take out the leaders of the enemies so you can get Materials and weapon drops. Zelda will abandon your keep to the west and will head straight to the Temple. Intercept any enemies along the way and stand in their path to prevent them from reaching Zelda. Wizzro will also pursue Zelda so do your best in taking out as much enemies as you can before you encounter Wizzro again.
Once you encounter Wizzro, it's up to you if you'll defeat him quickly or if you'll whittle his forces and farm Materials from his other high-ranked monsters. Once ready, defeat Wizzro to complete the scenario.
Anything missing from this guide?
ASK A QUESTION for Hyrule Warriors
Comments for 07: The Sacred Sword
Add a comment
Please log in above or sign up for free to post commentsNo comments yet. Tell us what you think to be the first.
Table of ContentsClose
- Basics
- Weapons
- Legend Mode
- Adventure Mode
- Collectibles: Skulltulas
- Collectibles: Heart Containers
- Collectibles: Heart Pieces
- Bazaar
- Badges
Guide Updates
Get notified of updates to this guide
Many of our guides get updated with additional information. To get an email when this guide is updated click below.
 Join us on Discord
Click to close