6A: (Ocarina of Time) The Water Temple
Thank you for printing this page from www.SuperCheats.com.
Remember to come back to check for updates to this guide and much more content for Hyrule Warriors
Follow this guide to hear about updates
Last Updated:
Map: Lake Hylia
Recommended Element: Lightning
Heart Container: Darunia
Heart Piece: Sheik
Skulltula: Defeat 1,000 enemies
Start by taking out the larger targets nearby. Make your way to the south and capture the outposts along the way. Ruto will be surrounded by enemy forces to the south so head there and provide assistance. Defeat the two Lizalfos leading the army against her. Once done, you have to escort her to the Lakeside Keep.

Capture the Lakeside Keep and once Ruto reaches it, she will activate a mechanism that will drain water and reveal the Water Temple's entrance. Before heading towards the temple, clear the Temple Face Keep to the east to reveal a chest containing a Sealed Weapon.


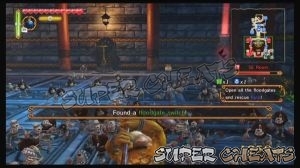
Ruto will be trapped in the temple's Central Hall so you have to find and open all the floodgates to rescue her. One of the floodgate controls is located in the southeast corner base. Make your way there while capturing outposts along the way. Eventually, Summoners will appear to the south. Make sure to open the nearby floodgate first then head straight towards the summoners to defeat them. Otherwise, they'll just summon higher-ranked enemies.

By opening the floodgates, you'll also make the East and West Rooms accessible. Clearing them is optional but will help your army gain foothold inside the temple. Once you've opened the floodgates from the Southeast and Southwest rooms, the Gatekeeper in the Central Hall will appear as well. Defeat it to open the Central Hall and rescue Ruto. After regrouping with her, she'll flee from the battlefield and your victory condition for the scenario will change to defeating Zelda.
Capture all the rooms and outposts in the area before heading to Zelda. Make sure to break the jars to restore your magic, SP, and hearts. Confront Zelda and battle her. After a few moments, she'll summon King Dodongo in the field. It is recommended to take out this threat first so leave Zelda and proceed to the field to help your forces deal with the giant, fire-breathing lizard.
Dealing with Dodongo is pretty much the same. Equip your bombs and wait for it to open its mouth when it's charging for a firebreath attack. Once it swallowed the bombs and detonated within it, the weakness gauge will appear. Repeat the process until the gauge is depleted, allowing you to perform a special attack that will deal heavy damage to the mini-boss.

Taming the fire lizard
Once Dodongo has been dealt with, head back to the temple and face Zelda. This impostor's attacks are fast but she's not that aggressive. Keep attacking but remember to fall back when she starts blocking your attacks and she's moving. She'll reveal her weakness gauge after almost every attack combo she makes but it's not recommended just staying beside her and wait for the gauge to appear. Her combos usually end with a move that will deal AoE (area-of-effect) damage around her, capable of knocking your warrior out or pushing him/her away. If you want to exploit her weakness gauge, time your evasion at the moment she activates her AoE skill. That way, you'll avoid getting damaged but you're still in strike range from her.

Taming the fire lizard
Next Page
6B: (Twilight Princess) – The Shadow KingPrevious Page
5C: (Skyward Sword) Land in the Sky
6B: (Twilight Princess) – The Shadow KingPrevious Page
5C: (Skyward Sword) Land in the Sky
Guide Menu
Anything missing from this guide?
ASK A QUESTION for Hyrule Warriors
Comments for 6A: (Ocarina of Time) The Water Temple
Add a comment
Please log in above or sign up for free to post commentsNo comments yet. Tell us what you think to be the first.
Table of ContentsClose
- Basics
- Weapons
- Legend Mode
- Adventure Mode
- Collectibles: Skulltulas
- Collectibles: Heart Containers
- Collectibles: Heart Pieces
- Bazaar
- Badges
Guide Updates
Get notified of updates to this guide
Many of our guides get updated with additional information. To get an email when this guide is updated click below.
 Join us on Discord
Click to close