14: Liberation of the Triforce
Thank you for printing this page from www.SuperCheats.com.
Remember to come back to check for updates to this guide and much more content for Hyrule Warriors
Follow this guide to hear about updates
Last Updated:
Map: Ganon's Tower
Recommended Element: Light
Heart Container: Zelda
Heart Piece: Impa
Skulltula: Defeat 1,000 enemies
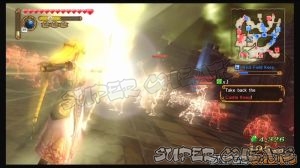
As soon as the battle starts, two Argoroks will appear in the battlefield, and a Summoner in the Fairy Fountain. You have to engage and defeat the two of them. You also have to be careful of the massive enemy force surrounding them. While battling the Argoroks, Darunia and his bombchu will arrive. You have to escort them to towards the West Field Keep.

Down to earth.
If you defeat one of the Argoroks, the other will make its way to the bombchu, as well as a faction of Ganondorf's forces. Fight near the bombchu and take out the Argorok as fast as you can. Keep escorting the Darunia and the bombchu until they reach the destination. A large chunk of the enemy army will attempt to stop them. Make sure to take out the stalmasters and dinolfos


Anti-dragon warfare
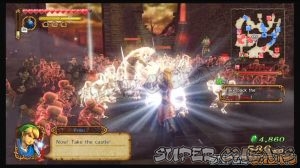
Once the bombchu destroys the wall, head inside and capture the West Field Keep. After capturing it, Ganondorf will enter the battlefield. This will raise the morale of his troops and he'll also summon random lightning strikes in the battlefield.

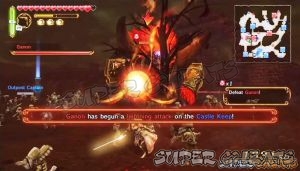
Ganondorf and his powerful units will be boosted by a tremendous amount of power. Your allies will attempt to stall them but will fall one by one. Fighting him at this state is very disadvantegous so ignore your allies for now and head toward the Castle Keep. Defeat the gatekeeper outside to open the gate then defeat the stalmaster and dinolfos inside. Make sure to destroy the Beamos emplacements as well. Defeat the Keep Boss next until you reclaim the castle. This will remove the giant sword that amplifies Ganondorf's power, weakening him and his troops.
The last objective now is to fight Ganondorf and defeat him. For the meantime, make sure to defeat the Summoner if you haven't yet; otherwise, captain-level enemies will keep pouring in. It's also a good idea to go there since the Gold Skulltula can be found under the boulder inside the Fairy Fountain once you've defeated 1,000 enemies.
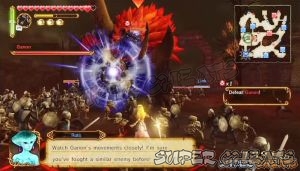
Ganondorf will be so much easier to deal with without his power boost. You have to be aggressive, at the same time careful since he doesn't seem to stagger even when using your powerful combos. His weakness gauge usually appears whenever he's using his charge attacks. The gauge will only remain visible for a few seconds so you'll have to fight close to him and evade at the right time so you'll be in striking distance once the gauge appears. The exception in this tactic is when Ganondorf is releasing a flurry of attacks while stationary; he'll be encased in a trapping bubble of slashes and you'll get caught in it too if you don't move away immediately. The annoying lightning strikes are still active so keep moving and immediately evade if you see the ground under your feet emanating a purple circular wave.


Putting the dark lord to rest
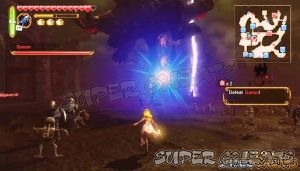
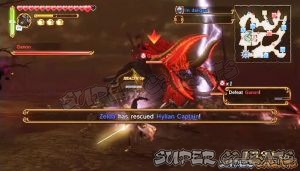
After defeating Ganondorf, the massive enemy, Ganon will appear. You need to destroy some of its key parts using different Tools before you can reveal its weakness gauge. To do this, you have to observe what type of attack it's going to use then use the appropriate tool to stop that attack and damage it. Its moves are pretty much similar to the previous bosses you fought (that require tools to defeat) If you see it charging up for a fire blast attack (King Dodongo's attack), throw some bombs on its hands to destroy a part of its gauntlet. Once it hovers in the air and does a fire breath attack, get around it and wait for its tail to turn blue (Argorok). Use the hookshot to bring it down and destroy one of its tusks. Successfully doing these counterattacks will prevent Ganon from using the same moves again.

If Ganon charges up blue energy on its left arm gauntlet (Gohma), get close enough to it and wait for it to fire the blast. Fire an arrow to the gauntlet's open eye to destroy it. Finally, wait for it to open the appendages on its shoulders that will fire seed-like projectiles (Manhandla). Use your boomerang to destroy both of them.
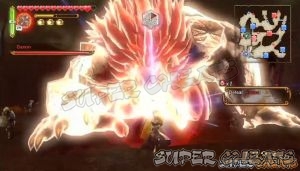
Once all four key parts are destroyed, Ganon will switch to its basic attacks. One is a continuous stream of red energy which is pretty easy to evade, and the other one is a charging attack that will reveal make the crystal on Ganon's forehead glow post-attack. Ruto will manage to upgrade your bow with infinite light energy so you have to use it to hit the crystal. This will knock Ganon out for a few seconds, revealing its weakness gauge. Keep repeating the same method until you whittle down its HP and defeat it.


Evil's bane
Anything missing from this guide?
ASK A QUESTION for Hyrule Warriors
Comments for 14: Liberation of the Triforce
Add a comment
Please log in above or sign up for free to post commentsNo comments yet. Tell us what you think to be the first.
Table of ContentsClose
- Basics
- Weapons
- Legend Mode
- Adventure Mode
- Collectibles: Skulltulas
- Collectibles: Heart Containers
- Collectibles: Heart Pieces
- Bazaar
- Badges
Guide Updates
Get notified of updates to this guide
Many of our guides get updated with additional information. To get an email when this guide is updated click below.
 Join us on Discord
Click to close